Prep time: 20 minutes
Cook time: 0 minutes
Total time: 4 hours 20 minutes (including chilling)
Servings: 12 slices
Irresistible No-Bake Oreo Cheesecake Slice is a creamy, dreamy dessert that can make any gathering feel special. If you’re anything like me, there’s just something about the combination of rich cream cheese and the crunchy texture of Oreos that brings forth a wave of nostalgia. This dessert invites you to relive those carefree days spent savoring your favorite treats, and it does it without requiring the use of an oven. Whether you’re hosting a birthday party, a family gathering, or simply indulging yourself at home, this easy recipe has you covered.
In this guide, you’ll discover not just how to create this incredible dessert, but also tips on achieving the best texture and flavor. You’ll learn about variations, common mistakes to avoid, and storage tips that ensure you can enjoy it longer. The balance of sweetness and slight bitterness in the Oreo cookies pairs beautifully with the velvety, smooth cheesecake filling. So, grab your mixing bowl and let’s get started!
What Is Irresistible No-Bake Oreo Cheesecake Slice?
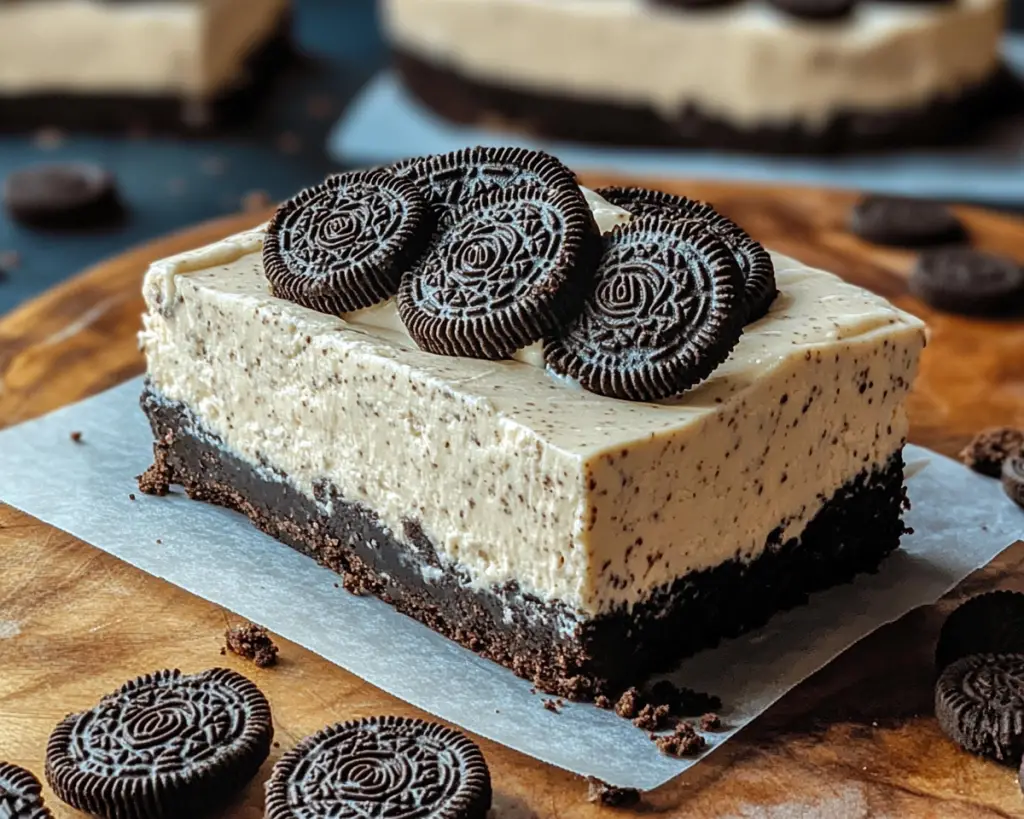
Irresistible No-Bake Oreo Cheesecake Slice is essentially a homemade cheesecake crafted without any baking, which makes it a perfect choice for warm weather or for anyone who simply wants a stress-free dessert. This delightful dish typically features a layer of crushed Oreo cookies combined with melted butter, forming the bottom crust. The creamy filling, made up of cream cheese, sugar, and whipped cream, is then poured over the crust and chilled to perfection.
The texture of this cheesecake is key to its appeal. The bottom layer offers a delightful crunch, while the filling provides a smooth and creamy experience, making every bite an indulgent treat. The flavor profile is just as impressive; the chocolatey essence of the Oreos mingles seamlessly with the rich cream cheese, creating a sweet yet slightly tangy sensation. This no-bake version is perfect for even the busiest of households, as it saves you time and energy without sacrificing any deliciousness.
Why You’ll Love This
One of the best features of this Irresistible No-Bake Oreo Cheesecake Slice is its incredible ease of preparation. Unlike traditional cheesecakes, which often require hours of precise baking, cooling, and assembling, this version allows you to create a gourmet dessert in just a few straightforward steps. Whether you are a busy parent trying to whip up something special for a potluck or a beginner in the kitchen seeking a foolproof recipe, this cheesecake fits the bill perfectly.
Another reason you’ll appreciate this dessert is its versatility. Not only can you customize the flavor by choosing different cookie types or toppings, but it can also accommodate various dietary needs, allowing you to make a gluten-free or dairy-free adaptation with the right substitutions. Plus, it’s a relatively budget-friendly dessert, utilizing simple ingredients that you can easily find in your local grocery store.
And let’s face it—who can resist the rich flavor of Oreos? The chocolate cookies combined with creamy cheesecake make it a standout dessert that will impress your friends and family. Just imagine the delight on their faces as they dig into this beautiful treat.
Ingredients You’ll Need
- Oreo cookies: The star of this dessert. Their chocolatey flavor creates a rich base and pairs beautifully with the creamy filling.
- Unsalted butter: Helps to bind the crushed Oreo cookies for the crust. Always use unsalted to control the overall saltiness of the dish.
- Cream cheese: Provides the luscious, creamy texture necessary for the cheesecake filling. Let it sit out for a while before mixing for the best results.
- Powdered sugar: Offers sweetness without the graininess of granulated sugar, making the filling silky smooth.
- Heavy whipping cream: Whipped to soft peaks, it adds a lightness to the filling that balances the density of the cream cheese.
- Vanilla extract: Enhances the flavor, bringing all elements together. Choose a good quality vanilla for the best taste.
Each ingredient plays a crucial role in the overall flavor and texture of the cheesecake. If you’re in a pinch, you can substitute different cookie types for the crust, but be mindful of flavor differences. For example, using chocolate graham crackers will yield a different, yet lovely, taste.
How to Make
- Prepare the crust by crushing the Oreo cookies into fine crumbs. You can do this by placing them in a ziplock bag and smashing them with a rolling pin or using a food processor for a finer texture. Once crushed, melt the unsalted butter and mix it with the Oreo crumbs in a medium bowl until the mixture resembles wet sand.
- Press the crust mixture evenly into the bottom of a 9×9-inch baking dish or a springform pan. Make sure to pack it tightly so that it holds together once chilled. You can use the flat bottom of a glass or a measuring cup to press it down evenly. Place this crust in the refrigerator while you prepare the filling.
- In a large mixing bowl, beat the cream cheese with an electric mixer until it’s smooth and creamy. It should be free of lumps, so take your time with this step. Gradually add the powdered sugar and continue mixing until well blended. Make sure to scrape down the sides of the bowl to ensure everything is well combined.
- Add the vanilla extract and mix until just combined. In another bowl, whip the heavy whipping cream until soft peaks form. This gives your cheesecake its light texture. Gently fold the whipped cream into the cream cheese mixture in stages, being careful not to deflate the whipped cream.
- Once everything is well combined, pour the cheesecake filling over the chilled Oreo crust. Smooth the top using a spatula. Return the dish to the refrigerator and let it chill for at least 4 hours, or preferably overnight, to set properly.
- Once set, remove the cheesecake from the refrigerator and slice it into squares. This no-bake cheesecake can be garnished with additional crushed Oreos, whipped cream, or chocolate sauce, depending on your preference. Serve cold for the best experience.
Though there are only a few steps, taking your time with each stage will yield a dessert that exceeds your expectations. Ensure you allow ample chilling time, as this is crucial in developing the perfect texture.
Variations & Substitutions
Gluten-Free Variation
If you or your guests have a gluten sensitivity, you can easily adapt this recipe. Instead of traditional Oreos, look for gluten-free chocolate sandwich cookies. These alternatives will provide a similar taste and texture, so you won’t miss out on the experience. Just ensure that the remaining ingredients are gluten-free.
Chocolate Chip Oreo Cheesecake
For those who crave an extra touch of decadence, consider adding mini chocolate chips to your filling. Simply fold in a cup of mini chocolate chips before pouring the filling into the crust. This variation adds little bursts of chocolate throughout the cheesecake, elevating its richness and texture.
Fruit Topping Variation
To lighten up this rich dessert, you can top your cheesecake slice with fresh fruit. Strawberries, raspberries, or even sliced bananas add a lovely, refreshing balance to the rich creaminess of the cheesecake and can make it feel a bit more indulgent without the guilt. You might also consider utilizing a fruit sauce drizzled over each slice before serving.
Dairy-Free Option
If you would like to make this cheesecake suitable for a dairy-free diet, swap out cream cheese for a vegan cream cheese alternative and use coconut cream instead of heavy whipping cream. The flavors will remain vibrant, and you’ll end up with a deliciously creamy texture without the dairy.
Common Mistakes to Avoid
When preparing this Irresistible No-Bake Oreo Cheesecake Slice, there are a few common pitfalls that can hamper your success. One major mistake is not ensuring that your cream cheese is at room temperature before mixing. If it’s cold, it can result in a lumpy filling that is difficult to smooth out. Take your time to let it warm up!
Another potential issue is not allowing enough chill time for the cheesecake to set. If you slice it too soon, the filling may be too soft and won’t hold its shape. It’s tempting to rush this step, but patience truly pays off.
Also, make sure to pack your crust well into the pan. If you leave it too loose, it can crumble easily when cutting or serving. A well-packed crust ensures that you have each delicious bite combined with that fantastic cheesecake filling.
Storage, Freezing & Reheating Tips
To store your Irresistible No-Bake Oreo Cheesecake Slice, simply cover it tightly with plastic wrap or transfer it into an airtight container. It will last in the refrigerator for about 5–7 days. For an even longer shelf life, you can freeze individual slices. Wrap each piece tightly in plastic wrap and then place them in a freezer-safe container. This allows you to enjoy indulgence any time you crave it, simply by thawing it in the refrigerator overnight.
When thawing, make sure not to microwave it, as this will change the texture and potentially lead to a less satisfying eating experience. Instead, get it out the night before you want to enjoy it. Always prioritize food safety! Any leftovers should be handled appropriately to avoid spoilage.
Frequently Asked Questions
Can I use a different type of cookie for the crust?
Absolutely! While Oreos are classic for a reason, feel free to experiment with other cookies, like chocolate graham crackers, Biscotti, or even vanilla wafers. Each will impart its own unique flavor to the dessert while still creating that delightful crust.
How can I prevent my cheesecake from cracking?
Since this cheesecake is a no-bake version, cracking isn’t usually a major concern as it is with baked cheesecakes. However, if you’re worried, ensure to mix your ingredients at low speed and avoid overmixing, which can incorporate excess air. Just remember to take your time with the chilling process so that it sets solidly.
Is it necessary to use heavy cream?
Heavy whipping cream is preferred for this recipe due to its high-fat content, which results in a lighter, creamier texture. If you substitute with lower-fat options, it may affect the overall quality and richness of your cheesecake.
Can I make this cheesecake ahead of time?
Certainly! This dessert is perfect for preparing in advance. You can make it up to two days ahead of time and keep it stored in the refrigerator until you’re ready to serve. It will actually taste better after chilling for a longer duration, as the flavors meld together beautifully.
How do I cut my cheesecake without making a mess?
To ensure clean slices, run a knife under hot water, wipe it dry, and then cut into the cheesecake. The heat will slightly soften the edges, allowing for a smooth cut. Wipe the knife clean between slices to maintain sharp edges on each piece.
Conclusion:
This Irresistible No-Bake Oreo Cheesecake Slice checks all the boxes—it’s simple to prepare, decadently delicious, and can be surprisingly versatile to suit various tastes and diets. The creamy filling paired with the crunchy crust creates a textural delight that’s sure to please everyone in your household. I encourage you to give it a try and, more importantly, make it your own by playing with different flavors and toppings.
Don’t hesitate to share your results with family and friends, and feel free to leave a comment below about your experience. Remember, cooking and baking should be fun, so enjoy the process, let your creativity shine, and indulge in this irresistible dessert. Happy baking!


