Prep time: 20 minutes
Cook time: 25 minutes
Total time: 45 minutes
Servings: 12 phyllo cups
The aroma of freshly baked phyllo dough wafting through your home can instantly transport you to a bustling Mediterranean kitchen. Each bite of these **Crispy Spinach and Feta Phyllo Cups** combines delightful crunch with rich, savory flavors, making them perfect for **appetizers**, party snacks, or to elevate any family meal. What makes this recipe particularly special is not just its **delectable** taste but also its **ease of preparation**. You’ll be whisked away on a culinary adventure, equipped with simple techniques that even the busiest of home cooks can master. Whether you are serving it for a cozy family gathering or a festive celebration, this recipe promises to impress with its blend of textures and flavors.
In this article, you’ll not only learn how to create these delightful phyllo cups but also discover tips, variations, and more to suit different tastes and dietary needs. Grab your apron and prepare to dive into a world of crispy perfection!
What Is Crispy Spinach and Feta Phyllo Cups Recipe?
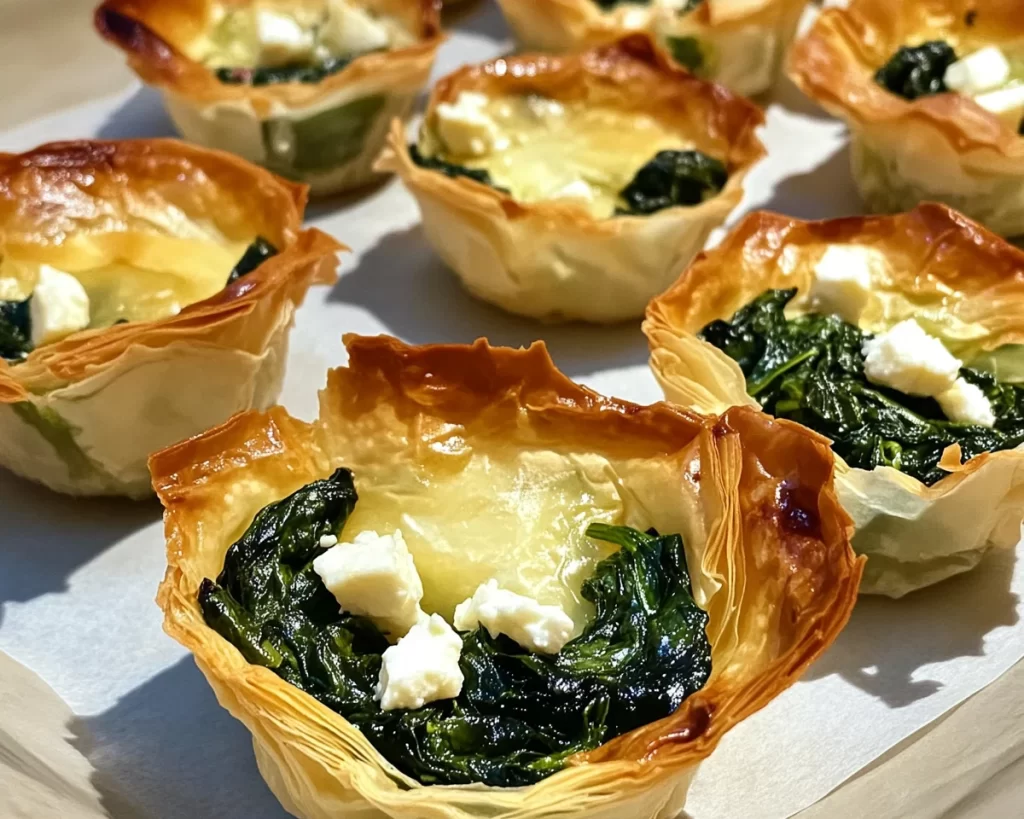
Crispy Spinach and Feta Phyllo Cups are a delightful dish originating from Mediterranean cuisine, where the combination of **phyllo dough**—known for its flaky, crispy layers—meets the rich, creamy textures of **feta cheese** and nutrient-packed spinach. This dish juxtaposes the **crispy exterior** with a savory, slightly tangy filling that is sure to tantalize your taste buds. Each cup is not only a feast for the mouth but also for the eyes; the golden-brown hue of the phyllo contrasts beautifully with the green of the spinach.
These phyllo cups are ideal for gatherings, providing a touch of elegance to any table. The layers of phyllo, prepared with a sprinkle of butter or olive oil, create a satisfying crunch as you bite into them. Inside, you find a mixture that is soft yet textured, providing a wonderful mouthfeel that makes you want to go back for just one more. Perfect for entertaining or a simple meal at home, they cater to both casual and sophisticated palates.
Why You’ll Love This
One of the many reasons you will fall in love with this recipe is its **exquisite flavor** combined with remarkable ease. The balance between the **earthy** taste of spinach and the salty tang of feta creates a **delicious harmony** that pleases even the most discerning of taste buds. The best part? This dish can be prepared ahead of time, making it a **hassle-free** option for busy parents or planners.
Another appealing aspect is the cost-effectiveness of the ingredients. Most of the components are budget-friendly, giving you the ability to whip up a gourmet dish without breaking the bank. The versatility of this recipe also shines through—whether served as an appetizer, a part of a larger meal, or even as a delightful snack, it can adapt to any occasion. You can also experiment with various fillings based on what you have on hand, making it an excellent option for fun **leftover creations**.
Ingredients You’ll Need
- Phyllo dough: The star of our dish, it provides the signature crispy texture. Look for it in the frozen section of your grocery store, allowing it to thaw in the refrigerator overnight before use.
- Fresh spinach: A key ingredient packed with nutrients and flavor. You can use fresh baby spinach for a sweeter taste or swap it for Swiss chard if you prefer a different flavor profile.
- Feta cheese: This salty cheese adds creaminess to the filling. If you want a milder taste, try using ricotta cheese instead.
- Onion: Chopped onion adds a sweet foundation when sautéed. Yellow or red onions work well based on your taste preference.
- Garlic: Minced garlic enhances the aromatic quality of the filling, providing depth and richness to the overall flavor.
- Egg: Beaten egg acts as a binder, helping hold the filling together while also adding richness.
- Olive oil or melted butter: Used for brushing the phyllo layers, creating that necessary crispiness. Choose olive oil for a healthier alternative.
- Salt and pepper: Essential for seasoning and enhancing the flavors of filling.
Make sure you have all of these ingredients lined up for a streamlined cooking experience. You might even find that many of these ingredients are staples in your kitchen, making this recipe achievable with minimal effort.
How to Make
- Begin by preheating your oven to 375°F (190°C). This step is vital for ensuring the phyllo cups cook evenly and achieve the desired crispiness.
- Next, take a skillet and set it over medium heat. Add a tablespoon of olive oil or a small pat of butter. When hot, toss in the chopped onion and sauté until it becomes translucent, about 3-5 minutes. This process not only enhances the onion’s natural sweetness but also adds a flavor base to your filling.
- Add the minced garlic to the skillet and sauté for another minute, allowing its pungent aroma to fill your kitchen. Be careful not to burn it, as charred garlic can become bitter.
- Add the fresh spinach to the skillet. Stir frequently as it wilts, which should take about 3-4 minutes. You want the spinach to retain some moisture, ensuring your filling is not too dry.
- Remove the skillet from heat and let the mixture cool slightly. In a separate bowl, combine the sautéed spinach and onion with crumbled feta cheese, the beaten egg, and a sprinkle of salt and pepper. Mix well until all ingredients are fully combined.
- Now, prepare the phyllo dough. Carefully unroll the sheets and cover them with a damp towel to prevent them from drying out. Take one sheet and brush it lightly with olive oil or melted butter, then layer another sheet on top. This layering is crucial for achieving that flaky texture, so continue with at least 4-5 layers.
- Once you have a stack of layered phyllo sheets, cut them into squares large enough to fit in a muffin tin. Gently press each square into the wells of the muffin tin, ensuring they are shaped like cups.
- Fill each phyllo cup with the spinach and feta mixture, making sure not to overfill, as the filling will expand slightly during baking. Brush the edges of the phyllo cups with more oil or butter for an extra crunchy finish.
- Bake the cups in the preheated oven for 20 to 25 minutes, or until the tops are golden brown and crispy. Allow them to cool slightly before removing them from the muffin tin to prevent sticking.
- Serve these scrumptious phyllo cups warm, garnished with fresh herbs if desired, and prepare for the rave reviews!
Cooking doesn’t have to feel complicated, and this straightforward recipe emphasizes that you can enjoy gourmet flavors without unnecessary stress.
Variations & Substitutions
Cheese Variation: If feta is not your favorite, feel free to experiment with other cheeses. You could use ricotta for a softer texture, or even add some grated mozzarella for a gooey center. Mixing different cheeses can introduce unique flavors and textures, allowing you to customize the filling to your personal preference.
Vegetable Variation: Swap out spinach for a mix of other vegetables like roasted red peppers, mushrooms, or artichoke hearts. Each of these vegetables can add vibrant flavor profiles to your phyllo cups; just make sure to sauté them beforehand to remove excess moisture. This variation is perfect for a hearty twist and can cater to those looking for a more diverse vegetable intake.
Vegan Variation: To create a vegan version of these phyllo cups, substitute the feta cheese with a vegan alternative, like nutritional yeast and blended tofu. You can also use flaxseed meal mixed with water instead of the egg as a binder. By using these simple adjustments, you’ll create a dish that everyone can enjoy, regardless of dietary restrictions.
Herb Variation: Fresh herbs can elevate the flavor of the filling tremendously. Consider adding herbs like dill, parsley, or basil for an aromatic kick. These herbs bring freshness to the dish and complement the creamy feta well. Adding herbs also provides a beautiful contrast of colors and can make your phyllo cups visually appealing.
Each of these variations allows you to personalize this dish, accommodating different preferences and creating new flavor combinations.
Common Mistakes to Avoid
When preparing your Crispy Spinach and Feta Phyllo Cups, it’s important to avoid some common pitfalls. One common mistake is not allowing your phyllo dough to thaw properly. Always follow the instructions on the package and give it ample time in the refrigerator. Working with frozen dough that hasn’t been properly thawed can lead to frustrating tearing or sticking.
Another critical point to remember is the necessity of brushing your phyllo layers with oil for added crispiness. Skipping this step can result in a bland texture and muted flavor. Make sure to give each layer a light coating, as this is what contributes to that golden, flaky crust.
Additionally, be cautious of overfilling your phyllo cups. While a generous filling is tempting, too much can lead to spillage and make them hard to remove from the muffin tin. Stick to a moderate portion for the best overall outcome.
Lastly, keep a close eye on the baking time. Every oven is different, and while the suggested time is a guideline, some may need slightly less or more time. Watch for that golden brown color to know when they are done. Always prioritize safety—burnt phyllo can ruin the entire dish and ruin your enjoyment.
Storage, Freezing & Reheating Tips
If you find yourself with leftovers—though they’re unlikely—you can easily store them for future enjoyment. Allow the phyllo cups to cool completely before placing them in an airtight container. They can be stored in the refrigerator for up to 3 days. For best quality, it’s not recommended to store and freeze them once baked, as the **crispiness** can diminish.
If you’d like to prepare them ahead of time, consider assembling the phyllo cups and filling them, then placing them in the freezer before baking. You can freeze them in an airtight container for up to 3 months. When you’re ready to enjoy, bake them directly from the freezer, adding a few extra minutes to the baking time.
For reheating baked phyllo cups, place them on a baking sheet and heat in a 350°F (175°C) oven for about 10-15 minutes, just until warmed through. This method helps to regain some of that crisp texture lost during storage, making them taste as if they were fresh out of the oven.
Food safety tip: Always check the appearance and smell before consuming leftovers, and discard anything that appears off.
Frequently Asked Questions
Can I make phyllo cups ahead of time?
Absolutely! You can prepare the phyllo cups and the filling in advance. Store them separately and assemble them just before baking. Alternatively, you can fully assemble and freeze the cups, baking them from frozen when you’re ready to enjoy.
What if I don’t have phyllo dough?
If you can’t find phyllo dough, you can use puff pastry as a substitute. While the texture will be slightly different, it will still produce well-formed cups that are delicious. Just be sure to roll it out slightly thinner before using it to mimic the layers of phyllo.
Can I use frozen spinach instead of fresh?
Yes, frozen spinach can absolutely be used in this recipe! Just be sure to thaw it completely and drain most of the water to avoid a soggy filling. Squeeze it out with a kitchen towel or strainer to remove excess moisture.
How can I adjust the flavor of the filling?
You can add spices and herbs to enhance the flavor further! Consider incorporating cumin, nutmeg, or crushed red pepper flakes for some heat. These spices can add dimensions to the earthy spinach and creamy feta.
What can I serve with phyllo cups?
These phyllo cups pair well with a variety of side dishes or sauces. Consider serving them alongside a refreshing salad, tzatziki sauce, or a yogurt dipping sauce for added flavor. These accompaniments can elevate the meal and offer contrasting textures and flavors.
Conclusion:
The Crispy Spinach and Feta Phyllo Cups are not just a culinary treat; they are a testament to how simple ingredients can yield a spectacular dish. Their versatility allows for endless customization, making them suitable for various occasions and dietary preferences. I encourage you to try your hand at this delightful recipe, customize it with your favorite ingredients, and share it with those you love. Enjoy the process, revel in the delicious aroma, and watch as your friends and family savor each bite. Happy cooking!