Prep time: 30 minutes
Cook time: 45 minutes
Total time: 1 hour 15 minutes
Servings: 24 cake pops
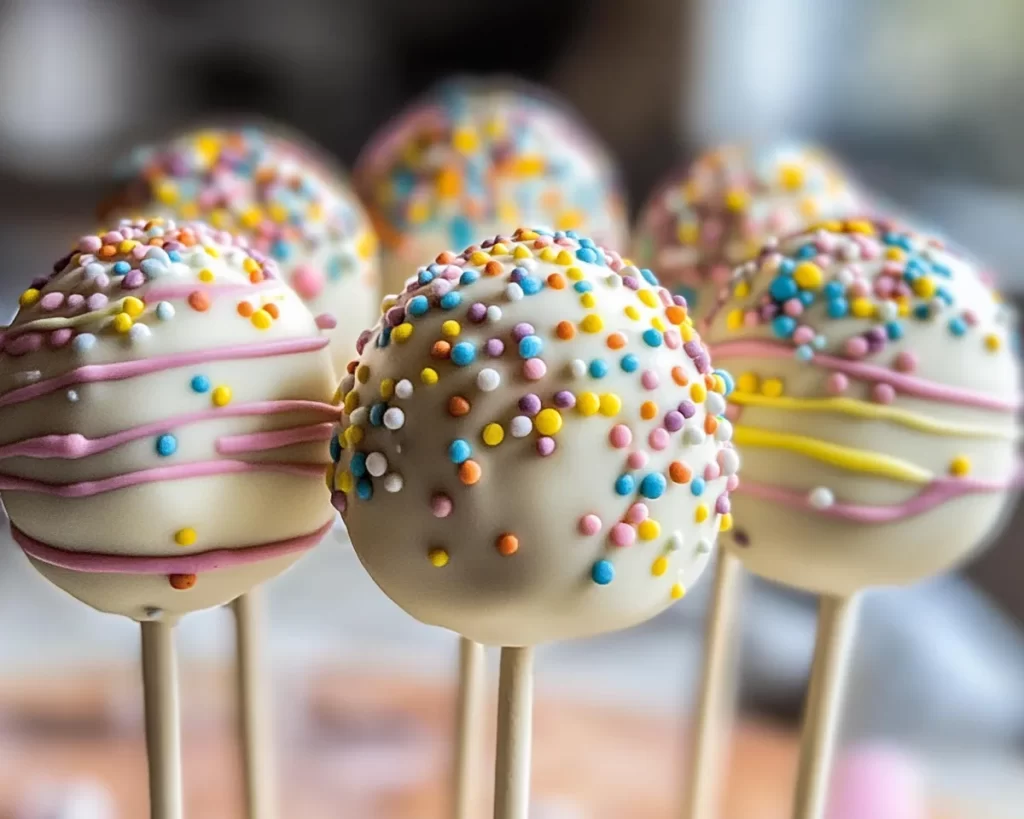
Creating a sweet treat that is not only delightful to taste but also visually appealing can sometimes be a challenge, especially as holidays approach. These Easter Vanilla Cake Pops are here to solve that problem! Imagine a soft, vanilla-flavored cake, coated in rich chocolate, perfectly shaped into fun little bites. Perfect for your Easter celebration or any festive gathering, they provide an element of whimsy that guests of all ages will appreciate. What’s even better is that making these cake pops is simpler than it looks! You’ll be surprised at how easy it is to craft these delightful little morsels with a few simple ingredients.
In this guide, you will learn everything you need to know about making perfect Easter Vanilla Cake Pops, including tips for decorating, common mistakes to avoid, and fantastic variations that will suit different tastes. Whether you’re a busy parent wanting to impress your children, a beginner looking to explore cake pops for the first time, or a seasoned baker aiming to whip up something fun, there is something here for everyone.
What Is Easter Vanilla Cake Pops?
Easter Vanilla Cake Pops are small spherical desserts made from baked vanilla cake that is crumbled and mixed with frosting to create a dough-like consistency. Once formed into little balls, the cake pops are coated in a layer of melted chocolate or candy melts, and often decorated with sprinkles or edible decorations. Their origins can be traced back to the growing trend of cake pops in the early 2000s, where they quickly became popular at birthdays, celebrations, and holiday events.
The texture of these cake pops is one of their best features; they are moist and have a lovely crumb thanks to the combination of cake and frosting. When you take a bite, you experience a burst of sweet vanilla flavor complemented by the rich chocolaty coating, making them a delightful end to any meal or a sweet snack during the day. They are also incredibly versatile, which means you can customize them based on your preferences and the occasion, making them a perfect addition to your Easter festivities.
Why You’ll Love This
There are so many reasons to love Easter Vanilla Cake Pops! First and foremost, they are **incredibly delicious**, blending the sweetness of vanilla cake with a velvety chocolate exterior that almost melts in your mouth. They provide an excellent way for you to use leftover cake or crumbs—the perfect solution for a busy parent looking to utilize everything without waste. Additionally, these cake pops are fun to make with children, presenting a fantastic opportunity to get them involved in the kitchen.
You might think that cake pops are tricky to make, but this recipe is designed to simplify the process. While they look like they belong in a professional bakery, they can be created in your very own home kitchen. Plus, they offer a wide range of **cost-effective** possibilities because you can buy supplies in bulk or use leftover baking ingredients. For those who are health-conscious, you can even incorporate dietary alternatives such as gluten-free cake or low-sugar ingredients to make them fit into a healthier eating plan.
Ingredients You’ll Need
- For the Cake:
You will need 1 box of vanilla cake mix, following the package instructions. Alternatively, you can create a homemade version using flour, sugar, baking powder, butter, eggs, and salt. The cake is the base of your pops, providing flavor and structure. - For the Frosting:
Use 1 cup of vanilla frosting. This acts as a binder, helping to combine the cake crumbs into cohesive balls. You can use store-bought or make your own with butter, powdered sugar, vanilla extract, and milk. - For the Coating:
A 12-ounce bag of chocolate or candy melts is essential for coating the cake pops. You can choose milk chocolate, dark chocolate, or white chocolate depending on your preference. - For Decoration:
Edible decorations like sprinkles, shredded coconut, or edible glitter are wonderful options for topping your cake pops. These will add that festive touch that is perfect for Easter! - For Handling:
You will also need lollipop sticks, which are essential for handling and presenting your cake pops. You can find these at most craft or baking supply stores.
How to Make
1. **Prepare the Cake:** Begin by baking the vanilla cake according to the package instructions if you chose a boxed mix. If you’re making your cake from scratch, preheat your oven to 350°F (175°C) and mix together the dry ingredients first. Pour the batter into a greased cake pan and bake until a toothpick comes out clean, about 25-30 minutes. Once the cake is cooled completely, crumble it into a large bowl.
2. **Mix with Frosting:** Take your **frosting** and add it gradually to the crumbled cake. You want to ensure that the mixture is moist but not overly wet. Use your hands to thoroughly combine the cake and frosting until you can form a ball that holds together. This step is crucial to achieving the right texture of cake pops.
3. **Shape the Cake Balls:** Scoop out about a tablespoon of the cake mixture and roll it into a ball between your palms. Keep an eye on the size; making them uniform aids in even coating and presentation. Once you’ve shaped all your cake balls, place them on a baking sheet lined with wax paper. Refrigerate for about 30 minutes to set.
4. **Prepare the Coating:** While your cake balls are chilling, melt your chocolate or candy melts in a microwave-safe bowl. Heat in intervals of about 30 seconds, stirring in between until completely smooth. This will ensure a glossy finish on the cake pops.
5. **Attach the Sticks:** Dip the tip of each lollipop stick into the melted chocolate before inserting it halfway into a cake ball. This helps the stick adhere better. Repeat with all the balls before returning them to the fridge for another 10 minutes.
6. **Coat the Cake Pops:** Dip each cake pop into the melted chocolate, covering it completely. Allow any excess chocolate to drip off. For an even coating, you can gently tap the stick against the side of the bowl.
7. **Decorate:** Before the coating sets, roll the wet cake pops in sprinkles or any other decoration of your choice. This is the time to get creative!
8. **Set Them Up:** Insert the decorated cake pops back into the Styrofoam or a cake pop holder, allowing them to set completely, which may take about 20 minutes.
9. **Serve and Enjoy:** Once set, your Easter Vanilla Cake Pops are ready to serve! Place them on a decorative plate for your guests or package them individually for a sweet mini gift.
Variations & Substitutions
Chocolate Cake Pops
If you’re a fan of rich chocolate flavors, you can swap the vanilla cake mix for chocolate cake mix. This variation provides a delightful twist that chocolate lovers will appreciate. The process remains the same, but you’ll be indulging in the deep, satisfying flavor of chocolate, which pairs beautifully with white chocolate coating. Consider pairing it with mint-flavored frosting for an extra layer of flavor classic combination.
Gluten-Free Cake Pops
For those needing gluten-free options, simply substitute the cake mix with a certified gluten-free cake mix. This variation opens up the recipe to accommodate those on a gluten-restricted diet while maintaining the cake pop’s inviting sweetness and texture.
Vegan Cake Pops
You can make these pops vegan by using egg replacers (like flaxseed meal or applesauce) and plant-based butter when making your cake. Opt for vegan frosting as well, and ensure your candy melts are dairy-free. The resulting cake pops will be enjoyable for anyone, retaining their delightful flavor and moist texture.
Seasonal Flavor Cake Pops
Incorporate seasonal flavors such as lemon or almond extract to personalize your cake pops for any holiday, not just Easter! Use lemon cake with a lemon glaze or almond cake with white coating, and top them with edible flowers or colored sugar to match the season’s celebrations.
Common Mistakes to Avoid
One common mistake is making the cake balls too large. If you shape them too big, they may not set correctly and can become top-heavy when coated with chocolate, leading to fall-offs of the stick. It is best to keep these bites small, around 1 to 1.5 inches in diameter, to ensure a consistent and enjoyable cake pop experience.
Another mistake is not allowing the cake pops to chill thoroughly before coating. Skipping this step results in soft cake balls that fall apart when dipped in chocolate. It’s imperative to chill the cake balls adequately, so they harden and hold their shape.
Lastly, be aware of the temperature of the melted chocolate. If it’s too hot, it can melt the cake ball and ruin its form. Allow the chocolate to cool for a moment if it seems too hot while you’re working. **Ensuring your coating remains at the right temperature will lead to beautifully coated pops.**
Storage, Freezing & Reheating Tips
After preparing your Easter Vanilla Cake Pops, if you find yourself with leftovers, you can store them successfully. Place them in an airtight container in the refrigerator for up to one week. It is vital to ensure that they are completely cooled and set before storage to avoid any moisture that could lead to sogginess.
If you want to save cake pops for later, you can freeze them! Make sure to freeze them in a single layer on a baking sheet first, then transfer them to an airtight container with parchment paper between layers. They can last for about 2-3 months in the freezer. When ready to enjoy, simply thaw the pops in the fridge for a few hours rather than microwaving, allowing them to maintain their integrity.
When reheating is required, do not place them in the microwave, as this can cause them to become overly soft. Instead, let them defrost naturally at room temperature, which will keep them fresh and intact.
Frequently Asked Questions
Can I make cake pops ahead of time?
Yes, you can! These cake pops can be made a few days in advance, which is perfect for busy parents or anyone preparing for a large gathering. Just ensure they are stored properly in an airtight container to maintain their freshness.
Can I use other types of chocolate for coating?
Absolutely! While milk chocolate, white chocolate, and dark chocolate are popular choices, you can also explore using flavored melts like strawberry or even color melts that are exciting for kids. The key is to ensure whichever chocolate you use is tempered correctly for the best consistency.
How can I prevent cake pops from falling off the stick?
To keep cake pops securely attached to the stick, ensure that you dip the stick in melted chocolate before inserting it into the cake ball. This little trick works like glue and keeps the pops from sliding down the stick when they are dipped.
What can I use instead of candy melts?
If you don’t have access to candy melts, you can use chocolate chips as an alternative. Just be aware that they may not yield the same smooth coating, as candy melts are designed specifically for melting and coating.
What’s the best way to decorate cake pops?
The best decoration methods can be as varied as your imagination. You can roll them in crushed nuts, shredded coconut, sprinkles, or edible glitter. Using a drizzle of contrasting chocolate is another fun way to elevate the design, enhancing both aesthetics and flavor.
Conclusion:
In summary, these Easter Vanilla Cake Pops are a fun, flavorful, and visually appealing addition to your festivities. They provide a sweet treat that is sure to bring smiles to your family and guests, and they are customizable to suit a variety of tastes and dietary needs. So roll up your sleeves, gather your ingredients, and dive into the joyous world of cake pop making! Your creation will not only brighten the table but also create delightful memories. Make sure to share your adaptations and creations with others, and enjoy every bite of this sweet adventure!


