Prep time: 20 minutes
Cook time: 25 minutes
Total time: 45 minutes
Servings: 12
St. Patrick’s Day is a festive occasion celebrated with rich traditions, beloved Irish dishes, and vibrant colors, especially green! While you might think of hearty stews or hearty breads, this St. Patrick’s Day, why not indulge your sweet tooth with something unique? St. Patrick’s Day Green Sugar Cookie Bars are the treat to whip up this holiday, combining the sweet joy of sugar cookies with the fun of festive colors. Imagine sinking your teeth into soft, chewy bars topped with a lovely green hue, enveloped with a delightful frosting that ties everything together.
What makes these cookie bars special is their texture; they are chewy on the inside with a lovely, slightly crispy edge, embodying the perfect balance that every dessert should exhibit. They are not only aesthetically pleasing but also bring together a medley of flavors that are subtly sweet, making them irresistible. This recipe is designed to be straightforward and manageable, even for those newer to baking. By the end, you’ll have a colorful dessert that not only captures the essence of the holiday but is sure to be a showstopper on any dessert table.
In this recipe, you will learn everything you need to know about making these delightful bars. You will discover the essential ingredients, step-by-step instructions, and creative variations. Whether you need a festive treat for a party or a fun cooking activity with kids, these green sugar cookie bars are the way to go!
What Is St Patrick’s Day Green Sugar Cookie Bars?
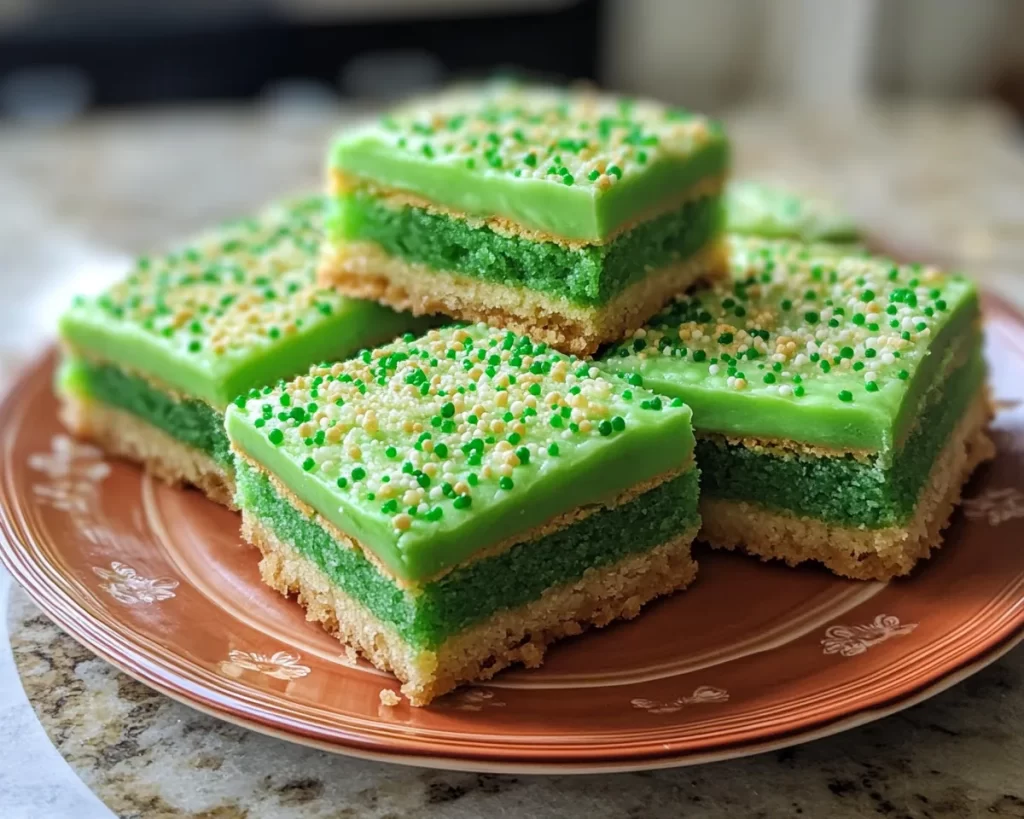
St. Patrick’s Day Green Sugar Cookie Bars are delectable sweet treats that combine traditional sugar cookie flavors with a festive twist. This dish draws its origins from classic sugar cookies, blending a buttery dough with sugar and vanilla, giving it that quintessential sweetness we all crave. However, what sets these bars apart is their vibrant green hue, which can be achieved through various methods—most commonly using food coloring or natural substitutes like matcha.
The texture of these cookie bars is something to look forward to; they are soft and chewy yet have a hint of crispiness at the edges. The aroma wafting through your kitchen while they bake is nothing short of heavenly, with the sweet scent mingling with buttery notes, beckoning you to come and indulge. The subtle sweetness paired with the creamy frosting makes these bars not just a treat for the eyes but for the taste buds as well.
Flavors of vanilla and butter have a starring role, while the green color adds an element of fun. A hint of frosting on top offers a satisfying creaminess that complements the bars’ overall texture. Whether you’re celebrating a holiday or merely want to add a pop of color to your dessert offerings, St. Patrick’s Day Green Sugar Cookie Bars can easily become a family favorite.
Why You’ll Love This
You will absolutely adore these St. Patrick’s Day Green Sugar Cookie Bars for many reasons. First and foremost is the taste: they are phenomenally sweet without being overpowering. The balance of flavors allows the vanilla and butter to shine through, creating a dessert that feels both decadent and approachable. Additionally, these bars are incredibly easy to make. Even novice bakers will find this recipe manageable, as it uses straightforward ingredients and methods, ensuring you don’t have to fuss too much.
The cost-effective nature of this dessert is another highlight; most ingredients can be found in your pantry. Sugar, flour, and butter are staples in many kitchens, making this a budget-friendly option for celebrations. Despite the low cost, these bars look impressive, making them perfect for shared gatherings.
Another aspect is the versatility of the recipe. You can easily adapt the color, flavors, or toppings to suit different occasions, from birthdays to holidays. This creates endless possibilities; if you want to tailor them for different seasons or events, the foundation remains the same. So, don’t hesitate to experiment and make it uniquely yours.
Lastly, they represent a friendly way to get kids involved in the kitchen. Whether it’s measuring out ingredients or stirring the dough, kids love participating in cooking, especially when sweet treats are involved. The overall experience becomes a memorable one, filled with laughter and creativity, making these cookie bars far more than just a dessert.
Ingredients You’ll Need
- All-purpose flour: 2 cups — This is the base of your sugar cookie bars. It contributes to the structure and chewiness. You can substitute gluten-free flour if needed.
- Sugar: 1 cup — For sweetness and a light texture, granulated sugar is commonly used. Brown sugar can be mixed in for a deeper flavor if desired.
- Butter: ½ cup (softened) — Unsalted butter is best, adding richness and flavor. Make sure it is at room temperature for easy mixing.
- Egg: 1 large — This helps bind the ingredients together, contributing to a delightful texture. If you are looking for an egg substitute, try using ¼ cup applesauce.
- Vanilla extract: 2 tsp — This adds flavor depth to the bars. Pure vanilla is preferred for the best taste.
- Baking powder: 1 tsp — This leavening agent helps the bars rise and become light and fluffy.
- Salt: ½ tsp — Salt enhances flavor and balances the sweetness of the bars.
- Green food coloring: A few drops — This creates the vibrant green color that makes the bars festive. You may also use natural alternatives like spirulina for a healthier option.
- Frosting: (optional) — A simple buttercream frosting can be made with powdered sugar, softened butter, and vanilla extract. You can also add a splash of milk to achieve the desired consistency.
Each ingredient plays an integral role in achieving the perfect cookie bar, so do not be tempted to skip or swap them hastily!
How to Make
- **Preheat your oven** to 350°F (175°C). This step is crucial, as it ensures an even bake. Set your oven rack in the center, where the heat is most consistent.
- In a large mixing bowl, combine **softened butter** and **sugar**. Use a hand mixer or stand mixer on medium speed to cream these together for about 2-3 minutes, until the mixture feels light and fluffy. This process is essential for aeration, which gives your cookies a better rise and texture.
- Add the **egg** and **vanilla extract** to the butter-sugar mixture. Beat until fully incorporated; this should take about a minute. The eggs will help bind the mixture while enhancing the flavor with vanilla.
- In a separate bowl, whisk together the **flour, baking powder, and salt**. This step is important to ensure that the baking powder is evenly distributed throughout the flour, ensuring an even rise during baking.
- Gradually incorporate the dry ingredients into the wet mixture. Mix just until combined; overmixing can lead to tough bars. Consider using a spatula to fold in the flour, ensuring it’s well integrated without overworking the dough.
- Add the **green food coloring** gradually, mixing until you achieve your desired hue. This is a fun step, where you can adjust the intensity of the green to make it as vibrant as you wish!
- Line a baking pan (approximately 9×13 inches) with parchment paper for easy removal. Pour the cookie dough into the prepared pan, spreading it evenly using a spatula. Be sure to press down gently to ensure even thickness.
- Bake in the preheated oven for 20-25 minutes. The edges should turn lightly golden, while a toothpick inserted in the center should come out clean. Remember, every oven is different, so keep a close eye as they bake.
- Once baked, remove from the oven and cool in the pan for 10 minutes before transferring to a wire rack to cool completely. This will firm up the texture, making it easier to slice later.
- For the frosting, while the bars are cooling, prepare a simple buttercream by mixing together **powdered sugar**, **softened butter**, and a splash of milk. Beat until fluffy and spreadable, adjusting the milk until you achieve your desired consistency.
- Once the bars are cool, spread the frosting over the top evenly using a spatula. Feel free to drop some sprinkles on top for added festivity before slicing the cookie bars into squares or rectangles.
Following these detailed steps ensures success, making your St. Patrick’s Day Green Sugar Cookie Bars a delicious and enjoyable experience for everyone.
Variations & Substitutions
Gluten-Free Variation: If you or your guests have gluten sensitivities, you can easily make these cookie bars gluten-free by substituting the all-purpose flour with a reputable gluten-free flour blend. Be cautious, as different blends behave differently, so you may want to look for one specifically formulated for baking. The flavor will still remain sweet and satisfying without sacrificing any of the fun!
Matcha Green Tea Cookies: For a unique twist on flavor, consider substituting a portion of your flour with **matcha green tea powder**. This not only enhances the green color but also offers a delightful earthy taste that complements the sweetness of the bar. You can mix 1-2 tablespoons of matcha into the flour before combining it with the wet ingredients. This is perfect for those who enjoy a bit of a health boost alongside their dessert.
Chewy Lemon Sugar Cookie Bars: If you prefer a citrusy kick, you can turn these into lemon-flavored bars by adding the zest of one lemon and replacing a portion of the vanilla extract with **fresh lemon juice**. The lemon provides a refreshing contrast to the sweetness, giving these bars a zesty and vibrant taste, perfect for spring gatherings.
Nutty Variations: If you are a fan of nuts, consider folding in some **chopped nuts** or **chocolate chips** into the batter before baking. Walnuts, pecans, or even white chocolate chips complement the green color beautifully, adding both texture and richness. Just be aware that adding nuts may slightly change the bake time, so keep an eye on them!
Fruity Topping: Experiment with the frosting by topping your cookie bars with fresh fruit like berries or banana slices. They not only add a touch of natural sweetness but also provide a delightful contrast to the frosting. If you’ll be enjoying these bars outside or in warmer weather, fresh fruit can also be a refreshing addition.
With these variations, you have the freedom to explore different flavors and customize your St. Patrick’s Day Green Sugar Cookie Bars to cater to your tastes and the preferences of your guests!
Common Mistakes to Avoid
One of the most common mistakes when baking St. Patrick’s Day Green Sugar Cookie Bars is **overmixing the dough**. When combining dry and wet ingredients, only mix until no flour is visible. Overmixing can develop gluten, leading to tough, chewy bars instead of the desired soft and tender texture. Keep this in mind, especially when you are folding in the flour!
Another common issue is **not measuring ingredients correctly**. Baking is notably a science; using too much or too little flour or sugar can drastically affect the outcome of your bars. Always use the spoon-and-level method for measuring flour—scoop the flour into your measuring cup and then level it off with a knife for accuracy.
Additionally, if you’re not careful, the bars can be either **undercooked or overcooked**. It’s best to check them a few minutes before the recommended baking time. If you notice the edges beginning to turn golden brown, check for doneness with a toothpick. It should come out clean or with a few crumbs, but not wet.
Ensure your ingredients are at **room temperature**. This means your eggs and butter should be softened for the best mixing results. Cold ingredients can lead to uneven batter and alter the final texture.
Finally, ignore food **safety practices** when storing or sharing your cookie bars. It’s vital to cool them completely before covering to avoid condensation. Storing them in an airtight container at room temperature helps maintain freshness, but if you opt to frost them, consider refrigerating!
By avoiding these common pitfalls, your St. Patrick’s Day Green Sugar Cookie Bars will turn out as delightful as you envisioned!
Storage, Freezing & Reheating Tips
When it comes to storing your St. Patrick’s Day Green Sugar Cookie Bars, they can last for several days, making them ideal for meal prep or holiday gatherings. After they are cooled completely and frosted, cut them into squares or rectangles and place them in an airtight container. You can keep them at room temperature for up to 3 days, although if you prefer, refrigerating them can prolong freshness slightly.
If you find yourself with leftovers, you can freeze these cookie bars for enjoyment later. To do this, slice them, and wrap each piece individually in plastic wrap. After wrapping, place the bars in an airtight freezer-safe container or a resealable freezer bag. They will remain good for up to three months in the freezer. When you’re ready to eat them, simply let them thaw at room temperature for a couple of hours, or you can pop them into the microwave for a few seconds if you prefer a gooey texture.
For reheating, consider the amount you want to warm up. If you’re only taking one or two, microwaving them for about 10-15 seconds on medium power will warm them without drying them out. For larger batches, preheat your oven to 350°F (175°C) and place the bars on a baking sheet covered with foil. Reheat for about 10-15 minutes, keeping an eye on them to ensure they warm through but do not get overcooked.
Food safety practices are vital: avoid leaving them out at room temperature for extended periods, especially if they are frosted or have perishable toppings. Eating them within 2-3 days is recommended if stored at room temperature.
Frequently Asked Questions
Can I make St. Patrick’s Day Green Sugar Cookie Bars ahead of time?
Yes, these cookie bars can easily be made ahead of time. You can prepare the dough and store it in the refrigerator for up to a day before baking. If you already baked them, cool and store them in an airtight container. They can last for up to 3 days on the counter or feel free to freeze them for longer storage.
What kind of frosting should I use for these cookie bars?
A classic buttercream frosting pairs wonderfully with these bars! However, you can also use cream cheese frosting if you prefer a tangy twist. For a healthier option, consider a simple glaze made from powdered sugar and milk, which can be drizzled on top of the bars for decoration.
What should I do if my cookie bars are too soft in the center?
If your cookie bars feel too soft in the center, they may need a few more minutes in the oven. You can check for doneness with a toothpick; if it comes out clean or with a few crumbs, they are ready. If they are still undercooked after the initial suggested bake time, add more time in 2-3 minute increments until they are perfect.
Can I use natural food coloring instead of artificial?
Absolutely! If you prefer to avoid artificial colors, you can use natural food coloring options like spirulina powder, beet juice, or other vegetable dyes. These alternatives can provide a unique flavor profile and color but may yield slightly different results. Just remember to adjust accordingly to achieve the desired hue.
Are these cookie bars suitable for dietary restrictions?
These bars can be altered to fit different dietary needs. By using gluten-free flour, egg substitutes like applesauce, and reducing sugar slightly, you can easily accommodate various dietary preferences. Always read labels and avoid cross-contamination to ensure the bars meet specific requirements.
Conclusion:
These St. Patrick’s Day Green Sugar Cookie Bars truly encapsulate the spirit of the occasion with their vibrant color and delicious flavors. They are simple to prepare and can easily bring joy to your family and friends, making your celebrations brighter and sweeter. Try customizing them to fit your personal taste or the preferences of your guests, whether through flavor variations or exciting toppings. Feel inspired to share your creations with loved ones or explore different festive recipes. Baking should always be a fun and delicious adventure, so get started on your cookie bar journey today!


