Prep time: 30 minutes
Cook time: 10 minutes
Total time: 40 minutes
Servings: 24 cookies
There’s something incredibly special about sugar cookies, especially when they are shaped like charming shamrocks for St. Patrick’s Day. These delightful St. Patrick’s Day Shamrock Sugar Cookies are not only a treat for your taste buds but also visually captivating. Whether you’re looking to get into the festive spirit with your family or impress guests during a celebration, this recipe will guide you through every step to success.
You’ll learn how to create tender, buttery cookies that melt in the mouth, adorned with luscious icing and vibrant sprinkles. Plus, expect some useful tips and handy variations to accommodate any dietary needs or flavor preferences that you might encounter.
What Is St Patrick’s Day Shamrock Sugar Cookies?
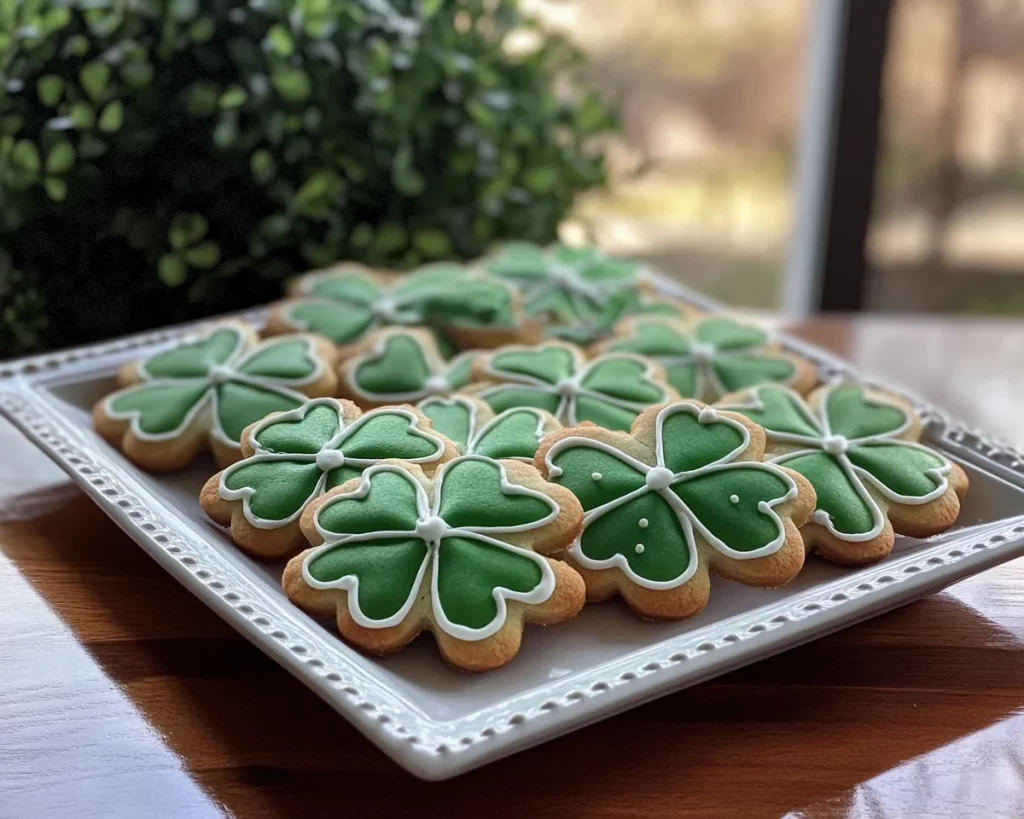
St. Patrick’s Day Shamrock Sugar Cookies are a playful and festive twist on the classic sugar cookie. Originating from old Irish traditions celebrating St. Patrick’s Day, these cookies symbolize luck and prosperity. Shaped like shamrocks, they have a rich, buttery flavor with a delicate crunch on the outside and a tender crumb on the inside.
These cookies meld delightful sweetness with a hint of vanilla and, depending on your icing choice, can be decorated in vibrant greens, whites, and golds to enhance the overall aesthetic. They are perfect not just for St. Patrick’s Day but can also serve as a fun plant motif for any occasion. The festive shapes plus the sweet aroma emanating from the oven are sure to evoke joy whether you’re baking for family gatherings, school parties, or even just to enjoy at home.
Moreover, these cookies provide a wonderful opportunity for kids to get involved in the kitchen, making it a fun family activity. As you roll out the dough and cut the shapes, not only will your home fill with the wonderful aroma of fresh-baked goods, but your spirits will be lifted as well.
Why You’ll Love This
One of the primary reasons you’ll fall in love with these cookies is their **versatility**. This sugar cookie dough can serve as a base for numerous creations, from holiday-themed treats to everyday snacks. They’re easy to make, requiring common pantry ingredients, and they come with the added benefit of being a perfect canvas for creative decorating. Each bite of these cookies combines sweet buttery goodness with a light, airy texture that melts in your mouth.
The cost factor is another plus; these cookies won’t break the bank and can be made in large batches. Plus, they can be frozen and stored for future enjoyment, making them great for meal prep or last-minute desserts.
Many might think sugar cookies to be bland or uninteresting, but these shamrock shapes can turn an ordinary cookie into a festive delight! You can also avoid common misconceptions that sugar cookies are too complicated; the steps are surprisingly simple, making them ideal even for beginner bakers.
Ingredients You’ll Need
- 2 3/4 cups all-purpose flour – This is the backbone of your cookies, providing structure and texture.
- 1 teaspoon baking soda – This will help your cookies rise and give them a soft texture.
- 1/2 teaspoon baking powder – This complements the baking soda to create an airy, chewy cookie.
- 1 cup unsalted butter, softened – For rich flavor and a tender crumb.
- 1 1/2 cups white sugar – This adds sweetness and aids in the cookie’s chewiness.
- 1 egg – Serves as a binder, helping the ingredients hold together.
- 1 teaspoon vanilla extract – Imparts a deep, sweet flavor.
- 1 teaspoon almond extract – Enhances the overall flavor profile (optional).
- 1/2 teaspoon salt – Balances the sweetness and elevates the flavor.
- Green food coloring – Optional, but fun for festive decorating!
- Royal icing – For decorating (can be homemade or store-bought).
- Sprinkles or edible glitter – Optional decoration for added visual flair.
Each of these ingredients contributes essential characteristics to your shamrock cookies. **All-purpose flour** provides stability; adjusting the amount based on humidity could help yield the perfect consistency. **Baking soda and baking powder** work in unison to ensure a puffy cookie that maintains its shape when baking. The **butter** enhances flavor, while **sugar** aids in browning and moisture retention.
You might be tempted to swap **unsalted butter** for margarine, but I highly recommend sticking with butter for that rich taste. When substituting the **eggs**, consider using **flaxseed meal** or unsweetened applesauce for a vegan version, though it changes the texture slightly. Adjusting the **extracts** will give your cookies a unique twist; if you’re a fan of citrus, lemon extract or zest can brighten the flavor profile.
How to Make
1. **Prepare Your Ingredients**: Start by preheating your oven to 375°F (190°C) and line your baking sheets with parchment paper. This will ensure that your cookies don’t stick and facilitate easy cleanup. Gather all the ingredients so that they are ready to use.
2. **Mix the Dry Ingredients**: In a medium bowl, sift together the all-purpose flour, baking soda, baking powder, and salt. Carefully combining these ingredients will evenly distribute the leavening agents throughout the flour and prevent clumps, leading to evenly baked cookies.
3. **Cream the Butter and Sugar**: In a large mixing bowl, cream the softened unsalted butter and white sugar together until light and fluffy. This usually takes about 3–5 minutes with an electric mixer on medium speed. Whipping air into the butter creates an airy texture in your cookie.
4. **Add the Egg and Flavors**: Beat in the egg, followed by the vanilla and almond extracts. Make sure to scrape down the sides of the bowl with a spatula to incorporate all ingredients. You’ll notice a sweet, enticing aroma begin to form.
5. **Combine Dry and Wet Ingredients**: Gradually stir in the flour mixture until fully combined. It is best to mix until just incorporated to avoid over-mixing, which can cause tough cookies. If you opt for **green food coloring**, add it now, mixing until you achieve the desired hue.
6. **Shape the Cookies**: Using a tablespoon or cookie scoop, portion out the dough and roll it into balls. Place them on the prepared baking sheets, leaving ample space for spreading. You can gently flatten them with the bottom of a glass for uniformity, but retaining the ball shape works well if you want thicker cookies.
7. **Bake the Cookies**: Place the baking sheets in the preheated oven and bake for 8–10 minutes, or until the edges are just golden brown. The centers may appear slightly soft, but they will continue cooking when removed from the oven.
8. **Cool the Cookies**: Once baked, allow the cookies to rest on the baking sheet for a few minutes before transferring them to a wire rack. This helps them retain their shape while cooling but also allows the excess moisture to escape, yielding a great texture.
9. **Decorate**: Once completely cool, decorate your cookies with royal icing and sprinkles. You can create shamrock patterns or write fun messages for a more personal touch.
This step-by-step guide provides clarity on the method without overwhelming you with technical jargon. By following these instructions, both beginner and seasoned bakers can create delicious treats that will impress.
Variations & Substitutions
Chocolate Chip Shamrock Sugar Cookies: You can easily elevate your shamrock sugar cookies by adding semi-sweet chocolate chips. Simply fold about 1 to 1.5 cups into your dough after mixing the dry and wet ingredients. The blend of rich chocolate and sweet cookie dough creates a harmonious flavor contrast that will delight chocolate lovers. This variation is perfect for those who can’t resist chocolate, and it adds a wonderful texture variation to the classic cookie format.
Gluten-Free Shamrock Cookies: For those with dietary restrictions, substituting all-purpose flour for a 1:1 gluten-free baking flour blend will work beautifully. Make sure your gluten-free flour includes xanthan gum for binding. The resulting cookie will have a slightly different texture but can still be tender and flavorful. This option ensures everyone can partake in the festive fun without concern for dietary needs.
Vegan Shamrock Sugar Cookies: If you’re looking for a vegan option, you can replace the egg with mashed banana or a chia seed egg (1 tablespoon chia seeds mixed with 2.5 tablespoons water, let sit for a few minutes until it thickens). Swap the butter for vegan shortening or coconut oil for a rich flavor. The key here is making sure your baking soda and powder are also vegan-friendly.
Each of these variations maintains the core essence of what makes shamrock sugar cookies enjoyable while allowing for personalization based on dietary preferences or flavor likes. It’s always fun to experiment in the kitchen and see how each adjustment alters the outcome!
Common Mistakes to Avoid
One of the most common mistakes when making sugar cookies is overmixing the dough. Doing so can develop gluten, leading to tough cookies instead of tender ones. It’s important to stop mixing just as the flour is incorporated for the best texture.
Another potential pitfall is not chilling the dough enough. Properly chilled dough helps prevent spreading during baking and results in that perfect cookie shape. If you’re short on time, at least try to chill it for 15–20 minutes.
Be cautious not to underbake your cookies, as they might not hold their shape if removed from the oven too early. The edges should be lightly golden, while the centers might still look a bit soft, allowing them to set once cooled.
Finally, when decorating, ensure your cookies are completely cool! Icing hot cookies can lead to a gooey mess, while waiting for them to cool ensures that your decorations stay intact and look beautiful.
Storage, Freezing & Reheating Tips
To store your St. Patrick’s Day Shamrock Sugar Cookies, keep them in an airtight container at room temperature for up to a week. This will help maintain their freshness and prevent them from becoming hard.
If you’d like to keep these cookies longer, consider freezing them. Just place cooled cookies in a single layer on a baking sheet and freeze until solid. After they’re frozen, transfer them to a zip-lock freezer bag, removing as much air as possible. They can be stored this way for up to three months. When you’re ready to enjoy them, simply thaw at room temperature or pop them in the microwave for a few seconds to enjoy that fresh-out-of-the-oven warmth.
When it comes to reheating, a minute in the microwave can do wonders, but make sure to wrap them in a paper towel to keep them soft. Alternatively, you can place them in a low oven (about 300°F) for a few minutes to revive their original chewiness.
For food safety, avoid leaving cookies out for extended periods, especially in warm environments. Always use clean utensils when handling cookies and ensure your hands are clean to avoid contamination.
Frequently Asked Questions
Can I use margarine instead of butter?
While you can substitute margarine for butter, for the best flavor and texture, I recommend using unsalted butter. Butter has a unique richness that margarine typically lacks, which may result in cookies that taste different than intended. Keep in mind that the moisture content varies between the two, so it may affect your end product slightly.
Can I decorate the cookies with chocolate instead of icing?
Absolutely! Using melted chocolate for decorating adds a rich and indulgent layer to the cookies. You can drizzle it over the cookies with a fork or dip the edges for a more substantial chocolate coating. Just be sure to allow the cookies to cool completely before dipping to maintain their shape.
Is there a way to make these cookies healthier?
Yes! You can make these cookies lighter by using a sugar substitute like stevia or monk fruit sweetener. Another option is to reduce the amount of sugar slightly or incorporate whole wheat flour for added fiber. Adding oats can also enhance nutritional value without significantly altering the classic taste.
What can I do if my cookie dough is too sticky?
If the cookie dough is too sticky to handle, you can refrigerate it for 30 minutes to 1 hour. Chilling helps firm up the dough, making it easier to roll and cut. Alternatively, dust your hands and the work surface with a bit of flour, but be cautious not to overdo it, as too much flour may alter the texture of your cookies.
How should I package the cookies for gifting?
To package your cookies for gifting, consider using clear treat bags tied with a colorful ribbon. This adds a personal touch and showcases their beautiful shapes and decorations. You could also use a decorative tin or box, layering cookies between parchment paper for an extra thoughtful presentation.
Conclusion:
St. Patrick’s Day Shamrock Sugar Cookies hold a special place in festive celebrations. Their delightful flavors and vibrant shapes can brighten any occasion. Remember, whether you’re sharing them at a gathering or enjoying them at home, you can personalize this recipe to make it uniquely yours! Don’t hesitate to try out the variations or turn this into a family tradition. Happy baking, and may your cookies always be a little bit sweeter!


