Prep time: 30 minutes
Cook time: 1 hour
Total time: 1 hour 30 minutes
Servings: 10 slices
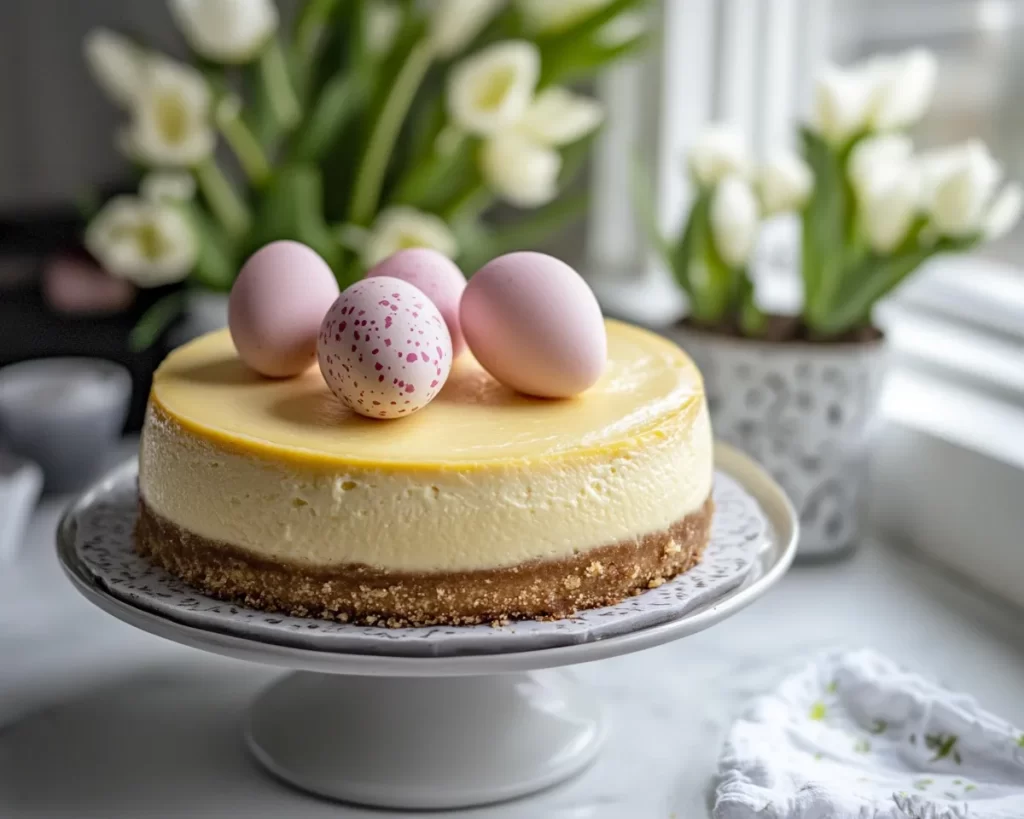
There’s something undeniably special about cheesecake, and when it’s infused with the rich, aromatic notes of vanilla, it elevates the dessert to a whole new level. Enter the **Easter Vanilla Bean Cheesecake**, an indulgent dessert that is as delightful to look at as it is to taste. The creamy texture paired with a buttery crust evokes feelings of joy reminiscent of family gatherings during the Easter holiday. It’s more than just a dessert; it’s a memory-making experience that you’ll cherish long after the last slice is gone.
What truly sets this cheesecake apart is the inclusion of real vanilla bean, which offers a depth of flavor that vanilla extract simply can’t replicate. This recipe is not only straightforward but also presents an opportunity to involve family or friends in the preparation process—perfect for busy parents or beginner cooks looking to impress their guests. In this article, you will learn how to create this masterpiece, from choosing the right ingredients to mastering the texture and flavor nuances that make the perfect Easter Vanilla Bean Cheesecake.
What Is Easter Vanilla Bean Cheesecake?
Easter Vanilla Bean Cheesecake is a luxurious dessert that perfectly combines a creamy filling with a crunchy, buttery crust. The **origin** of cheesecake dates back to ancient Greece, but modern interpretations, especially the rich and creamy versions popular in America, have made this dessert a staple at celebrations—particularly during holidays like Easter. The inclusion of real vanilla beans gives this cheesecake a fragrant aroma and enhances its flavor, setting it apart from others that may use less sophisticated flavorings.
The texture of this cheesecake is smooth and velvety, almost like a cloud on your palate. With each forkful, you will experience an explosion of creamy sweetness that is beautifully balanced by the slight crispness of the crust. The vanilla bean specks create an appealing visual contrast, making it not just a treat for the taste buds but also a feast for the eyes, perfect for special occasions.
In summary, this cheesecake embodies both a rich tradition and a modern twist that makes it perfect for festive gatherings. Its creamy filling and buttery crust bring together the best of all worlds—taste, texture, and celebration.
Why You’ll Love This
This Easter Vanilla Bean Cheesecake is not only delicious but also incredibly versatile and easy to make. You can prepare it ahead of time, making it the perfect dessert for busy hosts who need to focus on other meal preparations. Its *delicate vanilla flavor* resonates well with various palates, making it suitable for both adults and children alike.
Furthermore, the ingredients used are commonly available, meaning you can whip it up without breaking the bank. Each slice serves as an elegant finish to any Easter meal, and its luxurious taste will have your guests impressed.
One common misconception is that cheesecakes are complicated to prepare, which can deter some from trying. However, this recipe simplifies the process while ensuring that the end result is still a creamy, dreamy delight that rivals your favorite bakery’s offerings. All you need is some patience during the baking and cooling stages, and you’ll reap the rewards of your efforts.
Ingredients You’ll Need
- Graham cracker crumbs: These serve as the base for your crust. You can also use digestive biscuits or make a crust from scratch with flour, butter, and sugar.
- Unsalted butter: This adds richness and moisture to the crust. Opt for unsalted to control the saltiness in your dessert.
- Granulated sugar: This sweetens both the crust and filling. For a healthier alternative, try using coconut sugar.
- Vanilla beans: Key to this recipe, they provide a deep, aromatic flavor. If you can’t find them, use high-quality vanilla extract as a substitute, but the flavor profile will differ.
- Cream cheese: The primary ingredient that gives cheesecake its rich and creamy texture; ensure it’s at room temperature for easy mixing.
- Sour cream: This adds tanginess and creaminess to the filling. You may also use Greek yogurt for a lighter option.
- Eggs: Essential for binding the ingredients together; they must be at room temperature for the best results.
- All-purpose flour: This thickens the filling and helps it hold its shape; it can be substituted with cornstarch for a gluten-free version.
Each ingredient plays a vital role in creating the luxurious texture and flavor of the cheesecake. Understanding how these components work together can help you appreciate the entire baking process more deeply.
How to Make
1. **Prepare the crust:** Begin by preheating your oven to 350°F (175°C). In a medium bowl, combine the **Graham cracker crumbs** with melted **unsalted butter** and **granulated sugar** until the mixture resembles wet sand. Press this mixture firmly into the bottom of a springform pan to create an even layer. Baking it for about 10 minutes will help set the crust and add a nice crunch.
2. **Make the filling:** In a large mixing bowl, beat the **cream cheese** until it’s perfectly smooth, which typically takes about 2-3 minutes using a hand mixer. Scrape the sides of the bowl frequently to ensure even mixing. Next, add in the **granulated sugar**, **sour cream**, and the seeds from the **vanilla beans**. Continue mixing until completely blended and creamy.
3. **Incorporate the eggs:** Add the **eggs** to your mixture one at a time, ensuring each is fully incorporated before adding the next. This process is crucial for achieving a smooth texture without lumps. After all the eggs are in, mix in the **all-purpose flour**, just until combined; overmixing can lead to a dense cheesecake.
4. **Pour the filling:** Once your filling is well-mixed, pour it over the pre-baked crust. Use a spatula to spread the filling evenly, smoothing the top. This helps ensure an even bake, which is essential for a well-textured cheesecake.
5. **Bake the cheesecake:** Place the springform pan in the center of the preheated oven and bake for about 50–60 minutes. You’ll know it’s done when the edges are set, but the center has a slight jiggle—this is key as it will continue to firm up during cooling.
6. **Cool and refrigerate:** After removing it from the oven, allow the cheesecake to cool at room temperature for about an hour, then transfer it to the refrigerator to chill for at least 4 hours, but overnight is best. This cooling period allows the flavors to meld beautifully, making your cheesecake even more delightful.
7. **Serve and enjoy:** When you’re ready to serve, release the cheesecake from the springform pan and slice it into pieces. For an extra touch, consider drizzling caramel or chocolate sauce over the top, or serve with fresh berries for a burst of color and flavor.
Each step in this process is crucial to creating the ideal consistency and taste. Remember to be patient, as good things come to those who wait!
Variations & Substitutions
Chocolate Swirl Variation: If you’re a fan of chocolate, you can easily incorporate it into this cheesecake. Simply melt about 4 ounces of chocolate and let it cool slightly. Swirl it into the filling before baking for a rich chocolate flavor. This variation is perfect for chocolate lovers and can elevate the dish to a whole new level.
Fruit-Topped Variation: Want to add a fresh twist? Top your cheesecake with seasonal fruits like strawberries, blueberries, or raspberries. These toppings enhance the flavor and add a beautiful presentation to your dessert. They can also provide a contrasting tartness that will delight your palate.
Gluten-Free Variation: For those following a gluten-free diet, it’s easy to adapt this recipe. Substitute the **Graham cracker crumbs** with gluten-free options or finely-ground nuts, like almond flour. Additionally, opt for a gluten-free flour for the filling to ensure the entire cheesecake is safe for those with gluten sensitivities.
Mini Cheesecakes Variation: If you’re serving a crowd or looking for portion control, consider making mini cheesecakes using a muffin tin. Simply slice the crust ingredients into smaller portions and bake them in muffin cups. This makes for an adorable presentation and is perfect for parties.
Sugar-Free Variation: For those watching their sugar intake, you can substitute the **granulated sugar** with natural sweeteners like erythritol or stevia. Be cautious, as these sweeteners can have different sweetness levels and may affect the texture slightly, but they can still yield a delicious cheesecake.
Each variation allows you to personalize this recipe according to dietary preferences or simply to mix things up a bit. You can be creative and make the cheesecake your own!
Common Mistakes to Avoid
One common mistake is not allowing the **cream cheese** to come to room temperature before mixing. This can lead to lumps in your filling, resulting in a less-than-smooth cheesecake. Always remember to plan ahead and let your ingredients reach room temperature for the best texture.
Another area where many people falter is overmixing after adding the eggs. This can introduce air into the batter, causing the cheesecake to rise and then crack as it cools. Mix just until fully combined, and you’re more likely to achieve a flawless finish.
Lastly, be cautious not to open the oven door while baking. Cheesecakes are delicate and sudden temperature changes can lead to cracking. If you must check, do so quickly. Strive for that perfect, smooth top that is an indicator of a well-baked cheesecake.
Storage, Freezing & Reheating Tips
To store your Easter Vanilla Bean Cheesecake properly, keep it in the refrigerator, covered with plastic wrap or aluminum foil. It can last for about 4-5 days when stored properly. Ensure it is kept in an airtight container to avoid any unwanted odors seeping in.
If you wish to **freeze** the cheesecake, wrap it tightly in plastic wrap and then in aluminum foil. It can be frozen for up to 2 months. When you’re ready to enjoy it, allow it to thaw in the refrigerator overnight.
When it comes to **reheating**, you actually don’t need to. Cheesecake is best enjoyed chilled. However, if you wish to warm it slightly, microwave each slice for just a few seconds to take the chill off, but be careful not to overheat, as it can compromise the texture.
Food safety best practices should always be followed to ensure your cheesecake stays fresh and safe to eat. Always check for any unusual odors or changes in appearance before consuming leftover cheesecake.
Frequently Asked Questions
Can I use a different type of crust? Yes, you can! While the classic **Graham cracker crust** is a popular choice, you can substitute it with other types such as Oreo or digestive biscuits, or even make a crust with gluten-free options. Each type of crust will impart its own unique flavor and texture to your cheesecake.
How can I tell if my cheesecake is done? A great way to check for doneness is to look at the edges; they should be set while the center remains slightly jiggly. The residual heat will continue to cook it even after you take it out of the oven. Overcooking can lead to a dry cheesecake.
Can I make this cheesecake ahead of time? Absolutely! In fact, making your cheesecake a day in advance is often recommended. This allows the flavors to meld and enhances the overall taste. Just remember to store it in the refrigerator properly.
What should I do if my cheesecake cracks? Cracks are often a result of sudden temperature changes or overmixing the batter. If you find cracks on your cheesecake, don’t worry! You can cover them with fruit toppings, whipped cream, or ganache to create a beautiful presentation.
Is there a vegan alternative to this cheesecake? Yes, while this specific recipe is not vegan, you can create a vegan version using soaked cashews blended until creamy, coconut cream, or tofu as a base. Substitute the eggs with flax eggs or aquafaba to bind the ingredients together.
Conclusion:
In summary, the **Easter Vanilla Bean Cheesecake** stands out as a delightful dessert that is both easy to prepare and impressive to serve. With its creamy texture and aromatic flavor, it embodies the spirit of celebration. Don’t hesitate to try your hand at this recipe, customize it with your unique touch, and share it with family and friends. Whether it’s a holiday feast or a simple gathering, this cheesecake is sure to become a cherished classic in your kitchen. Enjoy making it—and even more, enjoy sharing it!


