Prep time: 15 minutes
Cook time: 12 minutes
Total time: 27 minutes
Servings: 24 cookies
When spring arrives, it brings with it sunshine, vibrant blooming flowers, and an irresistible urge to bake. Imagine biting into a soft, buttery cookie filled with luscious strawberry jam, where the sweetness of the fruit perfectly contrasts with the rich, crumbly texture of the cookie. These Spring Cookies: Strawberry Thumbprint Cookies are just that treat. With their delightful flavor and beautiful presentation, they remind us of cherished family gatherings and joyful picnics.
This recipe is not only simple but incredibly satisfying. Trusted by home cooks for generations, it holds a special place in the hearts of those who cherish homemade sweets. You will discover how to make these delightful cookies from scratch, with tips for customizing them to your taste.
What Is Spring Cookies: Strawberry Thumbprint Cookies?
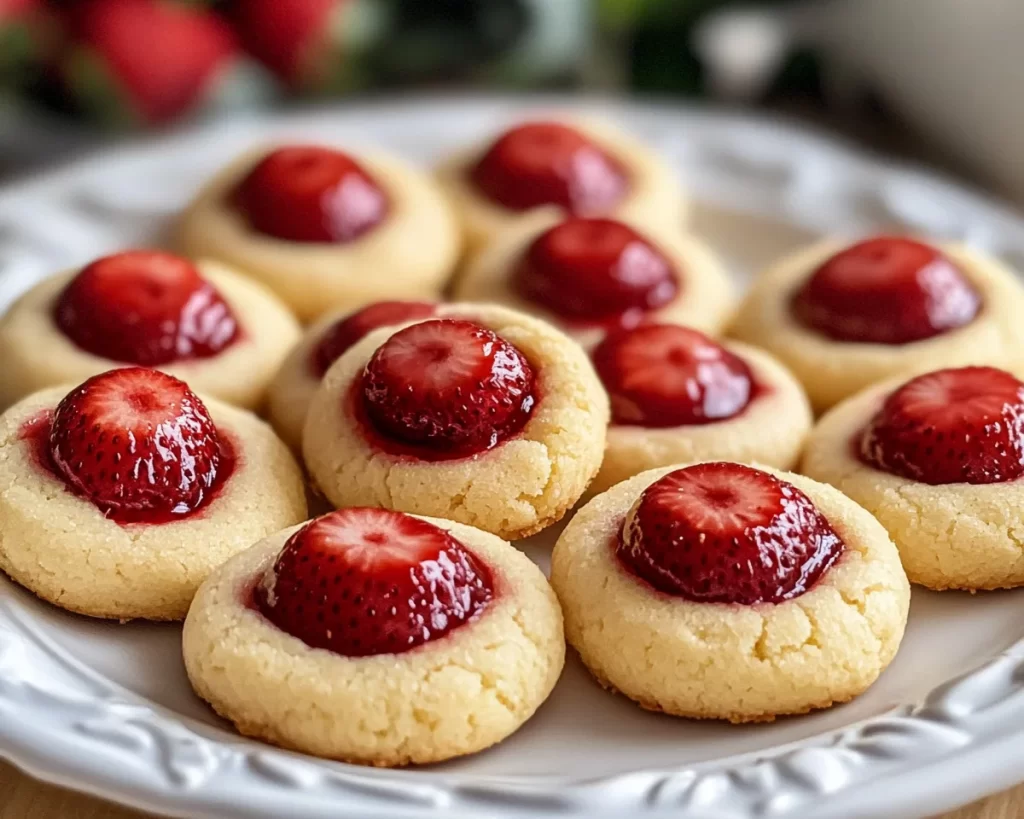
Strawberry Thumbprint Cookies are a classic treat that has been enjoyed by families for decades. Originating from European baking traditions, these cookies are characterized by their unique shape: the dough is rolled into small balls and then gently pressed in the center to create a “thumbprint” that holds a dollop of jam. The key ingredient, typically strawberry jam, adds a splash of vibrant color and a burst of flavor that makes each bite exceptionally pleasing.
The cookie dough is a simple mixture of flour, sugar, butter, and eggs, making it rich and buttery. The dough’s texture is soft yet sturdy enough to hold the jam without losing shape. The contrast of the crunchy edges and the gooey center creates a mouthfeel that is utterly satisfying. Unlike many cookies that are dense, Strawberry Thumbprint Cookies are light and tender, making them perfect for an afternoon tea or a delightful sweet treat after a meal.
More than just another cookie, these Strawberry Thumbprint Cookies can evoke memories of family baking sessions and community gatherings. The joyful act of pressing your thumb into the cookie dough, creating the perfect indent for the jam, adds a personal touch that makes these cookies even more special. Baking these thumbprint cookies offers an opportunity to spark creativity in the kitchen, allowing you to experiment with different jams or even chocolate fillings, turning a classic recipe into your own family tradition.
Why You’ll Love This
There are numerous reasons why Strawberry Thumbprint Cookies deserve a place in your baking repertoire. First and foremost, their taste is simply divine. They balance sweetness with a hint of tartness from the jam, making them a perfect companion to a warm cup of tea or coffee. The buttery cookie base also melts in your mouth, providing a delightful contrast to the chewy jam center.
In addition to their fabulous flavor, these cookies are also incredibly easy to make. Even novice bakers can successfully whip up a batch with minimal fuss. The beauty of these cookies lies in their simplicity—most of the ingredients are staples in your pantry, making them accessible for spontaneous baking sessions.
Moreover, they are cost-effective. Using just a handful of basic ingredients, you can create stunning cookies that look like they took hours to prepare. Beyond their economical nature, these cookies are remarkably versatile. You can substitute different types of jam, like raspberry or apricot, catering them to various taste preferences and dietary needs while still retaining the essence of this iconic treat.
However, many people mistakenly believe that all thumbprint cookies are overly sweet or complicated to make. In reality, these cookies can be adjusted to fit your flavor profile. By using less sugar in the dough or opting for natural fruit preserves, you can control the sweetness. The possibilities are endless with this recipe; your creativity can flourish and impress both friends and family.
Ingredients You’ll Need
- All-purpose flour: This is the base of your cookie. You can also use whole wheat flour for a nuttier flavor or gluten-free flour for those with dietary restrictions.
- Granulated sugar: Sweetness is essential! You can substitute with brown sugar for a richer taste.
- Baking powder: This will help the cookies rise and become fluffy. Without it, you’ll have flat cookies.
- Salt: A pinch of salt enhances the flavors of the other ingredients.
- Butter: Unsalted butter is typically used; it adds a rich flavor and tender texture. You can also substitute with coconut oil for a dairy-free version.
- Egg: This ingredient acts as a binder, holding the dough together. For a vegan option, you can use flaxseed meal or applesauce.
- Strawberry jam: This is the star of the show. Opt for high-quality, fruit-forward jam for the best flavor.
- Vanilla extract: Adding a splash enhances the overall flavor profile.
Each ingredient plays a specific role, contributing to the cookie’s delightful taste and texture. Experimenting with different substitutes can lead to interesting variations, allowing you to create the perfect Spring Cookies that suit your palate.
How to Make
Creating these delightful Strawberry Thumbprint Cookies is a straightforward process that yields impressive results. Follow the step-by-step instructions below to ensure your cookies turn out perfectly.
- Prepare Your Baking Sheet: Start by preheating your oven to 350°F (175°C). Line a baking sheet with parchment paper or a silicone mat to prevent sticking. This step helps with even baking and easy cleanup.
- Mix Your Dry Ingredients: In a large mixing bowl, whisk together 2 cups of all-purpose flour, 1 teaspoon of baking powder, and ½ teaspoon of salt. This ensures that the baking powder is evenly distributed throughout the flour, allowing your cookies to rise uniformly.
- Cream Butter and Sugar: In another bowl, combine 1 cup of softened unsalted butter with ¾ cup of granulated sugar. Beat with an electric mixer or a whisk until the mixture is light and fluffy, usually about 3-5 minutes. This creates air pockets that contribute to the light and crumbly texture of your cookies.
- Add the Egg and Vanilla: Once your butter and sugar are well combined, add one large egg and 2 teaspoons of vanilla extract. Mix until incorporated, ensuring that the egg brings moisture to the dough.
- Combine Dry and Wet Ingredients: Slowly add the dry ingredients to your wet mixture, mixing until just combined. It’s important not to overmix; a few flour streaks are okay. Overmixing can lead to tough cookies.
- Form the Cookies: Using a cookie scoop or your hands, form small balls of dough (about 1 inch in diameter) and place them on the prepared baking sheet, leaving enough space between each ball. Now comes the fun part!
- Create the Thumbprint: Take your thumb or the end of a wooden spoon and gently press down in the center of each ball, creating an indent. This is where your jam will go. Make sure not to press too hard; you want to create a well without breaking the cookie.
- Fill with Jam: Carefully spoon your preferred strawberry jam into each thumbprint. Don’t overfill, as the jam may bubble over during baking.
- Bake the Cookies: Place the baking sheet in your preheated oven and bake for about 12-15 minutes, or until the edges are golden brown. Keep an eye on them to ensure they do not overbake; the centers may look a bit soft, but they will firm up as they cool.
- Cool and Enjoy: Once they are done, remove the cookies from the oven and allow them to cool on the baking sheet for 5 minutes before transferring them to a wire rack. This helps them set up properly. As they cool, the aroma of buttery cookies and sweet strawberries will fill your kitchen, making it hard to resist diving in!
With each step, remember to savor the experience. The process is not just about the final product; it’s also about the joy of creating something delicious.
Variations & Substitutions
Raspberry Thumbprint Cookies: You can easily swap out strawberry jam for raspberry or even blueberry jam. These variations alter the flavor profile significantly while maintaining the delightful texture. The tartness of raspberries pairs wonderfully with the butteriness of the cookie, adding a refreshing zing to each bite. This variation appeals to those who enjoy slightly tangy flavors.
Chocolate Hazelnut Thumbprints: For a more indulgent treat, try filling your thumbprints with chocolate hazelnut spread instead of fruit jam. This creamy filling brings a luxurious element that pairs perfectly with the buttery cookie base. Top with chopped hazelnuts for a delightful crunch. Perfect for chocolate lovers, this variation puts a rich twist on the classic recipe, making it ideal for special occasions.
Nut-Free Option: If you’re looking to make these cookies nut-free, simply omit any nut-based products. Use seed butter or a fruit preserve instead of chocolate hazelnut spread. These substitutions maintain the flavor and texture while catering to those with nut allergies.
Vegan Version: To make these cookies vegan, substitute the egg with ¼ cup of unsweetened applesauce or a flax egg (1 tablespoon of flaxseed meal mixed with 2.5 tablespoons of water). Use dairy-free butter as well to avoid any animal products. The resulting cookies remain just as delicious, offering a sweet treat that everyone can enjoy.
Gluten-Free Adaptation: For a gluten-free version, replace all-purpose flour with a 1:1 gluten-free baking flour. Brands that include xanthan gum typically perform well. Just keep in mind that the texture may be slightly different, but they will still be delicious, offering everyone a chance to enjoy this springtime delight.
Each variation provides an opportunity to explore different flavors while staying true to the essence of Strawberry Thumbprint Cookies. Choosing the right fruit preserves or adapting the recipe to meet dietary restrictions makes these cookies a versatile treat you can enjoy throughout the year.
Common Mistakes to Avoid
Baking can be a tricky endeavor, and even experienced bakers can run into problems. One common mistake is overmixing the cookie dough. While it may be tempting to get a perfectly smooth mixture, overmixing can lead to tough cookies; the gluten in the flour becomes overly developed. To avoid this, mix until combined and add flour gradually.
Another issue you may face is the cookies spreading too much during baking. This can happen if your butter is too warm or if the dough isn’t chilled before baking. Ensure your butter is softened at room temperature, but not melted, and consider chilling the formed dough balls in the refrigerator for at least 30 minutes before baking.
Finally, it’s crucial to avoid using low-quality jam. Cheap fruit preserves may contain artificial flavors or colors that dilute the taste of your cookies. Opt for high-quality, fruit-filled jam to ensure every bite is bursting with fresh flavor.
Being aware of these common pitfalls will help ensure your Strawberry Thumbprint Cookies come out perfectly every time, ready for sharing or enjoying all by yourself!
Storage, Freezing & Reheating Tips
Once you’ve baked a batch of these delightful Strawberry Thumbprint Cookies, you’ll want to store them properly to maintain their freshness. Store the cookies in an airtight container at room temperature for up to one week. If you want to keep them longer, consider freezing.
To freeze, place the cooled cookies in a single layer on a baking sheet, making sure they are not touching, and put them in the freezer for about an hour. Once frozen solid, transfer them to a freezer-safe bag or container, layering parchment paper between each layer of cookies to prevent sticking. These cookies can be frozen for up to three months.
When you are ready to enjoy them again, simply remove the desired number of cookies from the freezer and let them thaw at room temperature for about 15-20 minutes. If you prefer, you can warm them up in an oven set to 300°F (150°C) for about 5-10 minutes, making them taste freshly baked again.
Food safety is also crucial; always make sure the cookies are completely cooled before storing to avoid condensation, which can lead to soggy cookies. Following these guidelines will ensure your Spring Cookies remain delicious for as long as possible!
Frequently Asked Questions
Can I use other types of fruit preserves?
Absolutely! While strawberry jam is a classic choice, feel free to experiment with other flavors such as raspberry, blueberry, or apricot. Each type of jam will impart its unique sweetness and tartness, making the cookies versatile and customizable to your taste.
How can I make these cookies healthier?
If you are looking to make healthier substitutions, consider using less sugar and opting for natural fruit preserves with no added sugar. Whole wheat flour can replace all-purpose flour for additional fiber. You might also use applesauce instead of butter for a lower-fat version, but keep in mind that the texture may change slightly.
What if the dough is too crumbly?
If you notice that the cookie dough is too crumbly, it may be due to too much flour or insufficient moisture. Try adding a teaspoon or two of milk or water, mixing gently until the dough comes together. Additionally, ensure that your butter is softened enough for better incorporation.
Why did my cookies spread too much while baking?
Overly warm butter or not chilling the dough before baking can cause cookies to spread significantly. Always use softened butter but not melted, and chill your cookie balls for 30 minutes. This will help maintain their shape during baking.
How do I know when the cookies are done baking?
Look for the edges of the cookies to become lightly golden brown. If the centers appear too soft, don’t worry; they will firm up as they cool. Keep an eye on them during the last few minutes of baking to ensure they don’t overbake.
Conclusion:
These Spring Cookies: Strawberry Thumbprint Cookies embody everything wonderful about springtime baking. With their delightful blend of sweet and tart flavors, combined with a buttery, crumbly texture, they are sure to impress. So, gather your ingredients, roll up your sleeves, and start baking! Feel free to customize the recipe to make it your own or share this delicious cookie with family and friends. Whether for a casual snack or a special gathering, these cookies will surely bring joy to anyone who tries them. So go ahead, indulge, and enjoy the sweet taste of spring!


