Prep time: 15 minutes
Cook time: 10 minutes
Total time: 25 minutes
Servings: 24 cookies
There’s something magical about spring that brings a sense of renewal and sweetness to our lives. This season often evokes memories of bright flowers, vibrant colors, and, of course, delicious treats that embody the vibrant essence of spring. One such delightful treat is the Soft Spring Sprinkle Cookies. These cookies are not just a feast for the eyes but also an explosion of flavors, a definite must-try. The chewy texture, coupled with a hint of sweetness from the sprinkles, makes these cookies an irresistible addition to your dessert repertoire. In this article, you will learn how to prepare these delightful cookies, discover tips for achieving the perfect texture, explore variations, and troubleshoot common mistakes.
What Is Spring Cookies: Soft Spring Sprinkle Cookies?
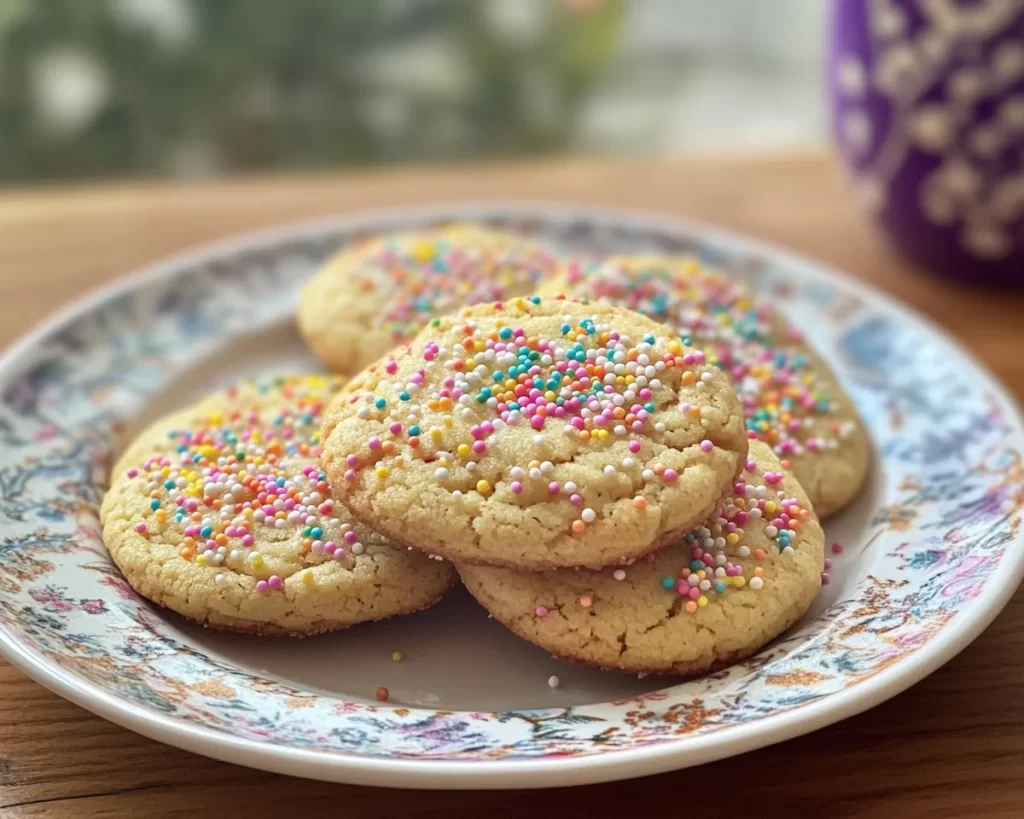
Soft Spring Sprinkle Cookies are a delightful treat that perfectly encapsulates the cheerful essence of spring. Originating from traditional cookie recipes, these cookies have been adapted to include vibrant and colorful sprinkles, making them an exciting centerpiece for any gathering or celebration. The chewy texture of the cookie is a delightful contrast to its sweet, crunchy sprinkles, creating an enjoyable juxtaposition every time you take a bite.
These cookies are not only pleasing to the eye but also filled with a subtle flavor profile that is enhanced by the vibrant colors of the sprinkles. The combination of vanilla and butter flavors creates a rich, inviting aroma while baking that will fill your kitchen with an irresistible scent. When you bite into one of these cookies, you’ll experience a soft, pillowy texture that melts in your mouth, leaving you craving more. The sprinkles add a playful touch that is sure to delight both kids and adults alike.
Furthermore, Soft Spring Sprinkle Cookies are incredibly versatile and can be made for various occasions, whether it’s a family gathering, a school event, or simply a rewarding snack after a long day. What makes this treat truly special is the ease of preparation combined with delightful results, allowing anyone, from beginner bakers to seasoned pros, to bring a taste of spring into their kitchen.
Why You’ll Love This
There are countless reasons to fall in love with Soft Spring Sprinkle Cookies. One of the most prominent reasons is their delectable taste. The cookies strike the perfect balance between sweetness and rich, buttery flavors, appealing to a wide range of palates. Whether you’re a fan of cookies, sprinkles, or both, this recipe is sure to satisfy your cravings.
What’s more, the preparation of these cookies is remarkably easy. With just a few basic ingredients, you can whip up a batch in under an hour, making them perfect for busy parents or anyone needing a quick and tasty dessert option. You don’t have to be a baking expert to create a batch of these cookies that taste gourmet but are simple to prepare.
These cookies also offer remarkable **versatility**. You can easily customize them to suit various dietary preferences or simply mix it up for seasonal variety. For instance, using gluten-free flour allows those with gluten sensitivities to indulge, while swapping out sprinkles for chocolate chips can appeal to chocoholics. Additionally, the cost of ingredients is budget-friendly, allowing you to create these delightful treats without breaking the bank. Rather than purchasing expensive store-bought cookies, you can treat yourself and your loved ones to homemade delights.
Ingredients You’ll Need
To create these delightful Soft Spring Sprinkle Cookies, you’ll need the following ingredients:
- 2 ¾ cups all-purpose flour – The foundation for the cookie that provides structure.
- 1 tsp baking powder – Helps the cookies rise and achieve that desirable chewy texture.
- ½ tsp baking soda – Works with the baking powder to create a soft and airy cookie.
- ½ tsp salt – Balances the sweetness and enhances flavors.
- 1 cup unsalted butter, softened – Provides richness and moisture, creating a tender cookie.
- 1 cup granulated sugar – Adds sweetness and contributes to the chewiness of the cookies.
- ½ cup brown sugar – Introduces depth of flavor with a hint of caramel notes.
- 2 large eggs – Acts as a binding agent and adds moisture.
- 1 tsp vanilla extract – Infuses a warm, sweet flavor that elevates the cookie.
- 1 cup colorful sprinkles – Adds a fun, festive element and visual appeal.
Each ingredient plays a crucial role in ensuring that your Soft Spring Sprinkle Cookies turn out perfectly. You could substitute all-purpose flour with gluten-free flour if you have dietary restrictions. However, note that the texture may slightly differ. Be cautious not to overmix the dough, as doing so can lead to tough cookies.
How to Make
Making Soft Spring Sprinkle Cookies is simple and rewarding. Follow these step-by-step instructions for a successful batch:
- Preheat your oven to 350°F (175°C). This is essential to ensure even baking. You want your oven hot enough so that the cookies can spread slightly and rise perfectly.
- In a medium bowl, whisk together the flour, baking powder, baking soda, and salt. This step helps to evenly distribute the leavening agents and ensures a uniform texture. Set the mixture aside for later use.
- In a large mixing bowl, using a hand mixer or a stand mixer, beat the softened butter, granulated sugar, and brown sugar together on medium speed until the mixture is light and fluffy. This should take about 3-5 minutes. The fluffy texture is crucial for incorporating air and achieving a soft cookie.
- Add the eggs one at a time, mixing well after each addition. Then, add the vanilla extract and continue to mix. The batter should be smooth and creamy, exuding a delightful aroma of vanilla.
- Gradually add the dry ingredient mixture to the wet ingredients, mixing on low speed just until combined. Be careful not to overmix, as this can affect the final texture of your cookies. The dough should be thick and slightly tacky.
- Gently fold in the colorful sprinkles using a spatula. Distributing the sprinkles evenly not only enhances the appearance of the cookies but also adds delightful bursts of color and sweetness.
- Using a cookie scoop or spoon, drop rounded tablespoons of dough onto a parchment-lined baking sheet, spacing them about 2 inches apart to allow for spreading.
- Bake in the preheated oven for about 10-12 minutes, or until the edges are lightly golden. The cookies will appear soft in the center, which is ideal for that chewy texture.
- Once baked, remove the cookies from the oven and let them cool on the baking sheet for 5 minutes before transferring them to a wire rack to cool completely. Allowing them to rest on the baking sheet helps them set.
These cookies can be enjoyed warm or at room temperature. The aroma while they are baking is incredibly inviting, and you will find it hard to resist the temptation to sample a warm cookie fresh from the oven!
Variations & Substitutions
Chocolate Chip Spring Cookies: For a chocolate twist, you can easily swap out the colorful sprinkles for a cup of semi-sweet chocolate chips. This creates a rich flavor contrast while still retaining the soft and chewy texture. The chocolate will melt slightly, resulting in gooey pockets within each bite.
Nut-Free Version: If you are serving guests with nut allergies, be sure to check your baking ingredients for any potential contamination. You can prepare these cookies entirely nut-free by using sunflower seed butter instead of regular butter. The final product will provide a unique flavor profile while still being safe for nut-free diets.
Gluten-Free Soft Spring Sprinkle Cookies: For gluten-free diets, substituting regular flour with gluten-free all-purpose flour works wonderfully. Many brands now offer blends that mimic the texture of regular flour, allowing you to enjoy these cookies without compromising on taste or texture.
Vegan Soft Spring Sprinkle Cookies: To make these cookies vegan, you can replace the butter with coconut oil and use flax eggs in place of chicken eggs. Mix 1 tablespoon of ground flaxseed with 3 tablespoons of water, allowing it to sit for a few minutes until it thickens. This substitution allows you to enjoy a wholesome treat without animal products.
Common Mistakes to Avoid
When making Soft Spring Sprinkle Cookies, there are a few common pitfalls that you may encounter.
One critical mistake is not measuring your ingredients accurately. Too much flour can lead to dry cookies, while too little can cause them to spread excessively. Always use a kitchen scale or the spoon and level method for measuring flour, ensuring you get the right amount every time.
Another issue arises from using cold ingredients. It is crucial to let your butter come to room temperature before mixing, as this ensures proper incorporation and helps create a soft, tender cookie. If your butter is too cold, it won’t cream properly with your sugars, and your cookies may end up dense.
Overmixing the dough is another common mistake, especially among beginner bakers. Mixing the cookie dough until it’s perfectly smooth can lead to tough cookies, as developing the gluten in the flour alters the intended texture. Aim for a gentle mix until the ingredients are just combined for soft, chewy cookies.
Lastly, not allowing the cookies to cool on the baking sheet can lead to a crumbly, less cohesive cookie. Allowing them to rest briefly is essential for achieving the ideal texture; they will firm up as they cool.
Storage, Freezing & Reheating Tips
Proper storage of your Soft Spring Sprinkle Cookies ensures they remain fresh and delightful for days. Once the cookies are completely cool, store them in an airtight container at room temperature. They will stay soft for about 5-7 days. If you live in a humid environment, you may want to place a piece of bread in the container to help keep them from drying out, as the bread will absorb excess moisture.
If you want to enjoy the cookies later, they can be frozen for up to 3 months. To freeze, arrange the cookies in a single layer on a baking sheet lined with parchment paper. Once frozen solid, transfer them to a freezer-safe zip-top bag, ensuring you remove as much air as possible before sealing.
When you’re ready to enjoy your frozen cookies, simply take out what you need and let them thaw at room temperature. Alternatively, you can reheat them in the oven on a baking sheet at 350°F (175°C) for about 5 minutes to regain that freshly-baked softness. Just keep an eye on them to prevent overbaking.
Frequently Asked Questions
Can I use margarine instead of butter?
You can substitute margarine for butter; however, it may slightly affect the flavor and texture of the cookies. Butter provides a creamy richness that margarine may not fully replicate.
What should I do if my dough is too sticky?
If your cookie dough feels too sticky, you can chill it in the refrigerator for 30 minutes. Chilling solidifies the fat in the dough, making it easier to work with and preventing excessive spreading during baking.
How do I know when the cookies are done baking?
As a general rule, look for lightly golden edges and a soft center. The cookies will continue to cook slightly after you remove them from the oven, so it’s crucial not to overbake them.
Can I add nuts to the recipe?
Absolutely! Feel free to incorporate chopped nuts, such as walnuts or pecans. Add about ½ cup of nuts, folding them in along with the sprinkles for a delightful crunch.
How do I make the cookies more festive for holidays?
To make the cookies more seasonal, you can use themed sprinkles that match holidays, such as red and green for Christmas or pastel colors for Easter. You can also drizzle melted chocolate on top for an added decorative touch!
Conclusion:
In summary, Soft Spring Sprinkle Cookies are a delightful, easy, and versatile treat perfect for any occasion. The soft texture, sweet taste, and vibrant colors make them a favorite among both kids and adults. With endless variations and customization possibilities, you can easily adapt the recipe to fit your dietary needs or flavor preferences. I encourage you to try making these remarkable cookies, customize them to your liking, and share them with loved ones. Enjoy the process, savor every bite, and take pride in creating something special from your kitchen.


