Prep time: 15 minutes
Cook time: 12 minutes
Total time: 27 minutes
Servings: 24 cookies
It’s that wonderful time of year when the aroma of freshly baked cookies fills the air, and you feel a sense of warmth envelop you with each delightful bite. Imagine a cookie that’s perfectly soft and chewy, with a burst of sweetness from creamy white chocolate chunks. The CRK Cookies with White Chocolate are not just any cookies; they are a symphony of flavors and textures that will make your taste buds dance.
This recipe has been a beloved staple in my family for years, cherished for its simple ingredients and easy preparation. Perfect for busy parents who want to treat their kids, or for beginner bakers eager to whip up something delicious, these cookies are incredibly versatile. You will learn how to achieve that ideal softness and what secret tips can elevate your baking game.
What Is CRK Cookies with White Chocolate (Soft + Sweet)?
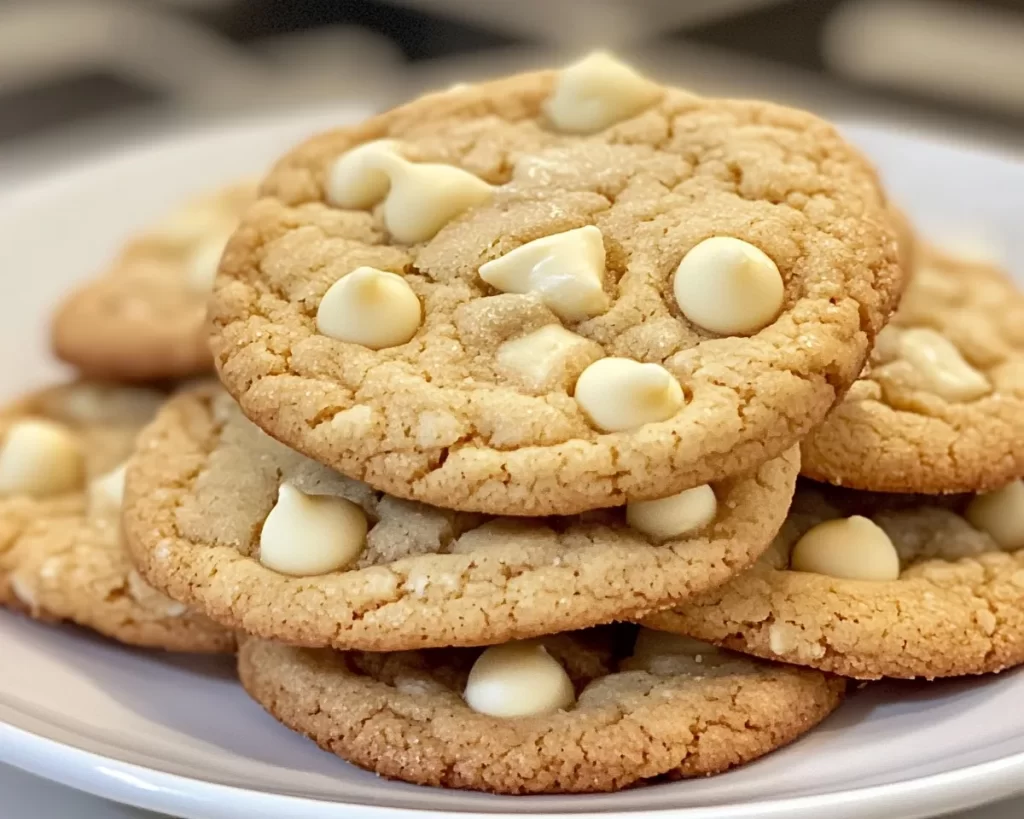
The CRK Cookies with White Chocolate are a delightful dessert that embodies softness and sweetness in every crumb. Originating from a mix of traditional cookie recipes, these cookies are designed to have a distinctive melt-in-the-mouth texture. With a golden exterior and a fluffy center, they provide a satisfying contrast that enhances your cookie-eating experience. The secret ingredient? Good quality white chocolate, which adds a richness that surprisingly balances the sweetness, making each bite a little piece of heaven.
These cookies are not only visually appealing, with their glossy chocolate flecks dotting the surface, but they also deliver a comforting nostalgia that makes you crave more. Often enjoyed with a glass of cold milk or a hot cup of coffee, they are perfect for any occasion. Whether you’re baking for a holiday celebration or just a weekend family treat, these cookies will always be a hit.
Why You’ll Love This
You’ll absolutely adore CRK Cookies with White Chocolate for several reasons. First and foremost, their flavor is incredible. The combination of buttery dough with sweet white chocolate is simply irresistible. Secondly, they are easy to make and don’t require any advanced baking skills. For busy weeknights when you’re juggling kids’ homework and dinner prep, these cookies come to the rescue as a quick fix that satisfies cravings without consuming all your time.
Another reason this recipe shines is its cost-effectiveness. With simple pantry staples like flour, sugar, and butter, you can create something extraordinary. These cookies are also versatile—there’s room for creativity! You can modify the recipe to include nuts, dried fruits, or even different kinds of chocolate depending on your personal preference.
One common misconception is that delicious cookies require elaborate techniques or overpriced ingredients. That’s absolutely untrue with this recipe! You can bake these luscious cookies without any pretension or fuss, making them accessible for everyone. Just remember, the key is to make use of quality ingredients, especially the white chocolate, to achieve that crème de la crème cookie experience.
Ingredients You’ll Need
- 2 1/4 cups all-purpose flour – The base of the cookie that provides structure.
- 1 teaspoon baking soda – A leavening agent that helps the cookies rise.
- 1 teaspoon salt – Enhances the flavor of sweet ingredients.
- 1 cup unsalted butter, softened – Adds moisture and richness. Make sure it’s soft but not melted!
- 3/4 cup granulated sugar – Sweetens the dough and contributes to the lovely texture.
- 3/4 cup brown sugar – Adds a deeper sweetness and chewiness.
- 1 teaspoon vanilla extract – Adds warmth and a hint of aromatic flavor.
- 2 large eggs – Binds all ingredients together.
- 1 1/2 cups white chocolate chips – The star ingredient that contributes sweetness and creaminess.
- Optional: 1 cup chopped nuts (like pecans or walnuts) for added crunch.
In this recipe, the flour and eggs play crucial roles, with the flour providing the bulk and structure and the eggs ensuring the cookies remain moist and chewy. Feel free to substitute brown sugar with coconut sugar for a slightly different flavor profile. Always remember that the quality of your ingredients directly affects the flavor and texture of your final product.
How to Make
- Start by preheating your oven to 350°F (175°C). Line two baking sheets with parchment paper. This ensures easy removal of the cookies once they are baked and prevents them from sticking.
- In a medium bowl, combine the all-purpose flour, baking soda, and salt. Whisk these dry ingredients together gently. This step ensures that the leavening agent is evenly distributed throughout the flour.
- In a large mixing bowl, cream the softened butter, granulated sugar, and brown sugar together until the mixture is light and fluffy. This can take about 3–5 minutes. The sugar should dissolve into the butter, creating a smooth base.
- Add the eggs, one at a time, into the butter and sugar mixture, fully incorporating each before adding the next. Toss in the vanilla extract as well. The mixture should look cohesive and glossy, which is a good sign that the ingredients are well combined.
- Gradually add the dry ingredient mixture to the wet ingredients. Stir gently with a spatula or a wooden spoon, taking care not to overmix. You want to blend them until just combined; overmixing can result in tough cookies.
- Gently fold in the white chocolate chips and nuts if you’re using them, ensuring even distribution without breaking the chocolate pieces. The dough will be thick, and that’s just what you want for a nice, chewy cookie.
- Using a cookie scoop or a tablespoon, drop dough onto the prepared baking sheets, spacing them about two inches apart. They’ll spread as they bake, so give them room!
- Bake in the preheated oven for about 10–12 minutes or until the edges are lightly golden brown. The centers may look soft, but they will continue to firm up as they cool. Don’t overbake; you want them soft in the middle!
- Once baked, remove them from the oven and let them cool on the baking sheet for 5 minutes before transferring to a wire rack to cool completely. This step is essential for achieving the perfect texture.
By following these steps closely, you’ll yield the classic cookie with the perfect golden edge and a soft, gooey middle rich with white chocolate. Experienced bakers will have fun with the process, while beginners will find it approachable and rewarding.
Variations & Substitutions
Nutty Variation: Incorporating 1 cup of your favorite nuts, like walnuts or pecans, can create a delightful crunch while enhancing the overall flavor. The nuttiness pairs perfectly with the sweetness of the white chocolate, making it a rich addition that elevates the cookie experience. If you’re preparing a special treat for someone with dietary restrictions like nut allergies, you can simply skip this variation and perhaps substitute in seeds like sunflower or pumpkin seeds which provide a similar crunch without the allergenic qualities.
Dark Chocolate Swirl: If you prefer the bold flavor of dark chocolate, try substituting half of the white chocolate chips with 1 cup of chopped dark chocolate. The contrast between the sweet and bitter tones creates an exciting balance and a gourmet touch to the cookie. This variation will appeal to dark chocolate lovers and is a fantastic way to introduce a more complex flavor profile to this basic cookie.
Gluten-Free Option: For a gluten-free variant, you can substitute the all-purpose flour with a gluten-free flour blend that contains xanthan gum. Be sure to check the proportions since these blends can sometimes vary in density and absorbency. You can also consider almond flour or coconut flour, keeping in mind that they may alter the taste slightly but still yield a delicious cookie suitable for those avoiding gluten.
Vanilla Bean Twist: For those who want a more intense flavor, consider adding the seeds of one vanilla bean along with the vanilla extract. This will infuse the cookies with a beautiful aroma and flavor profile, making them feel extra special, like a gourmet treat you’d find at a bakery. This variation works wonders and can surprise anyone who takes a bite.
Citrus Zest Infusion: Another intriguing variation is to add the zest of one orange or lemon to the dough. This adds an unexpected brightness that complement the sweetness of the white chocolate beautifully. It’s perfect for summer baking, providing a fresh twist on a classic cookie that can delight the senses with its aromatic and zesty notes.
Common Mistakes to Avoid
One common mistake people make while baking cookies is overmixing the dough. When you overmix, you activate the gluten in the flour too much, leading to tough cookies. You want your mixture to be just combined, achieving a nice balance between softness and chewiness. Always remember: less is more when it comes to mixing.
Another pitfall is using cold butter instead of softened butter. Cold butter won’t cream properly with the sugars, resulting in a dense and dry cookie. Ensure your butter is left out at room temperature for about an hour before you start baking.
Baking cookies for too long is another critical aspect to pay attention to. You might think you need them to be golden all over, but take them out when they are just barely golden at the edges and soft in the center. They will continue to cook on the baking sheet after they’re removed from the oven, so take them out a minute or two earlier than you think they are ready!
Finally, make sure to space the cookie dough scoops adequately on the baking sheet. If they are too close together, they will meld into one large cookie rather than staying as individual cookies. The ideal spacing is about two inches apart to allow for the spreading.
Storage, Freezing & Reheating Tips
After baking, allow your cookies to cool completely before storing them. If you want to keep them for several days, place them in an airtight container at room temperature. They will stay fresh for about a week, but you might find they disappear much more quickly than that!
For longer storage, you have the option to freeze the cookies. Simply layer them between sheets of parchment paper in an airtight container, and they’ll stay fresh for up to three months in the freezer. When you’re ready to enjoy them again, simply pull them out and let them thaw at room temperature for about 30 minutes. If you prefer them warm, you can reheat them in the oven at a low temperature for around 5 minutes to bring back their delightful texture.
Always be mindful of food safety guidelines. Make sure they are stored in a cool, dry place and ensure that your containers are airtight to protect the cookies from moisture, which can lead to them becoming stale.
Frequently Asked Questions
Can I use margarine instead of butter in this recipe?
While you can use margarine, it is advisable to stick with unsalted butter for the best flavor and texture. Butter contains fat that helps create the tender and chewy texture of the cookies, while margarine often has added water that can change the chemistry of your baked goods.
What should I do if my dough is too sticky?
If you find that your cookie dough is excessively sticky, you can add a little extra flour, a tablespoon at a time, until it reaches a more manageable consistency. Make sure not to overdo it; you want to maintain the soft, chewy texture of your cookies.
Can I replace white chocolate with other types of chocolate?
Absolutely! You can experiment with dark chocolate or semi-sweet chocolate chips. However, keep in mind that different chocolates will yield varying levels of sweetness and may require slight adjustments in sugar levels, depending on your taste preference.
Is it worth using high-quality chocolate for these cookies?
Yes! The quality of your chocolate can significantly affect the overall taste of your cookies. Opting for high-quality chocolate will result in richer, more flavorful cookies. Your tastebuds will thank you!
How can I tell if my cookies are done baking?
You’ll know your cookies are done when the edges are lightly golden brown but the center still looks slightly underbaked. They will set as they cool down, so removing them from the oven at this stage ensures you’ll have those scrumptious gooey centers you desire.
Conclusion:
These CRK Cookies with White Chocolate are more than just a recipe; they’re a delightful experience waiting to happen in your kitchen. With their soft and chewy texture, combined with the sweet richness of white chocolate, they are bound to win over your family and friends. The best part is that you can easily customize them to suit any flavor preference or dietary need. I wholeheartedly encourage you to give this recipe a try, infuse it with your creativity, and enjoy the delightful satisfaction of baking. Don’t forget to share your creations and modifications with others, as spreading joy through delicious homemade treats is one of the sweetest pleasures in life!