Prep time: 15 minutes
Cook time: 10-12 minutes
Total time: 25-27 minutes
Servings: 24 cookies
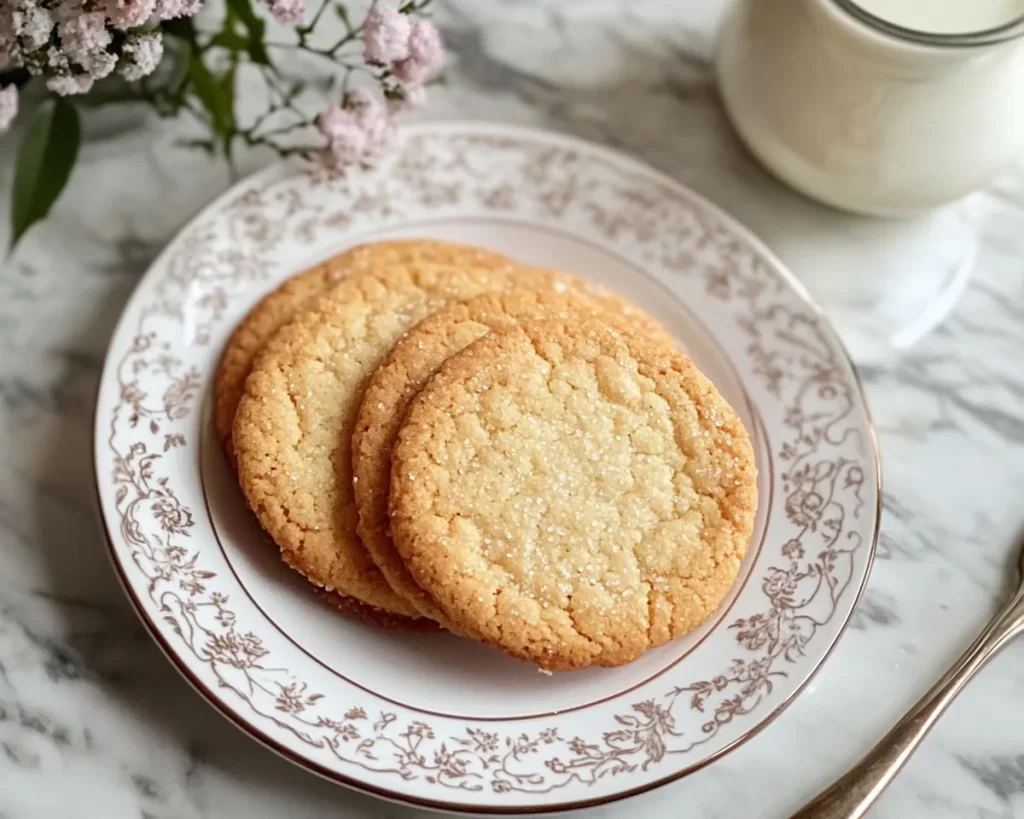
Imagine biting into a warm, soft cookie that melts in your mouth. That’s exactly what you get with these Milk Cookies: Soft Milk Sugar Cookies. They’re not just cookies; they encapsulate a feeling of comfort, reminiscent of childhood and home. Whether you’re a busy parent trying to put a quick treat together for your kids after school or someone wanting to impress loved ones with your baking skills, this recipe makes it effortless and enjoyable.
These cookies are not only simple to make but also deliver a burst of flavor that will keep you coming back for more. With a soft, tender texture, they provide the perfect base for various additions or can stand alone as a delightful treat. In this article, you will learn about the history and characteristics of these cookies, the ingredients you’ll need, step-by-step instructions for preparation, variations you can try, common mistakes to avoid, and storage tips to keep your cookies fresh.
What Is Milk Cookies: Soft Milk Sugar Cookies?
Milk cookies are a delightful, sweet treat commonly enjoyed in various cultures. The concept revolves around the combination of basic ingredients like flour, sugar, butter, and milk, resulting in a cookie that’s moist and subtly sweet. The distinctive aspect of these cookies is the incorporation of milk, contributing to their tender texture and rich taste. Traditionally, these cookies are made by creaming together sugar and butter, a method that introduces air into the dough, resulting in a lighter cookie.
The origin of milk cookies can be traced back to home kitchens, where they were crafted as a simple, comforting recipe for families. The flavor profile is sweet with a touch of creaminess from the milk, enhanced further with vanilla or other flavoring agents. The overall experience of eating milk cookies is best described as satisfying and comforting; they have a melt-in-your-mouth quality that pairs beautifully with a glass of cold milk or a warm cup of tea. With variations that suit different dietary needs or flavor preferences, you can easily adapt this classic recipe to make it your own.
Why You’ll Love This
There are countless reasons why you’ll adore these soft milk sugar cookies. First off, they are incredibly delicious, with a flavor that’s both sweet and rich. The use of milk makes them exceptionally soft, and the tender texture is sure to win over everyone who tries them. They can be enjoyed fresh out of the oven or stored for later, making them a versatile treat. Plus, the recipe is cost-effective, using everyday ingredients that you likely already have in your kitchen.
You might think that preparing soft cookies requires advanced baking skills, but this recipe proves otherwise. Even if you’re new to baking, you’ll find that you can create these cookies with confidence. One common misconception is that homemade cookies take too long or are too complicated. This recipe can be completed in under 30 minutes, from preparation to out of the oven! And if you’re concerned about health, milk cookies can be easily adjusted to accommodate dietary preferences, such as using whole wheat flour or substituting for dairy-free ingredients.
Ingredients You’ll Need
- 2 cups all-purpose flour: The base of the cookie, providing structure. You can use whole wheat flour for a healthier option.
- 1 cup granulated sugar: Adds sweetness. You may substitute it with brown sugar for a deeper flavor.
- 1/2 cup unsalted butter, softened: Creates a rich, creamy base. Make sure it’s at room temperature for easier mixing.
- 1/2 cup milk: The key ingredient that gives the cookies their soft texture. Almond or soy milk can be used as alternatives.
- 1 large egg: Acts as a binding agent. If you’re vegan, consider using flaxseed meal mixed with water as a substitute.
- 1 teaspoon vanilla extract: Provides a lovely aroma and enhances the overall flavor. Use pure vanilla for the best results.
- 1 teaspoon baking powder: Helps the cookies rise and become fluffy.
- 1/2 teaspoon salt: Balances the sweetness and enhances flavor.
Each ingredient plays a critical role in contributing to the texture and flavor profile of the cookies, so it’s essential to ensure you have quality ingredients for the best results. When measuring, it’s best to spoon the flour into your measuring cup and level it off—this prevents packing and ensures accuracy.
How to Make
1. **Preheat Your Oven**: Start by preheating your oven to 350°F (175°C). This step is crucial to ensure even baking. While the oven is heating, you can prepare your cookie dough.
2. **Cream the Butter and Sugar**: In a large mixing bowl, combine the softened butter and granulated sugar. Using a hand mixer or stand mixer, beat them together on medium speed until the mixture is light and fluffy. This should take about 3-5 minutes. The key here is to incorporate as much air as possible, which will result in a lighter cookie.
3. **Add the Egg and Vanilla**: Once your butter and sugar mixture is fluffy, add the egg and the vanilla extract. Beat these into the mixture on medium speed until well-blended. The egg adds moisture and richness, while the vanilla enhances the flavor.
4. **Combine the Dry Ingredients**: In a separate bowl, whisk together the all-purpose flour, baking powder, and salt. Whisking ensures that the baking powder and salt are evenly distributed throughout the flour. Gradually add this dry mixture to the wet ingredients, mixing on low speed. Be careful not to overmix, as this can lead to tough cookies.
5. **Incorporate the Milk**: Now it’s time to add the milk. Pour in the milk slowly while mixing on low speed, allowing it to combine adequately with the dough. You should have a smooth, creamy dough that is soft and slightly sticky. If it’s too dry, add a drop more milk.
6. **Scoop the Dough**: Using a cookie scoop or tablespoon, drop rounded scoops of dough onto a lined baking sheet about 2 inches apart. Don’t worry if they aren’t perfectly shaped; they will spread as they bake!
7. **Bake the Cookies**: Place the baking sheet in the preheated oven and bake for 10-12 minutes, or until the edges begin to turn golden. The centers may look slightly underbaked, but they will continue to cook while cooling.
8. **Cool and Store**: Once baked, set the cookies aside on the baking sheet for a few minutes before transferring them to a wire rack to cool completely. This helps them firm up a bit. Store any leftovers in an airtight container for up to a week.
These straightforward steps not only make for delicious cookies, but also allow even beginners to feel like pro bakers. With the soft texture and delightful aroma wafting through your kitchen, it’s hard not to crave one before they’re even cool.
Variations & Substitutions
Chocolate Chip Variation: Add 1 cup of semi-sweet or dark chocolate chips to the batter when you’ve mixed the dry ingredients with the wet. Chocolate adds an indulgent richness that balances the sweetness of the milk cookies. This variation is perfect for chocolate lovers and elevates the cookie to a more decadent treat.
Lemon Zest Variation: For a fresh twist, add the zest of one lemon to the wet ingredients. The citrus aroma will brighten the cookies and give them a refreshing flavor. If you enjoy a tangy taste, consider replacing some of the sugar with powdered sugar to create a more frosting-like texture after baking.
Nuts and Seeds Variation: Mix in 1 cup of your choice of nuts or seeds, such as chopped walnuts, pecans, or sunflower seeds, into the dough. This variation adds crunch and nutritional value to your cookies, making them heartier. It’s particularly good for those seeking a protein boost in their treats.
Dairy-Free Variation: Substitute the regular cow’s milk with almond or coconut milk and replace the unsalted butter with vegan butter or coconut oil. This modification ensures everyone can enjoy the cookies, regardless of dietary restrictions, while still maintaining most of the original flavor and texture.
Spices Variation: For a warm and cozy flavor, consider adding spices like cinnamon or nutmeg to the dough. Adding 1 teaspoon of cinnamon can create a more festive cookie, while nutmeg adds depth. This is a great option during the colder seasons or holidays to warm up your palate.
Adding these variations can make your cookie baking experience more exciting and allow you to tailor the recipe to suit different occasions or flavor preferences. Each variation provides its unique blend of textures and flavors, ensuring there’s something for everyone.
Common Mistakes to Avoid
One common mistake when baking cookies is not measuring your ingredients accurately. An excess of flour can lead to dense cookies, while too little can cause them to spread too thin. Always use measuring cups and spoons to ensure accuracy—especially when it comes to flour.
Another mistake many make is overmixing the dough. Once you add the flour, mix only until combined. Overmixing can lead to a tough texture instead of the desired softness. Additionally, be mindful of not letting your butter become too warm; it should be soft but not melted.
Lastly, avoid opening the oven door too soon while baking. Frequent temperature changes can result in unevenly baked cookies. Allow them to bake undisturbed until the timer goes off, then check for doneness.
By being aware of these common pitfalls, you can ensure that your cookies turn out perfectly every time you make them.
Storage, Freezing & Reheating Tips
To keep your cookies fresh, store them in an airtight container at room temperature. If stored properly, soft milk sugar cookies can last up to a week. For long-term storage, consider freezing them. Let the cookies cool completely before placing them in a freezer-safe bag or container, layering wax paper between each cookie to avoid sticking. They can be frozen for up to three months.
When you’re ready to enjoy a cookie, simply take it out of the freezer and let it thaw at room temperature. If you prefer warm cookies, you can reheat them in the oven at 350°F (175°C) for five to seven minutes to restore their freshness. Always ensure to check that they are warmed through by breaking one in half to see that it is heated inside.
For food safety, it’s important to label your containers or bags with the date so you can keep track of how long they have been stored. Proper storage techniques will help you enjoy your delicious milk cookies at their best.
Frequently Asked Questions
Can I make these cookies gluten-free? Yes, you can definitely make these cookies gluten-free by substituting all-purpose flour with a gluten-free flour blend. Be sure to use a blend that includes xanthan gum to mimic the elasticity of regular flour. This adaptation will maintain the cookies’ soft texture.
How can I enhance the flavor of the cookies? To enrich the flavor, consider adding extracts such as almond or coconut in addition to vanilla. You can also fold in mix-ins like chocolate chips or dried fruits that complement the sweetness of the milk.
What do I do if my cookie dough is too sticky? If your dough feels overly sticky, try chilling it in the refrigerator for about 30 minutes. This will make it easier to scoop and shape the cookies. Also, sprinkle a little flour on your hands or the cookie scoop to help manage the stickiness.
Can I use coconut oil instead of butter? Yes, coconut oil is a fantastic substitute for butter and will lend a subtle coconut flavor to your cookies. Make sure to melt the coconut oil and allow it to cool slightly before mixing it in with the other wet ingredients.
What’s the best way to serve these cookies? These soft milk sugar cookies are delicious on their own, but they can be elevated by serving them with a scoop of ice cream or alongside a glass of cold milk. You can also transform them into ice cream sandwiches by placing a scoop of ice cream between two cookies.
Conclusion:
These Milk Cookies: Soft Milk Sugar Cookies are a delightful, versatile treat that has the potential to become a favorite in your household. With their soft texture and rich flavor, they’re perfect for any occasion, whether you’re baking for a cozy family gathering or simply craving something sweet. Remember, you can customize these cookies with various flavors and ingredients to suit your preferences. Don’t hesitate to try this recipe, share it with friends and family, and maybe even make it a family tradition! Happy baking!


