Prep time: 20 minutes
Cook time: 10 minutes
Total time: 30 minutes
Servings: 24 cookies
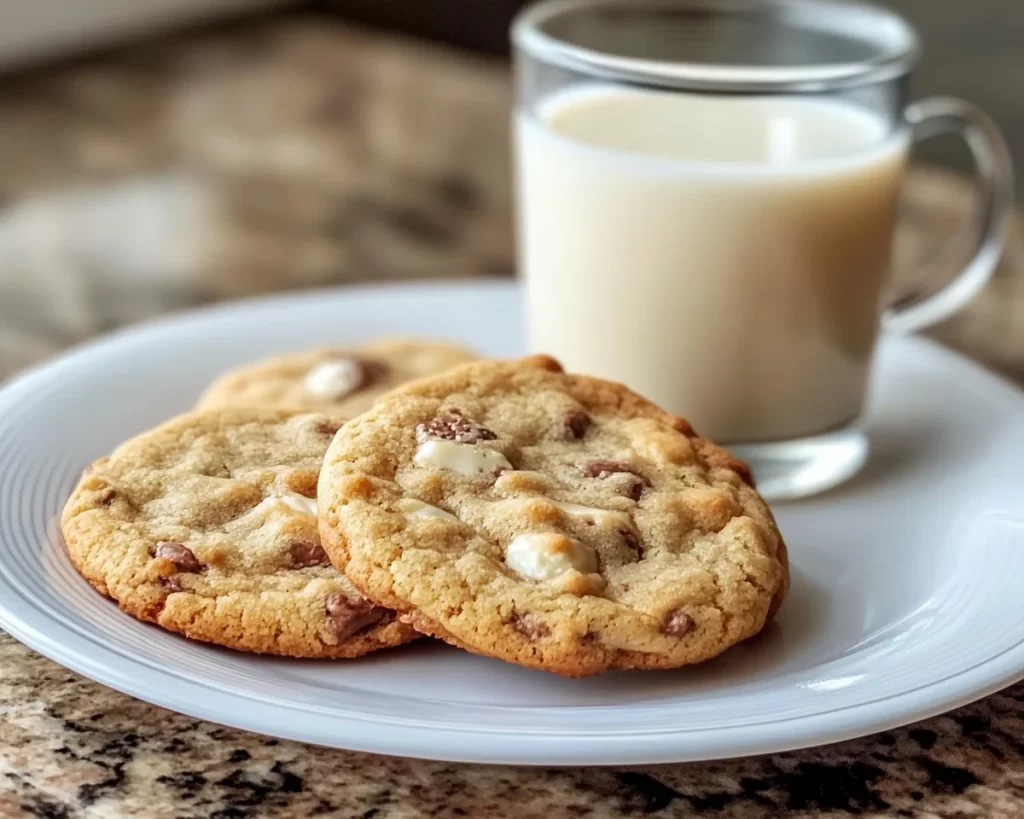
Imagine biting into a cookie that is soft, tender, and practically melts in your mouth. This is what Milk Cookies, specifically the Soft Milk Cookies, promise to deliver! Often cherished for their nostalgic appeal, these cookies remind many of their childhood baking experiences, filling the home with a warm, comforting aroma. The combination of simple ingredients and the ease of preparation make this recipe perfect for busy parents and beginners alike. In this article, you’ll discover the secrets to making these delicious cookies, tips for perfecting them, and exciting variations that allow for customization in every batch.
Milk Cookies are not just any ordinary cookies; they are a delightful soft treat that is beloved across various cultures. While the specific origins may differ, the **idea of using milk** in cookies has been a staple for many years. This unique ingredient brings extra moisture, resulting in an exceptionally delightful texture that is both chewy and melt-in-your-mouth soft. These cookies are subtly sweet, with a delicate flavor that pairs beautifully with a glass of milk or your favorite coffee. The beauty of this recipe lies in its simplicity, allowing you to create something incredible without feeling overwhelmed.
What sets Milk Cookies apart is the incorporation of basic kitchen staples combined in a way that elevates their taste and texture. This is not just a recipe; it’s a memory-maker. People of all ages adore them, making them a fantastic choice for gatherings, bake sales, or simply as a treat to enjoy after a long day. You will not only learn how to create these delightful cookies but also how to make them uniquely yours, using simple tweaks along the way.
What Is Milk Cookies: Soft Milk Cookies (Melt in Your Mouth)?
Milk Cookies are a type of confectionery that stand out due to their remarkably soft and tender texture. Originating from various cultures, these cookies typically use **milk as a primary ingredient**, which significantly impacts their consistency and flavor. With each bite, you’ll feel the cookie dissolve on your tongue, creating a delightful experience that beckons you to savor another. They hold a unique balance of sweetness and richness, making them an all-time favorite.
The beauty of Milk Cookies lies in their versatility. They can be adapted to suit a range of flavor profiles, from classic vanilla to variations that include chocolate chips or nuts. The simplicity of the recipe allows anyone to achieve fantastic results without professional baking skills. This means you can whip them up at a moment’s notice, whether it’s for a family gathering or a cozy evening snack. Milk Cookies are a testament to the fact that delicious desserts don’t require complex techniques or expensive ingredients.
When preparing Milk Cookies, the goal is to achieve a texture that is soft and tender while ensuring that the flavors remain uncomplicated and inviting. The use of warm, comforting ingredients creates a nostalgic feel, evoking memories of baking with family and friends. If you’re looking to impress guests or indulge in a sweet treat, these cookies are sure to do the trick.
Why You’ll Love This
There are numerous reasons why Milk Cookies are a beloved treat among cookie enthusiasts. **First and foremost**, their taste is sublime, combining a tender interior with a subtly sweet flavor that enhances any accompanying drink, especially a warm glass of milk or coffee. You will be amazed by how quickly they disappear!
Another great aspect of this recipe is its simplicity. With minimal ingredients and straightforward steps, it opens the door for beginners in the kitchen to create a delightful dessert without feeling intimidated. Even if you’ve never baked before, this recipe will give you confidence as you witness the ingredients transform into something wonderful right before your eyes.
Cost is another advantageous factor; all the ingredients are commonly found in most pantries, sparing you from a trip to specialty stores. This makes Milk Cookies an excellent choice for budget-conscious individuals who wish to create something delicious and comforting at home. Additionally, these cookies are incredibly versatile, allowing for various substitutions and modifications based on your preferences or dietary needs.
Common misconceptions about baking can deter many home cooks; however, creating Milk Cookies dispels those fears. They do not require extensive baking knowledge or precise measurements, making them a perfect gateway into the world of baking. By following a few simple guidelines, you will be able to bake cookies that impress your family and friends while enjoying the process immensely.
Ingredients You’ll Need
To create your delicious Milk Cookies, gather the following ingredients:
- 2 ½ cups all-purpose flour: This forms the base of your cookies, providing structure.
- 1 cup granulated sugar: Adds sweetness and helps achieve that delightful texture.
- 1 cup unsalted butter, softened: Essential for richness and moisture.
- 1 large egg: Binds the ingredients together for a cohesive dough.
- ½ cup milk: Enhances softness and flavor.
- 2 teaspoons baking powder: Helps the cookies rise and achieve a tender crumb.
- 1 teaspoon vanilla extract: Adds a warm, aromatic flavor.
- ½ teaspoon salt: Balances the sweetness.
Each ingredient plays a crucial role in the overall flavor and texture of the cookies. For instance, the use of unsalted butter ensures that you can control the salt levels, leading to a perfectly balanced cookie. The **addition of milk** is what makes Milk Cookies uniquely tender, allowing them to stand out from traditional cookie recipes. If you prefer a lower-fat option, consider substituting the butter with coconut oil, although this may alter the flavor somewhat.
Furthermore, should you want to explore different flavors or dietary needs, you can easily swap regular milk for almond or oat milk. This gives the cookies a unique taste while accommodating lactose intolerance or vegan preferences.
How to Make
To prepare your Milk Cookies, follow these step-by-step instructions:
- Preheat your oven: Begin by preheating your oven to 350°F (175°C). This step is crucial as it creates the ideal environment for baking, ensuring your cookies have the perfect rise and texture.
- Prepare your baking sheet: Line a baking sheet with parchment paper or a silicone baking mat. This prevents the cookies from sticking and makes for easy cleanup, allowing the golden-brown treats to slide off effortlessly.
- Mix the dry ingredients: In a medium-sized bowl, whisk together the all-purpose flour, baking powder, and salt. This ensures that the leavening agent is evenly distributed throughout the flour, leading to a consistent texture in your cookies.
- Cream the butter and sugar: In a large mixing bowl, use an electric mixer to beat the softened butter and granulated sugar until the mixture becomes light and fluffy. This typically takes about 3-5 minutes. Creaming the butter and sugar helps incorporate air, resulting in a softer cookie.
- Add the egg and milk: Beat in the large egg and half a cup of milk, followed by the vanilla extract. Continue mixing until all the wet ingredients are well combined. This is where the richness of the cookies begins to develop, enhancing the overall flavor.
- Incorporate the dry ingredients: Gradually add the dry mixture into the wet mixture, mixing on low speed until just combined. Be cautious not to overmix, as this can lead to tougher cookies. Stop mixing as soon as no dry flour remains visible.
- Scoop the dough: Using a cookie scoop or tablespoon, drop rounded spoonfuls of dough onto the prepared baking sheet, spacing them about two inches apart. This will allow the cookies room to spread as they bake.
- Bake: Place the baking sheet in the preheated oven. Bake for 8-10 minutes or until the edges turn lightly golden. Keep an eye on them, as baking times may vary depending on your oven!
- Cool the cookies: Remove the cookies from the oven and let them cool on the baking sheet for about 5 minutes before transferring them to a wire rack to cool completely. This resting time helps the cookies firm up, ensuring they maintain their soft shape.
As you prepare these cookies, take the time to enjoy the wonderful aromas filling your kitchen. The anticipation of sinking your teeth into a freshly baked Milk Cookie is sure to bring a smile to your face. With each step, remember that baking is just as much about the process as it is about the final product.
Variations & Substitutions
Chocolate Chip Milk Cookies: For an extra indulgent treat, consider adding half a cup of chocolate chips to the dough. The bittersweet chocolate melts beautifully into the soft cookie, creating a delightful contrast with the milky sweetness. This variation appeals to chocolate lovers and is always a crowd-pleaser.
Coconut Milk Cookies: For those seeking a tropical twist, substitute regular milk with coconut milk. This not only caters to lactose intolerance but also infuses the cookies with a subtle coconut flavor. The result is a chewy cookie that offers an unexpected taste and can be paired perfectly with shredded coconut for added texture.
Nutty Milk Cookies: If you’re a fan of nuts, consider adding half a cup of chopped pecans or walnuts into the dough. Nuts add a fantastic crunch and depth of flavor to the cookies, making them even more satisfying. Just be sure to chop them finely to prevent them from overpowering the soft texture of the cookie.
Spiced Milk Cookies: Elevate the flavor profile by adding a teaspoon of cinnamon or nutmeg to the dry ingredients. This adds warmth and complexity to the cookie, perfect for cozy gatherings, especially around the holidays.
Gluten-Free Milk Cookies: For those with gluten sensitivity, substitute the all-purpose flour with a gluten-free flour blend. While the texture may slightly vary, you will still enjoy the same delicious flavor. Be sure to check your baking powder and other ingredients to ensure they are also gluten-free.
Common Mistakes to Avoid
Even the most experienced bakers encounter hiccups during the baking process. One of the most common mistakes is **overmixing the dough** after adding the flour. This can lead to tough cookies instead of the desired **soft and melt-in-your-mouth texture**. To prevent this, mix your cookies until the flour is just combined; it’s acceptable to have a few lumps.
Another critical warning is not measuring your ingredients accurately. A **miscalculation—especially with flour or sugar**—can greatly affect the cookie’s outcome. It’s best to use a kitchen scale or measuring cups specifically for dry ingredients to ensure that your quantities are precise.
Finally, remember to adjust the baking time based on your oven’s characteristics. Every oven is different; some may bake faster, while others may be a bit slower. Always keep an eye on your cookies towards the end of the baking time.
Storage, Freezing & Reheating Tips
Storing your Milk Cookies properly is key to maintaining their delightful texture and flavor. Allow the cookies to cool completely on a wire rack before transferring them to an airtight container. Store them at room temperature for up to a week, although they are usually devoured much sooner!
If you would like to **freeze the cookies**, simply place them in a single layer on a baking sheet to freeze individually. After they are frozen solid, transfer them to a freezer-safe bag or container. They can last for up to three months in the freezer. When ready to enjoy, allow them to thaw at room temperature or microwave them for a few seconds for a warm treat.
Reheating your cookies is a delightful way to bring back that freshly baked feel. Simply place them in a microwave for about 10-15 seconds. Alternatively, you can use the oven by preheating it to 350°F (175°C) and warming the cookies for about 5 minutes.
Frequently Asked Questions
Can I use brown sugar instead of granulated sugar?
Yes, using brown sugar will add a deeper, slightly caramel flavor to your Milk Cookies. Brown sugar also helps to retain moisture, resulting in an even softer cookie.
Why are my cookies flat?
Flat cookies are often the result of not having enough flour, using melted butter, or not chilling the dough before baking. Always make sure to follow the recipe accurately and, when in doubt, refrigerate the dough for 30 minutes.
Can I omit the egg?
If you wish to make these cookies egg-free, you can substitute the egg with a flaxseed meal mixture or applesauce. For one egg, use one tablespoon of flaxseed meal mixed with three tablespoons of water, or replace with ¼ cup of applesauce for a moisture boost.
How do I know when the cookies are done baking?
The cookies should be lightly golden brown around the edges. The centers may look slightly soft, but they will set as they cool. It’s important to take them out of the oven when they still look underbaked to achieve that soft texture.
Can I customize the flavors more?
Absolutely! Feel free to experiment with different extracts like almond or peppermint. Incorporating various mix-ins, such as dried fruit or candy, will also give a unique twist to the classic Milk Cookie.
Conclusion:
Milk Cookies are not just any treat; they are the embodiment of comfort and nostalgia. Their simple ingredients and effortless preparation allow anyone to create something delicious in no time. From their soft texture to their adaptable flavor profile, these cookies are bound to become a family favorite in your home. Don’t hesitate to make this recipe your own by adding different flavors or trying out various substitutions. Get ready to enjoy a batch of melt-in-your-mouth cookies that will leave everyone craving more! Share this recipe with friends and family, and let them fall in love with Milk Cookies just as you have. Happy baking!


