Prep time: 30 minutes
Cook time: 25 minutes
Total time: 55 minutes
Servings: 12
The arrival of spring brings a sense of renewal, warmth, and celebration. One of the best ways to embrace the season is through delightful desserts that encapsulate the freshness and vibrancy of springtime. Enter the Spring Cake Designs: Pastel Sprinkle Cake Design, an exquisite dessert that not only pleases the palate but also captivates the eyes. This cake is more than just a sweet treat; it’s a canvas for your creativity, adorned with pastel colors and whimsical sprinkles that would brighten anyone’s day.
What makes this recipe truly special is its versatility. It allows you to express yourself through baking while also creating something delicious for family and friends to enjoy. The airy cake layers contrasted with a rich frosting and cheerful toppings will make any gathering a memorable one. Throughout this article, you’ll discover not only how to make this stunning cake but also tips for achieving that perfect pastel hue, the right frosting consistency, and even some creative twists that can cater to various dietary preferences.
What Is Spring Cake Designs: Pastel Sprinkle Cake Design?
The Pastel Sprinkle Cake Design is essentially a layered cake that can be customized to reflect the essence of spring. This dessert has its origins rooted in celebration, often making appearances at birthdays, weddings, and springtime festivities. The typical flavors are light and refreshing, incorporating elements like vanilla, lemon, or even almond, which resonate well with the vibrant colors used in decoration.
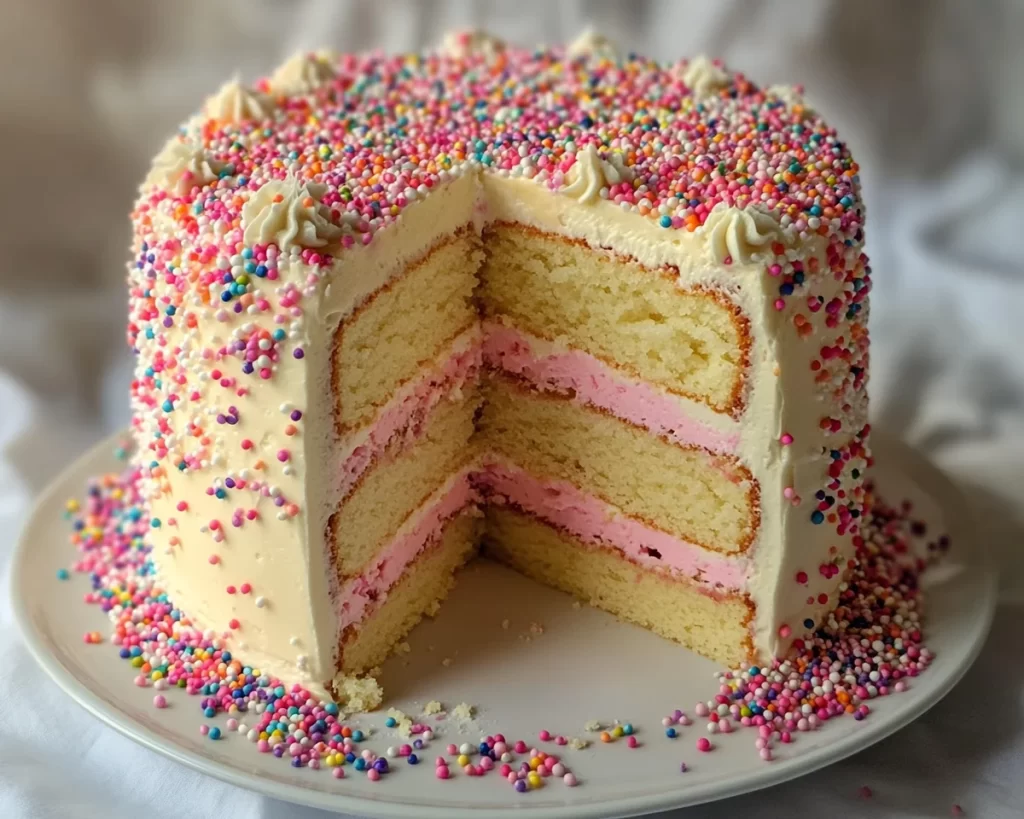
Visually, a spring cake often showcases a beautiful collection of soft pastel colors such as pink, mint green, and lavender, reflecting the burgeoning blooms found in nature during the season. The texture is generally light and fluffy, thanks to the incorporation of whipped eggs and buttermilk, which adds moisture and tenderness to the cake layers. Each bite is a delightful balance of sweetness and floral notes, making it a perfect treat for afternoon tea or a festive gathering.
Buttercream frosting usually plays a central role in this design, giving it a smooth finish that allows for ample decorating opportunities. The addition of sprinkles not only adds fun but also variety in flavors and textures, enticing all who behold it. This cake is not just a dessert but a centerpiece waiting to charm guests with its colors and flavors.
Why You’ll Love This
You’ll adore the Spring Cake Designs: Pastel Sprinkle Cake Design for many reasons. Firstly, it’s incredibly tasty; the combination of a moist cake layered with creamy frosting creates an experience that makes each slice irresistible. Whether you prefer the rich vanilla flavor or something a touch zestier, this cake can easily adapt to your palate.
The cake is also easy to make, even for beginners in the kitchen. The straightforward step-by-step process ensures anyone can successfully create this masterpiece without feeling overwhelmed. Plus, this recipe is cost-effective—using basic pantry ingredients that you likely already have at home means you won’t break the bank. Additionally, the ability to customize flavors and decorations makes this cake suitable for various dietary needs, ensuring everyone at your table finds joy in its taste.
Many people hesitate to bake due to common misconceptions, thinking that intricate desserts require advanced skills. However, this cake proves that even a novice can bring beauty and flavor together in one stunning design. With just a few simple steps and a bit of creativity, you can impress friends and family while making delicious memories.
Ingredients You’ll Need
- 2 cups all-purpose flour – This is the main structure of your cake. For a gluten-free version, consider using a 1:1 gluten-free flour blend.
- 1 ½ cups granulated sugar – Sweetens the cake to perfection while adding moisture.
- ¾ cup unsalted butter, softened – Adds richness and a creamy texture. You can substitute with margarine for a dairy-free option.
- 3 eggs – These are essential for providing the cake’s structure and moisture. For a vegan version, use flaxseed eggs.
- 1 cup buttermilk – This adds a lovely tang and keeps the cake moist. If unavailable, mix milk with a tablespoon of vinegar as a substitute.
- 2 teaspoons baking powder – A crucial ingredient for rising the cake; ensure it’s fresh for best results.
- 1 teaspoon baking soda – Works with the acidity of buttermilk to give lift to the cake.
- 1 teaspoon vanilla extract – Enhances the flavor of the cake; options like almond extract can be used for a twist.
- Pinch of salt – Balances the sweetness and enhances overall flavor.
- Buttercream frosting – Approximately 4 cups for frosting and decorating the cake; consider using pastel food coloring for the spring theme.
- Sprinkles – Various pastel-colored sprinkles for decoration, adding a fun crunch and aesthetic appeal.
Each ingredient plays a pivotal role in creating a memorable cake. For example, choosing quality butter and fresh eggs can elevate the taste significantly. Also, when selecting your sprinkles, opt for high-quality decorative elements that will not only enhance the visual presentation but also provide enjoyable texture.
How to Make
Follow these step-by-step instructions to create your own stunning Spring Cake Designs: Pastel Sprinkle Cake Design:
- Preheat your oven. Set your oven to 350°F (175°C). This is crucial as it ensures that the cake bakes evenly. While the oven heats up, prepare your baking pans. Grease two 9-inch round cake pans with butter and line the bottoms with parchment paper.
- Mix dry ingredients. In a large mixing bowl, whisk together the flour, baking powder, baking soda, and salt until well combined. This step helps distribute the leavening agents evenly throughout the flour, promoting even rising during baking.
- Cream the butter and sugar. In another bowl, use an electric mixer to cream the softened butter and granulated sugar together until it becomes light and fluffy, about 3-4 minutes. This process incorporates air, which will help the cake rise and achieve a tender crumb.
- Add eggs and vanilla. Now, add the eggs one at a time, mixing well after each addition. Then, mix in the vanilla extract. The mixture should be creamy and homogeneous. If using a stand mixer, be sure to scrape down the sides to ensure everything is well combined.
- Combine wet and dry ingredients. Gradually add the dry mixture to the wet ingredients in three parts, alternating with the buttermilk. Start and finish with the dry ingredients, mixing gently after each addition. This technique helps to avoid overmixing, ensuring a light cake.
- Divide and bake. Pour the batter evenly between the prepared cake pans. Smooth the tops with a spatula for an even layer. Bake in your preheated oven for 25-30 minutes, or until a toothpick inserted into the center comes out clean. Allow the cakes to cool in the pans for about 10 minutes before transferring them to wire racks.
- Prepare the frosting. While the cakes are cooling, prepare your buttercream frosting. In a large bowl, beat the softened butter until creamy. Gradually add powdered sugar, mixing on low until incorporated. Adjust with heavy cream for the desired consistency and add any food coloring if you prefer.
- Layer the cake. Once the cakes are completely cooled, place one layer on a serving plate. Spread a layer of frosting on top, then place the second layer on top of that, pressing gently to adhere. Use an offset spatula to frost the sides and top of the cake smoothly.
- Decorate. Finally, sprinkle your pastel-colored sprinkles generously over the top and sides of the cake. Feel free to get creative—create patterns or leave them simple for a more minimalist style. Ensure you press them gently into the frosting so they adhere well.
- Serve and enjoy. Slice the cake into pieces, serve, and watch as everyone enjoys this beautifully crafted dessert. The flavors and festive display will leave a lasting impression on your guests.
The key to success lies in preparation. Taking your time not only in gathering your ingredients but also in each step will ensure a delicious result.
Variations & Substitutions
Chocolate Variation: To transform this cake into a decadent chocolate version, simply replace ½ cup of the all-purpose flour with cocoa powder. This variation creates a rich, chocolatey base that pairs perfectly with vanilla buttercream frosting. You can also add chocolate sprinkles on top to match the theme. This version is perfect for chocolate lovers and maintains the same light texture you desire from a spring cake.
Lemon Zest Addition: For a zestier cake that embraces spring’s brightness, incorporate the zest of one lemon into the batter. This will add a refreshing citrus note that uplifts the overall flavor profile. Pair it with a lemon-flavored frosting to create a cohesive taste experience. Those who appreciate a touch of tang will gravitate towards this delightful variation, making it ideal for spring picnics or garden parties.
Vegan Variation: If you’re baking for vegans or those with dairy and egg allergies, replace the eggs with flaxseed eggs—1 tablespoon of ground flaxseed mixed with 2.5 tablespoons of water equals one egg. Use almond milk or oat milk as a substitute for buttermilk. For frosting, opt for a vegan butter and powdered sugar blend. This adaptation maintains the cake’s delightful moistness while catering to various dietary needs.
Gluten-Free Option: To cater to gluten-sensitive guests, swap the all-purpose flour with a gluten-free flour blend. Ensure the blend contains xanthan gum for proper rise and texture. This option allows everyone to partake in the sweetness of spring without compromising health needs. Additionally, double-check your baking powder and other ingredients for gluten-free labeling to avoid cross-contamination.
Fruit-Infused Variation: Enhance your cake with fruit flavors by adding pureed fruit like strawberries or raspberries to the batter. A cup of fruit puree can replace some of the buttermilk. This infusion not only adds flavor but also contributes beautiful color to the cake. Topped with a complimenting fruit glaze or fresh fruit, this variation brings a fresh taste to a classic dessert, perfect for brunch occasions.
Common Mistakes to Avoid
Creating a cake as beautiful and delicious as the Spring Cake Designs: Pastel Sprinkle Cake Design requires attention to detail. One common mistake is not accurately measuring the ingredients. Baking is a science, and being off by even a small amount can affect the texture and rise of your cake. Always use the spoon-and-level method or a kitchen scale for precise measurements.
Another frequent error is overmixing the batter after adding the flour. Overmixing develops gluten, leading to a denser cake rather than the light, airy texture you desire. To achieve the best results, mix until just combined and avoid vigorous stirring.
Pay close attention to your baking time. Opening the oven door too frequently can cause a sudden temperature drop, affecting how your cake rises. Use an oven thermometer to ensure accurate temperatures, and trust the toothpick test for doneness at the end of baking.
Lastly, remember that frosting can be finicky. Always ensure that your cakes are completely cool before you start frosting. A warm cake can lead to melted frosting, which can ruin the cake’s appearance. If you encounter issues with your frosting being too soft, refrigerate it briefly to help it firm up before application.
Storage, Freezing & Reheating Tips
Proper storage of your Spring Cake Designs: Pastel Sprinkle Cake Design ensures you can enjoy it over the next few days. Keep any leftover cake in an airtight container at room temperature for up to 3 days. If you find that it’s lasting longer, consider refrigerating it, but allow it to come to room temperature before serving for optimal flavor and texture.
If you want to extend the life of your cake, consider freezing it. Wrap the layers tightly in plastic wrap, ensuring no exposure to air, then place them inside a freezer-safe bag or container. Your cake can remain frozen for up to 3 months. When ready to eat, simply remove from the freezer and let it thaw in the refrigerator overnight. Once thawed, you can frost it as desired.
Reheating is generally not recommended for frosted cakes, as this can lead to melting and loss of texture. However, if you wish to enjoy a warm slice, gently microwave an unfrosted piece for about 10-15 seconds. Keep an eye on it to ensure it doesn’t overheat.
Always remember food safety best practices; when storing cakes, ensure they are kept in conditions that avoid contamination, particularly in humid environments where mold may develop.
Frequently Asked Questions
How can I ensure my cake rises properly?
To ensure a well-risen cake, it’s essential to check that your baking powder and baking soda are fresh. Both ingredients work to create air bubbles that make the cake rise. Also, be sure not to open the oven door too soon, as a sudden temperature change can affect the rise.
Can I make the frosting ahead of time?
Yes, you can prepare the buttercream frosting up to a week in advance. Store it in an airtight container in the refrigerator and let it come to room temperature before using. You may need to re-whip it to regain its fluffy consistency.
What other flavors can I use for this cake?
The beauty of this cake lies in its versatility. Beyond the traditional vanilla, you can experiment with flavors such as lemon, almond, or even chocolate. Feel free to infuse the batter with any flavors you love, adapting the frosting to match.
How should I cut the cake for serving?
For a beautifully presented cake, use a sharp knife and dip it in hot water between cuts. This technique allows for clean slices, showcasing the lovely layers without tearing the cake. Wipe the knife after each cut to maintain neatness.
Can this cake be made gluten-free?
Absolutely! Simply substitute the all-purpose flour with a high-quality gluten-free flour blend. Ensure that any other components, like baking powder, are also certified gluten-free to avoid cross-contamination.
Conclusion:
In summary, the Spring Cake Designs: Pastel Sprinkle Cake Design is a delightful way to celebrate the beauty of spring. Its moist layers, creamy frosting, and cheerful sprinkles not only satisfy cravings but also provide opportunities for creative expression. Don’t hesitate to customize this cake to suit your style or dietary needs; there’s no wrong way to bring the essence of spring into your kitchen.
So gather your ingredients, unleash your creativity, and share this cake with friends and family. It’s a guaranteed crowd-pleaser that can make any occasion feel special. Get started on your spring baking adventure today!


