Prep time: 15 minutes
Cook time: 10 minutes
Total time: 25 minutes
Servings: 24 cookies
Are you ready to whip up a batch of delicious, nostalgic memories? Imagine biting into a warm, soft cookie that melts in your mouth, filling your kitchen with a comforting aroma. These Classic Soft Milk Cookies are not just any cookies; they are a sweet reminder of our childhood, where the simplest ingredients come together to create something magical. This recipe is not only easy to make but also incredibly satisfying. Whether you’re a busy parent looking for a quick treat or a beginner in the kitchen wanting to impress your friends and family, this recipe is your go-to!
What makes this recipe special? It’s the combination of simplicity and nostalgia. Milk cookies have a unique flavor that dances between sweetness and a milky warmth, providing a comforting texture that’s perfect for any occasion. In this article, you will learn how to make these delightful cookies from scratch, including tips and tricks to ensure they come out perfect every time. Plus, we’ll explore variations that suit different tastes and dietary needs, so everyone can enjoy a cookie or two!
What Is Milk Cookies: Classic Soft Milk Cookies (Easy)?
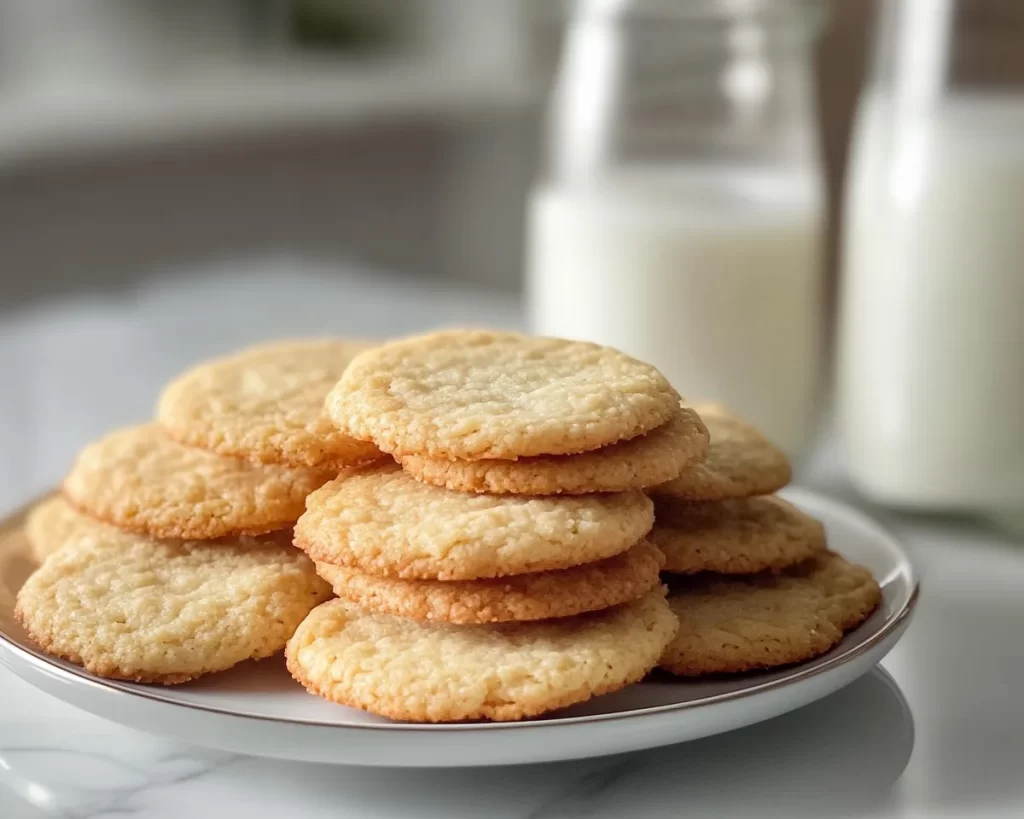
Milk Cookies, also known as Classic Soft Milk Cookies, derive their comforting flavor and softness primarily from two key ingredients: milk and butter. The origin of milk cookies is often traced back through nostalgic memories in households, where simple baking brought families together. The texture is chewy yet soft, often described as pillowy, making them ideal for dunking in a glass of cold milk. The subtle sweetness is enhanced by the rich flavor of the butter, which complements the milk perfectly, resulting in a cookie that is both satisfying and heartwarming.
These cookies differ from traditional chocolate chip cookies in that they are less sweet and have a more delicate flavor profile. The taste is reminiscent of a warm hug or a cozy evening at home. What sets these milk cookies apart is their versatility; you can easily customize them with various add-ins or flavors to suit your preferences. From classic vanilla to fun mix-ins, this recipe offers a canvas for your creativity. The result? A sweet treat that is sure to leave you and your loved ones craving more.
Why You’ll Love This
There are countless reasons to love these Classic Soft Milk Cookies. First and foremost, they are incredibly easy to make. With just a few straightforward ingredients, you can whip up a batch in no time. This is particularly great for beginners who want to ease into baking without feeling overwhelmed. Not only do the cookies taste incredible, but they also have a delightful texture that complements their flavor.
Cost-effectiveness is another attractive feature of this recipe. Often, you may find that the ingredients are already in your pantry, making this a budget-friendly choice. Plus, who doesn’t love the smell of freshly baked cookies wafting through their home? They elevate any occasion, whether it’s a movie night, a surprise treat for your family, or a gathering with friends.
Common misconceptions around milk cookies include the belief that they are complicated to make or always require special ingredients. In reality, this recipe proves that you can create something uniquely delicious without unnecessary fuss. It is a comforting bit of baking that transcends dietary restrictions or skill levels. By familiarizing yourself with the process, you’ll gain confidence and may even find yourself experimenting with new flavors and techniques in the kitchen.
Ingredients You’ll Need
To create these delectable Classic Soft Milk Cookies, you will need the following ingredients:
- 2 ¾ cups all-purpose flour – This forms the structure of your cookies. Make sure to measure it correctly for the best texture.
- 1 tsp baking soda – This ingredient helps the cookies rise and achieve that soft, chewy texture.
- ½ tsp salt – A little bit of salt enhances the flavors, balancing the sweetness.
- 1 cup unsalted butter, softened – Butter provides richness and moisture, making the cookies delightful.
- 1 cup granulated sugar – This sweetens the cookies brilliantly, contributing to that perfect sugary crust.
- ½ cup brown sugar – Brown sugar adds a subtle depth of flavor and moisture to the cookies.
- 1 large egg – Eggs bind the ingredients together while adding richness.
- 2 tablespoons milk – This is the star ingredient that gives the cookies their name and enhances their flavor.
- 1 tsp vanilla extract – Vanilla adds a warm, aromatic flavor that complements the other ingredients.
Every ingredient plays a crucial role in the final outcome of the cookies. For example, if you happen to run out of all-purpose flour, substituting with whole wheat flour can add a nutty flavor, although the texture may vary slightly. Similarly, you can opt for coconut sugar instead of granulated sugar if you prefer a less refined sweetener. The flexibility of this recipe allows you to adjust it according to your pantry and preferences, making it easy for anyone to enjoy freshly baked milk cookies.
How to Make
Creating Classic Soft Milk Cookies is a fulfilling and transformative experience. Follow these step-by-step instructions for a delicious batch:
- Prepare your workspace: Start by preheating your oven to 350°F (175°C). Line your baking sheet with parchment paper for easy cleanup. Gather all your ingredients so you have them on hand before you start mixing.
- Mix dry ingredients: In a large bowl, whisk together the all-purpose flour, baking soda, and salt. This ensures that the leavening agent is evenly distributed, giving your cookies a consistent texture.
- Cream the butter and sugars: In a separate bowl, beat the softened butter with both granulated and brown sugars until the mixture is light and fluffy. This typically takes 2-3 minutes. The fluffy texture is crucial as it helps incorporate air into the dough, making your cookies light and airy.
- Add the egg and flavorings: Beat in the egg, milk, and vanilla extract into the butter mixture, combining well after each addition. Ensure that the mixture is smooth and free of lumps before proceeding to the next step. The egg acts as a binding agent, creating a cohesive dough.
- Combine wet and dry ingredients: Gradually add the dry mixture to the wet mixture, folding it in gently. Avoid over-mixing, as this can lead to tough cookies. You want to create a thick, soft dough that holds together nicely.
- Portion out the cookies: Use a cookie scoop or tablespoon to drop rounded amounts of dough onto your prepared baking sheet, leaving enough space between each cookie to allow for spreading during baking.
- Bake: Place the baking sheet in the preheated oven and bake for 9 to 11 minutes, or until the edges are lightly golden. This timing is key; over-baking can lead to a dry cookie, while under-baking offers a gooey texture.
- Cool: Remove the cookies from the oven and let them cool on the baking sheet for about 5 minutes before transferring them to a wire rack to cool completely. This allows them to firm up, creating that perfect chewy consistency.
Following these detailed steps, you’ll be rewarded with a fragrant batch of cookies that are hard to resist. The process may seem extensive, but it’s truly straightforward and gratifying. Get ready to enjoy these delightful treats or share them with friends!
Variations & Substitutions
Chocolate Chip Variation: If you’re a fan of chocolate, consider adding 1 cup of chocolate chips to the dough. This simple addition transforms milk cookies into a classic chocolate chip rendition! The melty chocolate balances beautifully with the sweetness of the cookie, providing an irresistible treat that everyone will love.
Peanut Butter Variation: For a nutty twist, substitute ½ cup of the butter with peanut butter. This adds a rich, creamy flavor that is sure to satisfy any peanut butter lover. The cookies might spread a bit more due to the oil content in peanut butter, so keep this in mind when placing them on the baking sheet.
Gluten-Free Variation: To make this recipe gluten-free, exchange the all-purpose flour with a gluten-free flour blend. Make sure the blend includes xanthan gum to maintain the cookie’s structure. The cookies may have a slightly different texture but will still deliver that delightful milk cookie flavor!
Dairy-Free Variation: To make these cookies dairy-free, use a vegan butter or coconut oil instead of regular butter. Additionally, almond or oat milk can replace regular milk. The texture might differ slightly, but they’ll still be just as delicious!
Each variation offers a unique taste and experience, ensuring that everyone can find a version that suits their preferences, whether they are celiac, vegan, or simply a chocolate lover.
Common Mistakes to Avoid
One common mistake people make when baking cookies is not measuring the flour accurately. Too much flour can lead to dry cookies, while too little can make them overly gooey. To avoid this, use the spoon-and-level method: spoon flour into your measuring cup and level it off with a knife for precision.
Another critical warning is about under-mixing or over-mixing the dough. Under-mixed dough can result in unevenly distributed ingredients, leading to baked cookies that haven’t achieved their potential. On the other hand, over-mixing can activate the gluten in the flour, resulting in tougher cookies. Aim for just combined, letting the remaining flour incorporate as you fold gently.
Lastly, people often underestimate the importance of cooling. While the cookies may look done as soon as they come out of the oven, letting them sit on the baking sheet helps them firm up without overcooking. Allowing them to cool too quickly might lead to a flat, crispy cookie instead of a soft, pillowy treat.
By being mindful of these pitfalls, you can guarantee a batch of delicious milk cookies every single time.
Storage, Freezing & Reheating Tips
To keep your cookies fresh, store them in an airtight container at room temperature for up to a week. If you’d like to keep them longer, consider freezing them. To freeze, allow the cookies to cool completely, then place them in a single layer on a cookie sheet. After an hour, transfer them to a heavy-duty freezer bag or airtight container, separating layers with parchment paper. They can last for up to three months in the freezer.
If you want to enjoy a cookie from your freezer, you can either let it thaw at room temperature or microwave it for about 10-15 seconds for a warm, freshly-baked experience. Remember to check that they are thoroughly thawed to ensure the best texture.
For food safety, make sure to keep the cookies away from direct sunlight and moisture, as these can diminish their freshness. Enjoying a delicious milk cookie should always be a treat—ensuring they are stored properly will keep that warm, comforting experience intact.
Frequently Asked Questions
Can I use alternative sweeteners in this recipe? Yes, you can use alternative sweeteners, such as coconut sugar or agave syrup. However, be mindful of the ratios and how they might affect the cookie texture. Liquid sweeteners may change the wet-to-dry ingredient ratio, requiring you to adjust the flour accordingly to maintain the desired consistency.
What can I do if my dough is too sticky? If your dough feels excessively sticky, consider chilling it in the refrigerator for about 30 minutes. This will help firm it up, making it easier to scoop and shape. Alternatively, you can add a little more flour, but be cautious not to add too much as it can lead to dry cookies.
How do I know when my cookies are done baking? The edges of the cookies should be golden brown, while the center may appear slightly underbaked. They will continue to firm up as they cool on the baking sheet. Trusting this visual cue alongside the baking time provided will ensure the best results.
Can I double this recipe? Absolutely! This recipe can easily be doubled or halved to suit your needs. Just make sure to adjust your mixing bowls to accommodate the volume, and you may need to bake in batches if your oven space is limited.
Is it possible to get a vegan version of these cookies? Yes! To make these cookies vegan, substitute the regular butter with a plant-based butter and replace the egg with a flax egg or applesauce. Adjust the recipe accordingly, and you’ll have a delicious vegan treat that everyone can enjoy!
Conclusion:
The Classic Soft Milk Cookies are a perfect blend of simplicity and nostalgia that brings joy to every baking experience. With their soft, melt-in-your-mouth texture and warm flavor, they are a delightful treat for any occasion. I encourage you to try this recipe, make it your own, and share it with family or friends. Whether you choose to follow the traditional route or opt for a creative variation, these cookies are sure to leave everyone with a smile. Get ready to create more than just cookies; you’re baking warm memories that last a lifetime!


