Prep time: 30 minutes
Cook time: 45 minutes
Total time: 1 hour 15 minutes
Servings: 12
Indulging in a delicious cake can transport you back to cherished memories of family gatherings, birthday celebrations, or cozy afternoons with friends. The Spring Cake Designs: Pastel Drip Cake (Easy Look) is one such dessert that beautifully encapsulates moments of joy with its stunning appearance and delightful taste. This cake is not just a treat for the palate; it’s a feast for the eyes too, adorned with pastel colors and a luscious drip that beckons you to take a slice.
Preparing a cake that looks this good might seem daunting, but I assure you, it is surprisingly simple and requires no advanced baking skills! In this article, you’ll learn how to create this show-stopping cake from scratch, including tips on achieving that perfect pastel color and smooth drip effect. So, grab your apron, and let’s get started on this delightful baking adventure!
What Is Spring Cake Designs: Pastel Drip Cake (Easy Look)?
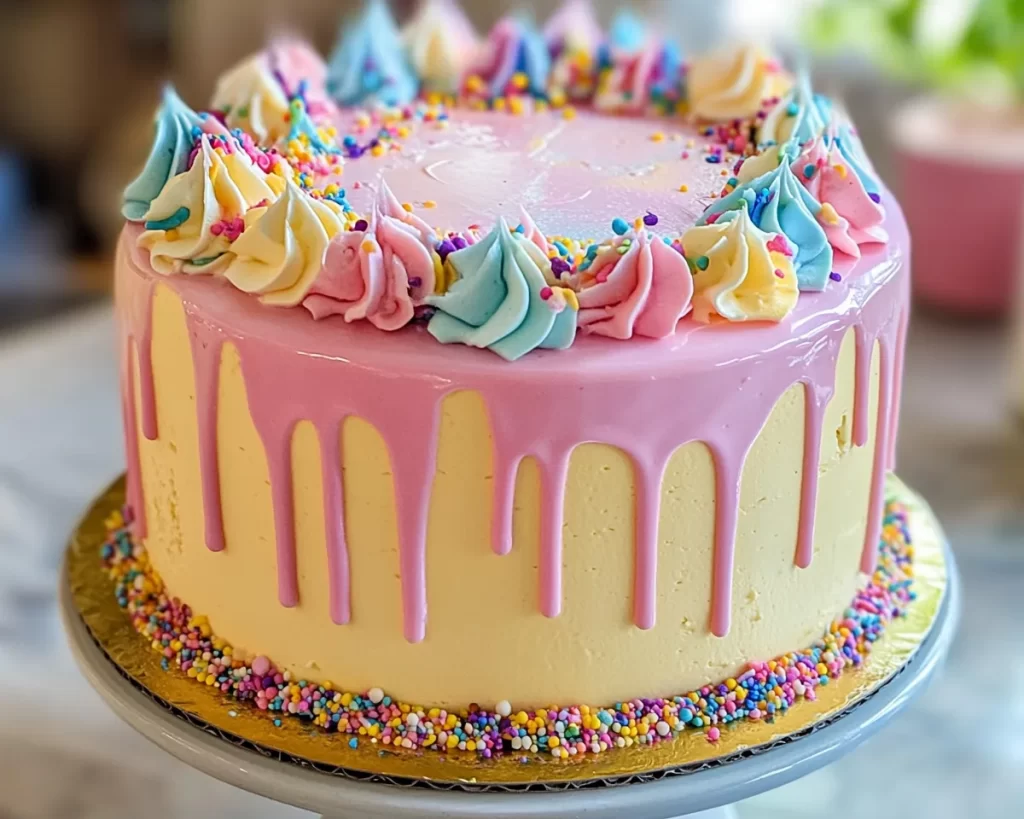
The Spring Cake Designs: Pastel Drip Cake is not just any ordinary cake; it is a masterpiece that combines layers of moist cake with rich frosting and a captivating drip effect. This cake often showcases light pastel colors such as pink, blue, and yellow, representing the freshness of spring. The tender crumb of the cake paired with the smooth, creamy texture of the frosting creates a delightful experience in every bite.
Originating from simpler cake designs, the drip cake trend has gained immense popularity due to its visual appeal and diverse flavor options. For this recipe, we’ll use a basic vanilla or lemon flavor, which pairs beautifully with various icings that can be colored to suit the season or occasion. The contrasting textures of the fluffy cake, rich frosting, and glossy drip create a delicious harmony that is sure to impress your guests.
You will also find that the beauty of this cake lies in its versatility. Whether you are preparing for a birthday party or a spring gathering, this cake can be customized to suit any celebration. With just a bit of creativity, you can add edible flowers, sprinkles, or other delightful decorations to enhance its visual appeal and flavor.
Why You’ll Love This
You will adore the Spring Cake Designs: Pastel Drip Cake not only for its gorgeous presentation but also for its incredible flavor. The taste is light and refreshing, making it perfect for spring occasions when you want something sweet without being overwhelming. The cake is relatively easy to prepare, so even beginner bakers can achieve professional-looking results without the stress.
Another appealing aspect is the affordability of the ingredients. Most of the components can be found in your pantry or local grocery store, making it a budget-friendly option. You can make this cake in advance for special occasions, which adds convenience to your planning process while ensuring that it remains a hit with family and friends.
Don’t worry if you think you’ve never made a drip cake before! Many commonly held misconceptions about baking may prevent you from trying. The truth is that achieving the drip effect is simpler than you might imagine. You will learn specific techniques that will allow you to create that perfectly smooth ganache or icing drip. Trust that you are more than capable of crafting this dessert!
Ingredients You’ll Need
To create your own Spring Cake Designs: Pastel Drip Cake, gather the following ingredients:
- 2 ½ cups all-purpose flour – Provides the structure of the cake.
- 2 ½ tsp baking powder – Helps the cake rise for a light texture.
- ½ tsp salt – Enhances the flavor of the cake.
- 1 cup unsalted butter, softened – Adds richness and moisture.
- 2 cups sugar – Sweetens the cake and contributes to its texture.
- 4 large eggs – Binds the ingredients together.
- 1 tbsp vanilla extract – Adds flavor.
- 1 cup buttermilk – Keeps the cake moist and adds tanginess.
- 4 cups powdered sugar – For the frosting, adding sweetness and structure.
- 1 cup heavy cream – Used in the ganache for a perfect drip effect.
- Chocolate chips (optional) – To melt for the drip.
- Food coloring – For pastel shades.
Each ingredient plays a critical role in achieving the desired outcome. You can replace all-purpose flour with a gluten-free blend if needed. Don’t hesitate to experiment with flavors—substituting buttermilk with almond milk or adding lemon zest can give a new twist to your cake.
How to Make
1. **Preheat the Oven:** Begin by preheating your oven to 350°F (175°C). This ensures that the cake bakes evenly. Prepare three 9-inch round cake pans by greasing them and lining the bottom with parchment paper for easy removal.
2. **Prepare the Dry Ingredients:** In a medium bowl, whisk together the all-purpose flour, baking powder, and salt. This step is crucial as it helps to evenly distribute the leavening agents throughout the flour.
3. **Cream the Butter and Sugar:** In a large mixing bowl, beat the softened butter and sugar together with an electric mixer on medium speed until the mixture is light and fluffy, which usually takes about 3-5 minutes. This is a key step for creating air pockets that will help the cake rise.
4. **Add the Eggs:** Carefully add the eggs, one at a time, mixing well after each addition. Include the vanilla extract and continue beating until everything is well incorporated. The mixture should be smooth and velvety.
5. **Combine the Mixtures:** Gradually add the dry ingredients to the butter mixture, alternating with the buttermilk. Start by adding a third of the dry mix, followed by half of the buttermilk, and repeat until all ingredients are combined. This technique assists in preventing the batter from becoming over-mixed.
6. **Bake the Cakes:** Divide the batter evenly among the prepared cake pans. Smooth the tops with a spatula, and place them in the oven. Bake for 25-30 minutes or until a toothpick inserted in the center comes out clean. Allow the cakes to cool in the pans for about 10 minutes, then remove them from the pans and cool completely on wire racks.
7. **Prepare the Frosting:** In a mixing bowl, beat the softened butter until creamy. Gradually add powdered sugar and mix on low speed. Once incorporated, increase the speed and add a splash of milk if needed, achieving a fluffy consistency.
8. **Layer and Frost the Cake:** Place one layer of cake on a serving platter and generously spread a layer of frosting over the top. Repeat this layer with the second cake and finish with the remaining frosting on the top and sides of the final layer.
9. **Make the Ganache:** In a small saucepan over medium heat, heat the heavy cream until just boiling. Remove from heat and pour over chocolate chips in a separate bowl. Let it sit for 1-2 minutes before stirring until smooth. Add food coloring to achieve desired pastel shades.
10. **Drip the Ganache:** Let the ganache cool slightly, then use a spoon or squeeze bottle to allow it to drip down the sides of the frosted cake, creating a beautiful splash of color. Be sure to work quickly before the ganache sets, ensuring an even drip effect.
11. **Decorate:** To finish, decorate the cake with additional frosting, sprinkles, or edible flowers. The presentation is just as important as the taste, so feel free to get creative!
Variations & Substitutions
Chocolate Drip Cake – For a twist, consider using a chocolate cake recipe instead of vanilla. This will add a depth of flavor, and you can use dark chocolate ganache for the drip, creating a luxurious chocolate experience. If you have chocolate lovers in your circle, they will appreciate this variation even more!
Fruit-infused Cake – Incorporate fresh fruits into the batter for a refreshing twist. Blueberries, raspberries, or chopped strawberries work wonderfully. Make sure to adjust the sugar levels slightly if using very sweet fruits, keeping balance in mind.
Gluten-Free Version – Simply swap the all-purpose flour with a gluten-free blend. Many available mixes can easily replace regular flour, but do check that your baking powder is also gluten-free. Follow the same steps, and you’ll have a delicious cake that everyone can enjoy!
Vegan Option – Replace the eggs with flaxseed meal or a commercial egg substitute, and use plant-based butter and almond milk. This version will provide a delightful cake suitable for those following a vegan lifestyle while still allowing for delightful flavor!
Common Mistakes to Avoid
Baking can often lead to unexpected mishaps, so it’s essential to be aware of common mistakes. One prevalent error is overmixing the batter, which can lead to a dense texture. Remember, mixing should only be done until no dry ingredients are visible; a few lumps are okay!
Another mistake can be improperly estimating your baking time. Every oven is different. It’s best to use a toothpick test to check for doneness rather than relying solely on time. If your cakes are baking unevenly, make sure your oven rack is set in the center and not too close to the heating elements at the top or bottom.
Sometimes, achieving the perfect ganache can be tricky. If the ganache is too thin, it may not drip properly; if too thick, you’ll struggle to achieve a smooth pour. Letting it cool to the perfect temperature is essential for that ideal drip effect!
Storage, Freezing & Reheating Tips
Proper storage is crucial for keeping your Pastel Drip Cake fresh and delicious. If not consumed right away, place the cake in an airtight container at room temperature for up to three days. If you need to store it longer, consider refrigerating it. Cover the cake with plastic wrap to prevent it from drying out.
For freezing, ensure the cake is completely cool before wrapping it tightly in plastic wrap and aluminum foil. This method will help maintain moisture and texture. You can freeze the cake for up to three months. To thaw, place it in the refrigerator overnight before serving.
Reheating is generally not necessary for cakes, but if you prefer a warm slice, consider microwaving it for a few seconds. Always keep frosting and ganache in mind since they may lose their texture when reheated. It’s best to serve your cake cold or at room temperature for optimal taste.
Frequently Asked Questions
Can I make this cake ahead of time?
Yes, you can make the cake layers ahead of time. They can be baked and stored in the refrigerator for up to 3 days or frozen for future use. Just make sure to wrap them tightly.
What if my cake is too dry?
Dry cakes often result from overbaking or not using enough moisture. Ensure that you keep an eye on the baking time and conduct the toothpick test to avoid dryness. Also, consider adding a simple syrup to the layers before frosting for extra moisture.
Can I make a gluten-free version of this cake?
Absolutely! Swap out the all-purpose flour for a 1:1 gluten-free flour blend. Check that other ingredients, like baking powder, are gluten-free. Follow the same instructions as outlined, and you’ll have a gluten-free delight.
How can I make the cake more festive?
Add sprinkles, edible glitter, or fresh fruit to elevate your cake’s appearance. You can also incorporate layers of different colors and flavors for a fun surprise.
What should I do if my ganache doesn’t drip correctly?
If you find that your ganache is not the right consistency, adjust the amount of cream or chocolate. Remember to let it cool slightly before applying, as temperature greatly affects its viscosity.
Conclusion:
In summary, the Spring Cake Designs: Pastel Drip Cake (Easy Look) offers a delightful balance of flavors, aesthetics, and ease of preparation. It stands out as a crowd-pleaser for various occasions, making it an excellent choice for any baker, beginner or experienced. I encourage you to try this beautiful recipe at home, customize it to your taste, and share it with friends and family. Let the colorful drips and layers inspire your creativity, and watch as your loved ones’ faces light up with joy! Embrace the joy of baking, and let today be the day you create your masterpiece!


