Prep time: 30 minutes
Cook time: 25 minutes
Total time: 1 hour 15 minutes
Servings: 12
There’s something absolutely delightful about the arrival of spring, and when you combine that joy with the sweetness of strawberries, you get a cake that sings of sunshine and celebration. The Spring Birthday Cake: Strawberry Layer Cake (Spring Style) is not just a dessert; it’s an experience, a memory in the making. Imagine biting into soft, fluffy layers of cake lovingly filled with a rich strawberry frosting, adorned with fresh strawberries on top. This cake is perfect for birthdays, spring gatherings, or simply those bright days when you crave something deliciously refreshing.
What makes this cake truly special is not just its enchanting flavor but also its vibrant colors, which make it a show-stopping centerpiece at any table. In this recipe, you’ll discover how relatively easy it is to create a stunning layered cake that impresses both friends and family. Whether you’re a seasoned baker or a novice in the kitchen, each part of this recipe is manageable and designed to build your confidence.
The following sections will guide you through the step-by-step process of creating this cake, highlight tips to achieve excellent results, provide variations for personalization, and even answer common questions you might have. I promise you will fall in love with every bite of this delectable dessert.
What Is Spring Birthday Cake: Strawberry Layer Cake (Spring Style)?
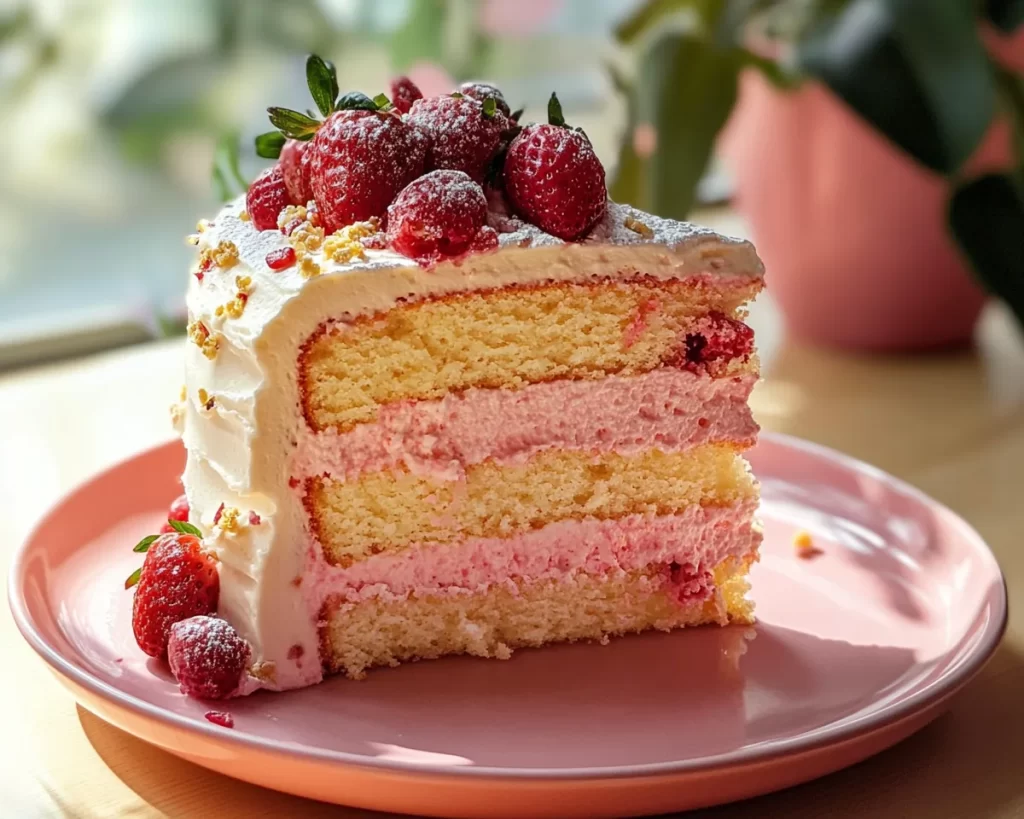
The Spring Birthday Cake: Strawberry Layer Cake is a modern twist on the classic strawberry shortcake, effortlessly blending layers of fluffy vanilla cake with a luscious strawberry cream filling. The origin of layered cakes dates back to European royal celebrations, but this version embodies the fresh essence of spring with its vibrant colors and flavors. The cake is moist and light, with a delicate crumb that melts in your mouth, while the strawberries provide a naturally sweet and tangy contrast, making each slice feel like a bite of spring itself.
This cake is often enhanced with whipped cream or a rich buttercream frosting that highlights the fruit’s inherent sweetness. The aroma that fills your kitchen as the cake bakes is intoxicating, reminiscent of leisurely afternoons spent in the garden. This cake is not just a treat for the taste buds but also for the eyes, looking stunningly beautiful when garnished with fresh strawberries on top. It’s a perfect dessert to celebrate special occasions, but it’s also a wonderful way to indulge yourself on a sunny day.
Why You’ll Love This
You’ll undoubtedly fall in love with the Spring Birthday Cake for various reasons. First and foremost, the taste is truly extraordinary; the balance of sweet strawberry and fluffy cake captures the essence of spring. Additionally, this recipe is surprisingly easy, making it accessible for both beginners and more experienced bakers. You can create an impressive dessert without spending countless hours in the kitchen.
Cost is another factor that adds to this cake’s appeal. Utilizing fresh strawberries, which are often abundant and relatively inexpensive during spring, makes for an affordable delight that won’t break the bank. It’s a versatile recipe that lends itself to various dietary needs; you can even modify it to be gluten-free or dairy-free without sacrificing flavor.
A common misconception surrounding layered cakes is that they require specialized skills or equipment. With this recipe, you can easily overcome that barrier. By focusing on simple techniques and quality ingredients, you’ll achieve a stunning cake that rivals those from your favorite bakery. Each bite promises to deliver a sense of satisfaction and joy, making every occasion—be it a birthday or a simple Sunday afternoon—worth celebrating.
Ingredients You’ll Need
To create the Spring Birthday Cake: Strawberry Layer Cake, you’ll need the following ingredients:
- 2 ½ cups all-purpose flour: This forms the cake’s structure, providing a soft and tender crumb.
- 1 tablespoon baking powder: Acts as a leavening agent to help the cake rise and achieve a light texture.
- ½ teaspoon baking soda: Works in conjunction with baking powder for optimal rising.
- 1 teaspoon salt: Balances flavors and enhances the sweetness of the cake.
- 1 cup unsalted butter: Must be at room temperature for easy creaming with sugar, contributing to the cake’s richness.
- 2 cups granulated sugar: This creates sweetness and contributes to the cake’s structure.
- 4 large eggs: Eggs are crucial for binding the ingredients together and creating a light texture.
- 1 tablespoon vanilla extract: Adds depth of flavor—don’t skip on quality!
- 1 cup buttermilk: Contributes moisture and flavor, helping maintain the cake’s tenderness.
- 2 cups fresh strawberries: Provides natural sweetness; use ripe, juicy strawberries for the best flavor.
- 2 cups heavy whipping cream: Essential for the frosting, creating a light and airy finish.
- ½ cup powdered sugar: Adds sweetness to the frosting and helps thicken it.
- Fresh strawberries for garnish: Use whole or halved strawberries to adorn your lovely creation.
Knowing your ingredients is crucial for a successful bake. If you’re looking for substitutions, you can easily replace all-purpose flour with a gluten-free flour blend, or swap out buttermilk for a dairy-free version using almond or soy milk with a splash of vinegar. Each ingredient has a role to play, contributing to that final heavenly experience.
How to Make
Making the Spring Birthday Cake: Strawberry Layer Cake involves several steps, but each is straightforward. Follow these directions carefully for a successful outcome.
- Preheat your oven: Preheat your oven to 350°F (175°C). This is crucial for proper baking, as a pre-heated oven ensures that the cake rises correctly and evenly. While your oven warms up, you can work on preparing your cake batter.
- Prepare the cake pans: Grease and flour three 9-inch round cake pans. This will prevent the cakes from sticking once baked. You can also line the bottoms with parchment paper for added insurance. It’s a simple step that makes a world of difference when it comes to the beautiful look of your finished cake.
- Mix dry ingredients: In a medium bowl, sift together the flour, baking powder, baking soda, and salt. This aerates the flour and ensures an even distribution of the leavening agents. Set this mixture aside while you prepare the other ingredients.
- Cream butter and sugar: In a large mixing bowl, beat the butter and granulated sugar until light and fluffy, about 4-5 minutes. Creaming is critical as it incorporates air into the mixture, which helps to produce a light texture in your cake. Use an electric mixer for best results.
- Add eggs one by one: Add the eggs one at a time, mixing well after each addition. Eggs are fundamental for providing structure and moisture to the cake. You should see the mixture become smooth and creamy at this point.
- Stir in vanilla: Mix in the vanilla extract, ensuring an even distribution throughout the batter. Vanilla adds a depth of flavor that complements the sweetness and the strawberries.
- Combine wet and dry mixtures: Gradually add the flour mixture to the butter and sugar mixture, alternating with the buttermilk, starting and ending with the flour. This method prevents the batter from becoming too heavy and helps create a tender crumb. Mix until just combined; over-mixing can lead to a dense cake.
- Divide batter: Evenly divide the batter among the prepared cake pans. A kitchen scale can be immensely helpful here, ensuring even layers that bake uniformly. Spread the batter out to the edges to promote even rising.
- Bake the cakes: Place the pans in the oven and bake for 25-30 minutes or until a toothpick inserted into the center comes out clean. Baking times may vary based on your oven, so keep an eye on them to avoid overbaking.
- Cool the layers: Once baked, remove the cakes from the oven and allow them to cool in the pans for about 10 minutes. Then, gently transfer them to a wire rack to cool completely. This step is vital as removing them too soon can cause the cakes to break apart.
- Prepare the strawberry filling: While the cakes cool, wash and slice the strawberries for the filling. You can choose to mash them slightly for a more flavorful filling, adding a touch of sugar to enhance their sweetness.
- Make the frosting: In a chilled bowl, whip the heavy cream and powdered sugar together until soft peaks form. Be cautious not to overwhip, or you might end up with butter. The frosting should be fluffy yet stable enough to hold its shape.
- Layer the cakes: Once the cakes are completely cool, place one layer on a serving plate and spread a generous amount of frosting on top, followed by a layer of sliced strawberries. Repeat this process for the second layer. Place the final cake layer on top.
- Frost the cake: Spread the remaining frosting evenly over the top and sides of the cake. Feel free to achieve a rustic look or smooth it out for a more finished appearance. Decorate with additional halved strawberries on top for an eye-catching presentation.
- Chill and serve: Chill the cake in the refrigerator for about 30 minutes to allow the frosting to set. This makes for cleaner slices. Cut into slices and serve, enjoying the delightful flavors and textures of your creation.
Each step, while seemingly simple, builds upon the last to create a cake that is not only delicious but also visually stunning. The key is patience and careful attention to detail, so take your time, and enjoy the process!
Variations & Substitutions
Gluten-Free Strawberry Layer Cake: If you’re catering to gluten-sensitive friends or family, consider using a gluten-free flour blend in place of all-purpose flour. Many brands, such as Bob’s Red Mill or King Arthur, offer great all-purpose gluten-free options that yield similar results to standard flour. Just remember to check the baking instructions on the package, as different blends may absorb moisture differently, impacting the texture of your cake. You may also want to add a bit of xanthan gum, which can help achieve that perfect cake texture.
Dairy-Free Option: If you prefer a dairy-free cake, you can easily swap the butter for a dairy-free butter substitute and use almond or coconut milk instead of buttermilk. To make buttermilk dairy-free, simply add a tablespoon of vinegar to a cup of milk substitute and let it sit for 5-10 minutes. This will mimic the acidity needed for the recipe. While the flavor might change slightly, the freshness of the strawberries will shine through like never before.
Chocolate Strawberry Layer Cake: For a decadent twist, turn this delightful dessert into a chocolate strawberry layer cake. Replace a cup of flour with cocoa powder and add a teaspoon of instant coffee to enhance the chocolate flavor. The combination of chocolate cake and strawberries creates an irresistible harmony that confectionery lovers crave. This sumptuous variation is perfect for any chocolate lover’s birthday!
Less Sweet Version: If you prefer a cake that’s not overly sweet, reduce the sugar in the batter to 1 ½ cups and in the frosting, adjust powdered sugar to your taste, starting at ¼ cup. The natural flavor of the strawberries will be more pronounced, allowing you to enjoy the delightful balance of sweet and tart without overwhelming your palate.
Vegan Strawberry Layer Cake: For a completely vegan-friendly version, substitute the eggs for flaxseed meal (1 tablespoon of flaxseed meal combined with 2.5 tablespoons of water for each egg) or applesauce. You can also replace the icing sugar with a sweetener like maple syrup for a more delightful flavor. Ensure your butter substitute is vegan-friendly. The resulting cake will be light, fluffy, and perfect for anyone looking to avoid animal products.
Feel free to experiment with these variations—cooking is all about enjoying the experience and making it your own!
Common Mistakes to Avoid
One common mistake is overly mixing your batter. When it comes to cake batters, mix until just combined to avoid a dense cake. Over-mixing can develop the gluten in the flour too much, leading to toughness rather than tenderness. It’s a critical step to make sure you’re mixing just enough to incorporate all the ingredients.
Another frequent error involves not using room temperature ingredients. When butter and eggs are at room temperature, they blend better, incorporating air that gives your cake its light texture. If they are too cold, it can lead to a lumpy batter and uneven baking.
Don’t underestimate the importance of checking that your ovens are at the correct temperature. An oven thermometer can be a helpful tool here. Baking times can vary significantly depending on your oven, and the last thing you want is an overbaked cake.
Lastly, don’t forget to let your cake layers cool completely before frosting. Attempting to frost a warm cake can result in a melty mess and ruin the aesthetic of your beautiful creation. Achieving this makes a world of difference in presentation.
Storage, Freezing & Reheating Tips
To store your Spring Birthday Cake, place it in an airtight container in the refrigerator for up to 4 days. This will keep it fresh and moist while preserving its flavors. If you want to store it for a longer period, consider freezing it. Wrap the entire cake securely in plastic wrap, followed by aluminum foil to prevent freezer burn. It can be frozen for up to 2 months.
When you’re ready to enjoy, let the cake thaw in the refrigerator overnight, allowing it to regain moisture. If the frosting softens too much during freeze-thaw, you can whip it up again for a fresh appearance and texture.
For food safety, always ensure that perishable components, such as whipped cream and fresh fruit, are stored correctly. If you’ve added strawberries on top, the cake should ideally be consumed within 2 days to avoid spoilage.
Frequently Asked Questions
Can I make this cake in advance?
Absolutely! This cake can be made a day in advance. Once assembled, just keep it refrigerated until it’s time to serve. This can even help enhance the flavors as they meld together overnight!
What if I don’t have buttermilk?
If you’re out of buttermilk, you can easily create a substitute by adding a tablespoon of vinegar or lemon juice to a cup of milk (dairy or plant-based). Let it sit for 5-10 minutes until it thickens slightly. This will give you that tang needed for the cake.
Can I use frozen strawberries instead of fresh ones?
While fresh strawberries are preferred for their vibrant flavor and texture, you can use frozen if necessary. Just be sure to thaw and drain them first to remove excess moisture, which prevents the cake filling from becoming soggy.
How do I prevent my cake from collapsing?
Ensure that your ingredients are fresh and correctly measured. Also, don’t open the oven door frequently while baking; this can cause sudden temperature changes that make the structure of your cake weak.
Can I use a different type of frosting?
Certainly! While this cake pairs well with whipped cream frosting, you can opt for cream cheese frosting or a simple ganache for a richer flavor. Each option will provide a delightful contrast to the strawberries.
Conclusion:
The Spring Birthday Cake: Strawberry Layer Cake is a beacon of springtime joy that celebrates the wonderful flavors of this season. With its layers of soft cake and luscious strawberries, it’s not just a dessert, but a reason to gather and celebrate life’s sweetest moments. Whether you choose to stick closely to the recipe or infuse your unique touch, this cake will surely be a hit with friends and family. I encourage you to try it, get creative with variations, and let the deliciousness inspire more delightful baking adventures. Share your successes, because every slice carries a story. So don’t wait—gather your ingredients and make this beautiful cake today!