Prep time: 15 minutes
Cook time: 30 minutes
Total time: 45 minutes
Servings: 4
Spring Desserts: Strawberry Vanilla Custard Cups in 7 Steps are a delightful way to celebrate the season’s freshness. Imagine creamy, rich custard enveloped in the sweet flavor of ripe strawberries, creating a dessert that is both elegant and easy to prepare. These cups are not only eye-catching with their vibrant colors but also exude a flavor profile that perfectly balances sweetness and creaminess. Whether you’re entertaining guests or treating yourself, these custard cups will surely leave everyone wanting more.
What Is Spring Desserts: Strawberry Vanilla Custard Cups in 7 Steps?
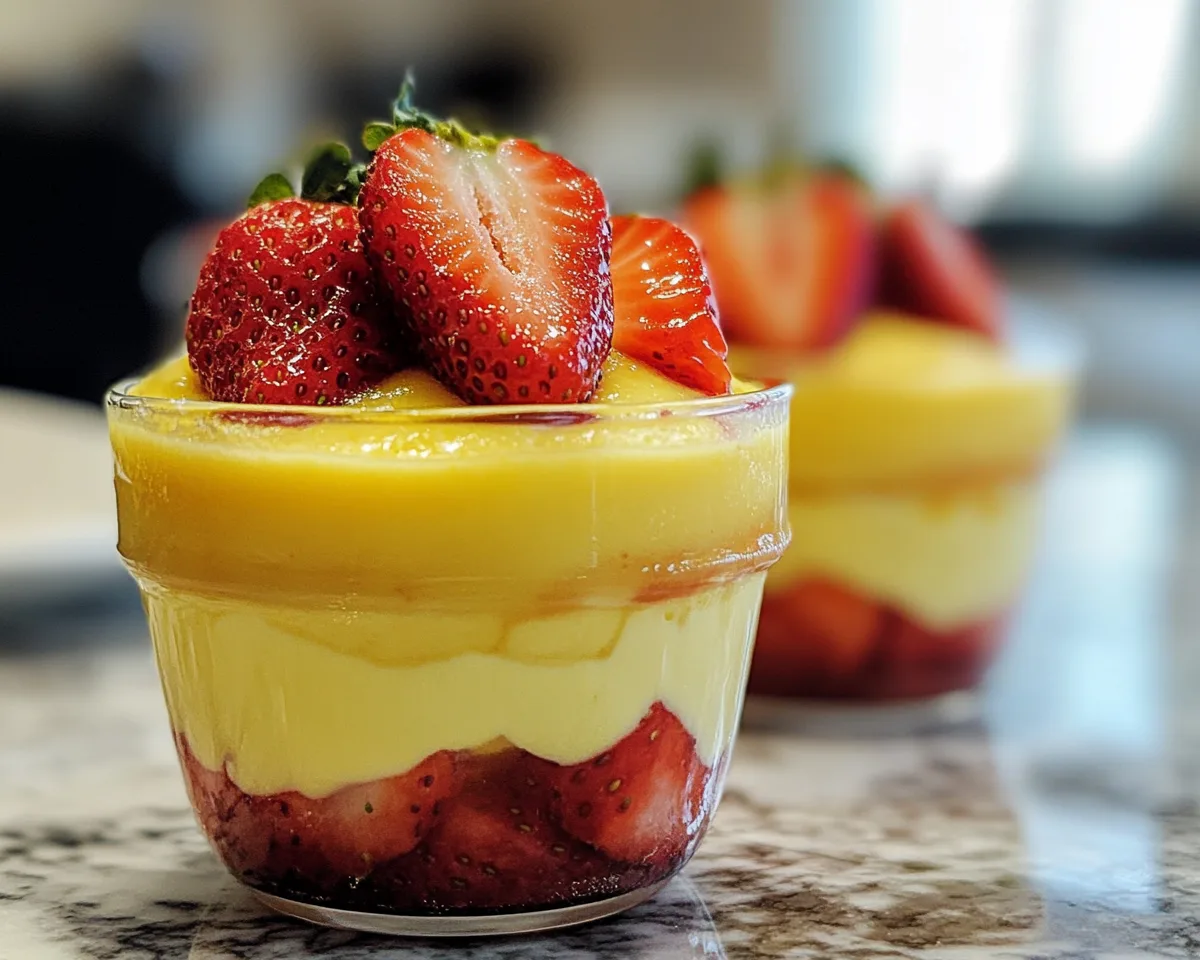
Spring Desserts: Strawberry Vanilla Custard Cups are a luscious combination of silky vanilla custard layered with fresh strawberries. This dessert is perfect for showcasing seasonal fruits and makes for a beautiful presentation. The custard is made from simple ingredients and is baked to form a smooth texture that complements the juicy strawberries. It’s an ideal treat for all occasions — whether it’s a family gathering, a picnic, or simply an after-dinner delight.
Why You’ll Love This
You’ll love these Strawberry Vanilla Custard Cups for their versatility and rich flavors. The recipe is straightforward, making it suitable for *busy parents* or *kitchen beginners*. The fresh strawberries enhance the custard’s flavor, and you can customize your cups with various toppings or by using different fruits. Additionally, these custard cups are easy on the budget, ensuring you can create a stunning dessert without breaking the bank. Their lightness makes them perfect for springtime gatherings, and you’ll appreciate how they can be made ahead of time, allowing you to spend more time enjoying the company of your loved ones.
Ingredients You’ll Need
- 2 cups fresh strawberries: These bring sweetness and a burst of color to your custard cups. Look for ripe, juicy berries for the best flavor.
- 1 cup whole milk: This forms the base of the custard, contributing to its creamy texture. Whole milk offers richness that low-fat or skim options may lack.
- 2 large eggs: Essential for setting the custard, eggs provide the necessary structure while also adding a silky richness.
- ½ cup granulated sugar: This sweetener balances the tartness of the strawberries and enriches the custard’s flavor.
- 1 teaspoon vanilla extract: An important flavor enhancer, vanilla complements the strawberries and adds depth to the custard.
- 1 tablespoon cornstarch: This thickener ensures your custard has the perfect consistency without being overly thick or thin.
- Pinch of salt: A small amount of salt enhances the flavors of the sweet ingredients.
How to Make
- Preheat your oven to 325°F (163°C). Preheating is crucial as it ensures that your custard bakes evenly, resulting in a smooth texture.
- In a medium saucepan, combine the milk, sugar, and a pinch of salt. Heat the mixture over medium heat until it’s just about to boil, stirring occasionally to prevent burning.
- While the milk mixture is heating, whisk together the eggs and cornstarch in a separate bowl. Gradually add a small amount of the hot milk mixture to the egg mixture, whisking constantly to temper the eggs and prevent them from scrambling.
- Slowly pour the egg mixture back into the saucepan with the remaining milk. Continue stirring over low heat until the mixture thickens, which should take about 5-7 minutes. You’ll know it’s done when it coats the back of a spoon.
- Remove the custard from heat and stir in the vanilla extract. This adds a warm, inviting aroma to your dessert.
- Pour the custard into individual cups or ramekins and let it cool slightly. Once cooled, place them in the refrigerator for at least 2 hours to set fully.
- Just before serving, layer the custard with chopped fresh strawberries. You can also sprinkle some additional sugar or a dash of mint for garnish.
Variations & Substitutions
Chocolate Custard Variation: For a rich chocolate twist, add 1/2 cup of melted dark chocolate to the milk mixture. This variation transforms your strawberry custard into a decadent chocolate dessert, pairing beautifully with the strawberries. The combination of chocolate and strawberry is timeless and loved by many.
Berry Medley Substitute: Swap out strawberries for a mix of your favorite berries, such as blueberries, raspberries, or blackberries. This not only enhances the flavor but also adds visual appeal. The mixed berries will add a tangy element to the custard, making it even more refreshing.
Mango and Coconut Twist: Incorporate fresh mango puree into the custard mixture or add coconut milk in place of half the whole milk. This tropical variation offers a fresh and exciting flavor profile. The sweetness of mango perfectly balances with the creaminess of the coconut, creating an exotic dessert.
Common Mistakes to Avoid
Incorrect Oven Temperature: Baking your custard at too high of a temperature can cause it to curdle. Be sure to monitor your oven and use an oven thermometer if necessary to maintain the correct temperature.
Not Properly Tempering the Eggs: Adding hot liquid too quickly to the egg mixture can result in scrambled eggs. Always add a little hot mixture slowly to the eggs first, whisking vigorously, before combining the two.
Skipping the Cooling Time: Allowing the custard to cool slowly is essential for proper setting. If you skip this step, your custard may not achieve the creamy, silk-like consistency expected. Patience is key here.
Storage, Freezing & Reheating Tips
To store your custard cups, keep them covered in the refrigerator for up to 3 days. Covering them helps to avoid absorbing any refrigerator odors. If you notice any condensation on the lid, gently dab it with a paper towel to avoid droplets falling into your custard.
If you want to freeze the custard, it’s best to do so before adding fresh fruit. Store the custard in an airtight container and consume it within 2 months for optimal flavor. When you want to enjoy it again, thaw in the refrigerator overnight and then layer with fresh strawberries before serving.
When reheating, do so gently in the microwave, starting with low power and checking frequently to prevent overheating, which can cause a change in texture.
Frequently Asked Questions
Can I use frozen strawberries for this recipe?
Yes, you can use frozen strawberries, but keep in mind that they may have a softer texture once thawed. For the best flavor, allow them to thaw in the refrigerator and drain excess moisture before layering them on your custard. This helps maintain the custard’s consistency.
How can I make this dessert dairy-free?
You can substitute whole milk with almond milk or coconut milk, and use a non-dairy cream for a richer flavor. Ensure that the other ingredients are also dairy-free. This way, you can still enjoy the delicious custard without dairy.
What can I serve with the custard cups?
These custard cups are delightful on their own but can be served alongside whipped cream, crushed graham crackers, or even a scoop of vanilla ice cream for an indulgent treat. You can also drizzle chocolate or caramel sauce for added flavor.
What should I do if my custard doesn’t thicken?
If your custard doesn’t thicken, it may need a bit more time over the heat. Continue to stir over low heat, taking care not to let it boil. Alternatively, you can mix a small amount of cornstarch with cold water in a separate bowl until smooth and gradually add it to your custard, heating until thickened.
Can I make this dessert ahead of time?
Absolutely! These custard cups can be made a day in advance and stored in the refrigerator. Just layer with strawberries right before serving to ensure they stay fresh and vibrant. This makes it an ideal dessert for gatherings where you want to minimize last-minute preparations.
Conclusion: Strawberry Vanilla Custard Cups in 7 Steps are a wonderful addition to your spring dessert repertoire. With their bright colors, smooth texture, and delightful flavors, they embody the essence of the season. Your friends and family will adore this simple yet impressive treat, making it a go-to recipe for any occasion. Enjoy your culinary adventure!