Let’s Get Real
Oh, Easter. The time of year when we pretend that we enjoy egg hunts more than the chocolate bunnies, when pastel colors somehow become fashionable, and when my inner child rejoices at the thought of all the sugar that I can possibly consume without judgment—because we’re celebrating, right? This year, instead of drowning my sorrows in a basket of chocolates like I might have done in my youth, I’ve decided to up my dessert game with an Easter Poke Cake. Trust me: this is no ordinary cake. It’s got layers of fun, nostalgia, and a touch of whimsy that takes me straight back to family potlucks when my Aunt Linda was determined to one-up everyone with her desserts. And spoiler alert: she never did!
But I must confess: I used to absolutely detest poke cakes—probably because the name itself made it sound like you were supposed to do something awkward to it rather than eat it. The concept, involving poking holes in a cake, felt bizarre to my kid-self. Now, I realize that those little holes are vessels of flavor just waiting to be filled with gooey goodness, and my heart (and taste buds) have since embraced it. So, if you’re curious about how to master this beauty, I’m here to take you through every step, misstep, and delightful flavor explosion that comes with crafting your very own Easter Poke Cake.
Ingredients, Unfiltered
What’s Really in Easter Poke Cake
Let’s not beat around the bush—this cake is a sweet symphony of flavors and textures. Here’s what you’ll need to get started on this pastel paradise:
Boxed Cake Mix: The lazy foodie’s best friend. Don’t let anyone tell you it’s not acceptable—it totally is! You can use vanilla or yellow cake, or even a lemon-flavored one for a bright twist. I usually go for vanilla because it lets the rest of the toppings do the talking.
Eggs: Because apparently, they’re necessary for everything, and Easter wouldn’t feel right without them—unless you’re going for that vegan vibe, in which case, I salute you! If you can find the eggs with the most vibrant yolks, it adds a nice touch to the color palette.
Water and Oil: Basic, but absolutely necessary. Who knew that water would make such a difference? That’s right, it hydrates the cake so it doesn’t crumble apart into a sad pile of crumbs! And oil? Well, it makes everything moist (and yes, I’m rolling my eyes at the word “moist” just like you are).
Sweetened Condensed Milk: Ah, the ambrosia of cakes. It transforms the average cake into a culinary masterpiece. It’s like giving your cake a sugar-loving hug that it never knew it needed. I mean, it’s sweet milk—how can that be bad?
Whipped Topping: Because we’re not trying to win the “healthiest dessert” competition here, right? If you’re feeling fancy, use the real stuff; otherwise, the Cool Whip is perfectly acceptable. Who am I to judge?
Gelatin (flavor of your choice): This is what gives our cake that gorgeous, vibrant color and fruity flavor that leaves people guessing. You can go wild with whatever flavor you want—jello is basically a free-for-all!
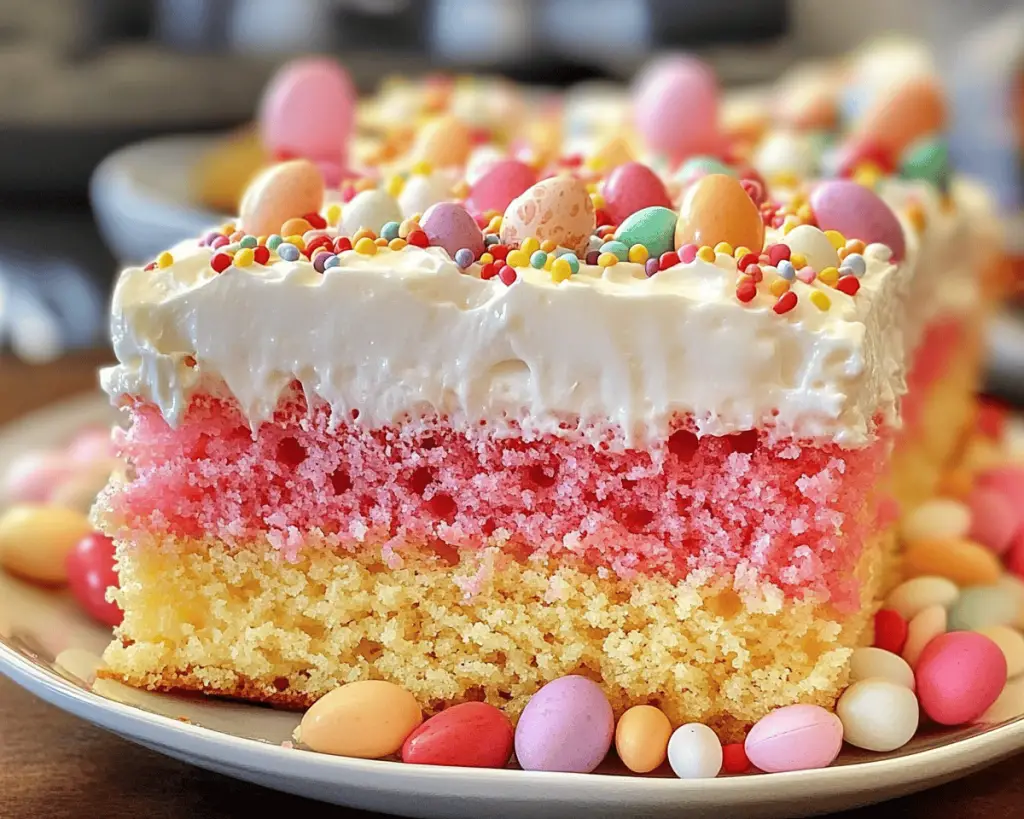
Decorative Candies: This is where it gets fun! Think colorful sprinkles, mini chocolate eggs, or pastel M&Ms. You want your cake looking like it jumped straight out of a springtime candy explosion.
Let’s Talk Health (or Not)
Is This Even Healthy? Let’s Discuss
Listen, if you’re looking for a health food blog, you’ve accidentally crashed into the wrong one. Is this cake the “healthy option”? LOL, absolutely not. But you know what? Sometimes health takes a backseat, and sugar takes the wheel. Sure, there’s a hefty dose of sugar, condensed milk, and whipped topping, and yes—I sleep just fine at night. This cake is a celebration of indulgence, whimsy, and more sugar than you’d want to admit. So go ahead, embrace the chaos! You can always tell yourself you’ll work it off when Easter rolls around next year.
Your Grocery List
Here’s What You’ll Need
– 1 box of vanilla or yellow cake mix (plus the ingredients as directed on the box: 3 large eggs, 1 cup of water, and ½ cup of vegetable oil).
– 1 cup of sweetened condensed milk (you can find this in any baking aisle—don’t judge me).
– 1 package (3 oz) of flavored gelatin (like strawberry or lime, depending on your fancy).
– 1 cup of whipped topping (do what feels right—fancy cream or Cool Whip).
– Candy decorations (sprinkles, chocolate eggs, etc., and I recommend getting extra because they’re delicious).
– Optional: some fruit for garnish (if you’re feeling healthy, which we know you’re not, but whatever).
The Actual Cooking Part
Okay, Let’s Make This
1. **Bake the Cake**: Let’s start by preheating that oven to 350°F (or 325°F if you’re using a dark pan). While it warms up, prepare your cake mix according to the box instructions. Mix like your life depends on it—this is not the time for half-hearted stirring. Toss in those eggs, water, and oil until it’s smooth as a baby’s bottom.
2. **Poke It Up**: Pour that glorious batter into a greased 9×13 inch baking dish. Bake according to box directions (usually about 25-30 minutes), but keep an eye on it. You definitely don’t want to take home “burned cake” this Easter! Also, I may have burned a cake once or twice. Let’s not talk about it.
3. **Holes, Holes, and More Holes**: Once your cake has baked to golden perfection, take it out of the oven and allow it to cool for about 15 minutes. Then, grab a sturdy wooden spoon or even a chopstick (who knew you’d be using your takeout utensils for such a noble cause?) and poke holes all over that cake! Aim for about 20 holes, but don’t get too meticulous—this is a fun cake, after all!
4. **The Milky Way**: Time to pour that luscious sweetened condensed milk over the holes. Go ahead, watch it sink in—it’s like magic. And don’t spare the details here; drizzle the entire cup over the cake—be generous! The cake is thirsty, and we need to quench it.
5. **Gelatin Rain**: Next, mix the gelatin according to the packet instructions. If you’re wondering why I’m telling you to do this, just trust the process. Once it’s mixed, pour it all over the cake. This vibrant liquid will seep into those holes and turn this cake from “meh” to “HOLY COW.”
6. **Chill and Chill Out**: Now, cover your cake with plastic wrap (Seriously, no plates were harmed in the making of this cake) and throw it into the fridge for at least 4 hours, but overnight is even better. My advice? Make it at night and let it work its magic while you sit on the couch in sweatpants contemplating how you’ve neglected your social life.
7. **Topping Off the Fun**: When you’re ready to serve this sugary masterpiece, slather the whipped topping over the top (yes, all of it) and go wild with toppings. This is where you can channel your inner artist! Sprinkles, chocolate eggs, maybe even some spring-themed peeps if you’re feeling it—just remember, less is not more in this case—go all out!
8. **Slice and Celebrate**: Cut it into generous squares and serve it at your Easter gathering where friends and family will be confused yet intrigued. “What is this beauty?” they will ask, while you’re casually shouting, “It’s a poke cake, people! Welcome to the future!”
Side Notes & Sassy Hacks
Bonus Tips You Didn’t Ask For
– **Substitutions**: If you want to lighten it up a bit (which, again, might be a bit counterintuitive), you could swap the sweetened condensed milk for something like a flavored yogurt. But honestly, who are we kidding? We want the condensed milk here.
– **Shortcuts**: Wanna make this even easier? You can use a store-bought cake if you’re feeling lazy. Life’s too short to spend all day in the kitchen—sometimes shortcuts lead to delicious exits!
– **Decorating Chaos**: I’ll let you in on a secret: my decorating skills might resemble a toddler on a sugar high, and that’s OK! There are days I want it to look Pinterest-perfect, and other days, I just want something that resembles dessert. Lean into it!
– **Make it a Theme**: Depending on the season, you can switch out the gelatin and toppings to make this a year-round cake. Halloween? Black and orange jello with gummy worms. Christmas? Red and green gelatin with crushed peppermint sweets. The possibilities are endless!
Final Words of (Culinary) Wisdom
Now that you’ve made it through this whirlwind of a recipe, you’re armed with the knowledge to impress your family and friends this Easter. You can whip up this Easter Poke Cake and revel in the magic of the moment when they first try it. If you do make it, please tag me in your glorious poke cake photos, or just send me a mental high-five! Remember, cooking should be fun, chaotic, and downright delicious. So whether you end up with a Pinterest-perfect cake or an abstract art piece that *might* need a little work, own it! Enjoy the sugar highs, the family gatherings, and maybe even an extra slice or two for yourself. Happy baking, my friends!


