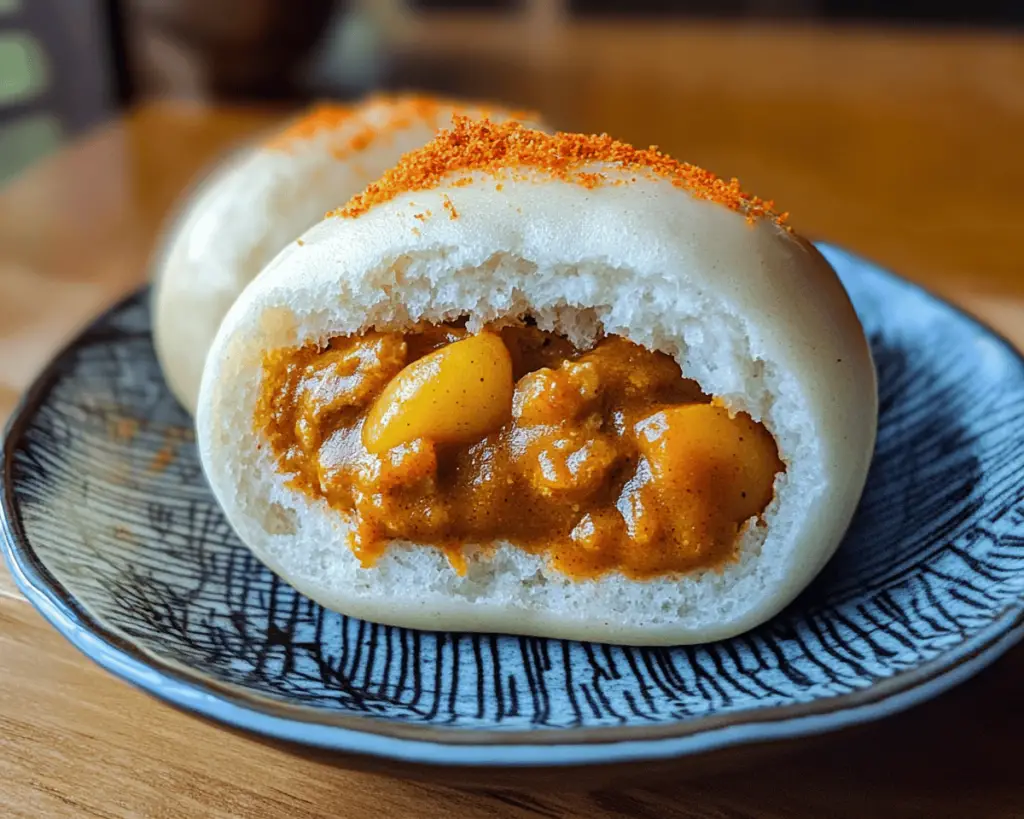
It’s a brisk Saturday morning in my kitchen, the kind that calls for bright sunlight streaming through the window and a little warmth from the oven to chase away the chill. My family—each of us snug in our pajamas—can smell the scent of frying dough wafting through the air. It’s the scent that transports me back to the streets of Osaka, where the local bakeries sell the most delightful Japanese curry buns, or katsu curry buns. I recall the first time I tasted one on a trip to Japan; the moment the crunchy exterior cracked open, revealing a luscious, aromatic filling, it felt like a little piece of joy burst forth with it.
Today, I am not merely replicating that experience; I’m inviting my family into the process, turning it into a cherished tradition. A pot of flavorful curry simmers on the stove, filling the house with warmth and homeliness. Each step in creating these curry buns connects me not just with delicious food, but with the essence of family and culture.
As I set about making these savory delights, I can’t help but reflect on the importance of cooking in our lives. Food has a way of tethering us to memories—of family gatherings, of travels taken, and of the people we love. The act of cooking these curry buns is, for me, a simple yet profound expression of love and togetherness.
Inside the Ingredients of Japanese Curry Bun
Let me take you into the heart of these curry buns by explaining the role of each ingredient that coalesces to create this wonderful dish.
All-purpose flour: The backbone of the dough. I find that a good all-purpose flour helps create a light, airy texture whilst maintaining that essential ability to crisp up nicely in hot oil. In a pinch, you can use bread flour, but the buns will have a slightly chewier texture—a great option, too, depending on your preference.
Instant yeast: This miniature miracle worker brings the dough to life. I remember the first time I experimented with yeast; I was mesmerized watching it froth up in warm water. Instant yeast saves time since it doesn’t require proofing, but don’t skip ensuring it’s fresh—you want your buns to rise beautifully.
Milk: I usually use whole milk for its richness. Milk not only enriches the dough, making it tender and flavorful, but it also gives the crust a beautiful golden color when fried. Feel free to substitute with almond or oat milk if you prefer dairy-free options.
Egg: This serves as both a binding agent in the dough and as an ingredient in the egg wash that gives the buns a glossy finish. You can easily replace it with a flax or chia egg if you need a vegan-friendly version.
Curry powder: The star of the filling. While store-bought curry powder is convenient, I often find myself experimenting with blends. A Japanese curry mix can create a sweet, mild heat that offers comfort with a hint of complexity. Don’t be afraid to play around with spices like turmeric or garam masala; each iteration tells a new story.
Vegetables: Carrots and onions are my go-to for the curry filling. They caramelize beautifully, adding a natural sweetness that perfectly balances the spice. You can easily sneak in peas or potatoes based on what you have on hand, making this dish quite versatile.
Meat (or a protein substitute): Traditional curry buns often include ground meat, typically beef or pork. However, I’ve had fabulous results using chicken or even lentils for a vegetarian option. The filling should always have some protein to create a satisfying bite.
Breadcrumbs: Panko breadcrumbs bring that coveted crunch factor. They are lighter than regular breadcrumbs and toast up beautifully, giving that extra texture to each bite of the bun. In a pinch, crushed cornflakes or even crushed crackers can be effective substitutes.
Oil: A necessity for frying. I use a neutral oil, like vegetable or canola, which has a high smoke point, ensuring that the buns fry evenly without too much splatter.
Each ingredient plays a specific role, harmonizing to create a textural and flavor symphony. So, as we gather these components, I encourage you to be mindful—think of the flavors, the aromas, and the memories each one invites into your kitchen.
How Japanese Curry Bun Fits Into a Balanced Life
When it comes to indulging in something as delicious as a Japanese curry bun, I believe enjoyment and balance go hand in hand. These buns, while certainly a treat, can be a part of a well-rounded diet. Each component contributes its unique nutritional benefits, making this dish both satisfying and nourishing.
The all-purpose flour serves as a source of carbohydrates, providing the necessary fuel for our bodies. And while we may consider it “simple,” it offers sustenance that deeply connects to the essence of home cooking.
The curry filling is where we can truly shine. With the aromatic spice of curry powder, we’re adding not just flavor but also health benefits. Turmeric, a common ingredient in many curry blends, is known for its anti-inflammatory properties. Combined with the natural sweetness and crunch of vegetables like carrots and peas, we add essential vitamins and fiber to our meal.
When preparing the filling, I often take stock of what’s available in my fridge. Adding a mix of colorful vegetables not only makes the filling more appealing but also increases its nutritional value. A pop of green from peas or a sprinkle of spinach transforms the dish—not just visually, but health-wise.
For those of us mindful of diet, remember that a little indulgence can be part of living fully. While frying does add calories, I’ve found success in balancing frequency. On days that I whip up these delightful buns, I often serve them alongside a fresh salad or some pickled vegetables, offering a contrast of flavors and textures that round out the meal.
A crucial lesson I hold dear is to savor each bite. When I indulge in the crunchy exterior, I remember to appreciate the comfort of the curry filling and the effort that went into making it. Cooking these buns is not just about the end result—it’s about the heart and soul we pour into them.
What You’ll Need
Here’s a concise break-down of what you’ll need to create your own Japanese curry buns. This recipe yields about 12 buns, perfect for sharing:
– **Dough:**
– 3 cups all-purpose flour
– 2 teaspoons instant yeast
– 1 teaspoon salt
– ½ cup milk (warm)
– 1 large egg (lightly beaten)
– 2 tablespoons sugar
– 2 tablespoons unsalted butter (melted)
– **Filling:**
– 1 tablespoon vegetable oil
– 1 medium onion (finely chopped)
– 1 medium carrot (diced)
– 1 cup cooked meat (minced or cubed) or protein substitute
– 2 tablespoons curry powder
– Salt and pepper to taste
– Optional: peas, potatoes, or other vegetables
– **Coating:**
– 1 cup panko breadcrumbs
– Additional oil for frying
Grab your ingredients and let’s transform them into something truly special.
Preparing Japanese Curry Bun Step by Step
1. **Make the Dough:** In a large bowl, mix together the flour, instant yeast, and salt. In a separate bowl, whisk together the warm milk, beaten egg, sugar, and melted butter. Combine the wet and dry ingredients until a shaggy dough forms, then knead on a clean surface for about 10 minutes. You’re looking for a smooth and elastic texture. A little extra elbow grease goes a long way here!
2. **First Rise:** Lightly grease a bowl and place the dough inside, covering it with a damp kitchen towel or plastic wrap. Allow it to rise in a warm spot for about an hour, or until it has doubled in size. I find that feeling the dough expand beneath my fingers is a little miracle in its own right.
3. **Prepare the Filling:** While the dough is rising, heat the oil in a skillet over medium heat. Sauté the onions until translucent and fragrant, about 5 minutes. Add in the carrots and any other vegetables, cooking until they’ve softened. If you’re adding cooked meat, throw that in next, followed by the curry powder, salt, and pepper. Cook for another 2–3 minutes until everything is well coated. Allow the filling to cool before using.
4. **Shape the Buns:** Once your dough has risen, punch it down gently to release the air. Divide the dough into 12 equal pieces and shape each piece into a ball. Flatten each ball into a disc, adding a spoonful of the cooled filling in the center. Fold the edges over and pinch to seal it tightly, ensuring that the filling stays inside.
5. **Second Rise:** Place the filled buns seam-side down on a parchment-lined baking tray. Cover them again and let them rise for another 30 minutes. This is the moment when anticipation peaks for me; we’re almost there!
6. **Coat the Buns:** Set up a dredging station: place the panko breadcrumbs on a plate. In a small bowl, beat the remaining egg and set it aside. Once the buns have risen, dip each one first in the egg wash, then in the panko, ensuring each is well coated. The layer of breadcrumbs will provide the distinctive crunch.
7. **Fry the Buns:** In a deep pot or a heavy skillet, heat oil over medium-high heat. You can test the oil with a small piece of leftover dough; if it sizzles upon hitting the oil, it’s ready for frying. Fry each bun, a few at a time, for about 3-4 minutes per side until they’re golden brown. Remember to keep an eye on the temperature; if the oil is too hot, the buns will darken before they’re fully cooked inside.
8. **Drain and Serve:** Once fried, transfer the buns to a plate lined with paper towels to absorb any excess oil. Allow them to cool slightly before biting into them. They’re best enjoyed warm, when that filling is still steaming.
Lessons from My Kitchen
Throughout my culinary journey with these Japanese curry buns, I have encountered many lessons, some joyful and others more perplexing. I distinctly remember one particular attempt when I miscalculated the rise time, nearly leaving my dough forgotten on the counter for hours. When I finally returned, the dough had expanded to a comical size, threatening to take over my kitchen! Yet, instead of despairing, I rolled with it and used that giant dough to create even larger buns—a tasty disaster turned delightful.
There have also been times when I’d run out of specific ingredients. One memorable occasion, I found that my curry powder had vanished mysteriously (probably hidden by my curious cat!). Undeterred, I scoured my spice cabinet and blended together a makeshift mix that included turmeric, cumin, and paprika. The result was a delicious deviation that I now incorporate whenever I want a new flavor profile.
While I cherish the traditional version, I encourage experimentation. These buns can change with the seasons by swapping in different vegetables or even spices, depending on what you have available. The flavors deepen when you allow the filling to rest overnight, so consider making a large batch and storing some for later to savor at your leisure.
Finally, sharing the process with family offers immeasurable joy. My children love shaping the buns and coating them in breadcrumbs, their laughter echoing in my kitchen as they compete for who can make the “prettiest bun.” By involving loved ones, you create an opportunity for storytelling and connection that transcends generations.
Cooking in the kitchen transforms from mere sustenance to an act of love—a tapestry woven from memories, flavors, and meaningful people. Every curry bun that emerges from my kitchen is not just a delicious dish; it’s a vessel of nostalgia, warmth, and community.
As you stand over your own creation—perhaps with the smell of frying dough filling your home—I invite you to reflect on what this dish means for you. Cooking is an opportunity to share not just a meal but parts of yourself and your history. Each curry bun is a new conversation; it brings with it tales of different flavors, ingredients, and experiences that unite us all.
Try them, share them, and allow them to remind you of what’s essential: love, creativity, and the irresistible joy of bringing together family around the dinner table.