Let’s Get Real
So, here’s the deal—I’m not quite sure what cursed me in my childhood, but for the longest time, I had a deep-seated hatred for cheesecake. I mean, seriously, the textural confrontation of cream cheese and that sickly-sweet graham cracker crust was just too much for my developing palate. Meanwhile, my friends swooned over every slice of cheesecake that landed on the table, while I plotted my revenge with cupcakes and cookies. Fast-forward twenty-something years, and guess who’s now obsessed with cheesecake? That’s right—me. More specifically, no-bake strawberry cheesecake bars that are giving me life, joy, and a general zest for summer.
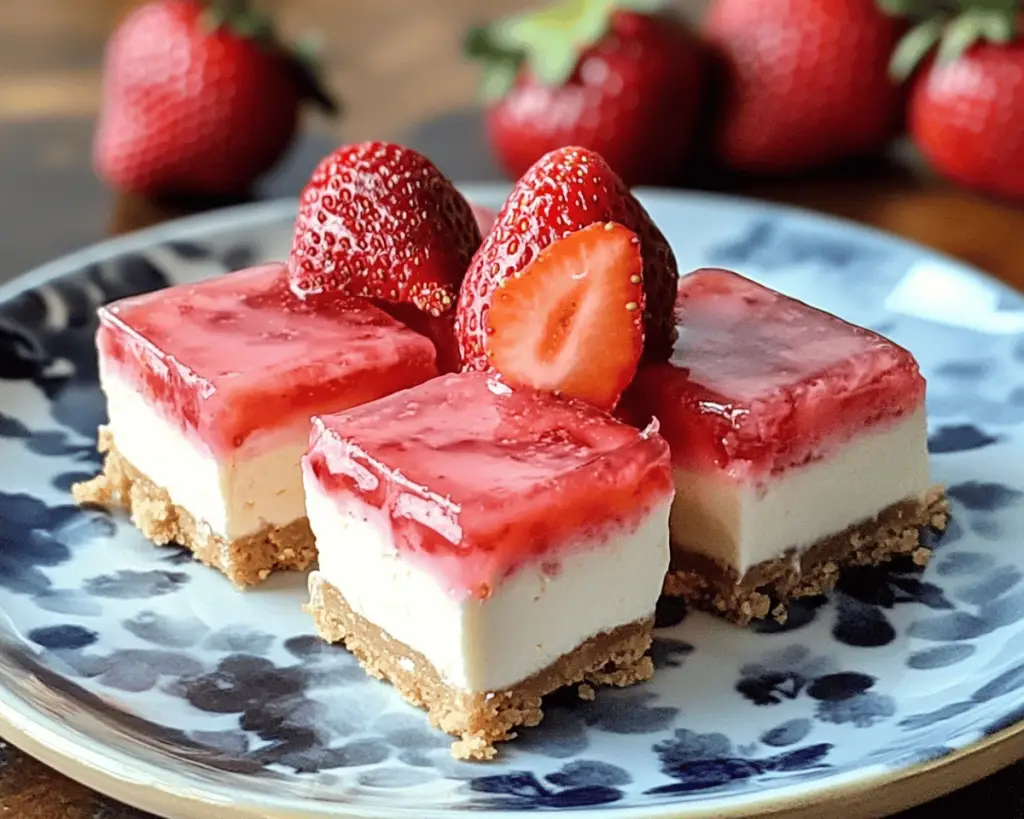
Between my job, social life, and a very active Netflix queue (I’m very committed to binge-watching, thank you very much), I’m all about the recipes that let me whip together something sweet without breaking out the oven. These no-bake strawberry cheesecake bars are bursting with bright berry flavor, creamy cheesiness, and that all-important satisfying crunch from the crust—all topped off with fresh strawberries that scream of summer bliss. And let me tell you, the only thing easier than making these bars will be watching everyone gasp in delight when I serve them at gatherings. Call me the Dessert Queen, because this simple yet show-stopping treat is what my hosting dreams are made of!
Ingredients, Unfiltered
What’s Really in No-Bake Strawberry Cheesecake Bars
Let’s break down what you need to make these little gems of happiness:
Graham cracker crumbs: Seriously, can we take a moment to appreciate the graham cracker? It’s the unsung hero of many a dessert. I usually prefer the generic brand because they taste the same but also because I’m a frugal foodie. And they’re easy to crush—just throw them in a ziplock and beat them with a rolling pin until they resemble fine sand. Yup, my therapy time is also my dessert prep time.
Granulated sugar: We need this sweet stuff to battle the slight tanginess of the cream cheese. Honestly, sugar is the solution to most of life’s problems—except actual problems. But you know what I mean. Just don’t go crazy, or we’ll end up on an episode of “What Were They Thinking?”
Unsalted butter: Ah, butter—the love language of baking. The magic ingredient that binds our crust together. Just make sure you melt it. I once tried to mix softened butter into crumbs and achieved what I’d like to call “the crunchy disaster.” Spoiler: no one wants to chew on crumbly rocks.
Cream cheese: Now, let’s talk cream cheese—the heart and soul of cheesecake. I choose to go with a full-fat option because this is a cheesecake, people! These are not “diet-friendly” bars; they’re “soul-pleasing” bars. Don’t skimp on the flavor! You’ll want this stuff creamy and delicious, so let it sit out for a bit before you whip it up. Cold cream cheese doesn’t fluff well, and trust me, you don’t want a lumpy cheesecake.
Powdered sugar: This is where the magic truly happens. Adding powdered sugar gives the cheesecake its dreamy texture. It’s like fairy dust for your dessert! You could probably use granulated if you’re desperate, but I promise you won’t love it as much. Plus, powdered sugar is great at hiding your stress-induced baking disasters.
Vanilla extract: A dash of this beauty elevates the flavor profile like nothing else. Go for the real stuff if you can. I mean, who doesn’t want to be fancy? And honestly, it feels good to douse everything you make with some legitimate vanilla.
Sour cream: Yes, I’m adding sour cream to this cheesecake batter. It gives the filling an unbelievable tang that balances the sweetness perfectly. I was skeptical at first but once I tried it, there was no turning back. Just be sure to use a decent brand—please don’t pick up that off-brand sour cream you found at the back of your fridge. You know the one; you had a strange encounter with it last November.
Fresh strawberries: And now, the pièce de résistance! Fresh strawberries on top of my cheesecake bars? Yes, please! You could use frozen ones if you’re in a bind, but nothing beats fresh berries at their peak. Plus, they make me feel like I’m living my best, wholesome life when I arrange them artfully. It’s almost like I know what I’m doing.
Let’s Talk Health (or Not)
Is This Even Healthy? Let’s Discuss
Let’s get real again, shall we? Are these no-bake strawberry cheesecake bars healthy? And here we arrive at the golden question of the day: does it really matter? Sure, you could argue that there’s fat, sugar, and a number of other ingredients that scream “calories!” But here’s my take: I will take “Oh my God, these are amazing!” over “Wow, this is so healthy” any day of the week.
Like, okay, there are fresh strawberries, which carry their own form of antioxidants, and you could convince yourself those graham crackers are fiber-rich if you squint hard enough. But in reality, these bars are dessert, folks. If I wanted a kale smoothie, I wouldn’t be here talking about cheesecake bars. They’re a fun, sweet escape from everyday life—a slice of joy that you can enjoy with friends, family, or even solo while you plop on the couch after a long day. Spoiler: that’s totally my plan.
Your Grocery List
Here’s What You’ll Need
– 2 cups graham cracker crumbs
– 1/4 cup granulated sugar
– 1/2 cup unsalted butter, melted
– 16 oz cream cheese, softened
– 1 cup powdered sugar
– 1 tsp vanilla extract
– 1/2 cup sour cream
– Fresh strawberries for topping (about 1-2 cups, depending on how fancy you wanna get)
This recipe yields about 16 bars, depending on your mood and how large you cut them. You could slice them up into tiny squares, but let’s be honest—what’s the point of eating just one?
The Actual Cooking Part
Okay, Let’s Make This
Alright, folks, it’s time to get this party started. Don’t panic if this looks messy — it’s supposed to! I’m here to guide you through the steps with all the love and chaos that home cooking brings.
1. **Prepare the crust:**
Grab a bowl and mix together your graham cracker crumbs, sugar, and melted butter. Get in there with your hands (that’s how I do it, anyway), and mix until it looks like wet sand. Just make sure you don’t taste it all—it’s tempting, truly, but hold strong! Wowza, the anticipation.
2. **Line your pan:**
Take an 8×8 square baking pan (or 9×9, I’m not here to police your baking supplies). Line it with parchment paper—this helps with lifting out the bars later. You could also use foil if that’s what you’ve got, but parchment has a fancy touch. Pour in the graham cracker mixture and press it down firmly with your fingers. No half-measures here! A solid press creates an immovable fortress of deliciousness. Place it in the fridge while you prep the filling.
3. **Make the cheesecake filling:**
Now, in a mixing bowl (and by “mixing” I mean “beat with reckless abandon”), combine the softened cream cheese, powdered sugar, vanilla extract, and sour cream until it’s all deliciously combined and creamy. Don’t be shy about these flavors! You want it smooth, fluffy, and practically begging for a spoon to dive in.
4. **Spread that filling:**
Bring out your pan with the graham cracker crust and spread the cheesecake filling all over. You want smooth, beautiful swirls—this is your moment, channel your inner pastry chef! But let’s face it, if I can do it, so can you. The perfect topping can be achieved with a spatula or even a spoon if you’re feeling reckless. Get creative!
5. **Chill out:**
Cover the completed cheesecake with plastic wrap and let it chill in the refrigerator for at least four hours, or overnight if you can wait. If you’re keeping up with my typical cooking chaos, this is when I panic because I forgot to prep it the night before and I need it done in two hours! You know, the usual.
6. **Strawberry time:**
Right before serving, hulled and sliced strawberries go on top like the gorgeous crown they are. I like to arrange them all fancy-like to show off my “baking skills.” If you’re feeling adventurous (or just lazy), throw them on whichever way they land—this isn’t an art museum, after all.
7. **Keep cool and slice:**
When you’re ready to dive into dessert bliss, pull that parchment paper out of the pan, slice it up into squares (or rectangles, whatever floats your boat), and voila! You’re now the proud owner of strawberry cheesecake bars that will blow your friends’ minds. Take a moment to bask in your baking glory—you’ve earned it!
Side Notes & Sassy Hacks
Bonus Tips You Didn’t Ask For
– **Leftover crust?** Yeah, I’ll be honest—the graham mixture is so tasty, I can’t resist stealing bites here and there. If you’ve got leftover crust, press it into a muffin tin for single-serve crusts. Just bake at 350°F for about 10 minutes until golden brown—they make adorable little mini cheesecakes!
– **Not-so-fancy fruit options:** If strawberries are out of season, I’ve been known to use frozen berries or even a can of cherry pie filling (don’t judge). You do you, boo! Layer in the berry flavors you adore.
– **No double-duty pan?** If you’re lacking a square pan, a round one is totally acceptable. Just check on the chill time because the thickness will differ.
– **Freezing nirvana:** These cheesecake bars freeze remarkably well. I like to keep a stash in my freezer for when unexpected guests arrive or when you just need to soothe the soul after a rough day. They become a solid, delicious treat, perfect right out of the freezer. Just slice and enjoy!
– **Keeping it together:** If you notice your cheesecake is a little wobbly (hey, it happens!), a sprinkle of gelatin can make things nice and sturdy. Just mix a bit of gelatin with cold water, let it bloom, and then combine it into the filling before you chill. This method is golden for hot days.
Final Words of (Culinary) Wisdom
I truly encourage you to dive right in and make these no-bake strawberry cheesecake bars because they embody all the joy that summer brings—a mix of sweetness, freshness, and ease. Whether you serve them at a sunny picnic or devour them while binging the next true-crime series, these bars remind you that life is meant to be celebrated with a mouthful of creamy bliss.
So, if you try this recipe, please tag me! Share your own versions, because the only thing better than this recipe is the way you put your own twist on it. Or just send me a mental high-five, as I’ll take whatever snacks come my way during this glorious season. Happy baking, friends!


