**Meta Title:** Charming Red Velvet Cake Pops for a Spooktacular Halloween
**Meta Description:** Delight in these festive Red Velvet Cake Pops, a delicious Halloween treat that’s fun to make and perfect for parties!
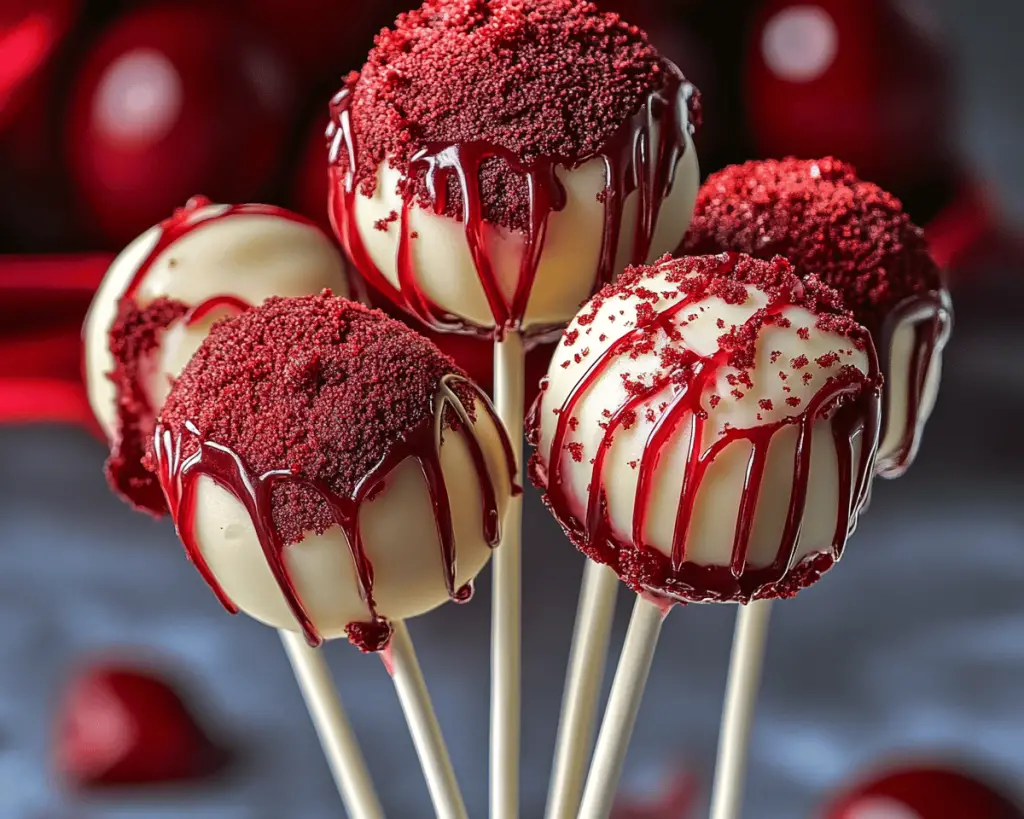
You know that feeling when Halloween is right around the corner, and you’re craving something sweet to get into the spooky spirit? Well, I’m here to whisk you away into the delightful world of Red Velvet Cake Pops! These charming little treats are not only perfect for Halloween but are also a hit at any festive gathering. The vibrant red color, creamy cream cheese frosting inside, and a luscious chocolate coating make them irresistible. Let’s explore how to create these decadent bites of joy that will enchant everyone at your party!
What are Red Velvet Cake Pops?
Red Velvet Cake Pops are sweet, bite-sized treats that derive their vibrant color from cocoa powder and red food coloring. Originating from the Southern United States, red velvet cake has become a beloved classic, known for its unique flavor profile — a delicate hint of cocoa with a slight tang from buttermilk. When crafted into cake pops, these delightful cakes are crumbled, combined with frosting, and formed into balls before being coated in chocolate and decorated.
The result? A dessert that combines the textures of moist cake, silky frosting, and a crispy candy shell. Imagine biting into one—your teeth sinking into the soft cake while the chocolate exterior adds a satisfying crack. It’s this perfect blend of texture and flavor that makes Red Velvet Cake Pops a popular choice for Halloween and beyond.
Why You’ll Love This Red Velvet Cake Pops Recipe
There’s a lot to adore about these Red Velvet Cake Pops! Not only are they fun to create, but they also add a festive touch to any Halloween spread. Here’s why you’ll want to whip up a batch:
1. **Deliciously Decadent**: Each bite is a perfect balance of rich chocolate flavor and creamy frosting, making these a crowd-pleaser.
2. **Adorable Presentation**: Dressed up with sprinkles or spooky decorations, they make a stunning visual impact at parties.
3. **Versatile**: They can cater to dietary restrictions if you use gluten-free cake mix or vegan frosting.
4. **Simple to Make**: Even if you’re a beginner in the kitchen, this recipe is straightforward, with minimal fuss.
5. **Great for Sharing**: Perfectly portioned, they’re an easy treat to grab and enjoy, making them great for kids and adults alike.
Let’s get baking!
Ingredients You’ll Need
To make your enchanting Red Velvet Cake Pops, gather the following ingredients:
– **1 box Red Velvet Cake Mix**: Provides the foundation for our cake pops with that signature vibrant color and moist texture. You can substitute this with a homemade red velvet cake if you’re feeling adventurous!
– **Ingredients required for the cake mix (usually eggs, oil, and water)**: Follow the instructions on the box; these ingredients will help achieve a fluffy cake.
– **8 oz cream cheese, softened**: Adds a deliciously creamy and tangy filling that pairs perfectly with the cake.
– **1 cup powdered sugar**: Balances the tanginess of the cream cheese to create a sweet filling.
– **1 to 2 cups chocolate candy coating (red or white chocolate)**: Provides a sweet shell that encases the cake pops. You can choose colored coating to fit the Halloween theme.
– **Cake pop sticks**: Essential for assembling the pops and allowing for easy handling.
– **Sprinkles or decorations**: To add that festive spooky flair.
Tips for picking quality ingredients: Opt for a high-quality cake mix if using boxed; it can make a difference in texture. For the cream cheese, choose full-fat for the creamiest filling.
How to Make Red Velvet Cake Pops
Creating Red Velvet Cake Pops is not only fun but also a fantastic way to gather family and friends in the kitchen. Here’s your step-by-step guide:
1. **Bake the Cake**: Preheat your oven according to the instructions on the cake mix box. Prepare a baking pan by greasing it or lining it with parchment paper. In a large bowl, mix the cake ingredients according to the pkg. Pour the batter into the pan and bake until a toothpick inserted into the center comes out clean (typically 25-30 minutes). Once baked, let the cake cool completely.
2. **Crumble the Cake**: After the cake has cooled, crumble it into fine pieces in a large mixing bowl. Use your hands or a fork to ensure there are no large chunks remaining — this helps with the texture of the pops.
3. **Prepare the Frosting**: In a separate bowl, beat the softened cream cheese with powdered sugar until it’s smooth and fluffy. The sweetness of the sugar pairs well with the creaminess of the cheese, creating a tasty filling.
4. **Combine the Mixtures**: Gradually add the cream cheese mixture to the crumbled cake, folding it in gently. Mix until all pieces of cake are coated with frosting, but be careful not to overmix. You’ll want a dough-like consistency that holds its shape.
5. **Form the Cake Balls**: Take about a tablespoon of the mixture and roll it into a ball between your palms. Continue this process until all the mixture is shaped. Place the balls on a baking sheet lined with parchment paper and refrigerate for about 30 minutes until firm — this will help them hold their shape when dipping.
6. **Melt the Chocolate Coating**: While the cake balls are chilling, melt your chocolate coating in a microwave or a double boiler. If using a microwave, heat in 30-second increments, stirring in between, until smooth and fully melted. If you want vibrant pops, add a few drops of food coloring to the melted chocolate.
7. **Dip the Cake Pops**: Remove the cake balls from the fridge. Dip the tip of each stick into the melted chocolate before inserting it into the center of the ball — this helps to secure it in place. Then, dip the entire ball into the melted chocolate, swirling gently to coat evenly. Allow any excess to drip off back into the bowl.
8. **Decorate While Wet**: If you’re using sprinkles or edible decorations, sprinkle them on immediately after dipping, while the chocolate is still soft. This ensures they stick well.
9. **Chill Again**: Place the dipped cake pops upright in a styrofoam block or similar stand to let the chocolate set completely. This could take about 15-20 minutes.
10. **Enjoy Your Festive Treats**: Once the chocolate is solidified, your Red Velvet Cake Pops are ready to serve! These delightful bites are perfect for snacking or sharing — just make sure to store any leftovers in the fridge.
Tips, Tricks & Variations
Here are some insider tips for perfecting your Red Velvet Cake Pops:
1. **Storage**: Store your cake pops in the fridge in an airtight container for up to one week. They stay fresh and delicious, with the cake being moist and the coating intact.
2. **Reheating the Chocolate**: If the chocolate hardens before you’ve finished dipping, you can gently reheat it in the microwave, adding a small amount of vegetable oil to thin it out for easier dipping.
3. **Flavor Variations**: Want to experiment? You can use different flavored frosting, like vanilla or buttercream, instead of cream cheese. Or add a splash of vanilla extract to enhance the flavor profile.
4. **Vegan Version**: Substitute a vegan cake mix and frosting, and use dairy-free chocolate to make them vegan-friendly.
5. **Plating Ideas**: Present your irresistible cake pops in a decorative cake stand or fill a decorative jar with them, tying a cute ribbon around it for an impressive and delightful display.
What to Serve With Red Velvet Cake Pops
Red Velvet Cake Pops can shine on their own, but they can also be paired with other delicious treats for an eye-popping dessert table. Here are some scrumptious options:
– **Spiced Pumpkin Muffins**: The autumnal flavors of pumpkin spice complement the sweet richness of the cake pops beautifully.
– **Chocolate Dipped Marshmallows**: These add a fun twist and are easy for guests to grab and enjoy alongside their cake pops.
– **Hot Chocolate**: Serve with a cup of rich hot chocolate topped with whipped cream; the sweetness pairs delightfully with the tangy cake pops.
– **Savory Platters**: Balance out the sweets with a savory cheese board filled with assorted cheeses, crackers, and fruits.
Nutrition & Health Benefits
While Red Velvet Cake Pops are undoubtedly a treat, they can also delight you with some nutritional benefits. Each pop contains protein from the cream cheese and can offer a sense of indulgence without breaking the calorie bank. Typically, an average cake pop has around 150-200 calories, depending on the ingredients used.
For more insights on the caloric content of desserts and healthy eating tips, you can check reputable sources like [Healthline](https://www.healthline.com) or the [USDA FoodData Central](https://fdc.nal.usda.gov/).
Frequently Asked Questions
1. **Can I make these cake pops in advance?**
Yes, you can make the cake pops a day in advance. Prepare and dip them, then store them in the fridge until you’re ready to serve. Just give them a quick check to see if the chocolate coating remains intact.
2. **What can I substitute for cream cheese frosting?**
If you’re not a fan of cream cheese, you can use vanilla buttercream or even a store-bought frosting. Just remember to adjust the sweetness to your liking, as some frosting types can be quite sweet.
3. **How do I fix cracks in the chocolate coating?**
If you encounter cracks when the chocolate hardens, it might be due to temperature changes. To fix this, re-dip the cake pop in melted chocolate, ensuring you cover the cracks with a fresh layer.
4. **Can I freeze cake pops?**
Absolutely! To freeze cake pops, wrap them tightly in plastic wrap and then store them in a freezer-safe container. They should last for up to three months. When you’re ready to enjoy, thaw them in the refrigerator for 24 hours.
5. **Do I have to use food coloring?**
No, food coloring is optional, but it enhances the visual appeal. If you prefer a more natural color, look for natural food dyes or simply use less cocoa powder to achieve a lighter hue.
**Conclusion**
There’s something truly magical about transforming a classic cake into adorable Red Velvet Cake Pops, especially during the festive season of Halloween. They’re not just visually stunning; they also bring joy with every bite. This recipe allows you to involve friends and family in the kitchen, creating beautiful memories while indulging in a delicious treat.
So, why not gather your loved ones and set out to create these delightful Red Velvet Cake Pops tonight? Get ready for smiles and compliments as you serve these spooktacular goodies at your Halloween bash. If you loved this treat, leave a comment or tag me on Instagram—I can’t wait to see your cake pop creations!


