**Meta Title: Easy No-Bake Butterfinger Balls Recipe for Sweet Cravings**
**Meta Description: Satisfy your sweet tooth with this easy no-bake Butterfinger Balls recipe. Perfect for parties or a quick treat at home!**
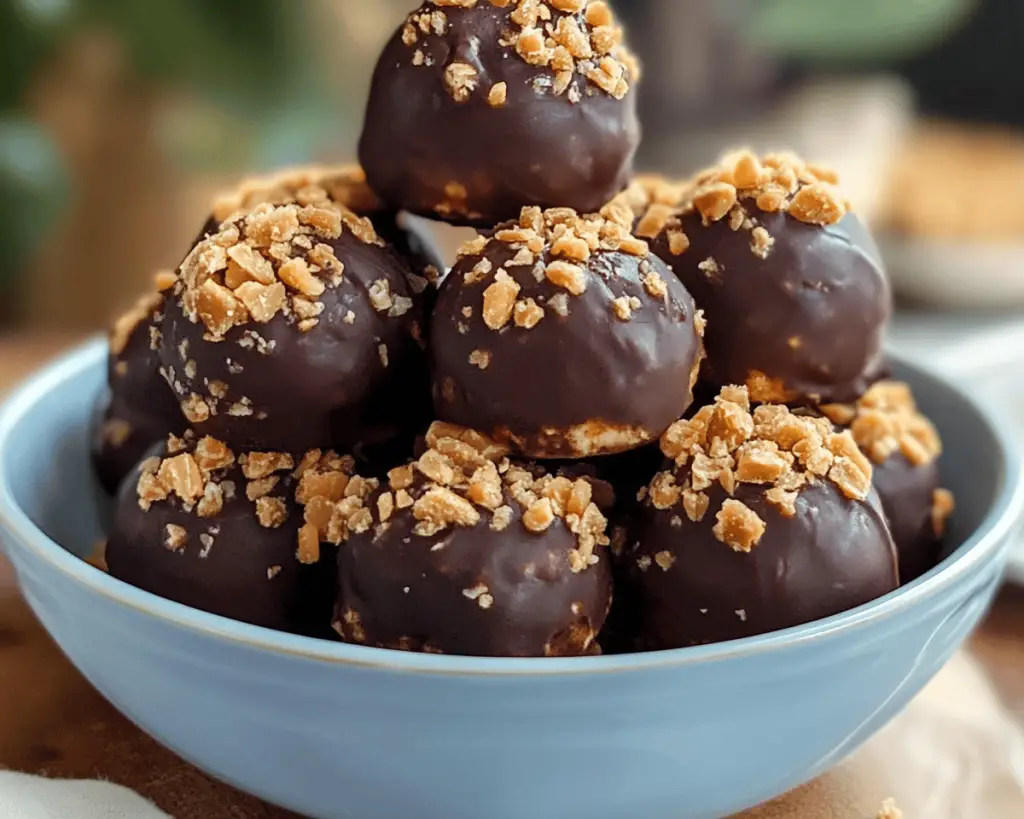
You know that feeling when you’re hit with a craving for something sweet, crunchy, and utterly irresistible? Picture this: creamy peanut butter meets crispy, crunchy cereal and a luscious chocolate coating that melts in your mouth. This dreamy combination takes the form of delightful no-bake Butterfinger balls—so easy to make, you’ll be left wondering why you haven’t tried them before! With a perfect balance of flavors and textures, these treats are sure to be a hit at any gathering or a special treat for yourself after a long day.
Today, I’m going to guide you through the creation of these heavenly no-bake Butterfinger Balls, sharing my tips and insights as we go along. Let’s dive into this indulgent recipe that guarantees a burst of nostalgic flavors with every bite. The best part? You don’t even need to turn on your oven!
What are No-Bake Butterfinger Balls?
No-bake Butterfinger Balls are bite-sized treats inspired by the famous Butterfinger candy bars. Unlike their candy bar counterparts, these delightful morsels are made with a mixture of creamy peanut butter and crushed cereal for that signature crunchy texture, all rolled into balls and coated in rich chocolate. The name “Butterfinger” itself conjures up thoughts of crispy peanut butter goodness wrapped in chocolate—what’s not to love?
The magic of these treats lies in their simplicity. With just a handful of ingredients, you can create a dessert that’s both familiar and totally unique. The texture balances the smoothness of the peanut butter with the delightful crunch of the cereal, while the chocolate coating adds that extra touch of indulgence. Plus, they come together without any baking, making them the perfect quick treat for your next gathering or an afternoon pick-me-up.
Why You’ll Love This Easy No-Bake Butterfinger Balls Recipe
There are countless reasons to love this easy no-bake Butterfinger Balls recipe, but let me highlight a few that stand out:
1. **Quick and Simple**: With minimal preparation time and no baking required, these treats can be whipped up in the span of just 30 minutes or less.
2. **Family-Friendly Fun**: Making these Butterfinger balls is a great way to get the kids involved in the kitchen. Rolling the balls and dipping them in chocolate can be a messy but fun family activity.
3. **Customizable**: Feel free to get creative! Swap out the chocolate coating for white chocolate or drizzle with caramel for a unique twist.
4. **Great for Meal Prep**: These treats can be made ahead of time and stored in the fridge or freezer, making them an ideal snack for those busy days when you need a little sugar boost.
5. **Perfect for Any Occasion**: Whether you’re hosting a party, attending a potluck, or just indulging in a sweet treat on a random Tuesday, these no-bake Butterfinger Balls are sure to please everyone.
Ingredients You’ll Need
To make your own delicious No-Bake Butterfinger Balls, here’s a simple list of all the ingredients:
– **1 cup creamy peanut butter**: The star ingredient! Choose a high-quality peanut butter for the richest flavor. You can also use crunchy peanut butter if you prefer extra texture.
– **2 cups crushed cereal (like cornflakes)**: This adds the signature crunch that makes these treats so enjoyable. You can crush the cereal to your desired texture—more crumbly for a finer mix or coarser for extra crunch.
– **1 cup powdered sugar**: This sweetens and helps bind the mixture together. If you need a lower-sugar option, consider using a sugar substitute blend designed for baking.
– **1 ½ cups milk chocolate chips**: Perfect for melting and coating the balls. You could also use semi-sweet or dark chocolate if you prefer a richer taste.
– **1 tablespoon coconut oil**: This is optional, but adding a bit of coconut oil to your melted chocolate helps it smoothly coat the peanut butter balls for an even, glossy finish.
Before you start, make sure to gather all these ingredients. Freshness matters, especially with peanut butter and chocolate, so pick the best quality you can find.
How to Make Easy No-Bake Butterfinger Balls
Now that we have everything ready, let’s get into the fun part—making these delectable treats! Follow these steps to create your own No-Bake Butterfinger Balls:
1. **Combine Wet and Dry Ingredients**: In a large mixing bowl, combine 1 cup of creamy peanut butter with 1 cup of powdered sugar. Stir together until you reach a smooth, thick consistency. This forms the base of your Butterfinger balls.
2. **Add the Cereal**: Next, gently fold in the 2 cups of crushed cereal. Mix until the cereal is well coated in the peanut butter mixture, and you have a cohesive blend. This crunchy addition is what makes these bites so special!
3. **Roll Into Balls**: Using your hands, scoop out a tablespoon of the mixture and roll it into a ball shape. Aim for about 1-inch diameter for bite-sized treats. Place the rolled balls onto a parchment-lined baking sheet. Repeat until all of the mixture is used up.
4. **Chill in the Fridge**: Once you have all of your balls made, pop them into the fridge to chill for about 30 minutes. This will help the balls firm up, making them easier to coat with chocolate later.
5. **Melt the Chocolate**: While the balls chill, melt the 1 ½ cups of milk chocolate chips along with the 1 tablespoon of coconut oil in a microwave-safe bowl. Heat in 30-second intervals, stirring in between, until smooth and fully melted.
6. **Coat the Balls**: Take the chilled peanut butter balls from the fridge. Using a fork or toothpick, dip each ball into the melted chocolate, ensuring it’s fully coated. Allow any excess chocolate to drip off before placing it back on the parchment-lined sheet.
7. **Set the Chocolate**: Let the coated balls sit at room temperature until the chocolate hardens. You can also place the baking sheet back in the fridge for about 10 minutes to speed up the setting process.
8. **Serve and Enjoy**: Once the chocolate has set, these creamy and crunchy delights are ready to be enjoyed! Serve them fresh, or store them in an airtight container in the fridge for up to a week.
Tips, Tricks & Variations
– **Storage**: Store your No-Bake Butterfinger Balls in an airtight container in the refrigerator for up to one week. They also freeze beautifully! Just place them in a freezer-safe bag and enjoy at your leisure. Thaw them in the fridge when you want to enjoy one.
– **Chocolate-Coating Variations**: Feel free to swap out the chocolate for other options! White chocolate, dark chocolate, or even flavored chocolates can completely change the flavor profile. Consider using chocolate melts or candy chocolate for a more colorful twist.
– **Spice It Up**: For an extra kick, add a pinch of sea salt or a dash of cinnamon to the peanut butter mixture. This little touch will enhance the dessert with a lovely warm note.
– **Make it Vegan**: To make these treats vegan, simply substitute regular chocolate with dairy-free chocolate chips, and make sure to use natural peanut butter without added sugar.
– **Portable Treats**: If you’re taking these to a potluck or gathering, consider showing them off by placing them in cute paper cups for a fun presentation!
What to Serve With No-Bake Butterfinger Balls
These delightful no-bake treats shine on their own, but pairing them with complementary flavors and textures can elevate your dessert experience even further. Here are some ideas on what to serve alongside your Butterfinger Balls:
– **Milk or Dairy Alternatives**: A cold glass of milk—classic or plant-based—is the perfect partner to your sweet treats, enhancing the creamy peanut butter flavor.
– **Coffee or Tea**: The rich flavors of coffee or a nice cup of herbal tea contrast beautifully with the sweetness of the Butterfinger Balls, creating a balanced sweet-meets-bitter delight.
– **Ice Cream**: Consider serving these Peanut Butter Balls with a scoop of vanilla ice cream. The creamy coldness pairs so well with the chocolatey and crunchy treats!
– **Fruit**: Fresh fruits like strawberries or bananas add a bright note to your dessert table, offering a fresh, tart contrast to the sweetness of the treats.
Nutrition & Health Benefits
While these No-Bake Butterfinger Balls are undeniably a treat, they do have some nutritional perks:
– **Protein Boost**: Peanut butter is a good source of protein, which helps in muscle repair and provides lasting energy. Just be mindful of portions since they’re calorie-dense!
– **Healthy Fats**: The healthy fats found in peanut butter can be beneficial for heart health and providing satiety.
However, like all treats, moderation is key! If you want a nutritious indulgence, you can find credible sources for healthy eating habits on sites like [Healthline](https://www.healthline.com) and [USDA](https://www.usda.gov).
Frequently Asked Questions
1. **Can I use crunchy peanut butter instead of creamy?**
Absolutely! Crunchy peanut butter adds an extra layer of texture and delightful crunch to these treats. It’ll enhance the overall experience, so feel free to use your preferred type of peanut butter.
2. **How can I make these gluten-free?**
To keep these Butterfinger Balls gluten-free, ensure that the cereal you use is certified gluten-free. Many brands offer gluten-free cornflakes that work perfectly for this recipe.
3. **Can I freeze these treats?**
Yes! These no-bake Butterfinger Balls freeze exceptionally well. Freeze them in a single layer on the baking sheet and, once solid, move them to an airtight container or zip-top bag for easy access later on.
4. **What’s the best way to store leftovers?**
Store leftover Butterfinger Balls in an airtight container in the refrigerator. They will keep fresh for up to a week. If you’ve frozen them, allow them to thaw in the fridge before enjoying.
5. **How long does it take for the chocolate to set?**
Usually, the chocolate will set in about 30 minutes at room temperature, but you can speed this up by placing the balls back in the fridge for about 10 minutes.
In conclusion, these Easy No-Bake Butterfinger Balls are the ultimate indulgence that is just as delightful to eat as they are simple to make. Their combination of creamy peanut butter, crunchy cereal, and rich chocolate makes them a texture lover’s dream. Whether it’s a cozy night in or a spirited gathering of friends, these treats are bound to steal the show.
So why not give them a shot tonight? Gather your ingredients, roll up your sleeves, and have some fun! If you loved making these Butterfinger Balls, I’d love to hear all about it. Drop a comment below or tag me on Instagram with your delicious results! Happy cooking!


