**Crispy Tenders: Perfectly Crunchy Chicken Delight**
—
*Meta Title: Crispy Tenders Recipe – Easy, Crunchy, and Delicious!*
*Meta Description: Discover the secrets to making crispy tenders at home! This simple recipe guarantees golden, crunchy chicken that your family will love.*
—
Imagine this: it’s a cozy weekend afternoon and the aroma of something delicious wafts through your kitchen. Your mouth begins to water as you hear that familiar sizzle on the stovetop. The irresistible crunch of perfectly fried chicken tenders beckons you closer. Is there anything better than a plate of homemade crispy tenders? Whether you’re whipping them up for a family dinner, serving them at a gathering, or just treating yourself, these tenders are sure to please.
What makes this recipe special? It’s simple yet packed with flavor, perfect for all ages, and you can customize them to suit your taste! So grab your apron and let’s dive into the crunchy goodness of crispy tenders!
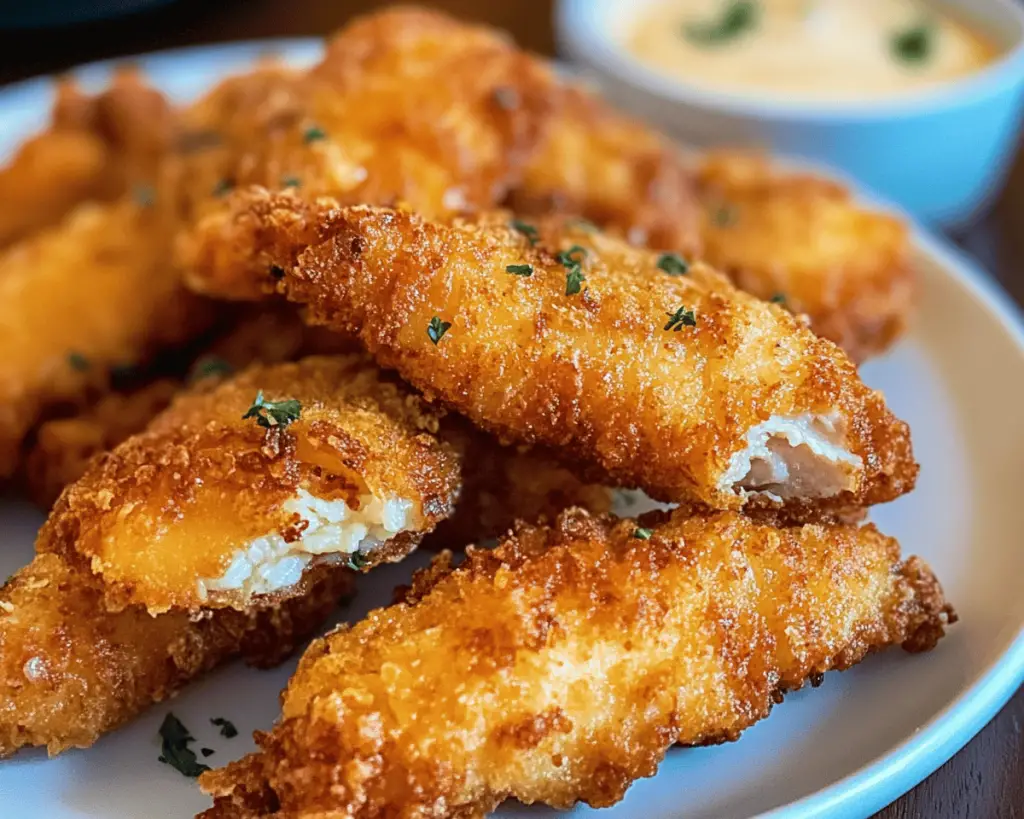
What are Crispy Tenders?
Crispy tenders, also known as chicken tenders or chicken nuggets, are strips of chicken breast coated in a crunchy breading and fried until golden and crispy. These delicious morsels are not just a treat for the taste buds—they also offer a delightful contrast of textures. The *tender* chicken inside is juicy and moist, while the *crispy* exterior adds a satisfying crunch that keeps you coming back for more.
Traditionally enjoyed as a comfort food in many cultures, crispy tenders are a staple on restaurant menus and beloved at home. The famed *Southern fried chicken* influences this recipe with its use of spices and crunchy coating, giving a nod to comforting family meals shared around the table.
You can serve crispy tenders with various dipping sauces, from classic honey mustard to zesty barbecue, making them perfect for any occasion. This recipe captures that homey, feel-good essence, and its versatility allows for countless variations.
Why You’ll Love This Crispy Tenders Recipe
Here’s why this crispy tenders recipe will become a go-to in your home:
– **Quick and Easy**: With straightforward steps, you can have these tenders ready in no time, making them perfect for busy weeknights.
– **Perfectly Crunchy**: The secret to that satisfying crunch lies in the double-breading technique. You won’t be able to resist!
– **Customizable Flavor**: Adjust the herbs and spices to suit your family’s taste. Add cayenne for a kick or keep it simple with salt and pepper.
– **Kid-Friendly**: Kids love crispy tenders! Serve as finger food, and watch them disappear in no time.
– **Great for Meal Prep**: Make a larger batch and freeze leftovers for a quick meal later—just reheat in the oven to maintain that fabulous crunch.
– **Dipping Delight**: Pair with your favorite sauces for a complete meal. Whether you prefer ranch, ketchup, or something a little fancier, these tenders are ready to be dunked!
– **Family or Party Friendly**: Make enough for a cozy family night or serve them at your next party—these tenders are crowd-pleasers!
Ingredients You’ll Need
To make these delectable crispy tenders, gather the following ingredients:
– **1 lb (450g) chicken breasts**: Cut into strips (use tenderloins for a more tender bite).
– **1 cup all-purpose flour**: For coating the chicken and creating that initial layer of crunch.
– **2 large eggs**: Whisked, these help adhere the breadcrumbs to the chicken.
– **1 cup breadcrumbs**: Choose panko for an extra crispy texture. You can also use regular breadcrumbs, but panko results in a better crunch.
– **1 teaspoon garlic powder**: Adds depth of flavor.
– **1 teaspoon onion powder**: For a savory touch.
– **1 teaspoon paprika**: Gives a lovely color and slight smokiness.
– **Salt and pepper, to taste**: Essential for seasoning.
– **Oil for frying**: Use a neutral oil with a high smoke point, like vegetable or canola oil.
For serving:
– **Dipping sauces**: Honey mustard, barbecue sauce, ranch dressing—whatever you love!
How to Make Crispy Tenders
Follow these easy steps to create your very own crispy tenders:
**1. Prepare the Chicken**
Start by slicing your chicken breasts into strips about 1 inch wide. The uniformity helps with even cooking. Pat them dry with paper towels to ensure the coating sticks well.
**2. Season the Flour**
In a shallow bowl, combine the all-purpose flour, garlic powder, onion powder, paprika, and a generous pinch of salt and pepper. This flour mix is where much of the flavor begins, so don’t skimp!
**3. Whisk the Eggs**
In another shallow bowl, whisk together the eggs until they are smooth. This will help the breadcrumbs adhere beautifully to your chicken.
**4. Prepare the Breadcrumbs**
In a third shallow bowl, pour in the breadcrumbs. This is where the magic happens—every piece of chicken will get a delightful crunch from this layer.
**5. Coat the Chicken**
First, dip a chicken strip into the seasoned flour, ensuring it’s well coated. Shake off any excess flour. Next, dip it into the egg mixture, allowing the excess to drip off. Finally, roll it in the breadcrumbs, pressing lightly to ensure the coating sticks well. Set aside and repeat with remaining chicken.
**6. Heat the Oil**
In a large skillet or deep frying pan, pour enough oil to cover the bottom—about 1/4 inch deep is perfect. Heat over medium-high heat until shimmering. You can test if it’s ready by dropping a small piece of breadcrumb; if it sizzles immediately, you’re ready to fry!
**7. Fry the Tenders**
Carefully add the coated chicken strips to the hot oil, making sure not to overcrowd the pan. Fry in batches if necessary. Cook for around 3-4 minutes on each side or until they are golden brown and fully cooked. Use tongs to flip them and keep an eye on the heat to avoid burning.
**8. Drain and Serve**
Once the tenders are golden and crispy, use a slotted spoon to remove them from the oil and place them on a paper towel-lined plate. This will absorb any excess oil. Keep them warm in a low oven while frying the remaining strips.
**9. Enjoy**
Serve your crispy tenders hot with a platter of your favorite dipping sauces. Dive in—there’s nothing like the first bite of a crispy tender, right?
Expert Tips, Tricks & Variations
– **Double Dipping**: For an even crispier coating, double-dip each tender. After the first round of coating in flour, egg, and breadcrumbs, dip them in the egg and breadcrumbs again!
– **Baking Option**: If you prefer a healthier alternative, bake your tenders at 425°F (220°C) on a greased baking sheet. Spray them lightly with cooking oil and bake for about 15-20 minutes, flipping halfway.
– **Flavors Galore**: Experiment with flavoring your breadcrumbs! Mix in grated Parmesan cheese, Italian seasoning, or your favorite spices to create unique variations.
– **Batch Cook**: Consider making a double batch and freeze them before frying. Lay them on a baking tray in the freezer until solid, then transfer them to a zip-top freezer bag. Fry directly from frozen, just add a couple of extra minutes to the cooking time.
– **Plating Ideas**: Make your presentation pop by serving the tenders on a wooden board with various dips in small bowls. Toss in fresh veggies or a colorful salad for a complete meal.
What to Serve With Crispy Tenders
Pair your crispy tenders with these delightful accompaniments:
– **French Fries**: The classic combo! Crispy fries with a sprinkle of sea salt complement tenders perfectly.
– **Coleslaw**: A creamy, crunchy slaw adds a refreshing contrast to the crunchy tenders.
– **Corn on the Cob**: Summer sweetness adds a delicious pop to each bite.
– **Mac and Cheese**: Creamy and cheesy, mac and cheese is the ultimate comfort food pairing.
– **Dipping Sauces**: Don’t forget the sauces! Honey mustard, chipotle mayo, and ranch dressing are excellent choices for complementing the flavors of the tenders.
Storage, Freezing & Meal Prep
Once you’ve savored your crispy tenders, here’s how to store extras:
– **Storage**: Place any leftovers in an airtight container in the refrigerator for up to 3 days. To reheat, place them on a baking sheet in a preheated oven at 400°F (200°C) for about 10-15 minutes to restore that crispy texture.
– **Freezing**: Freeze the uncooked, breaded tenders in a single layer on a baking sheet before transferring to a freezer-safe bag. This way, you won’t have clumps of tenders stuck together. They can be frozen for up to 3 months.
– **Meal Prep**: Prepare the tenders in advance for weeknight dinners. You can even cook a big batch and freeze them for later, ensuring a quick meal is just a reheat away!
Frequently Asked Questions
**1. Can I use a different type of meat?**
Absolutely! While chicken is traditional, you can swap in turkey or even fish. Just keep in mind that cooking times will vary, especially for fish.
**2. Why are my tenders not crispy?**
Make sure the chicken is well-coated, and the oil is hot enough before frying. If the temperature is too low, the coating will absorb oil and become soggy.
**3. Can I bake these tenders instead of frying them?**
Yes! For a healthier option, bake them at 425°F (220°C). Just remember to spray them lightly with oil for optimum crispiness.
**4. How do I know when the chicken is cooked through?**
The best way to ensure your chicken is cooked is to use a meat thermometer. Chicken should reach an internal temperature of 165°F (75°C).
**5. Can I add spices to the coating?**
Definitely! Feel free to get creative with your seasonings. Chili powder, cumin, or Italian herbs can elevate the flavor profile of your crispy tenders.
—
Now it’s your turn—grab your ingredients and create this magic in your kitchen tonight! Don’t forget to share your results or tag me when you try it. Happy cooking!


