**Prep time:** 15 minutes
**Cook time:** 10 minutes
**Total time:** 25 minutes
**Servings:** 24 pretzels
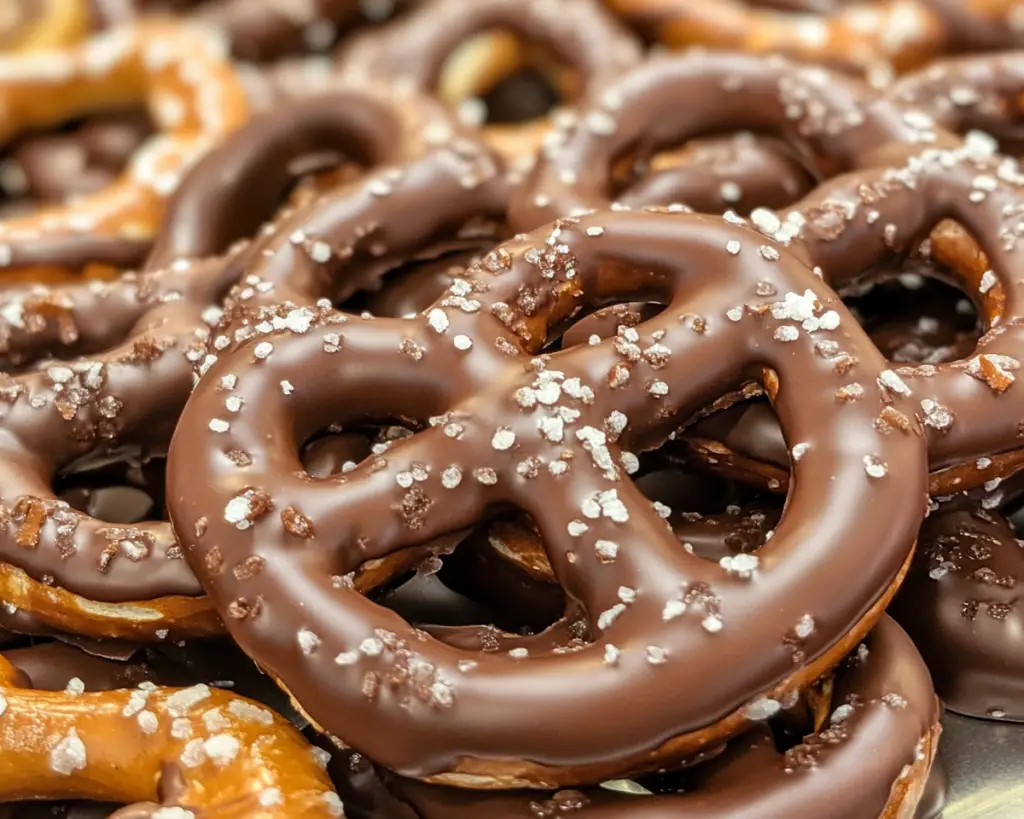
There’s something utterly magical about the combination of sweet and salty flavors, and that magic comes to life in chocolate-covered pretzels! Imagine crunchy pretzels dipped in rich, creamy chocolate, sprinkled with tempting toppings that add a whole new layer of flavor and texture. Whether you’re preparing them for a party, gifting them to friends, or simply indulging in a special treat, chocolate-covered pretzels are a versatile delight. Today, I’ll guide you through a simple way to whip up these treats, including tips, variations, and answers to common questions.
What Are Chocolate Covered Pretzels?
Chocolate-covered pretzels are a delightful snack that combines the irresistible taste of salt with the rich sweetness of chocolate. Originating in the United States, these pretzels can be found at fairs, festivals, or simply as a homemade creation. The basic idea is straightforward: you take crunchy pretzels, dip them in melted chocolate, and let them set until the chocolate hardens.
The texture is truly a treat; you get the satisfying crunch from the pretzel alongside the smooth, creamy chocolate coating. Depending on how you choose to decorate them, the flavor can swing from traditional chocolate to funky, gourmet variations with toppings like nuts, sprinkles, or even sea salt. This versatility is what makes chocolate-covered pretzels a beloved choice for snack time or a festive gathering.
Why You’ll Love This Chocolate Covered Pretzels Recipe
**Delicious Flavor**: The winning combination of sweet and salty flavors creates an addictive snack that appeals to everyone, from kids to adults.
**Easy to Make**: With just a few simple ingredients, you can create a stunning treat that looks elegant but doesn’t require professional baking skills.
**Endless Customization**: You can easily make them your own by using different types of chocolate (dark, milk, or white) and adding an array of toppings. This ability to personalize means they’re perfect for any occasion.
**Affordable**: Compared to many store-bought candies and snacks, making chocolate-covered pretzels at home is cost-effective. You can make a large batch for a fraction of the price!
**Perfect for Sharing**: They make great gifts, especially when beautifully packaged. Whether in a mason jar, box, or a festive gift bag, chocolate-covered pretzels are an excellent homemade gift for any holiday or celebration.
Despite their ease of preparation, some home cooks shy away from making chocolate-covered pretzels, fearing the chocolate will seize up or not coat evenly. With the right technique, you can avoid common pitfalls and create a batch that dazzles guests or family.
Ingredients You’ll Need
To make these delectable chocolate-covered pretzels, you’ll need the following ingredients:
– **Pretzels** (8 cups): Choose larger, thicker pretzels like pretzel rods or traditional twist pretzels. They hold up well to the chocolate coating and provide a satisfying crunch.
– **Chocolate** (2 cups, chopped or chips): You can use semi-sweet chocolate, milk chocolate, or white chocolate. Each brings a unique sweetness to the pretzels and creates a different flavor experience.
– **Toppings** (optional): Consider adding a variety of toppings, such as:
– **Chopped nuts**: Almonds, peanuts, or pecans add a crunchy texture.
– **Sprinkles**: Colorful sprinkles can make the pretzels festive for parties or celebrations.
– **Sea salt**: A sprinkle of sea salt on top can enhance the sweet flavor of the chocolate.
– **Coconut flakes**: For a tropical twist, shredded coconut adds an unexpected flavor and texture.
These ingredients can be customized to your liking, ensuring your chocolate-covered pretzels are as unique as you are!
How to Make Chocolate Covered Pretzels
1. **Prepare for Coating**: Start by lining a baking sheet with parchment paper. This will prevent the pretzels from sticking and make cleanup easier later on.
2. **Melt the Chocolate**: In a microwave-safe bowl, place your chopped chocolate or chocolate chips. Heat the chocolate in the microwave in 30-second increments, stirring between each interval until smooth. This process usually takes about 1-2 minutes. **Important**: Do not overheat the chocolate or it might seize up. If it does, you can add a small amount of shortening or coconut oil to loosen it back up.
3. **Coat the Pretzels**: Once your chocolate is melted and smooth, dip each pretzel into the chocolate using a fork or a dipping tool, ensuring it’s well-coated. Let the excess chocolate drip back into the bowl before placing it on the prepared baking sheet.
4. **Add Toppings** (if desired): While the chocolate is still wet, sprinkle your chosen toppings over the pretzels. This is where you can get creative! Dashing on some colorful sprinkles can make them look particularly festive.
5. **Let Them Set**: Allow the chocolate to cool and harden completely. You can leave the pretzels at room temperature, but if you want to speed up the process, place them in the refrigerator for about 15-20 minutes.
6. **Serve or Store**: Once the chocolate has set, the pretzels are ready to enjoy! You can store any leftovers in an airtight container at room temperature for up to 2 weeks.
5 Variations & Substitutions
**1. White Chocolate Pretzels**
Switching to white chocolate adds a sweet, creamy layer to the pretzels. It can also be colored with food coloring for themed events. Just melt it the same way as regular chocolate; the technique remains unchanged. Pair it with crushed graham crackers for a s’mores-inspired treat.
**2. Dark Chocolate Delight**
Using dark chocolate gives a rich, deep flavor profile that balances beautifully with the salty pretzel. Dark chocolate also provides health benefits due to higher cocoa content, including antioxidants. This variation is a favorite for those who enjoy less sweetness.
**3. Caramel Drizzle**
Before the chocolate sets, drizzle caramel sauce over the pretzels for a decadent boost. The gooey caramel paired with the chocolate enlivens the flavors and adds a sticky, chewy element.
**4. Spicy Crunchy Pretzels**
For those who enjoy a little kick, add cayenne pepper or chili powder to the melted chocolate before dipping the pretzels. The spice enhances flavor complexity, creating a truly unique snack experience.
**5. Nutty Heaven**
Before the chocolate sets, roll the pretzels in crushed nuts or drizzle with nut butter. This adds a delightful crunch and extra protein to each bite. Pecans or almonds work particularly well.
Common Mistakes to Avoid
When making chocolate-covered pretzels, there are several potential pitfalls to keep in mind:
**1. Seized Chocolate**: Be cautious when melting chocolate. If it overheats, it can seize and become unusable. Always melt in increments and stir often.
**2. Not Using Parchment Paper**: Failing to line your baking sheet can result in your finished pretzels sticking. Always use parchment paper or silicone baking sheets to ensure easy removal.
**3. Overloading on Toppings**: It might be tempting to go overboard with various toppings, but doing so can lead to a messy combination. Quality over quantity is key.
**4. Rushing the Cooling Process**: Be patient! Allowing the chocolate to set properly ensures a good texture. Rushing could lead to smudges or melted chocolate.
Storage, Freezing & Reheating Tips
To keep your chocolate-covered pretzels fresh, store them in an airtight container at room temperature. They will typically last for up to two weeks, but they are best enjoyed within a week for optimal flavor and texture.
If you have an abundance of pretzels, consider freezing them to preserve their freshness. Place them in a single layer on a baking sheet to freeze individually for about an hour before transferring them to an airtight container or freezer bag. They should last for up to three months in the freezer. To enjoy, simply pull out the desired number and let them thaw at room temperature for a few minutes.
Lastly, avoid reheating chocolate-covered pretzels as this can ruin the chocolate coating. If they become soft due to heat, let them cool naturally at room temperature.
Frequently Asked Questions
**1. Can I use chocolate chips instead of chocolate bars?**
Absolutely! Chocolate chips are convenient and readily available. Just be mindful that they may contain stabilizers that can affect melting. Ensure you melt them carefully, stirring often to achieve a smooth consistency.
**2. Can I make these ahead of time?**
Yes! Chocolate-covered pretzels can be made ahead of time. Once they are fully set, store them in an airtight container for up to two weeks. This makes them great for parties or holiday gifting!
**3. What should I do if my chocolate seizes?**
If your chocolate seizes, you can still salvage it. Add a teaspoon of vegetable oil or shortening to the melted chocolate and stir until it becomes smooth again.
**4. Can I use different kinds of pretzels?**
Certainly! While traditional twist pretzels work well, you can experiment with pretzel sticks, rods, or even chocolate-covered pretzel bites. The key is to choose a pretzel that can hold up to the chocolate coating.
**5. What are some unique toppings I can use?**
The options for toppings are nearly limitless! Crushed cookies, colored sugar, nuts, or even crushed popcorn can be used for unique flavors and textures. Get creative based on the events you are planning for!
In conclusion, chocolate-covered pretzels are a delightful and satisfying treat that anyone can make with ease. They’re perfect for satisfying that sweet and salty craving, giving you numerous opportunities for experimentation with flavors and textures. So why not gather your ingredients and get started? You’ll be amazed at the sweet indulgence you’re capable of creating. And remember, these pretzels are not just about the end product—it’s about the joy of crafting something delicious with your own hands. Enjoy the process, share them with loved ones, and savor every bite!