## Prep time
20 minutes
## Cook time
0 minutes
## Total time
20 minutes
## Servings
8 servings
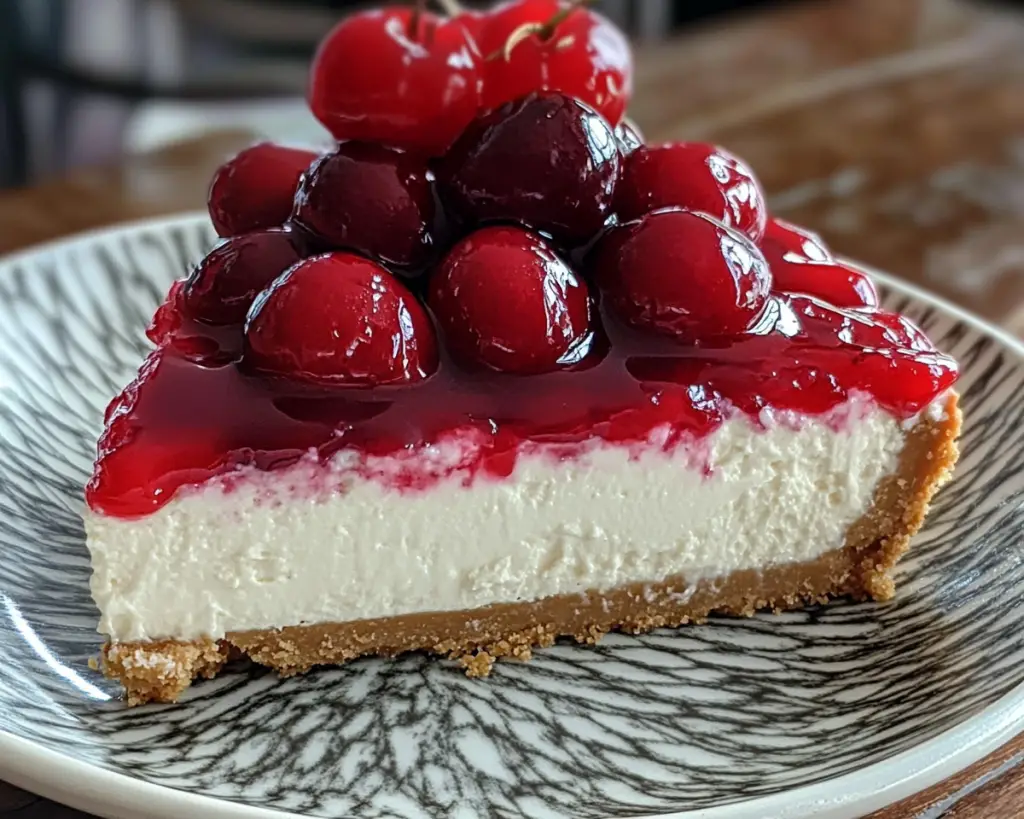
When you’re in need of an irresistible dessert, but time is short, a **no-bake cherry cheesecake** is the perfect solution. Imagine the luscious, creamy texture of the cheesecake, complemented by the bright and tangy flavor of fresh cherries topping it off. This recipe not only eliminates the need for baking but also uses simple ingredients that you probably have in your kitchen.
In this article, you will learn how to make this delightful dessert, along with variations, substitution options, and helpful tips to ensure your cherry cheesecake turns out perfectly every time.
What Is No-Bake Cherry Cheesecake?
No-bake cherry cheesecake is a rich, cream cheese-based dessert that doesn’t require any oven time, making it ideal for hot summer days, novice bakers, or busy parents. This cheesecake is made by combining softened cream cheese with sugar, vanilla, and whipped cream, which creates a light and airy filling. The cherry topping is typically made from fresh cherries or cherry pie filling, adding a vibrant burst of flavor and color.
This dessert hails from the classic cheesecake family but has a timeless twist with its no-bake aspect, allowing for a creamy texture without the hassle of baking and cooling. The **graham cracker crust** complements the cherry topping with its buttery crunch, creating an inviting contrast of textures.
Why You’ll Love This No-Bake Cherry Cheesecake
There are several reasons to fall in love with this no-bake cherry cheesecake:
1. **Quick and Easy**: With an overall prep time of just 20 minutes, this dessert can be whipped up in no time, making it an excellent option for unexpected guests or last-minute gatherings.
2. **Delicious Flavor**: The combination of sweet cream cheese and tart cherries creates a perfect balance that will satisfy any sweet tooth. Plus, it’s an excellent way to showcase seasonal fruits.
3. **Versatile and Customizable**: You can easily swap out the topping for other fruits or even chocolate ganache, making this cheesecake a canvas for your creative culinary ideas.
4. **Light and Refreshing**: Unlike baked cheesecakes, which can be dense and heavy, the no-bake version has a lighter feel, perfect for flavorful summer desserts.
5. **Crowd-Pleaser**: This cheesecake is suitable for all ages and occasions, from birthday parties to holiday celebrations, making it a go-to recipe for entertaining.
However, some might think that making a cheesecake is complex or time-consuming. But fear not—this easy no-bake recipe will dispel those misconceptions!
Ingredients You’ll Need
Here’s a list of ingredients you’ll need to make this no-bake cherry cheesecake, along with explanations for each:
– **Graham cracker crumbs (1 ½ cups)**: These provide the base of the crust, giving a sweet and crunchy texture. You can also use digestive biscuits or Oreos as alternatives.
– **Unsalted butter (1/2 cup)**: This ingredient acts as a binder in the crust and adds richness. If you’d like to reduce the fat content, you can substitute some of the butter with applesauce.
– **Cream cheese (16 ounces, softened)**: The main component of the cheesecake, cream cheese lends a rich, creamy texture. If you want a lighter option, you can use Neufchâtel cheese, which has less fat.
– **Granulated sugar (2/3 cup)**: This sweetens the cheesecake filling. You can opt for powdered sugar for a smoother consistency, though it may require some adjustments to the whip.
– **Vanilla extract (1 teaspoon)**: Adds flavor to the filling. You can also use almond extract for a different twist.
– **Heavy whipping cream (2 cups)**: Whipped to form soft peaks, this ingredient lightens the cheesecake filling and makes it fluffy. You can use coconut cream for a dairy-free alternative.
– **Cherry topping (1 can of cherry pie filling or 2 cups fresh cherries)**: This brings refreshing brightness to the cheesecake. If you’re using fresh cherries, make sure to pit and slice them for topping.
How to Make No-Bake Cherry Cheesecake
Follow these simple instructions to create your no-bake cherry cheesecake:
1. **Prepare the Graham Cracker Crust**: In a medium bowl, combine the **graham cracker crumbs** and **melted butter**. Mix thoroughly until the crumbs are fully coated. The texture should resemble wet sand. If it’s too crumbly, add a bit more melted butter. Once combined, press this mixture firmly into the bottom of a 9-inch round pie plate or springform pan. Use the back of a measuring cup to ensure it’s evenly spread out and compacted. Place the crust in the refrigerator while you prepare the filling.
2. **Make the Cheesecake Filling**: In a large mixing bowl, beat the softened **cream cheese** and **granulated sugar** together with an electric mixer on medium speed until smooth and creamy. This should take about 2-3 minutes. Scrape down the sides of the bowl to ensure all ingredients are combined.
3. **Add the Vanilla**: Once the cream cheese and sugar mixture is smooth, add the **vanilla extract**. Continue to mix until fully incorporated. This step is essential as it adds flavor to your cheesecake filling.
4. **Whip the Heavy Cream**: In a separate bowl, take the **heavy whipping cream** and whip it until soft peaks form. This usually takes 3 to 5 minutes using an electric mixer. Be careful not to over-whip, as it can turn into butter.
5. **Combine the Mixtures**: Gently fold the whipped cream into the cream cheese mixture using a spatula. Use a slow motion to keep the volume of the whipped cream; this ensures a light and fluffy cheesecake. Be careful not to mix too aggressively as you want to maintain that aerated texture.
6. **Fill the Crust**: Once combined, spoon the cheesecake filling into the prepared crust, spreading it evenly with a spatula. Smooth the top, then place it in the refrigerator to chill for at least 4 hours, or overnight if time allows. This chilling time is crucial for helping the cheesecake set properly.
7. **Add the Topping**: After the cheesecake has set, remove it from the refrigerator. If you’re using **cherry pie filling**, simply spoon it over the top of the cheesecake, ensuring even coverage. If you’re using fresh cherries, rinse and pit them before arranging them aesthetically on top of the cheesecake.
8. **Serve**: Slice the cheesecake into wedges and serve with additional cherries on the side if desired. This cheesecake is best enjoyed on the day it is prepared, but it will last for about 3-4 days in the fridge.
3 Variations & Substitutions
1. **Chocolate Cherry Cheesecake**:
– **How it Changes the Flavor/Texture**: Mixing in 1/2 cup of unsweetened cocoa powder into the cream cheese filling gives it a rich chocolate flavor.
– **Who It’s For**: Ideal for chocolate lovers who want a decadent twist on the original.
– **Tips for Success**: Consider also topping this version with chocolate shavings or a drizzle of chocolate syrup for an extra indulgence.
2. **Dairy-Free Cherry Cheesecake**:
– **How it Changes the Flavor/Texture**: Replace the cream cheese with blended cashews and coconut milk mixed with a bit of lemon juice to mimic that creaminess.
– **Who It’s For**: Perfect for those who are lactose intolerant or prefer plant-based options.
– **Tips for Success**: Soak the cashews overnight to ensure a smooth consistency. You may need to adjust the sugar depending on how sweet your coconut milk is.
3. **No-Bake Lemon Cherry Cheesecake**:
– **How it Changes the Flavor/Texture**: Adding the zest and juice of one lemon to the filling will give a refreshing citrusy kick that complements the cherries beautifully.
– **Who It’s For**: Great for those who enjoy a tart contrast with their rich desserts.
– **Tips for Success**: Adjust the amount of sugar in your filling based on the tartness of your lemons. A little extra zest can refine the flavor profile.
Common Mistakes to Avoid
1. **Overmixing the Filling**: Be careful not to overmix your cream cheese and whipped cream mixture. Overmixing can lead to a denser texture rather than the light and airy cheesecake desired. Just mix until smooth and combined lightly.
2. **Skipping the Chilling Process**: If you’re tempted to skip the chilling time, resist! The cheesecake needs this time to set and firm up so it can hold its shape when cut. If you’re in a hurry, leave it to chill for at least 2 hours; however, overnight chilling is best for optimal results.
3. **Ignoring Temperature of Ingredients**: Using cold cream cheese will result in lumps in your filling, as it won’t mix smoothly. It’s essential to let the cream cheese come to room temperature (about 30 minutes out of the fridge) before incorporating it with the other ingredients.
Storage, Freezing & Reheating Tips
To store your no-bake cherry cheesecake, cover it loosely with plastic wrap or aluminum foil to keep it fresh in the refrigerator. It can be stored for up to **4 days**. However, keep in mind that the longer it sits, the crust may become soggy.
If you want to freeze the cheesecake, slice it into portions and wrap each slice tightly in plastic wrap, then aluminum foil. It can be frozen for up to **3 months**. To thaw, place it in the refrigerator overnight before serving.
Reheating isn’t necessary for this dessert. Enjoy it cold straight from the fridge, or let it sit at room temperature for a few minutes before serving for a softer texture.
Frequently Asked Questions
1. **Can I use a different fruit topping for my cheesecake?**
– Absolutely! You can top your cheesecake with an array of fruits like blueberries, strawberries, or raspberries. Each fruit will lend its unique flavor profile and create a beautiful presentation.
2. **Is it possible to make mini no-bake cheesecakes?**
– Yes! You can easily adapt this recipe to make individual mini cheesecakes by using muffin tins or cupcake liners. Simply adjust the crust and filling proportions accordingly and about 2-3 hours of chilling time should suffice.
3. **Can I use low-fat cream cheese in this recipe?**
– Yes, you can use low-fat cream cheese for a lighter version of this cheesecake. However, it might not be as rich or creamy as the full-fat version, which is often preferred for traditional cheesecakes.
4. **What can I do if my cheesecake doesn’t set?**
– If your cheesecake didn’t set, it may not have been chilled long enough. If it’s still too soft after chilling, you can try adding a bit of gelatin dissolved in water to the filling next time, or consider using a store-bought no-bake cheesecake mix.
5. **Can I make this recipe in advance?**
– Yes, this cheesecake is perfect for making ahead of time, as it stores well in the refrigerator for a few days. Just be sure to wait until serving time to add your cherry topping, as this keeps the cherries fresh and vibrant.
In conclusion, this easy no-bake cherry cheesecake recipe is a must-try for anyone looking for a quick dessert that’s both delicious and visually appealing. With versatile options for customization and the convenience of not needing an oven, you’ll want to add this recipe to your rotation of go-to desserts. So get creative, experiment with flavors, and enjoy the sweet success of your homemade cheesecake!
Happy baking, or in this case, no-baking! Don’t forget to share your creations and inspire others to dive into the world of no-bake desserts.


