### Prep time
20 minutes
### Cook time
12 minutes
### Total time
32 minutes
### Servings
24 cookies
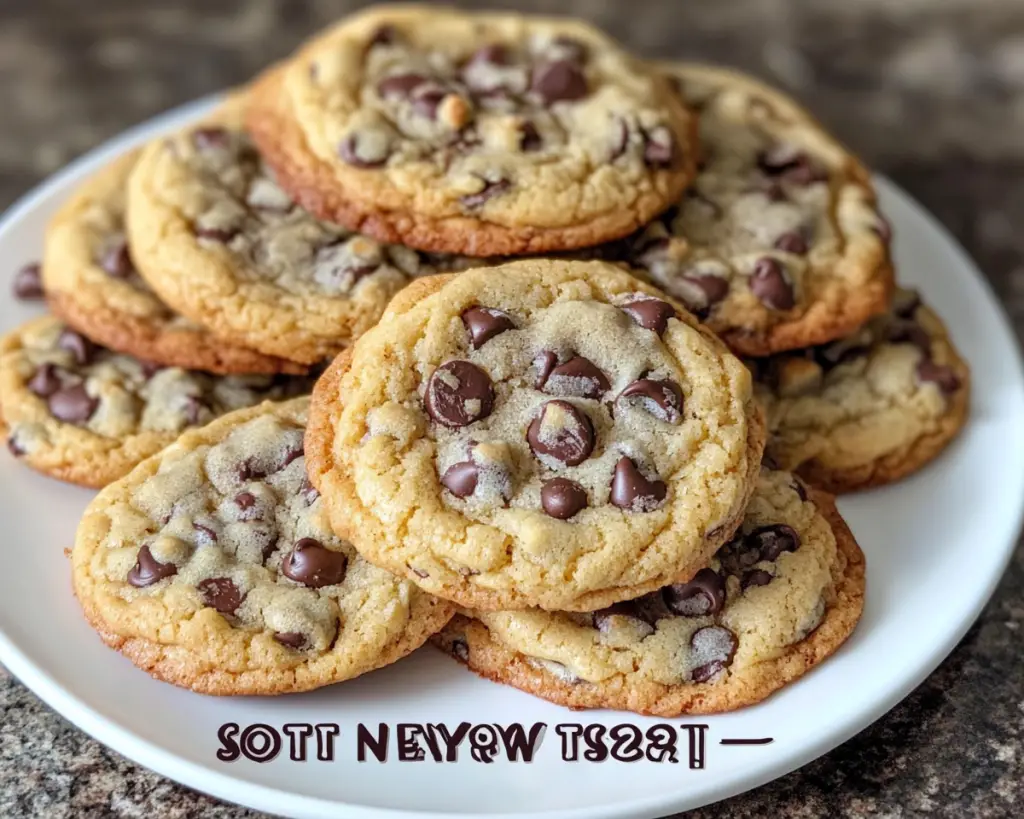
When it comes to the iconic chocolate chip cookie, few can rival the reputation of the **New York Times Chocolate Chip Cookies**. These cookies are celebrated for their rich flavor, incredible chewy texture, and the delightful contrast between sweet and salty. Whether you’re a seasoned baker or a beginner, this recipe is perfect for anyone who craves the ultimate cookie experience. Imagine pulling a tray of warm cookies from the oven, watching the chocolate chips melt slightly as the aroma wafts through your kitchen; it’s a heartwarming moment that can fill any home with joy.
This recipe is more than just a collection of ingredients; it’s a straightforward method that results in cookies often described as the perfect mix between a thick and chewy cookie. In this article, you’ll learn the ins and outs of making these delicious cookies, discover helpful baking tips, and explore variations that cater to diverse tastes and dietary preferences. Let’s dive into this cookie adventure!
What Are New York Times Chocolate Chip Cookies?
The **New York Times Chocolate Chip Cookies** gained acclaim when they were featured in the publication not only for their taste but also for their unique preparation method. Originating from the minds of bakers Jacques Torres and David Leite, these cookies elevate the classic into gourmet territory. The key to their texture lies in a combination of high-quality ingredients, precise technique, and the crucial rest time for the dough.
These cookies boast a **crispy edge** paired with a **soft and chewy center**. This delightful textural contrast is achieved through careful ingredient ratios, particularly the use of both brown and granulated sugars, which contributes to the caramelized flavor and moistness. The chocolate chips, ideally high-quality bittersweet chocolate, melt beautifully in the dough, creating pockets of rich chocolate in every bite.
The cookies are traditionally larger than average, with each scoop of dough roughly the size of a golf ball, allowing for that lovely spread and textured surface. The sprinkle of sea salt on top helps enhance the sweetness and brings a gourmet touch, making each bite a taste sensation.
Why You’ll Love These New York Times Chocolate Chip Cookies
The allure of **New York Times Chocolate Chip Cookies** lies not just in their flavor but also in their simplicity and reliability. Here are a few reasons why this recipe stands out:
– **Incredible Flavor**: The combination of brown sugar and high-quality chocolate creates a complex taste profile. Each bite bursts with sweetness balanced by a touch of salt.
– **Perfect Texture**: With their chewy centers and crispy edges, these cookies hit all the right notes for texture, making them incredibly satisfying.
– **Versatile and Customizable**: You can easily customize these cookies to suit different dietary needs or flavor preferences by swapping out the chocolate, adding nuts, or adjusting the sweetness.
– **Great for Meal Prep**: These cookies store well, making them perfect for preparing ahead for parties, gatherings, or just stocking up on a treat for busy days.
– **A Classic with a Twist**: Although they pay homage to the classic cookie, the method and careful ingredient selection elevate them into something incredibly gourmet.
With this recipe, you can bring a bit of New York’s bakery magic into your home, impressing friends and family alike.
Ingredients You’ll Need
To make these irresistible cookies, gather the following ingredients:
– **2 1/4 cups (280g) all-purpose flour**
The base of your cookie. Ensure it’s measured accurately, preferably using a kitchen scale for consistency.
– **1 teaspoon baking soda**
This is your leavening agent that helps the cookies spread and rise to the perfect height.
– **1 teaspoon sea salt**
Integral for balancing the sweetness, it also enhances the flavors of the other ingredients.
– **1 cup (2 sticks, 227g) unsalted butter, at room temperature**
Softened butter helps in achieving a creamy texture in the cookie dough.
– **3/4 cup (150g) granulated sugar**
Adds sweetness and contributes to a nice crisp edge.
– **3/4 cup (165g) packed light brown sugar**
Brown sugar contributes moisture and a rich flavor thanks to its molasses content.
– **1 teaspoon pure vanilla extract**
A must-have for any chocolate chip cookie recipe; it adds depth of flavor.
– **2 large eggs**
Eggs provide structure and moisture to the dough.
– **2 cups (340g) semisweet or bittersweet chocolate chips**
Choose high-quality chocolate for the best taste — Ghirardelli or Guittard brands are excellent options.
– **Flaky sea salt for topping**
Just a sprinkle before baking enhances the flavor and adds a gourmet touch.
Each of these ingredients plays a crucial role in ensuring your cookies come out perfectly every time. If you need substitutes or alternatives, I’ll cover those in the variations section below.
How to Make New York Times Chocolate Chip Cookies
Making these cookies doesn’t require any fancy equipment; just a reliable oven and some mixing bowls will do the trick! Here’s a step-by-step guide on how to create these delightful treats:
1. **Prepare Your Oven and Baking Sheets**
Preheat your oven to 350°F (175°C). Line two baking sheets with parchment paper to prevent the cookies from sticking and ensure they bake evenly.
2. **Mix Dry Ingredients**
In a bowl, whisk together the **flour**, **baking soda**, and **sea salt**. This helps distribute the leavening agent and salt evenly throughout the flour. Set this mixture aside.
3. **Cream Butter and Sugars**
In a large mixing bowl, using an electric mixer, beat the **butter**, **granulated sugar**, and **brown sugar** together on medium speed until the mixture is light and fluffy, about 2-3 minutes. This step is vital for incorporating air into the butter, which ultimately helps the cookies rise properly.
4. **Add Eggs and Vanilla**
Add the **eggs** one at a time, mixing well after each addition to ensure they’re fully incorporated. Then add the **vanilla extract**. Scrape down the sides of your bowl with a spatula to get all the ingredients well combined.
5. **Incorporate Dry Ingredients**
Gradually add the dry ingredients to the wet mixture, mixing on low speed until just combined. Be careful not to overmix, as this can lead to tough cookies.
6. **Fold in Chocolate Chips**
Using a spatula or wooden spoon, gently fold in the **chocolate chips** until they’re evenly distributed throughout the dough.
7. **Chill the Dough (Optional but Recommended)**
For the best flavor and texture, cover the dough with plastic wrap and refrigerate for at least 24 hours. This resting step allows the flavors to deepen and the cookies to develop that chewy texture. If you’re short on time, you can bake immediately, but the results may not be as superb.
8. **Scoop Cookies**
Using a cookie scoop or a tablespoon, drop cookie dough balls onto your prepared baking sheets. Make sure to leave enough space between them, as they will spread during baking.
9. **Sprinkle with Sea Salt**
Just before placing the trays in the oven, sprinkle each ball of dough with a little flaky sea salt. This finishing touch will enhance the flavors beautifully.
10. **Bake**
Bake in the preheated oven for 10-12 minutes, or until the edges are golden brown but the centers are still soft and slightly underbaked. Trust your instincts — they will continue to harden as they cool on the baking sheet.
11. **Cooling Time**
Let the cookies cool on the baking sheets for about 5 minutes before transferring them to a wire rack to cool completely. This step allows them to set properly and will prevent them from breaking apart.
12. **Enjoy!**
Once the cookies have cooled completely (if you can wait), indulge in the warm, gooey sensation as you bite into the freshly baked cookie. Pair with a glass of milk or a scoop of ice cream for an extra special treat!
5 Variations & Substitutions
Playing around with this classic recipe can yield a variety of different flavors. Here are some fun variations and substitutions for you to consider:
1. **Nutty Addition**
For an extra crunch, add in 1 cup of **chopped walnuts** or **pecans**. Nuts complement the chewy chocolate perfectly; their texture adds a delightful dimension. If you or someone you are baking for has nut allergies, simply omit the nuts or replace them with toasted rolled oats for a crunchy texture.
2. **Dark Chocolate Delight**
Swap out semisweet chocolate chips for **dark chocolate chips** or **milk chocolate**, depending on your sweetness preference. Dark chocolate can enhance the complexity of flavors and elevate the cookie’s gourmet aspect. For a luxurious touch, try using **Valrhona** or **Callebaut** chocolate; they’re known for their high quality.
3. **Peanut Butter Chocolate Chip Cookies**
Incorporate **1/2 cup of creamy or crunchy peanut butter** into the butter and sugar mixture during creaming. This adds a rich, nutty flavor that pairs exceptionally well with chocolate. You might want to reduce the butter slightly to maintain the dough’s right consistency; try starting with 1 stick instead of 1 cup.
4. **Vegan Version**
Substitute the **eggs** with **flax eggs** (1 tablespoon of ground flaxseed mixed with 2.5 tablespoons of water per egg, let sit for 5 minutes to thicken). Replace **butter** with a vegan butter substitute or coconut oil. Make sure to use dairy-free chocolate chips to keep these cookies 100% vegan-friendly!
5. **Brown Butter Chocolate Chip Cookies**
For an added depth of flavor, brown the butter by melting it in a saucepan over medium heat until it turns golden brown and has a nutty aroma. Allow it to cool before mixing with sugars. Brown butter adds a caramel-like richness that takes these cookies to another level!
Common Mistakes to Avoid
Baking can sometimes be tricky, especially when it comes to cookies. Here are some common pitfalls to avoid:
– **Too Much Flour**: Ensure you accurately measure flour. Too much flour can result in dry cookies. Using a kitchen scale is the best way to ensure you’re using the right amount. Remember, fluff up the flour with a spoon and spoon it into your measuring cup rather than scooping it directly.
– **Not Chilling the Dough**: While you can bake them right away, letting the dough rest in the fridge for at least a few hours — or ideally 24 hours — can make a significant difference in flavor and texture. Skipping this step rushes the development of flavors.
– **Underbaking or Overbaking**: Keep an eye on your cookies as they bake. They should be golden around the edges but still soft in the center. Oven temperatures can vary, so your baking time might need slight adjustments.
– **Using Low-Quality Ingredients**: Since these cookies hinge on the quality of your ingredients, using mediocre chocolate or standard sugars can lead to lackluster results. Opt for the best chocolate chips you can find, and if possible, organic butter and flour.
– **Overmixing the Dough**: Once you combine the wet and dry ingredients, mixing just until incorporated is key to achieving that perfect chewy texture. Overmixing can develop gluten and result in tougher cookies.
Storage, Freezing & Reheating Tips
Proper storage ensures your cookies remain fresh and delicious for longer:
– **Room Temperature Storage**: Store cookies in an airtight container at room temperature for up to 1 week. Placing a slice of bread in the container can help keep them soft, as the bread will absorb any excess moisture.
– **Freezing**: If you want to freeze cookies, let them cool completely before placing them in a single layer in a freezer-safe bag or container. They can be stored in the freezer for up to 3 months. For convenience, you can also freeze the cookie dough directly; scoop the dough onto a baking sheet, freeze until firm, and then transfer to a bag. Bake from frozen, adding an extra minute or two to the baking time.
– **Reheating**: When you’re ready to enjoy your frozen cookies, you can either thaw them at room temperature or microwave them for about 15-20 seconds. This will revive their soft texture and warm them up perfectly.
Frequently Asked Questions
1. **Why are my cookies spreading too much?**
If your cookies are spreading more than expected, it could be due to several reasons. The butter may have been too warm during mixing, causing it to liquefy too much. Make sure to use room temperature butter, not melted butter, and chill your dough if you’re experiencing issues. Additionally, ensure you’re measuring your flour properly to avoid adding excess.
2. **Can I use whole wheat flour instead of all-purpose?**
Yes, but it’s essential to substitute only half the flour with **whole wheat flour** to maintain the texture. Whole wheat flour can create denser cookies, so if you want a healthier alteration, also consider adjusting the sugar and adding a touch more moisture.
3. **Why do I need to chill the dough?**
Chilling the dough helps develop flavors, prevents the cookies from spreading too much, and ensures a chewier texture. During chilling, the fats solidify, which means they’ll melt more slowly in the oven, resulting in thicker cookies with a soft center.
4. **Can I make these cookies gluten-free?**
Absolutely! Substitute the all-purpose flour with a cup-for-cup gluten-free flour blend designed for baking. Make sure to select a blend that contains xanthan gum, which mimics the elasticity gluten provides in traditional recipes.
5. **How do I bake cookies evenly?**
To achieve even baking, rotate your baking sheets halfway through the baking time. If your oven has hot spots, this ensures all cookies get equal time and heat exposure. Also, try to space out the cookies adequately to allow for proper air circulation.
In conclusion, the **New York Times Chocolate Chip Cookies** are more than just a delightful treat; they are an experience that brings people together. Whether it’s a bustling family gathering or a quiet evening at home, these cookies hold the power to create cherished memories.
So go ahead and try your hand at this classic recipe! Don’t hesitate to tweak it according to your personal taste or dietary needs. Remember to embrace your time in the kitchen—the joy of baking is as much about the process as it is about the finished product. Enjoy creating something delicious that will undoubtedly bring smiles to those who share in the joy of your homemade chocolate chip cookies!


