Prep time: 15 minutes
Cook time: 30 minutes
Total time: 45 minutes
Servings: 4
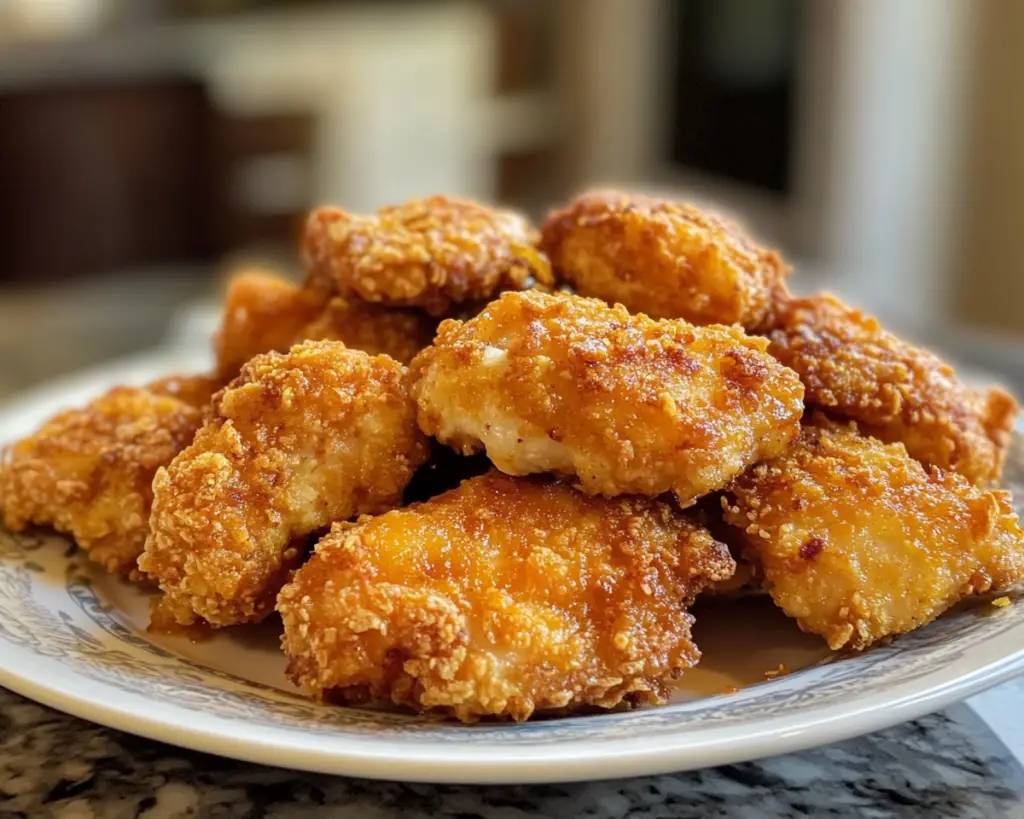
Crispy Malibu Chicken, also fondly known as the Perfect Golden Cheesy Delight, is more than just a dish; it’s a nostalgic journey with each crispy bite. Picture this: you’ve had a long day, and all you crave is a comforting meal that tantalizes your taste buds and satisfies your hunger. This delightful recipe combines a crisp crust, succulent chicken, and ooey-gooey cheese, all while being easy enough for even a beginner to whip up. With a bit of passion and the right ingredients, you can create a dish that feels gourmet but is incredibly rewarding at the same time.
What makes this Crispy Malibu Chicken recipe extra special is its versatile nature; it easily adapitates to dietary preferences and ingredient swaps while still delivering an explosion of flavors. Throughout this article, you will learn how to prepare this enchanting dish with step-by-step instructions, perfect variations suited for various dietary needs, common mistakes to avoid, and ultimately, how to serve it to your family or friends in a way that will leave them asking for seconds.
What Is Crispy Malibu Chicken Recipe – Perfect Golden Cheesy Delight?
Crispy Malibu Chicken is a delightful dish that originates from classic American cuisine, particularly popular in casual dining settings and family-oriented restaurants. It combines chicken breasts, breaded and fried until golden brown, topped with a substantial layer of cheese. The dish is both satisfying and indulgent, making it a favorite among people of all ages. Its unique textural contrasts—the crispiness of the breading coupled with the gooiness of melted cheese—make each bite a memorable experience.
But what exactly does “Malibu” imply in this context? The name often brings to mind the laid-back, sunny coast of California, where tropical flavors and ease reign supreme. While this dish doesn’t incorporate tropical ingredients per se, it successfully embodies a spirit of carefree dining. The flavor profile is robust yet comforting, thanks to a harmonious blend of seasonings. You’ll find that Crispy Malibu Chicken perfectly encapsulates texture and taste, offering a fulfilling dish that can be enjoyed any day of the week.
In this recipe, we’re going to explore the meticulous steps to achieve that flawless crispy exterior while maintaining juicy tender chicken on the inside. Expect flavors that coax a sigh of satisfaction as you savor each mouthful, making it irresistible for both family dinners and casual gatherings.
Why You’ll Love This
Crispy Malibu Chicken is a winner for many reasons. To start, the *taste* is absolutely incredible. The combination of crispy breading and melted cheese creates a flavor experience that is rich and satisfying. Whether you’re sharing it with your family during a busy weeknight or serving it at a dinner party, this recipe will win your guests’ hearts—and their appetites.
Beyond its *tantalizing taste*, this recipe is straightforward and requires minimal culinary skill. It’s approachable enough for beginners, making it a great choice if you’re still finding your footing in the kitchen. Just follow the clear, step-by-step instructions, and you’ll have a dish that looks like it came straight from a professional kitchen.
Furthermore, this dish is cost-effective, especially if you’re cooking for multiple people. The ingredients are economical, and you’re likely to find most of them in your kitchen already. Compared to dining out, preparing this dish at home will not only save your budget but also allow you to customize flavors to suit your and your family’s preferences.
Finally, one common misconception is that deep-frying is the only way to get that perfect crispy texture. While frying does yield a satisfying crunch, you can also achieve excellent results using the oven, making this dish healthier without sacrificing flavor. This versatility caters to various dietary preferences, opening up additional avenues for customization based on dietary restrictions.
Ingredients You’ll Need
- Chicken breasts: Six boneless, skinless chicken breasts serve as the main protein. Look for ones that are similar in size for even cooking. If you prefer a leaner option, chicken thighs can also be used.
- Breadcrumbs: Use panko breadcrumbs for that extra crunch. If you’re looking for a gluten-free alternative, you can substitute these with crushed cornflakes or gluten-free breadcrumbs.
- Eggs: Two large eggs act as a binder, helping the breadcrumbs adhere to the chicken. For a vegan option, consider using a flaxseed meal mixed with water as a binding agent.
- Shredded cheese: A blend of mozzarella and cheddar cheese provides the gooey cheesy goodness that pulls this dish together. Feel free to experiment with different cheese varieties like Monterey Jack or pepper jack for added flavor.
- Seasonings: A mix of salt, pepper, garlic powder, and paprika elevates the flavor profile. Customize based on your preferences to create a unique twist.
- Flour: For dredging the chicken, all-purpose flour primarily aids in adhering to the egg wash and breadcrumbs. If you’re gluten-free, use a gluten-free flour blend.
- Oil: For frying, choose an oil with a high smoke point, like canola or vegetable oil. If you’re baking, olive oil can add a lovely flavor.
Each ingredient plays a crucial role in bringing the dish to life. While it’s essential to source good-quality chicken, don’t forget that fresh seasonings enhance the *overall experience*. The right blend can turn an ordinary meal into something extraordinary.
How to Make
To prepare your Crispy Malibu Chicken, gather all your ingredients and follow these step-by-step instructions:
- Prepare the chicken: Start by placing the boneless, skinless chicken breasts on a cutting board. If they are uneven in thickness, pound them gently using a meat mallet to ensure even cooking. This step is vital for achieving perfectly cooked chicken that’s tender and juicy.
- Set up your breading station: In three separate shallow dishes, set out the all-purpose flour, beaten eggs, and panko breadcrumbs mixed with seasonings. Dredge each chicken breast first in the flour, ensuring an even coating, then dip into the egg wash, letting any excess drip off before pressing into the breadcrumb mixture. Coating the chicken in this order will ensure a perfectly crisp exterior upon cooking.
- Heat the oil: Heat a large skillet over medium-high heat and add enough oil to cover the base of the pan. Wait until the oil is shimmering but not smoking, indicating it is hot enough to give that golden-brown crust. A temperature check can be done by dropping a breadcrumb into the oil; if it sizzles instantly, you’re ready to fry.
- Fry the chicken: Carefully place the coated chicken breasts into the skillet, ensuring not to overcrowd the pan. Fry each piece for approximately 5-7 minutes on each side or until they are golden brown and cooked through (the internal temperature should reach 165°F or 75°C). Use a pair of tongs to flip the chicken gently to avoid losing the breading.
- Add the cheese: Once the chicken is golden brown and cooked, place them on a paper towel-lined plate to drain excess oil. On a baking sheet, arrange the chicken pieces and generously sprinkle shredded cheese over each piece. Broil in the oven for 2-3 minutes until the cheese is bubbly and golden, keeping a close eye to prevent burning.
- Serve: Once the cheese has melted to perfection, remove the chicken from the oven and let it rest for a few minutes before serving. This resting period helps redistribute the juices within the chicken, keeping it more tender. Serve with lemon wedges or your choice of dipping sauce for that extra zing.
Following these detailed steps will yield perfectly crispy, cheesy chicken that will have everyone asking for more. Don’t hesitate to add your spin, be it through dipping sauces or accompanying sides, to customize it to your family’s tastes.
Variations & Substitutions
Gluten-Free Variation: One of the simplest ways to adapt this recipe for those with gluten sensitivities is to replace traditional breadcrumbs with gluten-free alternatives. Moreover, you can use gluten-free flour for dredging, which won’t compromise flavor while ensuring those with dietary restrictions can enjoy this delightful chicken.
Spicy Malibu Chicken Variation: If you like a kick in your meal, consider adding crushed red pepper flakes to the breadcrumb mixture. This variation not only adds heat but also a delightful depth of flavor. Pair this spicy chicken with a cool ranch or blue cheese dip to balance out the flavors. You can also serve it with a side of tangy slaw for those who enjoy a crunch.
Herb-Infused Version: For those who enjoy fresh flavors, mixing in finely chopped herbs like parsley, oregano, or basil into your breadcrumb mixture can enhance the overall taste of the dish. This variation can bring brightness to the chicken, giving the dish a garden-fresh touch, making it perfect for spring or summer dining.
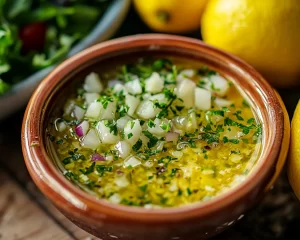
Lemon Garlic Alternative: Another fantastic twist is to marinate the chicken breasts in a mixture of lemon juice, garlic, and olive oil for an hour before the breading process. This pre-marination not only infuses the chicken with flavor but also maintains moisture during cooking. The result is a refreshing, zesty chicken that pairs beautifully with a side of roasted vegetables or a fresh garden salad.
Vegetable Option: For a vegetarian alternative, you can replace the chicken with thick slices of eggplant or zucchini. Just bread and cook them the same way. This variation makes for an exciting meatless option while retaining that wonderful crispy texture, along with the cheesy goodness on top.
Each variation opens up new pathways to explore the casual yet satisfying essence of Crispy Malibu Chicken. No matter which route you take, you’re guaranteed a delightful meal experience.
Common Mistakes to Avoid
When making Crispy Malibu Chicken, there are several common pitfalls to be aware of. One critical mistake is skimping on the *seasonings*. Ensure to adequately season each component, from the flour to the breadcrumbs, as this sets the flavor foundation for the entire dish. Without this, the chicken can taste flat and unappetizing.
Another frequent error is overcooking the chicken. Rushing the frying process may lead to burnt breadcrumbs while leaving the chicken undercooked inside. To prevent this, ensure that the oil is sufficiently hot before adding the chicken, and test the internal temperature with a meat thermometer to assure safety and optimal juiciness.
Lastly, frying too many pieces at once can cause a drastic drop in oil temperature. Avoid overcrowding the pan. This slows down the cooking process and can lead to greasy chicken instead of a delightful crispy outside. It’s advisable to cook in batches for those perfect golden-brown results that everyone craves.
Storage, Freezing & Reheating Tips
Proper storage of Crispy Malibu Chicken is essential to maintain its flavor and texture. If you have any leftovers, let the chicken cool completely before transferring it to an airtight container. It can last in the refrigerator for up to 3 days. However, be aware that reheating may cause the coating to lose its crispness.
For freezing, wrap each chicken piece in plastic wrap and place them in a freezer-safe bag. Properly stored, they can remain frozen for up to 2-3 months. When you’re ready to eat, thaw overnight in the refrigerator. Reheating can be done in the oven at 375°F (190°C) for about 10-15 minutes, allowing it to regain some of its crispy exterior.
For food safety, never leave cooked chicken at room temperature for longer than **two hours**. Proper refrigeration and reheating are vital to prevent any risk of foodborne illness.
Frequently Asked Questions
Can I bake Crispy Malibu Chicken instead of frying it?
Yes, you can! For a healthier option, place the breaded chicken on a parchment-lined baking sheet and spray lightly with cooking oil. Bake at 400°F (200°C) for 20-25 minutes or until golden and cooked through, flipping halfway to achieve an even crisp.
What dipping sauces pair well with Crispy Malibu Chicken?
Crispy Malibu Chicken pairs beautifully with various dipping sauces. Some popular options include ranch, honey mustard, or a spicy Sriracha mayo for those who enjoy a kick. You could also serve it with a zesty marinara sauce for an Italian twist.
Can I use frozen chicken breasts for this recipe?
It’s recommended to thaw chicken breasts before cooking to ensure even cooking and achieve the desired texture. If using frozen chicken, let it thaw overnight in the fridge for best results.
Is this recipe suitable for meal prep?
Absolutely! Crispy Malibu Chicken can be a great choice for meal prep. Prepare them ahead and store individual portions in the fridge or freezer. Just be aware that you’ll want to reheat them in the oven to regain the crunchiness.
What sides go well with Crispy Malibu Chicken?
This dish is versatile and pairs well with a variety of sides. Consider serving it alongside roasted vegetables, a crisp salad, or some creamy mashed potatoes to create a complete meal experience that tantalizes your taste buds.
Conclusion:
Crispy Malibu Chicken is a delightful dish that combines ease of preparation with incredible flavor and texture. It’s perfect for casual weeknight dinners or entertaining guests, loading you up with comfort while remaining versatile enough to accommodate various preferences. You can customize it to suit your family’s taste, all while enjoying that crunch and melty cheese that keeps everyone coming back for more. So roll up your sleeves, give it a try, and don’t forget to share your culinary triumphs with friends and family! Happy cooking!