Prep time: 20 minutes
Cook time: 12 minutes
Total time: 32 minutes
Servings: 24 cookies
The aroma of freshly baked cookies can evoke cherished memories and warm feelings of love and celebration. If you’re reminiscing about special occasions, you might remember those delightful swirl cookies that mesmerize with their vibrant colors and irresistible taste. These Swirl Cookies are not just a treat; they are a journey down memory lane, reminding you of times spent with loved ones, especially during Valentine’s Day. Decorating sweets is a beautiful expression of affection, and this recipe allows you to get creative while enjoying the delightful interplay of flavors.
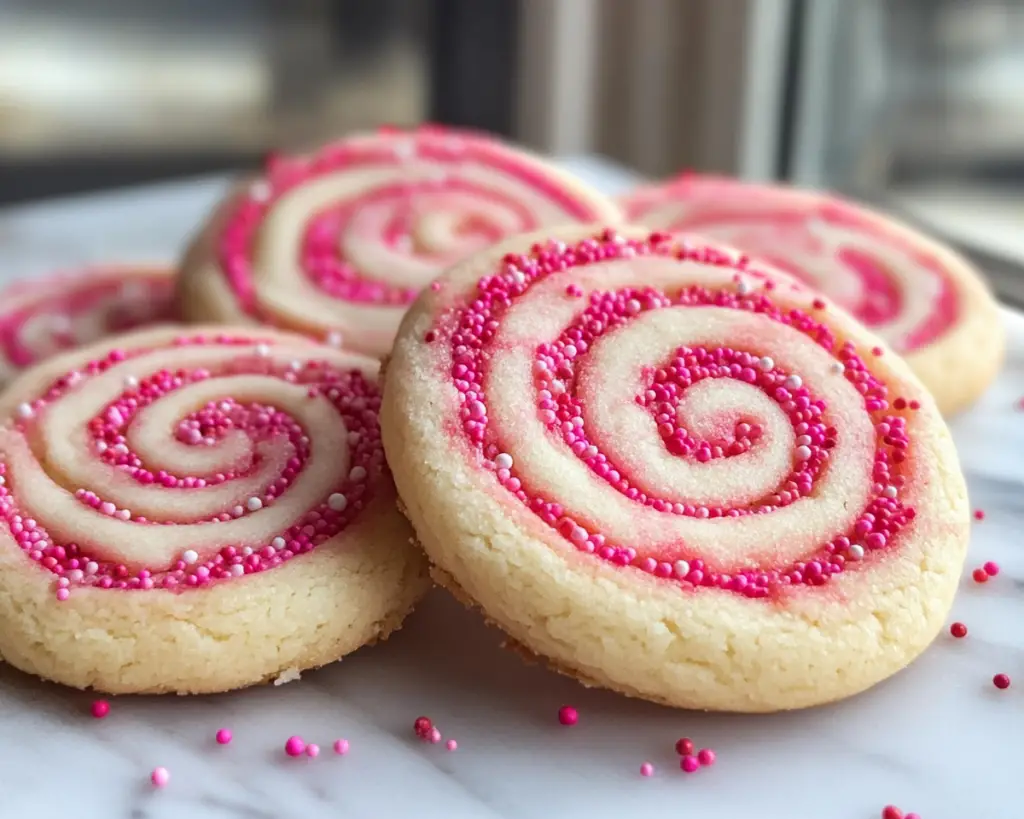
This easy Valentine’s Day recipe gives you stunning pinwheel treats adorned with colorful sprinkles that are guaranteed to impress but are simple enough for beginner bakers. With just a few steps, you will learn how to achieve a delightful mix of buttery sweetness and playful visuals that will make your loved ones smile. Whether you are preparing for a classroom party or a cozy evening at home with your sweetheart, these cookies provide the perfect touch of flair.
What Is Swirl Cookies Recipe – Easy Valentine’s Day Pinwheel Treats with Sprinkles?
Swirl cookies, also known as pinwheel cookies, are a visually stunning dessert that combines two or more flavors of dough. Originating from the traditional methods of baking where flavors and colors intertwined beautifully, these cookies are as pleasing to the eye as they are to the palate. The texture is soft yet firm, allowing it to be sliced cleanly into rounds that reveal a delightful spiral pattern. Each bite bursts with a combination of flavors, where the hint of vanilla or cocoa creates a delightful contrast against the buttery backdrop.
The joy of baking these cookies lies not just in their taste but in the creative process that you and your family can enjoy together. Each swirl represents a unique blend of flavors, often enhanced by festive decorations like colorful sprinkles that capture the spirit of special occasions. Considered a perfect treat for Valentine’s Day, these cookies symbolize love and thoughtfulness. They can be molded to fit your celebration, whether as a sweet gift or a charming centerpiece on a dessert table.
Moreover, the possibilities are endless! By incorporating different extracts and colored sprinkles, you customize each batch to suit events such as birthdays, holidays, or just a delightful weekend treat. The magic unfolds when the dough becomes united into a beautiful scroll, a true testament to your cooking skills.
Why You’ll Love This
These swirl cookies deliver incredible taste and visual appeal, making them a favorite for all ages. The delightful sweetness, combined with the inviting softness of the cookie, creates a dessert that everyone can enjoy. Additionally, making these cookies is a budget-friendly option that doesn’t compromise on flavor. Using simple pantry staples, this recipe is perfect for busy parents looking to whip up something special without breaking the bank.
The process itself is straightforward, making it accessible even for novice bakers. The joy of creating these cookies offers a wonderful experience to children and families who can join in the fun. Don’t let misconceptions about baking intimidate you; with the right techniques and a little practice, anyone can master this recipe.
Consider this: many cookie recipes require cumbersome techniques, yet this one provides clear and uncomplicated steps. Plus, it gives you the flexibility to experiment with flavors and colors, allowing you to put a personal touch on each batch. Even if you’re not a master baker, you’ll find success with these cookies with the right guidance and a little creativity.
Ingredients You’ll Need
- All-purpose flour: This is the primary structure for the cookies, giving them a soft yet firm consistency. Substitute with gluten-free flour for a gluten-free version.
- Unsalted butter: Using unsalted allows you to control the salt levels in your baking. It offers a rich flavor and perfect texture.
- Sugar: Granulated sugar not only sweetens the dough but aids in achieving that coveted crispy outer texture.
- Powdered sugar: Used for the icing or to dust the finished cookies; it provides a fine sweetness without the graininess of granulated sugar.
- Eggs: Essential for binding the ingredients together while also adding moisture to the dough.
- Baking powder: A vital leavening agent responsible for helping the cookies rise to the desired thickness.
- Vanilla extract: Adds a warm, comforting flavor that complements the sweetness of the cookies beautifully.
- Cocoa powder: For the chocolate version of these cookies, offering depth and richness in flavor.
- Sprinkles: These are the joyful finishing touch, bringing color and fun to your swirl cookies.
Every ingredient plays a critical role in achieving the best possible result in your baking. It’s essential to use quality ingredients, as they can significantly influence the final product. For instance, using fresh eggs and high-quality vanilla extract enhances the flavor significantly, making your cookies unforgettable. Furthermore, feel free to experiment with different flavored extracts, such as almond or peppermint, to customize your cookies for different occasions.
How to Make
1. **Prepare the dough.** Start by creaming together the unsalted butter and granulated sugar in a large mixing bowl using a hand mixer or stand mixer. Mix on medium speed until the mixture is light and fluffy, approximately 3-5 minutes. This step is crucial as it incorporates air into the dough, ensuring your cookies are light and tender.
2. **Incorporate the eggs and vanilla.** Add the eggs, one at a time, ensuring each is fully mixed before adding the next. Once combined, pour in the vanilla extract. Mix on low speed until just combined. The mixture should appear creamy and smooth, free of any lumps, indicating that the wet ingredients are well incorporated.
3. **Combine dry ingredients.** In a separate bowl, whisk together the all-purpose flour, baking powder, and a pinch of salt. Gradually add the dry mixture to the wet mixture, mixing on low speed until combined. Stop mixing when no flour is visible. Overmixing can result in tough cookies, so it’s essential to just blend until the dough comes together.
4. **Color the dough.** Divide the dough into two separate portions. In one half, add cocoa powder and mix well to create your chocolate dough. For the other half, leave as vanilla. Feel free to add a few drops of food coloring if you want to add visual interest. This will enhance the look of your pinwheels, transforming them into delightful treats perfect for celebrations.
5. **Roll it out.** Place one portion of dough between two sheets of parchment paper and roll it out until it’s about ¼ inch thick. Repeat this with the second portion of dough. The key here is to maintain a consistent thickness, which ensures even baking. Once both layers are rolled out, it’s time to assemble them!
6. **Layer and swirl.** Remove the top layer of parchment from one of the rolled-out dough pieces and lay it over the other layer. Carefully peel back the parchment from the top layer. Starting from one end, gently lift the edge of the dough and begin to roll it tightly into a log. This is where the magic happens, as the different colors create that enticing swirl effect. Once fully rolled, wrap the log tightly in plastic wrap or parchment and chill in the refrigerator for at least 30 minutes.
7. **Preheat the oven.** Set your oven to 350°F (175°C) while the dough chills. This step is essential as it ensures the cookies bake evenly, achieving that beautiful golden-brown color.
8. **Slice and bake.** Once chilled, remove the log from the refrigerator and slice it into ¼-inch thick rounds. Place these rounds onto a baking sheet lined with parchment paper, ensuring to space them at least 2 inches apart to allow for spreading. Bake in the preheated oven for about 10-12 minutes or until the edges are lightly golden. The aroma that fills your kitchen during baking will be irresistible!
9. **Cool and decorate.** After baking, allow the cookies to cool on the baking sheet for about 5 minutes before transferring them to a wire rack. Once cooled completely, feel free to dust with powdered sugar or dip them in icing for added sweetness. A generous sprinkle of colorful sprinkles will make them festive and eye-catching!
10. **Serve and enjoy!** These cookies are best enjoyed fresh but can be stored for several days in an airtight container. Gather family and friends, pour some milk or coffee, and share these delightful treats.
Variations & Substitutions
Chocolate Mint Variation
Add a refreshing twist by incorporating peppermint extract into the chocolate dough. This variation is perfect for mint lovers and brings a festive flair, especially around holidays. You can also add crushed peppermint candies to the cookie dough for a delightful crunch. The cookie will have a rich chocolate flavor, accentuated by the bright notes of mint, creating an invigorating treat that stands out at any gathering.
Colorful Sprinkles Variation
If you want to make your cookie visually stunning, mix colorful sprinkles directly into the dough before rolling it out. This not only adds visual appeal but also a playful crunch in every bite. This variation is perfect for kids, as they are likely to enjoy the added texture and brightness. You can match the sprinkles to any celebration theme, such as heart-shaped sprinkles for Valentine’s Day!
Vegan Variation
For a vegan twist, substitute unsalted butter with vegan butter and replace eggs with a flaxseed meal or applesauce. This creates a plant-based version of the swirl cookies while maintaining delicious flavors. The texture may be slightly different, but the taste will be just as delightful, allowing everyone to indulge in a sweet treat, regardless of dietary preferences.
Citrus Twist Variation
Zest of lemon or orange can be added to either or both doughs for a refreshing citrus flavor. This brightens up the cookies, making them even more delightful, especially in the warmer months. The zest adds an aromatic component that complements the sweetness beautifully, offering a sophisticated uplift to your standard swirl recipe.
Common Mistakes to Avoid
Baking can sometimes seem tricky, but understanding common pitfalls can streamline your experience. One common mistake is over-mixing the dough after adding the flour. This can result in tough cookies instead of the tender, melt-in-your-mouth texture you desire. Aim to mix until just combined to avoid this issue.
Another error is not chilling the dough properly before slicing. Chilling helps the butter firm up, preventing the cookies from spreading too much while baking. Skipping this step may leave you with flat cookies rather than pillowy swirls. It’s also vital to ensure you’re using the right measuring techniques; flour should be spooned and leveled, not scooped, to maintain consistency in your results.
Be cautious with oven temperatures as well. Every oven is different, and not all may be accurately calibrated. Always keep an eye on your cookies while baking, particularly nearing the end time. You should remove them once they are golden around the edges but slightly soft in the center, as they will continue to bake on the pan as they cool.
Storage, Freezing & Reheating Tips
Storing your swirl cookies properly will keep them fresh and delicious for longer. Place cooled cookies in an airtight container at room temperature, where they can last for up to a week. If you want to extend their life, consider freezing them.
To freeze, wrap each cookie individually with plastic wrap and then place them in a freezer-safe bag. This allows you to pull out just the number of cookies you want later without defrosting the entire batch. Frozen cookies can last for up to three months. When you’re ready to enjoy, simply transfer them to the refrigerator a few hours before serving or microwave them for a few seconds for warm, delectable bites.
Be aware of safe food practices; ensure that your cookies are stored in a cool area and are not exposed to moisture to avoid becoming stale. When reheating, doing so gently will maintain their tender texture and delightful taste.
Frequently Asked Questions
Can I make these cookies without using cocoa powder?
Absolutely! You can leave out the cocoa powder and use only the vanilla dough for a delightful version. If you want to add a twist, consider flavoring the vanilla dough with almond or lemon extract instead. The options are genuinely endless, allowing you to customize the flavors to your liking.
How can I make these cookies gluten-free?
Substituting all-purpose flour with a suitable gluten-free flour blend will give you excellent results. Make sure to use a blend that includes xanthan gum, which helps replicate the binding properties of gluten. Always check individual ingredient labels if you’re maintaining strict dietary restrictions.
What should I do if my dough is too sticky?
If you find your dough too sticky, it’s essential to know that this can happen due to moisture levels in the air or due to ingredients. You can add a small amount of flour, a tablespoon at a time, until you achieve the desired consistency. You may also benefit from chilling the dough longer, as this will help firm it up.
Can I decorate these cookies with icing?
Yes, decorating them with icing is a fantastic idea! After baking and cooling, you can drizzle a simple icing made from powdered sugar and a touch of milk or lemon juice. Feel free to sprinkle additional items on the icing, such as nuts or extra sprinkles, to add some flair and flavor.
How long do I need to chill the dough?
It’s recommended to chill the dough for at least 30 minutes, but that can be extended if you have time. Chilling helps in firming up the butter and makes it easier to slice without sticking to your knife. Allowing it to chill longer, even up to a few hours, further benefits flavor development.
Conclusion:
These Swirl Cookies are incredibly versatile, bursting with flavor and festive cheer, making them an ideal choice for any occasion. Their delightful taste and charming appearance add a special touch, elevating your baking repertoire. With just a little effort, you can create a treat that’s not only visually stunning but also brings happiness to everyone who enjoys them. Don’t hesitate to try customizing the flavors or decorating them to suit your style. This recipe is a joyful exploration into baking that you won’t want to miss. So gather your ingredients, invite your loved ones into the kitchen, and create something truly special together!


