Prep time: 15 minutes
Cook time: 45 minutes
Total time: 1 hour
Servings: 8
The mere thought of a **Classic Yogurt Cake** evokes a sense of comfort and nostalgia. Whether you are reminiscing about cozy family gatherings or seeking a simple yet delightful dessert recipe, this cake has a way of bringing people together. The charm of a yogurt cake lies in its *effortless preparation* and *wonderfully soft texture*. Made with just a few simple ingredients, it is a treat that delights the taste buds without overwhelming the cook. In this article, you’ll discover how to create a cake that is light yet satisfying, the tricks to perfecting it every time, and various ways to make it your own.
This recipe is more than just a cake. It represents an essential part of *French baking traditions*, where yogurt acts as a crucial ingredient for creating moisture and tenderness in baked goods. This recipe can even be made gluten-free or with alternative sweeteners, making it suitable for various dietary preferences. You will learn the basics of this recipe, along with tips for elevating it further, and exciting variations to consider.
What Is Classic Yogurt Cake Light Soft and Foolproof?
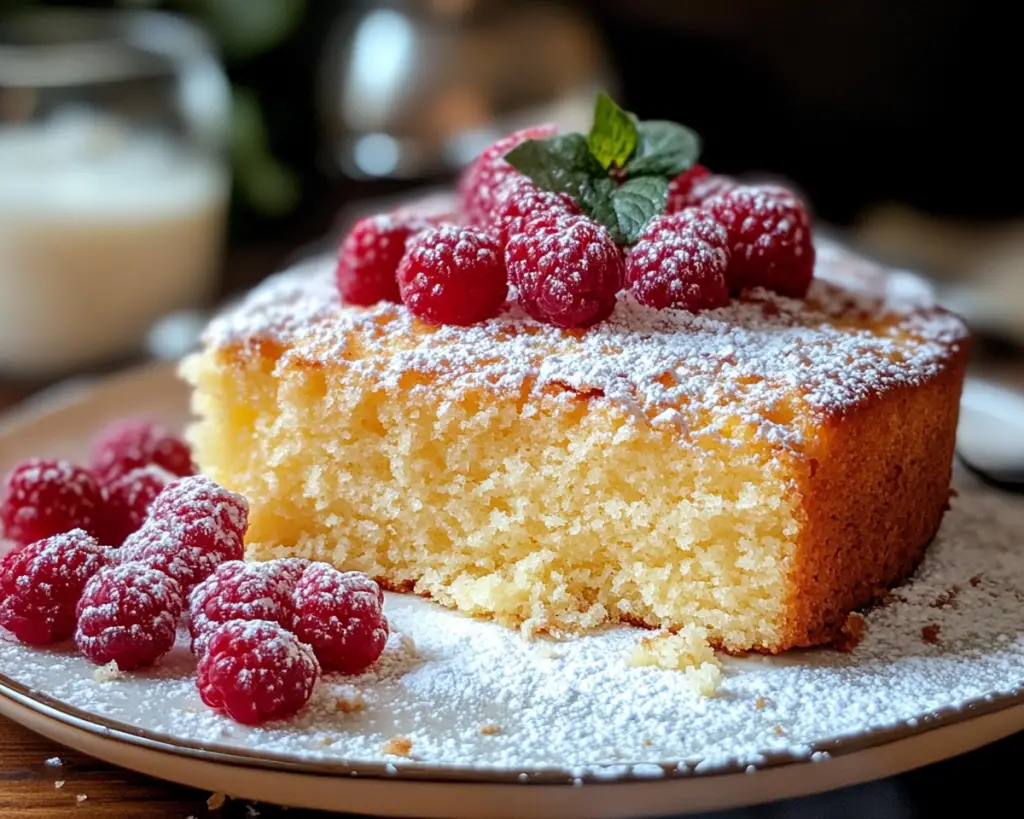
Classic Yogurt Cake is a delightful dessert that effortlessly combines simplicity with flavor. Originating from France, this cake is often prepared using plain yogurt as a key ingredient, which contributes to its *incredible softness* and moistness. The cake typically features a light vanilla flavor that pairs beautifully with countless toppings or fruit. Its texture is often described as *light, airy, and melt-in-your-mouth*, which makes it a favorite for both children and adults.
One of the most appealing aspects of this cake is its *foolproof nature*. Even novice bakers can achieve delightful results, thanks to straightforward steps and common ingredients. The yogurt not only enhances its moisture but also allows for a slight tanginess that balances the sweetness perfectly. It’s easy to see why this cake shines as a go-to dessert for various occasions, from birthday parties to casual afternoon teas.
The beauty of Classic Yogurt Cake doesn’t only lie in its flavor and texture. Simple enough for a weeknight dessert, it becomes sophisticated when served with fruits, creams, or glazes. Using yogurt helps to keep the *fat content lower than many other cakes*, making it a guilt-free option for sweet cravings.
Why You’ll Love This
You’ll love this Classic Yogurt Cake for numerous reasons. Firstly, its *deliciously soft texture* makes it a treat for anyone looking for a dessert that melts in the mouth. The cake’s flavor is subtly sweet and effortlessly elevates any simple gathering, giving it a touch of elegance. Because the base is versatile, easy variations can satisfy different dietary needs without needing an extensive list of ingredients.
Another appealing factor is the ease of preparation. In less than an hour, you can whip up this delightful cake, making it ideal for busy parents or anyone wanting a quick dessert solution. Unlike other cakes that require meticulous measuring or special techniques, Classic Yogurt Cake welcomes even the most inexperienced bakers into the kitchen with joy.
Additionally, this cake is budget-friendly. You won’t need to spend a fortune on fancy ingredients, making it a fantastic choice for those who are looking to create delicious desserts without breaking the bank. Health-conscious individuals will appreciate that it’s lower in fats than other cake options, suitable for anyone wanting to indulge without compromising their dietary goals.
Finally, the cake is incredibly versatile. You can easily modify it according to your preferences, from incorporating different flavors to adding various toppings. The possibilities are limitless, allowing you to customize your cake with seasonal fruits, chocolate, or nut toppings.
Ingredients You’ll Need
- Plain Yogurt (1 cup): This is the star ingredient which contributes to the cake’s moisture and softness. You can use any kind like Greek yogurt for a thicker texture or dairy-free options like coconut yogurt.
- Granulated Sugar (1 cup): This sweetens the cake while helping with the browning process during baking. For a healthier twist, consider using coconut sugar or honey, but you may need to adjust the liquid in the recipe.
- Eggs (2 large): Eggs provide structure and richness to the cake. If you’re looking for a vegan alternative, try using flaxseed meal as an egg substitute – one tablespoon of flaxseed mixed with three tablespoons of water equals one egg.
- All-Purpose Flour (1.5 cups): The backbone for the cake, providing the necessary structure. You can substitute with almond flour or a gluten-free blend for a gluten-free version.
- Baking Powder (2 teaspoons): This leavening agent helps the cake rise, resulting in a fluffy texture. Always check for freshness to ensure optimal rise.
- Salt (1/4 teaspoon): Just a pinch of salt enhances the sweetness and balances the flavors.
- Olive Oil or Melted Butter (1/2 cup): The fat component keeps the cake moist. Olive oil adds a slight fruitiness, while butter brings a rich flavor.
- Vanilla Extract (1 teaspoon): For added flavor, vanilla extract enriches the overall taste. Feel free to substitute with almond extract for a different flavor note.
How to Make
- Preheat your oven: Start by preheating your oven to 350°F (175°C). Line an 8-inch round cake pan with parchment paper and lightly grease it to ensure easy removal after baking. This step is crucial for achieving that lovely golden crust that you want for your cake.
- Mix the wet ingredients: In a large mixing bowl, combine one cup of plain yogurt, one cup of granulated sugar, and two large eggs. Whisk them together until the mixture is smooth and creamy. The yogurt should be your focus here, as it’s essential for that desired texture. You want to beat the eggs well to introduce air, which will help the cake rise, so don’t skip this step!
- Add flavorings: Stir in half a cup of your choice of olive oil or melted butter, along with one teaspoon of vanilla extract. Whisk again until everything is well-incorporated. At this point, the mixture should have a slightly thicker consistency and a lovely aroma from the vanilla. Ensure that the oil or butter isn’t too hot to avoid cooking the eggs prematurely!
- Combine dry ingredients: In a separate bowl, whisk together one and a half cups of all-purpose flour, two teaspoons of baking powder, and a quarter teaspoon of salt. Gradually add this dry mixture into the wet ingredients, mixing gently with a spatula or wooden spoon. Avoid overmixing as this can lead to a dense cake; you want to mix just until no visible flour remains.
- Pour and smooth: Once fully combined, pour the batter into your prepared cake pan. Use a spatula to smooth out the surface. This is where you can also customize your cake – consider adding in some berries or chocolate chips if you desire a fun twist!
- Bake: Place the cake in the preheated oven and bake for approximately 40–45 minutes, or until a toothpick inserted into the center comes out clean. The cake should rise beautifully and develop a lovely golden-brown crust as it bakes. Keep an eye on it during the last few minutes to prevent browning too much.
- Cool and serve: When done, remove the cake from the oven and allow it to cool in the pan for about 10 minutes before transferring it to a wire rack. Let it cool completely. You can serve it plain or topped with powdered sugar or fresh fruit for added elegance. The aroma will be irresistible, and you’ll be tempted to dive right in!
Variations & Substitutions
Fruit-Infused Variation: You can elevate your Classic Yogurt Cake by adding seasonal fruits, such as blueberries, raspberries, or peaches. Simply fold in about one cup of your favorite chopped fruit after mixing the wet and dry ingredients. The fruit not only adds flavor but also moisture to the cake, creating a delightful contrast in texture. If you are using fresh fruit, reduce the sugar slightly to balance the sweetness, especially if they are very ripe. This variation is perfect for a summer gathering or whenever you have fresh fruit on hand.
Chocolate Lovers Variation: For chocolate enthusiasts, incorporating cocoa powder is a fantastic option. Replace half a cup of the flour with half a cup of unsweetened cocoa powder. This creates a decadent Chocolate Yogurt Cake that pairs beautifully with a dollop of whipped cream. Make sure to check your baking times as this variation may slightly require a longer baking time. It’s a wonderful choice for birthday parties or any festive occasion where chocolate is a must!
Gluten-Free Option: If you or your loved ones are following a gluten-free diet, you can easily adapt this recipe. Substitute the all-purpose flour with a 1-to-1 gluten-free flour blend. Since gluten-free flours can behave differently, adding an extra teaspoon of baking powder could also help to ensure a great rise. This version maintains the cake’s soft and moist texture, and it’s hard to even notice the difference!
Vegan Variation: For a totally egg-free and dairy-free delight, swap the eggs for a mixture of flaxseed meal and water, as previously mentioned. Use a plant-based yogurt like coconut or almond yogurt instead of traditional yogurt. Replace the butter with coconut oil for an enriching texture. This variation still results in a beautifully moist and fluffy cake while catering to those adhering to plant-based diets.
Common Mistakes to Avoid
Baking can sometimes lead to unforeseen hiccups, but knowing the typical pitfalls can help you achieve the best Classic Yogurt Cake. One common mistake is overmixing the batter, which can result in a dense cake. Remember, once the flour is added, mix just until combined! Another issue could be using cold eggs or yogurt straight from the refrigerator; this can impact how the batter blends. For best results, allow your ingredients to come to room temperature.
An additional warning is regarding the oven temperature. Not all ovens are created equal! If your cake doesn’t look done after the suggested time, do not forget to check it with a toothpick. If it comes out with a wet batter, return it to the oven for a few more minutes. On the other hand, if your cake starts to brown too quickly, consider placing a piece of aluminum foil loosely on top to prevent over-browning.
A final point to consider is the cooling process. Rushing to slice the cake while it’s still warm can lead to a messy result. The cake is best left to cool in the pan for about ten minutes before transferring it to a wire rack. This ensures it retains its structure and doesn’t crumble under pressure.
Storage, Freezing & Reheating Tips
This Classic Yogurt Cake is excellent for making ahead of time and can be stored easily. If you plan to enjoy it within a few days, keep it covered at room temperature. Remember, it’s best enjoyed when fresh, but it will still taste great for up to five days. Just ensure you place it in an airtight container to retain its moisture and softness.
If you have leftovers or a batch you wish to save for later, freezing is a fantastic option. Slice the cake into individual pieces and wrap each slice tightly in plastic wrap, followed by aluminum foil. Store it in a freezer-safe bag or container. It can last in the freezer for up to three months. When you are ready to enjoy it, simply thaw in the refrigerator overnight or leave it at room temperature for a couple of hours.
For reheating, you can pop a slice in the microwave for 10-15 seconds; this revives the softness. Alternatively, place it in an oven preheated to 350°F (175°C) for about 5-10 minutes to warm it through while maintaining a lovely crust.
Frequently Asked Questions
Can I use flavored yogurt instead of plain? Absolutely! Using flavored yogurt, such as vanilla or fruit-infused options, can enhance the cake’s taste. However, it’s advisable to adjust the sugar content according to the sweetness of the yogurt you choose. Keeping a balance will prevent the cake from becoming overly sweet.
Is there a way to make this cake healthier? Yes, you can make several substitutions to make it healthier. Substitute granulated sugar with alternatives like honey or maple syrup. You can also use whole grain flour instead of all-purpose flour for added fiber. Yogurt itself offers health benefits, as it’s packed with probiotics which aid digestion.
Can I make this cake in advance? Yes! This cake stores well and can be made a day or two ahead of time. Just cover it tightly once it’s cooled and keep it at room temperature or in the fridge. However, be mindful that the cake is best enjoyed fresh, so if you can, make it on the day of serving.
Can I double the recipe? Definitely! This recipe is perfect for doubling. However, keep in mind that you may need to adjust the baking time slightly when using a larger pan. You can use a 9×13-inch baking pan for a doubled recipe. Make sure to keep an eye on the cake as it bakes to ensure even cooking throughout.
What should I serve with Classic Yogurt Cake? This cake pairs beautifully with fresh fruits, whipped cream, or even a light drizzle of chocolate ganache. To elevate it even more, you can also serve it alongside a scoop of ice cream for a more indulgent dessert experience. Fresh berries or a simple fruit compote work exceptionally well for a light finishing touch.
Conclusion:
This Classic Yogurt Cake shines as a testament to the joy of simple ingredients combined with straightforward cooking techniques. Its *unfailing texture*, *subtle sweetness*, and many variations make it a versatile choice for any occasion. Whether you are a busy parent or a beginner looking to explore baking, this cake provides an easy entry.
I encourage you to try this delightful recipe and share your unique twist on it with friends and family. Let the aroma fill your kitchen, and enjoy the tender, flavorful slice of cake that awaits you! Revisit it often, and don’t hesitate to tweak it to suit your taste preferences; it’s a forgiving recipe that celebrates creativity in the kitchen. Happy baking!


