Prep time: 30 minutes
Cook time: 25 minutes
Total time: 55 minutes
Servings: 12
When it comes to delectable and comforting pastries, nothing quite compares to the allure of a truly flaky fruit cream cheese Danish. This delicate pastry, with its layers of buttery, flaky dough established through proper culinary technique, combined with creamy cheese and fruity fillings, invites you into a delightful experience that brings nostalgia and warmth. Imagine waking up in your cozy kitchen, the aroma of baking filling the air, and before you know it, you have a tray of golden-brown Danish ready to share with friends or family.
What makes this recipe truly special is not just the enticing appearance but also the melt-in-the-mouth texture that the secret of flaky pastry brings. In this guide, you’ll learn how to master this craft, from selecting the right ingredients to baking them to perfection. You can expect comprehensive tips to ensure each pastry is a success, variations to cater to different tastes, and ways to approach this delightful recipe even if you’re a beginner or short on time.
What Is Can You Make Truly Flaky Fruit Cream Cheese Danish?
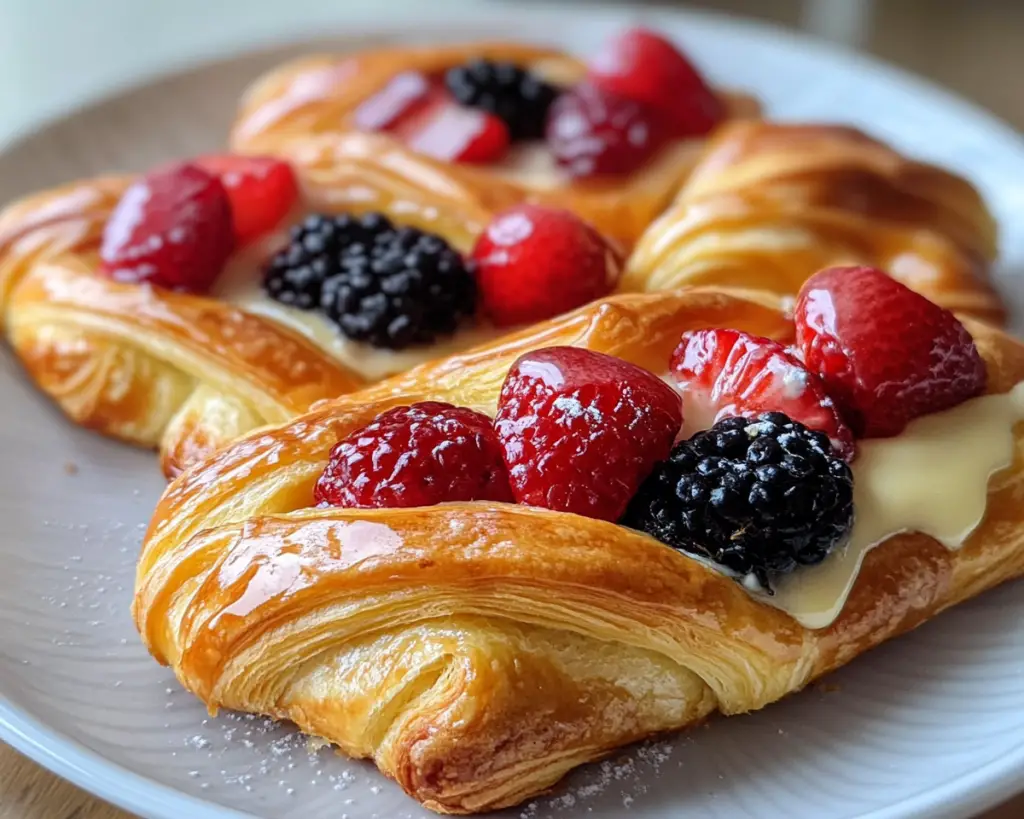
The fruit cream cheese Danish is a delightful pastry that bridges the gap between savory and sweet, slathered in rich cream cheese and crowned with your favorite fruits. The origins of Danish pastry trace back to the 19th century in Denmark, where bakers innovated techniques that eventually spread worldwide. The **Danish dough** is known for its **lamination** process, which involves folding multiple layers of butter into the dough — a labor of love resulting in a flaky, tender pastry that melts in your mouth.
Each bite bursts with flavor, thanks to the combination of the layered dough and the rich cream cheese filling, which balances perfectly with the sweetness of fresh or cooked fruits. This elegant pastry is often enjoyed during breakfast or brunch but can also serve as an indulgent dessert. The creaminess from the cheese complements the juicy fruits, while the crispy pastry adds texture, creating a harmonious experience that you can’t resist.
Whether it’s a weekend treat or a special occasion, mastering the art of these flaky pastries not only elevates your baking skills but also brings a touch of elegance to your table. You will impress friends and family with these delectable treats, which are surprisingly easy to make once you know the steps and tips for success.
Why You’ll Love This
You’ll love this recipe for many reasons! First, the flavor profile is simply irresistible. The crispy, flaky layers envelop creamy cheese and juicy fruits, creating a delicious contrast that satisfies your cravings. It’s a versatile recipe; you can swap out fruit fillings, adjust sweetness, or even infuse spices like cinnamon or vanilla to suit your own preferences or dietary needs.
Another advantage is the **ease of preparation**. Although it may seem complex to make a layered pastry at home, you will find that breaking it down into steps makes it manageable. Plus, investing in your homemade cream cheese Danish saves you money compared to store-bought versions, which can be costly.
Many people shy away from baking due to misconceptions about difficulty, but I assure you that with the right guidance, you’ll not only get the technique down but also gain the confidence to create other baked goods. This recipe’s forgiving nature means even if you make a mistake, you learn from it, and with practice, you’ll be baking like a pro in no time.
Ingredients You’ll Need
- All-Purpose Flour: The foundation of your pastry, it creates the structure. If you’re looking for a gluten-free option, you can use a certified blend.
- Unsalted Butter: Use cold, high-quality butter for the most flaky texture. This is a key ingredient in the **lamination** process.
- Granulated Sugar: Adds sweetness to the dough and filling. You can substitute it with honey or maple syrup for a natural option.
- Sour Cream: Brings tanginess to the cream cheese filling, balancing the sweetness. Greek yogurt can be used as a healthier alternative.
- Vanilla Extract: Provides a warm flavor to the filling; always opt for pure vanilla for the best results.
- Fresh or Frozen Fruit: Choose seasonal fruits such as strawberries, blueberries, or peaches. For convenience, frozen fruits work excellently, too.
- Egg Wash (Egg and Milk): Gives the pastry its golden-brown glaze. For a vegan option, use a mix of almond milk and a bit of oil.
Each ingredient plays a pivotal role in creating the delicious layers and flavors of the traditional Danish. Optimizing ingredient selection allows you to customize the taste further and cater to dietary requirements, ensuring everyone can indulge in this treat.
How to Make
1. **Prepare the Dough:** Start by mixing your flour, sugar, and salt in a large bowl. Cut the cold, cubed butter into the dry ingredients using a pastry cutter until it resembles coarse crumbs. The goal is to coat the flour with butter, which is essential for creating those flaky layers. Once combined, stir in the sour cream and vanilla extract until the mixture forms a dough. Avoid overworking the dough to ensure a light pastry.
2. **Chill the Dough:** Wrap the dough in plastic wrap and refrigerate for at least an hour. This chilling period allows the butter to firm up, which is critical for the lamination process. While the dough chills, it also helps to relax the gluten structure, making it easier to roll out later.
3. **Roll Out the Dough:** On a lightly floured surface, roll out your chilled dough into a rectangle, about 1/4 inch thick. The goal is to create a uniform layer. If the dough becomes too warm, pop it back into the fridge for a few minutes; a cold dough is easier to work with.
4. **Laminate the Dough:** Fold the dough into thirds, like a letter. This process incorporates layers of butter that will create the flaky texture when baked. Roll it out again into a rectangle and fold it once again. Repeat this process two to three times, chilling the dough between folds. Each fold increases the flaky layers significantly.
5. **Make the Filling:** In a mixing bowl, combine your softened cream cheese, remaining sugar, and a pinch of salt. Mix until smooth and creamy. Add the fruits and stir gently, being careful not to break them down too much. You can customize this filling based on your preference or seasonal fruits available.
6. **Shape the Danishes:** After the final chill, roll out the dough one more time. Using a pizza cutter or knife, cut squares or rectangles from the rolled dough. Add a spoonful of the cream cheese mixture in the center and fold the corners over the filling, pinching to seal. Alternatively, you could create a pinwheel or other shapes to make them unique.
7. **Preheat and Bake:** Preheat your oven to 375°F (190°C). Arrange the pastries on a lined baking sheet and apply an egg wash for a glossy finish. Bake for about 20–25 minutes or until golden brown and puffed. The aroma that fills your kitchen during baking will be irresistible!
8. **Cool and Serve:** Once baked, allow your fruit cream cheese Danishes to cool on a wire rack. This ensures a firm base while still being warm enough to enjoy. Drizzle with icing or dust with powdered sugar for an additional sweet touch if desired.
Feel free to dive into the process, take your time with each step, and savor the art of baking. You’ll find that the process is just as enjoyable as the end product.
Variations & Substitutions
Berry Bliss Variation: Substitute the fruits in the filling for mixed berries like raspberries, blueberries, or strawberries. The combination of tart and sweet will elevate your Danish to new heights, with berries providing a beautiful color contrast. This variation is excellent if you prefer a more vibrant and fruity flavor.
Chocolate Delight Variation: Imagine chocolate, smooth cream cheese, and pastry all in one. For this variation, mix cocoa powder into your cream cheese filling. You can also add chocolate chips for an extra indulgence. This version caters to those with a sweet tooth looking for a different twist on the classic Danish.
Nutty Fan Variation: Incorporate some crushed nuts such as almonds or pecans into your filling for a delightful crunch. Nuts add an earthy flavor and a delightful texture contrast against the creaminess of the cheese and fresh fruit.
Spiced Apple Variation: Make a beautiful fall-inspired Danish by using spiced apples instead of traditional fruit. Dice apples and toss them with cinnamon, nutmeg, and a bit of sugar before adding them to your filling. This warm and cozy combination is perfect for chilly mornings.
Each of these variations opens up new culinary adventures while maintaining the core essence of the classic Danish. You can explore flavors that resonate with your taste preferences or cater to seasonal occasions.
Common Mistakes to Avoid
One common mistake is using warm dough or butter. It can lead to a less flaky structure; it’s crucial to keep the ingredients cold throughout the process. Always ensure your butter is properly chilled and don’t rush through the chilling times.
Another issue arises when you overwork the dough. This can lead to tough pastries instead of the desired flaky texture. Remember to handle the dough as little as possible during mixing and rolling.
Lastly, be cautious with baking times. Each oven is different, and pastries can go from golden brown to burnt in just moments. Keep an eye on your Danishes, and it’s wise to check for doneness a few minutes before the prescribed time.
Storage, Freezing & Reheating Tips
For optimal freshness, store any leftovers in an airtight container in the refrigerator for up to three days. When ready to enjoy, you can reheat them in the oven at a low temperature, which helps revive the flaky texture.
If you wish to **freeze** your Danishes for later, it’s best to do so before baking. Prepare them up to the point of baking, then place on a baking sheet to freeze individually before transferring them to a freezer-safe container or bag. This method prevents sticking. When ready to bake, you can go from freezer to oven; just add a few extra minutes to the baking time.
Be sure to practice good food safety, particularly when dealing with dairy-filled pastries. Always ensure that your cream cheese is fresh and store the pastries in the fridge if not consumed promptly.
Frequently Asked Questions
Can I use low-fat cream cheese in this recipe?
Yes, you can substitute low-fat cream cheese if you want a lighter option. However, keep in mind that it may slightly alter the richness and texture of the filling. You’ll still enjoy a delicious pastry; it just might be less creamy.
How can I prevent the cream cheese filling from leaking out during baking?
To prevent leakage, be sure to **properly seal** your Danishes. Pinch the edges tightly and consider chilling them again for a brief period before baking, allowing the filling to set slightly.
Is it possible to make the Danish dough ahead of time?
Absolutely! You can prepare the dough up to two days in advance and store it in the fridge. Just ensure that it’s well wrapped to avoid drying out. You can also freeze the dough for longer storage if needed.
What can I replace sour cream with?
If you’re looking for a substitute for sour cream, Greek yogurt is an excellent option. It provides a similar tangy flavor and creaminess, making it a perfect alternative in both taste and texture.
Can these Danishes be made vegan?
Yes, you can make a vegan version by substituting ingredients. Use vegan butter in place of regular butter, and consider tofu cream cheese mixed with a bit of lemon juice for the filling. Your Danishes can still be flaky and tasty while accommodating dietary preferences.
Conclusion:
In conclusion, mastering the art of crafting truly flaky fruit cream cheese Danishes is not just about following a recipe; it’s about creating a sensory experience that delights your taste buds and warms your heart. With the right techniques and delicious variations, you can impress friends and family alike with this comforting pastry. So go ahead, roll up your sleeves, gather your ingredients, and create a batch that everyone will savor. Share the happiness and warmth that comes from baking and indulge in the joy this delightful treat brings. Don’t hesitate—jump in and make your unique version today!


