Prep time: 30 minutes
Cook time: 45 minutes
Total time: 1 hour 15 minutes
Servings: 12 servings
There’s something profoundly satisfying about the combination of sweet spices and flaky pastry that brings to mind warm family gatherings and cozy evenings. If you’re looking to impress friends and family or simply indulge in a delightful dessert, then **Apple Pie Baklava** should be your next kitchen adventure. This unique dessert marries the luscious flavors of classic apple pie with the rich textures of traditional baklava, resulting in a dish you won’t easily forget.
In this recipe, you’ll explore how to make this fantastic fusion dessert from scratch, including the *essential* ingredients that create its unforgettable flavor, texture, and aroma. Whether you’re a seasoned chef or a busy parent looking for an easy way to wow your family at dinner, this guide is designed to help you succeed. You will also discover variations, tips, common mistakes to avoid, and more. Let’s get into it!
What Is Apple Pie Baklava: A Unique Dessert Delight?
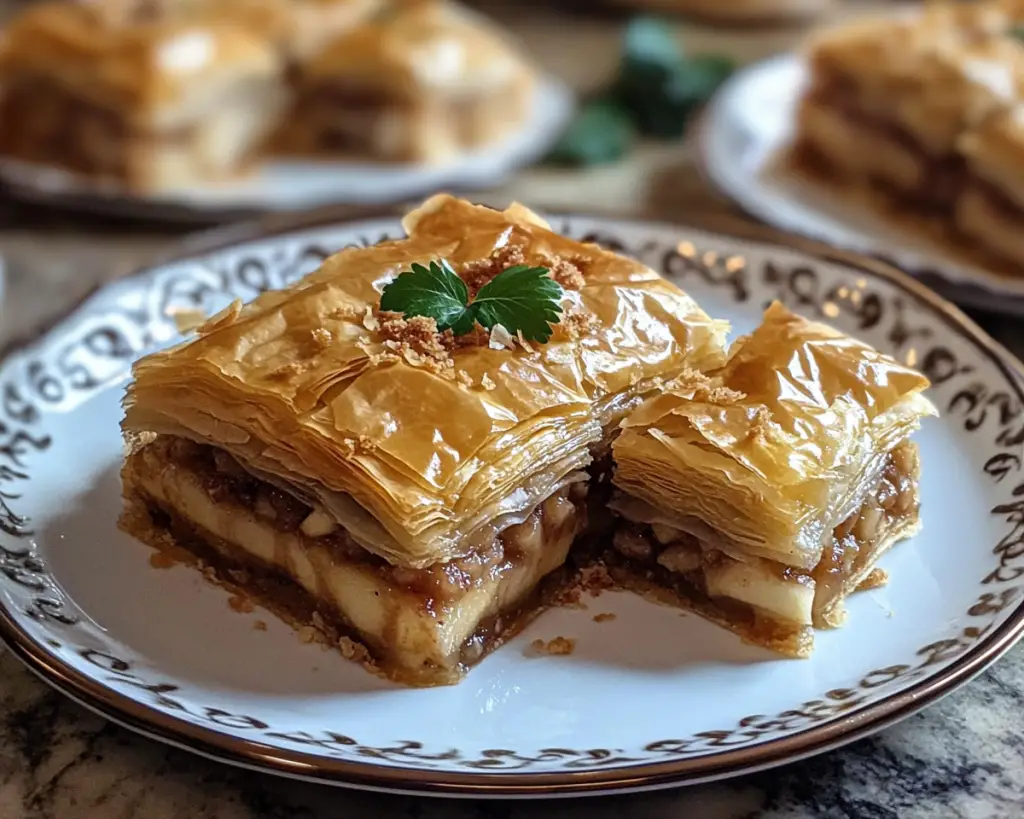
**Apple Pie Baklava** is a creative twist on two beloved dessert classics: apple pie and baklava. Originating from the *Middle Eastern* culinary tradition, baklava typically consists of thin layers of phyllo pastry filled with nuts and sweetened with syrup. In this fusion, we’ve added the delightful components of an apple pie, including spiced apples, sugar, and butter, to achieve a dish that balances sweet and spicy flavors with a satisfying crunch.
Each layer of phyllo pastry in this recipe adds *delicacy* and *crispy texture*, while the spiced apples contribute a moist, sweet filling reminiscent of traditional apple pie. Drizzling this layered creation with honey and cinnamon syrup enhances the sweetness, pulling all the elements together for an unforgettable dessert experience. You’ll not only enjoy the flavors, but the aroma that fills your kitchen will transport you to cozy fall evenings.
Combining these two desserts creates a unique dish that appeals to both baklava enthusiasts and apple pie lovers alike. With the right techniques and attention to detail, you can evoke feelings of nostalgia while indulging in something innovatively delicious.
Why You’ll Love This
There are countless reasons to appreciate **Apple Pie Baklava**. First and foremost, the *taste* is genuinely enchanting; the warm spices, sweet apples, and crunchy phyllo layers meld together to create a delicious marriage of flavors. The aroma alone is enough to make your mouth water, reminding you of the comforting scents of home baking and festive celebrations.
Apart from its delightful flavor, this dessert is surprisingly *easy to make*. The ingredients are generally accessible, and with just a bit of preparation, you can impress your family and friends or surprise your guests at gatherings with your culinary creativity. Budget cooking is also a plus here; the ingredients are inexpensive and often found in many pantries, making this a great choice for feeding hungry guests without breaking the bank.
Moreover, this fusion dessert allows for extensive *versatility*. You can adjust the spices to match your preference or make it gluten-free by using alternative pastry. This dessert also carries a visual appeal, making it not just a feast for the palate but for the eyes as well. Lastly, it is a great conversation starter, inviting compliments and shared stories while around the table.
Ingredients You’ll Need
To create this mouthwatering **Apple Pie Baklava**, gather the following ingredients:
- Phyllo pastry: This delicate pastry creates the flaky layers essential for baklava. Ensure you thaw it completely before use.
- Apples: Granny Smith or Honeycrisp work best for their tartness and crispiness. They hold their shape well during baking.
- Granulated sugar: Used to sweeten the apple filling, enhancing natural flavors. Consider alternatives like coconut sugar for a unique twist.
- Cinnamon: A key spice in both apple pie and baklava, adding warmth and depth to the dish.
- Walnuts: Chopped walnuts provide a satisfying crunch and complement the apple filling beautifully.
- Butter: Melted, to brush between layers of phyllo that give a rich flavor and crispy texture.
- Honey: Used in the syrup, adding sweetness and a wonderful sheen to the finished baklava.
- Water: Needed for the syrup, bringing it all together.
Each ingredient serves a specific purpose in this recipe; for instance, the phyllo pastry is essential for that characteristic crunch that makes baklava so appealing, while cinnamon and sugar enhance the sweetness of the apples, making this dessert truly irresistible.
How to Make
Creating your own **Apple Pie Baklava** is easier than you might think. Follow these steps for an impressive dessert that will delight everyone:
- Begin by preheating your oven to 350°F (175°C). This temperature will ensure that your baklava cooks evenly and achieves the perfect crisp.
- Take your phyllo pastry out of the freezer and allow it to thaw completely. It’s crucial to cover it with a damp towel while you work to prevent it from drying out. The layers are delicate and can break easily if left exposed to air.
- In a large mixing bowl, peel and core about 4 cups of your chosen apples. Chop them into small, bite-sized pieces. You want them to be evenly sized to ensure they cook thoroughly.
- Add 1 cup of granulated sugar and 1 tablespoon of cinnamon to the chopped apples. Mix them well to coat the apples thoroughly with the sugar and spices. Set this mixture aside to let the flavors meld.
- Melt 1 cup of butter in a small saucepan over low heat. This will be used for brushing the layers of phyllo pastry, enhancing both flavor and texture.
- Now it’s time to layer your baklava. Start by brushing the bottom of a 9×13 inch baking dish with melted butter. Carefully lay down your first sheet of phyllo pastry, brushing it with more melted butter. Repeat this process, layering about 8 to 10 sheets of phyllo, making sure each layer is well-buttered. The key is to build that *crispy foundation*.
- Evenly spread half of the apple mixture over the phyllo layers. Then sprinkle a layer of chopped walnuts (approximately 1 cup) over the apples. This will add a delightful crunch to the dessert.
- Continue layering phyllo sheets on top, again brushing with butter, until you have about 8 sheets on top of the walnut-apple layer. Add the remaining apple mixture and sprinkle with another layer of walnuts before finishing with another 8 to 10 layers of butter-brushed phyllo.
- Once all layers are complete, use a sharp knife to cut the baklava into diamond or square shapes. This will allow the syrup to soak in properly once baked.
- Bake the baklava in the preheated oven for about 45 minutes, or until the top is golden brown and crispy. You can almost smell its delightful aroma filling your kitchen!
- While the baklava is baking, prepare the syrup. In a saucepan, combine 1 cup of honey, 1 cup of water, and 1 teaspoon of cinnamon. Bring this mixture to a gentle simmer and cook for about 10 minutes, allowing it to thicken slightly.
- Once the baklava is done, remove it from the oven and immediately pour the warm syrup evenly over the hot baklava. This step seals in moisture and sweetness, making every bite heavenly.
- Allow the baklava to cool completely in the pan before serving. This waiting period helps it to set and makes it easier to cut through the layers.
And there you have it! A scrumptious **Apple Pie Baklava** that is as rewarding to make as it is to eat.
Variations & Substitutions
Nut-Free Variation: If you or someone you’re serving has a nut allergy, you can simply omit the walnuts. Instead, you can incorporate additional spices like nutmeg or even a *vanilla extract* to maintain richness and flavor. Utilize oats as a substitute; lightly toasting them in a pan before adding can add a new texture.
Gluten-Free Variation: If you’re looking for a gluten-free option, use gluten-free phyllo dough. Many brands offer alternatives that maintain the flaky texture you need. Make sure to also check that your spices and other ingredients are certified gluten-free.
Flavor Additions: For a different flavor profile, consider adding 1 tablespoon of lemon juice to the apple mixture to brighten the flavors or even some caramel sauce drizzled over the layers for an added sweet note. Additionally, using pears in place of apples can lead to a delightful surprise.
Herbal Twist: For a unique touch, incorporate fresh herbs like rosemary or thyme. Surrounding your apples with hints of these herbs can give a savory edge to the sweet baklava, creating a contrast that is sure to elicit praise.
Each variation allows you to customize the recipe to fit dietary needs or personal preferences while still retaining the core flavor and texture profile of this delightful dessert. Have fun experimenting!
Common Mistakes to Avoid
As with any recipe, there are common pitfalls that can occur while making **Apple Pie Baklava**. One frequent mistake is letting the phyllo pastry dry out. Always cover your pastry sheets with a damp cloth while you are working to keep them from becoming brittle. If they do dry, your baklava won’t have that desired crispy texture and can end up being chewy, which we want to avoid.
Another often-overlooked factor is the *syrup application*. Pouring cold syrup over hot baklava can result in overly soggy layers. It’s crucial to use warm syrup poured directly onto the hot pastry. This combination ensures that each layer is adequately soaked, enhancing flavor without compromising texture.
Lastly, don’t rush the baking process. It might be tempting to lower the temperature to cook it faster, but this will result in uneven cooking. Always stick to the recommended temperature and keep an eye on the color. The baklava should be golden brown and flaky before you consider it done.
Storage, Freezing & Reheating Tips
To store your **Apple Pie Baklava**, keep it covered at room temperature for up to **3 days**. However, if you’re looking to extend its shelf life, you can freeze it. Simply wrap the cooled baklava tightly in plastic wrap and place it in an airtight container. It can be frozen for up to **2 months**. When you’re ready to enjoy, let it thaw at room temperature before reheating.
If you want to reheat baklava, place it in a heated oven at 350°F (175°C) for about **10 minutes**. This will restore its crispiness while ensuring the filling remains warm. Avoid microwaving it, as this can make the pastry soggy.
When it comes to *food safety*, always ensure that proper hygiene standards are met. Wash your hands and surfaces before preparing food, and regularly check the temperature of your dish to ensure its safety for consumption.
Frequently Asked Questions
Can I use other fruits besides apples in this baklava? Absolutely! You can experiment with various fruits like pears, cherries, or even mixed berries. Just keep in mind that different fruits have different moisture levels, so adjust the sugar and baking time accordingly.
How do I know when the baklava is done? Keep an eye on the color of the layers. The top should be golden brown and crisp. Baking it too long can lead to burnt edges, while underbaking may result in chewy layers.
Is baklava hard to make? Not at all! While working with phyllo dough may seem intimidating, this recipe simplifies the process. With some practice, layering becomes second nature, and the results are incredibly rewarding.
Can I make this baklava in advance? Yes! You can prepare it a day in advance. Just be sure to store it in an airtight container at room temperature. The flavors will continue to meld, making it even more delicious.
Can I add nuts to the apple filling? Definitely! Adding nuts to the apple mixture, such as pecans or almonds, can enhance both flavor and texture. Be sure to chop them finely to ensure they distribute evenly throughout the filling.
Conclusion:
Making **Apple Pie Baklava** combines the much-loved characteristics of both apple pie and baklava into one elegant dessert. The rich flavors and textures make this a memorable treat for anyone fortunate enough to share in its goodness. Whether you’re making it for a holiday gathering or a weeknight treat, this recipe will surely become a favorite in your repertoire. Don’t hesitate to experiment with different ingredients and flavors to make it your own. Enjoy this culinary journey, and share your delicious results with family and friends!


