Prep time: 15 minutes
Cook time: 30 minutes
Total time: 45 minutes
Servings: 4-6
Are you ready to elevate your game day experience with snacks that are not only delicious but also a healthier choice? Welcome to the world of Baked Not Fried Game Day Snacks! Picture this: the aroma of perfectly seasoned snacks wafting through your home while your friends and family gather around, eagerly anticipating the big game. This recipe is special because it provides all the crunch and flavor you crave without the heaviness of traditional fried snacks, making it suitable for everyone—whether you’re conscious of your health or not. In this article, you’re going to learn how to prepare these irresistible bites that are perfect for any gathering, along with tips, variations, and answers to your burning questions.
What Is Baked Not Fried Game Day Snacks?
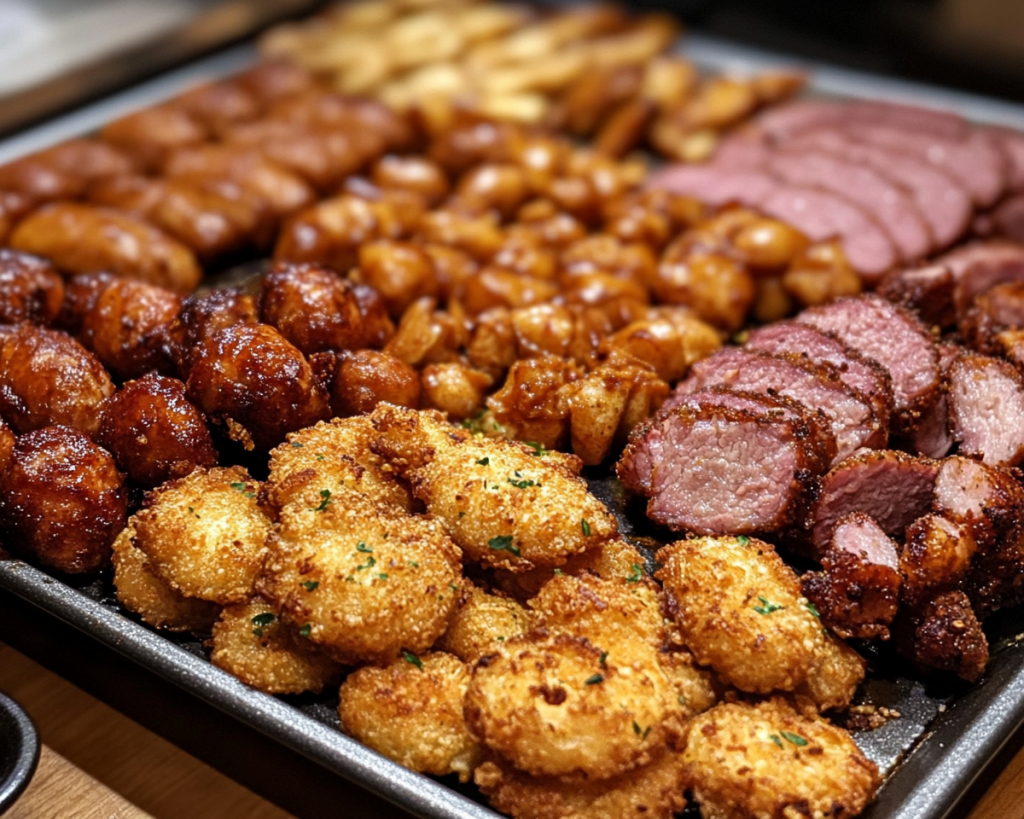
Baked Not Fried Game Day Snacks are a delightful twist on traditional game day fare. Originating from health-focused culinary trends, these snacks offer a crispy texture and fulfilling flavors without the added oils and fats associated with frying. Imagine biting into a snack that’s golden brown on the outside, with a warm, tender interior that bursts with flavor—this is what you’ll get with baked snacks. Using fresh herbs and spices, each component is crafted to enhance the overall taste and provide a satisfying crunch.
The beauty of these snacks lies in their versatility. You can make a variety of different flavors using similar base ingredients, allowing you to customize them according to your family’s preferences or dietary restrictions. They are perfect for busy parents looking to provide a wholesome treat for their children or for anyone wanting to enjoy tasty snacks during the game without sacrificing their health goals. Whether you are hosting a football bash, a movie night, or simply enjoying a weekend gathering, Baked Not Fried Game Day Snacks will surely be the star of the show.
Why You’ll Love This
There are countless reasons to love Baked Not Fried Game Day Snacks! To begin with, they are not only delicious but also an excellent example of how you can indulge without apology. Their delectable flavor and crispy texture make them appealing to both kids and adults alike. You can serve them alongside slices of your favorite dip, which adds an extra layer of enjoyment.
One common misconception is that healthy snacks have to be bland or uninspiring. This recipe flips that notion on its head, combining creative spices and fresh ingredients to ensure that every bite is bursting with flavor. Plus, they are easy to prepare, which is a significant win for anyone juggling a busy lifestyle. You won’t need extensive culinary skills to whip up this treat, making it perfect for beginners as well. Furthermore, the ingredients can be adjusted based on dietary preferences, whether you are looking for gluten-free options or vegetarian delights.
Lastly, consider the cost-effectiveness. Making your snacks at home is significantly cheaper than purchasing them pre-made or from fast-food places. You have control over every ingredient, ensuring a fresher, tastier result that will leave everyone wanting more.
Ingredients You’ll Need
- Chickpeas – The base of our snacks. They’re rich in protein and fiber, making them a fulfilling choice. If you’re looking for a substitute, you can also use black beans or lentils.
- Olive oil – Used to help the snacks crisp up in the oven. Alternative oils like avocado oil work too, but avoid oils that have a high smoke point.
- Garlic powder – Adds an aromatic depth to your snacks. Fresh garlic can be used, but the powder is easier and less time-consuming.
- Paprika – This spice gives a subtle smokiness that enhances the overall flavor. Smoked paprika can add an even richer flavor.
- Salt and pepper – Essential for amplifying all flavors. Adjust according to your taste preference.
- Parmesan cheese – Adds a salty, nutty flavor. For a dairy-free option, try nutritional yeast.
- Parsley or cilantro – Fresh herbs that enhance flavor and presentation. Basil can serve as a great alternative for a sweeter taste.
Each ingredient plays a crucial role in contributing to the overall flavor and texture of Baked Not Fried Game Day Snacks. With just a few pantry staples, you can create a wholesome treat that doesn’t skimp on taste.
How to Make
- Preheat your oven. Begin by preheating your oven to 400°F (200°C). This is essential for ensuring that your snacks become crispy and golden. An adequately preheated oven leads to even cooking, which is crucial in achieving the perfect texture.
- Rinse and drain the chickpeas. Open a can of chickpeas (or use cooked chickpeas), and thoroughly rinse them under cool running water. Drain them well to remove excess liquid, which can prevent them from crisping up in the oven. Pat them dry with a clean kitchen towel to remove any remaining moisture.
- Season the chickpeas. In a mixing bowl, add the dried chickpeas, olive oil, garlic powder, paprika, salt, and pepper. Use a spatula to gently toss the ingredients together until the chickpeas are well-coated with the seasoning. Feel free to adjust the seasoning to your taste; add more spices if you want extra flavor!
- Spread them on a baking sheet. Line a baking sheet with parchment paper for easy cleanup. Spread the seasoned chickpeas in a single layer on the sheet. Make sure they are not crowded; overcrowding can result in steaming instead of baking, leading to a less crispy snack.
- Bake until crispy. Place the baking sheet in the preheated oven and bake for about 25-30 minutes. Halfway through the baking process, give the chickpeas a gentle stir to ensure they cook evenly. You’re looking for a golden hue and a crunchy texture; they should be crispy on the outside while tender on the inside.
- Add the cheese and herbs. Once the chickpeas are baked, take them out of the oven and sprinkle the Parmesan cheese and freshly chopped parsley or cilantro over the top. Mix them gently while they’re still warm, allowing the cheese to melt slightly and stick to the chickpeas.
- Cool and Serve. Allow them to cool slightly before serving. Enjoy your Baked Not Fried Game Day Snacks with your favorite dip or on their own, and watch as everyone devours these guilt-free treats!
Each step in this process is designed to showcase the textures and flavors that make these snacks so appealing. They not only taste great but also provide a satisfying crunch, perfect for any gathering.
Variations & Substitutions
Spicy Chickpeas: Want to add some heat? Try adding cayenne pepper or chili powder to the seasoning mix. This variation will give your snacks a spicy kick that complements the other flavors beautifully. Perfect for those who love bold flavors or are looking to impress guests with a kick!
Cheesy Garlic Variation: For cheese lovers, increase the amount of Parmesan and add a bit of garlic salt. This will create an intensely cheesy flavor that pairs excellently with various dips, such as spinach or ranch. It’s perfect for gatherings where the guests are eager for something savory.
Herb-Infused Snacks: Want a fresher vibe? Experiment with different herbs like rosemary, thyme, or oregano. The infusion of different herbs entirely transforms the flavor profile, making it appealing for those who appreciate subtle and aromatic flavors. This variation can easily cater to those looking for a lighter alternative.
Nut-Free Version: If you or someone else has nut allergies, you can replace Parmesan cheese with nutritional yeast. It provides a cheesy flavor without any nuts and is often lower in calories, making it excellent for those focused on dairy-free options.
Gluten-Free Option: To create a gluten-free version, all ingredients already comply; however, ensure that any additional seasoning or dips you might use are labeled gluten-free as well. These snacks inherently provide a better alternative for people watching their gluten intake and still want to enjoy tasty treats on game day.
Every variation not only changes the recipe but also caters to different dietary needs and preferences, making this recipe incredibly versatile.
Common Mistakes to Avoid
One common mistake is not allowing your chickpeas to dry completely after rinsing. A wet chickpea can lead to sogginess rather than crispness. Make sure to pat them dry thoroughly before seasoning and placing them in the oven.
Another issue is overcrowding the baking sheet. If the chickpeas are too close together, they will steam instead of roast. Always spread them out in a single layer, which will ensure they evenly crisp up in the oven. Remember to give them enough space!
Lastly, not preheating the oven is a mistake that can result in undercooked snacks. Preheating is essential for achieving that desired crispy texture. Take your time to ensure your oven is hot before baking!
Storage, Freezing & Reheating Tips
Storing your Baked Not Fried Game Day Snacks is crucial for maintaining their crunch. Place any leftovers in an airtight container and store them in a cool, dry area for up to 3 days. If you want to keep them for longer, consider freezing them. Lay the baked chickpeas on a parchment-lined tray to freeze them individually before transferring them into a zip-top bag for up to 2 months. This way, you can pull out a few whenever you want a snack without losing the quality.
When you’re ready to eat, reheat them in the oven at 350°F (175°C) for about 10 minutes to regain their crispiness. Avoid using a microwave, as it will make them chewy rather than retain their crunchy texture. If you noticed them losing their crunch in storage, a quick re-bake will remedy that!
While these snacks are delicious, remember to follow all food safety guidelines. If you notice any off-flavors or smells in stored snacks, it’s best to err on the side of caution and discard them.
Frequently Asked Questions
Can I use dried chickpeas instead of canned for this recipe?
Yes, you can use dried chickpeas! Just make sure to soak them overnight and cook them until tender before proceeding with the recipe. This will require a bit more planning but can lead to even more flavorful snacks.
How can I make these snacks vegan?
You can easily make these snacks vegan by omitting the Parmesan cheese or substituting it with nutritional yeast. This will still give you that cheesy flavor without any dairy, making them suitable for everyone.
Are these snacks suitable for kids?
Absolutely! Baked Not Fried Game Day Snacks are a fantastic option for kids. They are nutritious and may even encourage them to enjoy legumes, all while being flavorful and fun to eat.
Can I prepare these snacks ahead of time?
Yes, you can prep these snacks in advance! Season the chickpeas a few hours before baking and keep them refrigerated. Just remember to bake them right before serving to get that perfect crunch.
Can I use different beans or legumes?
Definitely! This recipe is quite versatile, and you can experiment with other legumes like black beans or lentils. Just make sure to adjust the cooking time according to the beans’ texture and cooking requirements.
Conclusion:
Baked Not Fried Game Day Snacks are not just a healthier alternative; they’re a fun and versatile choice for any gathering or quiet night at home. You’ve learned how to make these simple yet delightful snacks, customized to fit nearly any dietary need, while still remaining full of flavor. Whether you’re sharing them with friends during the big game or enjoying a quiet night in, these snacks will surely impress! I encourage you to try them out, customize them to your taste, and share the joy of wholesome snacking with your loved ones. Grab your ingredients, preheat that oven, and start creating your delectable game day treats today!