Prep time: 30 minutes
Cook time: 1 hour
Total time: 1 hour 30 minutes
Servings: 12 servings
Are you ready to dive into a dessert that will have everyone talking? Banana Pudding Crunch Cheesecake is not just a treat – it’s a delightful combination of flavors and textures that will satisfy your sweet tooth and impress your guests. Imagine a creamy cheesecake infused with the rich flavor of ripe bananas, all topped with a crunchy layer that brings an exciting texture to each bite. This dessert takes the classic southern favorite, banana pudding, and elevates it to a fabulous cheesecake level, making it perfect for any occasion, from family gatherings to special celebrations.
In this recipe, you will learn how to create a luscious cheesecake that has the perfect balance of sweetness and flavor. You’ll also discover tips to ensure it turns out perfectly every time, as well as some variations to cater to different dietary needs. So, let’s get started on this delicious journey of making your own Banana Pudding Crunch Cheesecake!
What Is Banana Pudding Crunch Cheesecake?
Banana Pudding Crunch Cheesecake is a decadent dessert that combines the traditional flavors of banana pudding with the creamy texture of cheesecake. This delightful dessert originates from classic southern kitchens, where banana pudding has been a beloved staple for generations. Typically, banana pudding is made with layers of vanilla custard, vanilla wafers, and fresh bananas, all topped with whipped cream.
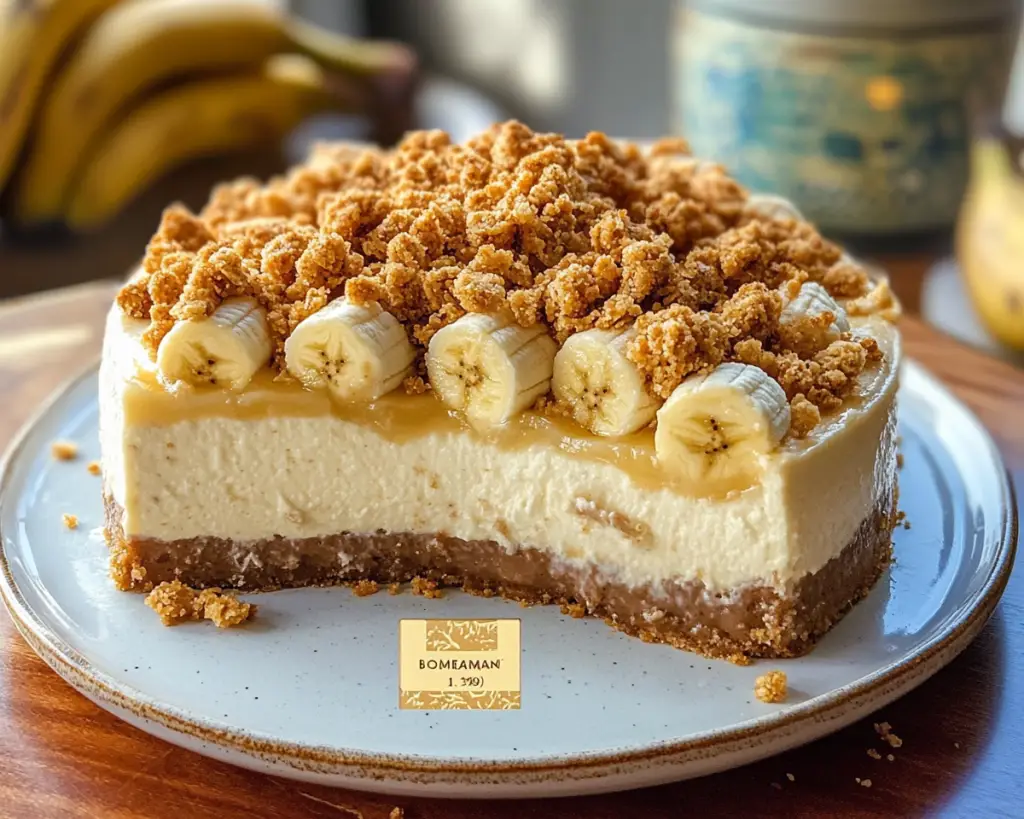
In this cheesecake adaptation, the layers blend harmoniously, featuring a buttery graham cracker crust that serves as the foundation, creamy cheesecake filling enriched with pureed bananas, and a topping of whipped cream sprinkled with crushed cookies for that essential crunch. The flavors of vanilla and banana meld beautifully, while the texture offers both creaminess and a satisfying crunch that makes every bite a pleasure. This cheesecake is ideal for those who love bananas and creamy desserts but want something a little more sophisticated than the traditional pudding.
Why You’ll Love This Banana Pudding Crunch Cheesecake
There are so many reasons to love this Banana Pudding Crunch Cheesecake! Firstly, the taste is simply incredible; the combination of sweet bananas, rich cream cheese, and crunchy cookie topping creates an unforgettable dessert experience. You will find that this cheesecake is not overly sweet, allowing the natural flavors of the bananas to shine through.
Additionally, this recipe is incredibly easy to follow, with common ingredients that can be found in most kitchens or local grocery stores. Even if you’re a beginner in the kitchen, with a little patience and the right guidance, you can master this recipe. You can also make it ahead of time to free up your schedule on the day of your event, which is perfect for busy parents or anyone wanting to streamline their baking process.
Another great aspect is the versatility of this cheesecake. You can customize it by adding different toppings or adjusting ingredients to cater to various dietary preferences. Whether you want to make a gluten-free version or adjust it for a vegan diet, the possibilities are endless. With this recipe, not only are you creating a delicious dessert, but you are also bringing warmth and joy to those enjoying it.
Ingredients You’ll Need
To create this delightful Banana Pudding Crunch Cheesecake, you will need the following ingredients:
- Graham cracker crumbs: 1 and ½ cups (for the crust). These provide a sweet, crunchy base to the cheesecake.
- Unsalted butter: ½ cup, melted (for the crust). It binds the crumbs together while adding a rich flavor.
- Granulated sugar: 1 tablespoon (for the crust). It adds sweetness to the crust.
- Cream cheese: 2 (8-ounce) packages, softened. This is the main ingredient for the creamy filling.
- Confectioners’ sugar: 1 cup. It sweetens the cheesecake without adding texture.
- Vanilla extract: 2 teaspoons. It enhances the overall flavor of the cheesecake.
- Bananas: 2 ripe, mashed (for the filling). They provide moisture and a natural sweetness to the cheesecake.
- Heavy cream: 1 cup (for whipping). This will be a component of the topping.
- Vanilla wafers: 1 cup, crushed (for the topping). They add a delightful crunch and extra banana flavor.
- Fresh bananas: for garnish. Slices of fresh banana on top add a beautiful presentation.
When preparing your ingredients, consider using organic or high-quality items for the best flavor. For substitution options, gluten-free graham crackers can replace regular ones if you’re catering to gluten-sensitive individuals. Additionally, if you don’t have the time to mash fresh bananas, you can use banana puree as a quick alternative, but make sure to choose one without added sugars.
How to Make Banana Pudding Crunch Cheesecake
Follow these simple steps to create a mouthwatering Banana Pudding Crunch Cheesecake:
- Prepare the crust: Preheat your oven to 350°F (175°C). In a medium-sized bowl, mix the graham cracker crumbs, melted butter, and granulated sugar until well combined. Press this mixture firmly into the bottom of a 9-inch springform pan to create an even crust. Bake in the preheated oven for about 10 minutes or until lightly golden. Remove from oven and allow it to cool completely.
- Make the cheesecake filling: In a large mixing bowl, beat the softened cream cheese with an electric mixer on medium speed until smooth and creamy, about 2-3 minutes. Gradually add in the confectioners’ sugar, mixing until smooth. Stir in the vanilla extract and mashed bananas until fully incorporated.
- Layer the filling: Pour the banana cream cheese filling over the cooled crust in the springform pan. Spread it evenly with a spatula, making sure to fill any gaps. Tap the pan gently on the counter to release any air bubbles.
- Bake the cheesecake: Bake the cheesecake at 325°F (163°C) for 50-60 minutes. It’s done when the edges are set but the center still has a slight jiggle; this will ensure a creamy texture. Turn off the oven and crack the door open, leaving the cheesecake to cool inside for another hour.
- Chill the cheesecake: Once cooled, remove the cheesecake from the oven and refrigerate for at least 4 hours or overnight to set completely.
- Prepare the topping: When ready to serve, beat the heavy cream in a mixing bowl until soft peaks form. Gently fold in the crushed vanilla wafers.
- Assemble and serve: Carefully remove the springform pan from the cheesecake. Spread the whipped cream topping on top, leaving some room around the edges for effect. Garnish with slices of fresh banana and additional crushed vanilla wafers if desired. Slice into wedges and serve chilled.
As you engage in the baking process, take a moment to enjoy the wonderful aroma of bananas and vanilla filling your kitchen. This cheesecake not only looks gorgeous but also provides a rich and indulgent taste that is bound to leave everyone wanting more.
5 Variations & Substitutions
1. Chocolate Banana Pudding Crunch Cheesecake: For chocolate lovers, adding cocoa powder to the cream cheese mixture can create a delicious chocolate twist. Simply mix in ¼ cup of unsweetened cocoa powder along with the other ingredients for the filling. You can also add chocolate chips for extra sweetness and texture.
2. Gluten-Free Banana Pudding Crunch Cheesecake: If you require a gluten-free version, substitute regular graham cracker crumbs with gluten-free graham crackers or almond flour. You can also use gluten-free vanilla wafers for the topping to keep the crunch but adapt for sensitivity.
3. Vegan Banana Pudding Crunch Cheesecake: For a vegan version, use a non-dairy cream cheese, such as cashew cheese or a coconut-based cream cheese alternative. Replace the heavy cream with coconut cream, and ensure to use a plant-based vanilla wafer crumb for the crust.
4. Banana Foster Cheesecake: For a distinct twist, consider making a Banana Foster Cheesecake by sautéing bananas in a mix of butter, brown sugar, and rum. Once done, blend these sautéed bananas into the cream cheese mixture to achieve a rich, caramelized flavor reminiscent of the popular dessert.
5. Mini Banana Pudding Cheesecakes: If you’re preparing for a large gathering or event, mini cheesecakes can be a fun option. Use a muffin pan lined with cupcake liners to create individual servings. The baking time will reduce to around 20-25 minutes, and they’ll be the perfect appetizer-sized dessert for your guests to enjoy!
Common Mistakes to Avoid
When making your Banana Pudding Crunch Cheesecake, it’s vital to avoid several common pitfalls:
Firstly, **don’t overmix the cream cheese**. Doing so can incorporate too much air, leading to cracks on the surface of the cheesecake. Mix until just combined for a creamy texture without excess air bubbles.
Secondly, ensure that **your ingredients are at room temperature**. Cold ingredients can cause the cream cheese to clump, preventing a smooth filling. Allow your cream cheese, eggs, and any other refrigerated items to sit out for about 30 minutes before use.
Thirdly, **avoid underbaking or overbaking** the cheesecake. It should be set around the edges while still slightly jiggly in the center. Following the suggested baking times will help you achieve that perfect texture.
Lastly, be patient and **allow adequate chilling time**. Patients is crucial for the flavors to develop and allows the cheesecake to completely firm up, making it easier to slice and serve.
Storage, Freezing & Reheating Tips
To store your Banana Pudding Crunch Cheesecake, cover it tightly with plastic wrap or aluminum foil and refrigerate. It will stay fresh for about 5-7 days in the refrigerator. If you have leftover servings, putting them in an airtight container can help maintain their quality.
For long-term storage, you can freeze your cheesecake. Wrap it thoroughly in plastic wrap, followed by aluminum foil to prevent freezer burn. A properly stored cheesecake can last up to 2-3 months in the freezer. When you’re ready to enjoy it, allow the cheesecake to thaw in the refrigerator overnight.
Reheating is generally not required, but if you want to serve it at room temperature, simply bring it out of the fridge and allow it to sit for about 30 minutes before slicing and serving. Avoid putting the cheesecake in the microwave, as this can melt the layers and change the texture.
If you notice any unusual odors or discolorations, it is essential to discard it for food safety. Always practice proper food handling to ensure freshness.
Frequently Asked Questions
Can I use frozen bananas for this recipe? Yes, you can use frozen bananas as long as they are fully thawed and drained of excess moisture. Keep in mind that using overly ripe bananas can add a stronger banana flavor, enhancing the dessert’s overall taste.
Is it necessary to use a springform pan? While a springform pan is ideal for cheesecakes due to its removable sides, you can also use a regular cake pan. Just ensure to line it with parchment paper to help with removal and presentation.
How can I tell when my cheesecake is done? The cheesecake should be set around the edges but have a slight jiggle in the center. This indicates that it will continue to firm up while cooling, resulting in a silky smooth texture.
Can I make this cheesecake ahead of time? Absolutely! This cheesecake can be made a day in advance and kept in the refrigerator. In fact, letting it chill for a more extended period allows the flavors to develop further.
What’s the best way to slice cheesecake? For clean slices, run a sharp knife under hot water before cutting, then wipe it dry. This helps create smooth edges and reduces the mess. Repeat this process for each slice for the best results.
Conclusion:
There you have it – a comprehensive guide to making the ultimate Banana Pudding Crunch Cheesecake! Not only is this recipe a crowd-pleaser, but it also showcases your culinary skills in the kitchen. The balance of creamy, sweet, and crunchy textures will satisfy all your dessert dreams. Remember, making this cheesecake is not just about following the recipe; it’s about sharing joy and love with those who enjoy your creation. So go ahead, give it a try, personalize it to your taste, and share it with friends and family. Enjoy every delectable bite and feel the warmth of home baking in your heart!


