Prep time: 10 minutes
Cook time: 10 minutes
Total time: 20 minutes
Servings: 6
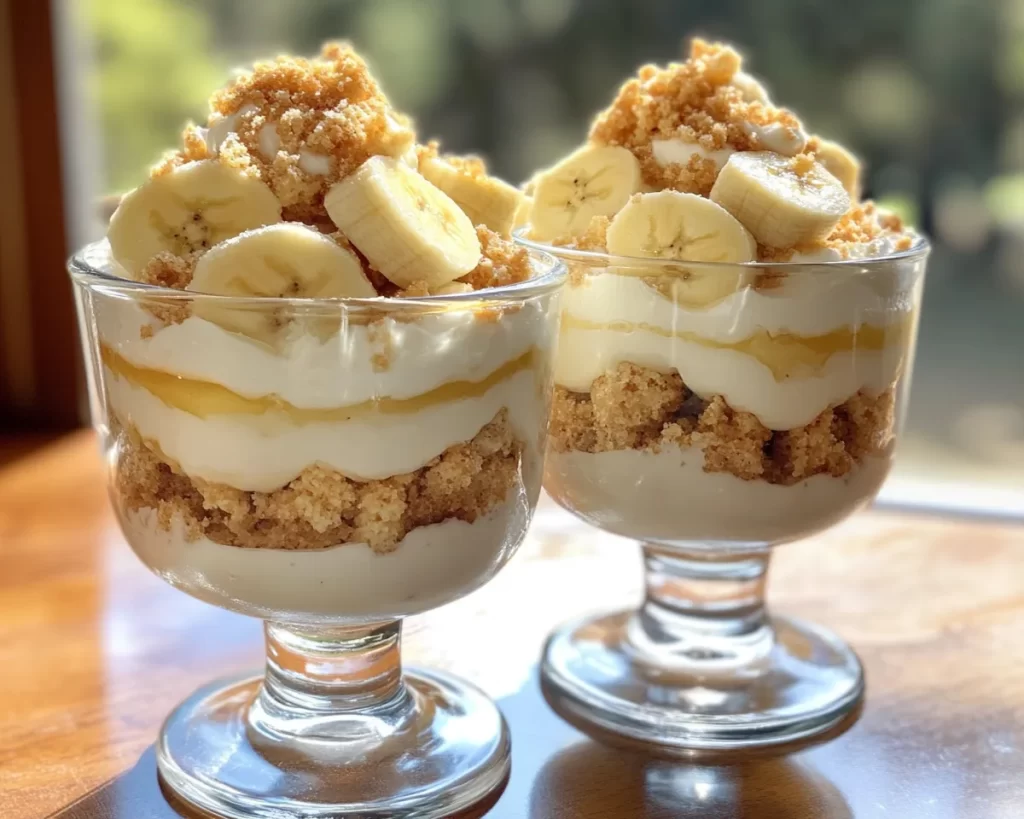
Banana pudding is a quintessential American dessert that brings nostalgia and comfort in every creamy, sweet spoonful. With this layered Magnolia style banana pudding recipe, you’ll savor the rich flavors of ripe bananas, fluffy whipped cream, and smooth vanilla pudding. Best of all, you can whip this delightful treat up in just 20 minutes!
What Is Banana Pudding: Layered Magnolia Style Banana Pudding in 20 Minutes ?
Banana pudding is not just a dessert; it’s a comforting and classic dish that carries sentimental value for many. Its origins can be traced back to the Southern United States and have evolved over the years. This particular rendition, layered Magnolia style, originates from the famous Magnolia Bakery in New York City, known for its rich and creamy interpretations of this beloved dish. The combination of layers of vanilla pudding, vanilla wafers, and bananas creates a sumptuous experience that’s perfect for family gatherings or casual get-togethers.
Why You’ll Love This
One of the appealing aspects of this layered banana pudding is its simplicity. It requires minimal preparation time, making it an excellent choice for busy parents or beginners trying to impress guests without investing endless hours in the kitchen. The creamy texture and sweet flavors of the pudding will surely resonate with everyone, from children to adults. Plus, it’s versatile and allows for creative variations.
Ingredients You’ll Need
- 2 ripe bananas: Look for bananas that are perfectly ripe, as they add natural sweetness and a rich flavor to your pudding.
- 1 box (5.1 oz) instant vanilla pudding mix: This provides the creamy base for your dessert and saves you from having to cook it yourself.
- 2 cups cold whole milk: Whole milk contributes to a rich and creamy texture that will support the pudding’s structure.
- 1 tub (8 oz) whipped topping: Using whipped topping will give your pudding a light and airy feel, making each bite delightful.
- 1 box vanilla wafers: These are the classic cookie element that adds a crispy texture and a hint of vanilla flavor.
- 1 teaspoon vanilla extract: This enhances the overall flavor profile of your pudding.

How to Make
- In a large bowl, combine the instant vanilla pudding mix with the cold whole milk. Whisk together until it starts to thicken, typically around 2 minutes. This is a crucial step as the pudding needs to reach the right consistency.
- Add the whipped topping and vanilla extract to the thickened pudding mixture. Gently fold until the mixture is smooth and well combined. This will enhance the creaminess and make the pudding fluffy.
- Now, prepare your serving dish. Start with a layer of vanilla wafers at the bottom to form a satisfying crunch in your pudding. Make sure to cover the bottom completely to achieve an even texture.
- Next, slice the ripe bananas and layer them over the first layer of vanilla wafers. The fruit will add a delightful contrast in flavor and texture.
- Pour half of the pudding mixture over the bananas, smoothing it out with a spatula to ensure even distribution. This layer is where the creamy magic happens!
- Repeat the layering process by adding another layer of vanilla wafers, followed by another layer of sliced bananas, and finally top with the remaining pudding mixture. Finish by sprinkling a few extra vanilla wafers on top for presentation.
- Chill the dessert in the refrigerator for at least 2 hours before serving. This allows all the flavors to meld and the vanilla wafers to soften slightly.
Variations & Substitutions
Chocolate Banana Pudding: For a rich twist, substitute the vanilla pudding mix with chocolate pudding. Layer with chocolate wafers and dark chocolate shavings for a decadent treat. This version will appeal to chocolate lovers and provide a luxurious take on the traditional recipe.
Healthy Banana Pudding: Swap out the whipped topping for a light Greek yogurt or whipped coconut cream to cut calories while still maintaining a creamy texture. Use low-fat milk and sugar alternatives to keep the dessert on the healthier side without sacrificing too much flavor.
Banana Pudding Parfaits: If you’re looking to serve individual portions, you can build banana pudding parfaits in small cups or jars. Layer the ingredients as you would in a big dish, but this allows for a personal touch with presentation, perfect for parties and gatherings.
Common Mistakes to Avoid
One common mistake is not allowing the pudding to chill long enough. Skipping the chilling step could result in a runny pudding that lacks the cohesive texture you want. Make sure to give it the proper time to set.
Another issue can arise from using unripe bananas. Unripe bananas can impact both the flavor and texture of your pudding. Always opt for ripe, sweet bananas for the best outcome.
Finally, it’s important to consider the layering order. Improper layering can result in a soggy bottom. Ensure you layer in this specific order: wafers, bananas, pudding, repeating as necessary to keep the textures aligned and visually appealing.
Storage, Freezing & Reheating Tips
If you have leftovers, store your banana pudding in the refrigerator in an airtight container. It’s best enjoyed within 3 days to retain its freshness and texture. The layers may begin to break down after a few days, but it will still taste great.
If you need to freeze banana pudding, it’s best to freeze individual portions to maintain quality. Make sure to wrap them tightly or use freezer-safe containers. When ready to serve, allow the portions to thaw in the refrigerator overnight for the best texture.
Reheating is generally not recommended, as it can alter the creamy consistency of the pudding. Serve it chilled for an optimal experience.
Frequently Asked Questions
Can I use a different flavor of pudding mix?
Absolutely! You can experiment with different flavors like chocolate or even butterscotch to create your own unique version of banana pudding. Just remember to choose flavors that complement the bananas for the best results.
How do I prevent bananas from browning?
To keep your bananas looking fresh, you can try lightly coating them in lemon juice before layering. This will help create a barrier that reduces the browning effect, preserving their appealing appearance for your dessert.
Can I make banana pudding ahead of time?
Yes! In fact, making banana pudding a day in advance is a great idea. The extra time in the refrigerator allows the flavors to deepen and the textures to develop. Just remember to cover it well to prevent it from absorbing any smells from the refrigerator.
What kind of bananas work best?
Look for ripe, medium to large bananas that have a few brown spots. These bananas will be sweet and soft, contributing to the overall flavor of your pudding. Avoid overly green bananas, as they won’t provide the best taste or texture.
Can I make this recipe gluten-free?
Absolutely! Just swap out the vanilla wafers for a gluten-free alternative, and you can enjoy this delicious dessert without worrying about gluten. There are many brands available that offer gluten-free cookies that will work perfectly in this recipe.
Conclusion: Making layered Magnolia style banana pudding in just 20 minutes is an attainable goal for anyone, no matter your cooking experience. This delightful dessert offers rich textures and flavors that can cater to various dietary preferences, making it a versatile addition to your dessert repertoire. Whether you are a busy parent looking for something quick, or a kitchen beginner aiming to impress, this recipe checks all the boxes while ensuring that every bite is packed with nostalgia and happiness. Serve it at parties or enjoy it quietly at home—no matter the occasion, this banana pudding is sure to be a hit!