**Prep time:** 20 minutes
**Cook time:** 2 hours
**Total time:** 2 hours 20 minutes
**Servings:** 8
If you’re looking to impress your guests or simply satisfy your sweet tooth, the **Pavlova Cake** is a dessert that will never let you down. With its crisp outer shell, soft and marshmallow-like interior, and the perfect topping of whipped cream and fresh fruits, this iconic dessert has earned its place in the hearts of many. Its light, airy texture not only tantalizes the taste buds but also provides a beautiful centerpiece for any table.
This **easy homemade Pavlova Cake** is a versatile treat—you can adjust the toppings to suit your preference or the season, allowing you to create variations that reflect your personal taste. In this article, you’ll learn to create a Pavlova from scratch, explore various toppings, and discover how to troubleshoot common baking challenges, ensuring that your experience is as sweet as the dessert itself.
What Is Pavlova Cake?
Originating from Australia and New Zealand, the Pavlova cake is named after the Russian ballerina Anna Pavlova, who toured these countries in the 1920s. This dessert is characterized by its meringue base, which is made from whipped egg whites, sugar, and a touch of vinegar or cornstarch to stabilize it.
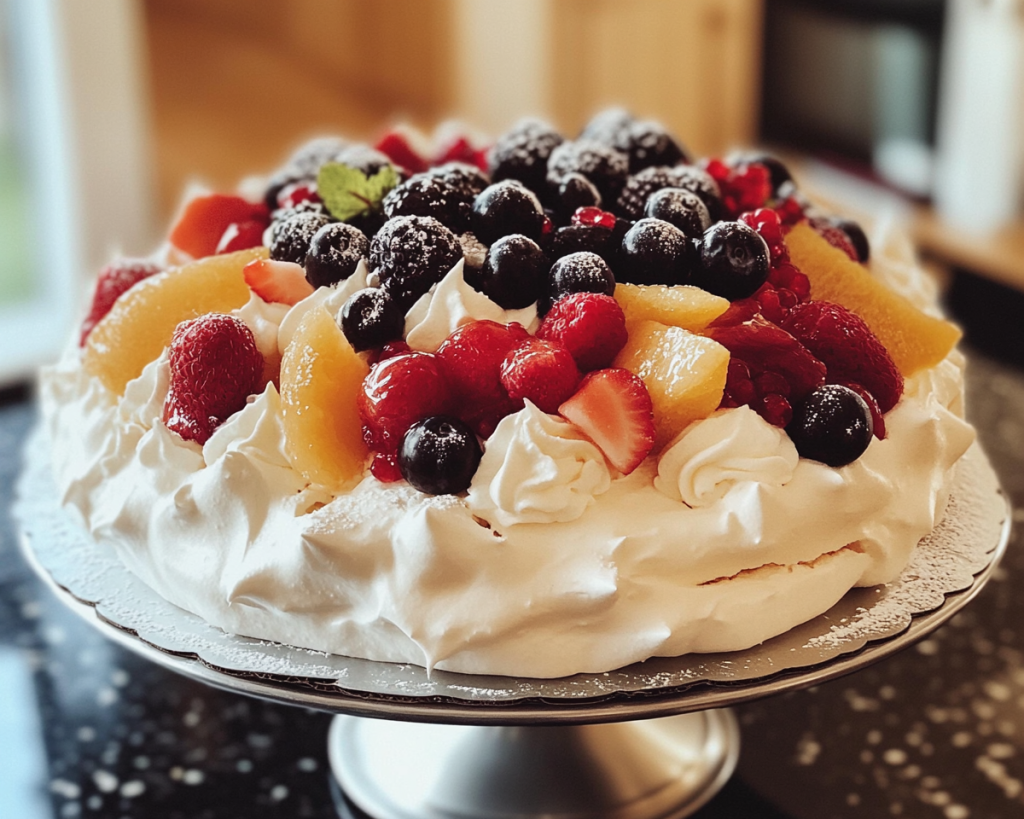
The result is a delightful combination: a crunchy exterior that gives way to a soft, chewy interior, often described as akin to marshmallows. The Pavlova is typically topped with **whipped cream** and an assortment of fresh fruits such as strawberries, kiwi, and passion fruit, making it not only delicious but also visually stunning. The contrast of textures—from the crisp meringue to the smooth cream and juicy fruit—creates a harmonious dessert experience.
What makes the Pavlova unique is its ability to be dressed up or down, making it suitable for both formal occasions and casual family gatherings. Plus, it embodies a certain charm that feels celebratory, beckoning you to slice into its lovely layers.
Why You’ll Love This Pavlova Cake
There are countless reasons to adore this **easy homemade Pavlova Cake**.
– **Taste:** The combination of sweet meringue, rich whipped cream, and fresh fruit creates a symphony of flavors. The meringue is sweet yet light, while the topping adds creamy richness and a tartness from the fruit that balances it beautifully.
– **Ease:** Although the meringue might seem intimidating at first, this recipe guides you step-by-step to achieve a successful result, even if you’re a baking beginner. The preparation is straightforward, and the hands-on time is minimal.
– **Cost-effective:** Most of the ingredients are pantry staples like eggs, sugar, and cream. Depending on the fruits you choose, it can be a budget-friendly dessert that looks lavish.
– **Versatility:** The base recipe can be topped with different fruits depending on the season, or you can even flavor your whipped cream with a splash of vanilla or a hint of lemon to customize it further.
– **Healthier alternative:** While it is still a treat, the Pavlova is often **gluten-free**, making it a great option for those with dietary restrictions.
However, there are common misconceptions surrounding the baking of **Pavlova**, such as difficulty or the fear of failure. The truth is, with the right technique and a bit of patience, you can achieve a gorgeous Pavlova that will impress your family and friends alike.
Ingredients You’ll Need
To make your **Pavlova Cake**, you’ll need the following ingredients:
– **4 large egg whites:** The star ingredient for meringue; they must be at room temperature for optimal whipping.
– **1 cup granulated sugar:** Sweetens the meringue and helps create its structure.
– **1 teaspoon white vinegar or lemon juice:** This acid helps stabilize the meringue, allowing it to hold its shape during baking.
– **1 tablespoon cornstarch:** This is optional but contributes to the Pavlova’s chewy texture.
– **1 cup heavy whipping cream:** For a decadent and fluffy topping that complements the meringue nicely.
– **Fresh fruits (such as strawberries, kiwi, and passion fruit):** These add natural sweetness and vibrant colors to your Pavlova.
When selecting fruits, consider what is in season to get the best flavor. You can also get creative with toppings, such as adding chocolate shavings or a drizzle of fruit syrup.
How to Make Pavlova Cake
Creating a homemade Pavlova might seem daunting, but with this step-by-step guide, you’ll find it easy!
1. **Preheat the Oven:** Start by preheating your oven to 250°F (120°C). A low temperature is crucial for gently drying out the meringue without browning it.
2. **Prepare the Baking Sheet:** Line a large baking sheet with parchment paper. You can draw a circle on the parchment as a guideline for where to spread your meringue.
3. **Whip the Egg Whites:** In a clean mixing bowl, add the room temperature egg whites. Using a stand mixer or hand mixer, beat the egg whites on medium speed until they become foamy. This will take about 1-2 minutes.
4. **Add Sugar Gradually:** Once foamed, gradually add the granulated sugar, about a tablespoon at a time, allowing it to dissolve before adding more. Continue beating until the mixture is glossy and forms stiff peaks. This can take about 10 minutes.
5. **Incorporate Vinegar and Cornstarch:** Gently fold in the white vinegar (or lemon juice) and cornstarch using a spatula. Be careful not to deflate the meringue; the aim is to keep it airy.
6. **Shape the Meringue:** Spoon the meringue onto your prepared baking sheet, using the circle guideline. Create a slight indentation in the center to hold the toppings later.
7. **Bake:** Place the baking sheet in the preheated oven and bake for about 1.5 to 2 hours. The Pavlova should feel dry to the touch and should not brown. Once done, turn the oven off and leave the Pavlova inside to cool completely. This helps prevent cracking.
8. **Whip the Cream:** Once your Pavlova has completely cooled, whip the heavy cream until soft peaks form. Be careful not to overwhip, or it will become butter.
9. **Assemble the Pavlova:** Transfer the cooled Pavlova to a serving platter. Top it generously with whipped cream and then arrange your fresh fruits creatively on top.
10. **Serve Immediately:** The Pavlova is best served right after assembly, as the meringue can soften with time due to moisture from the cream and fruit.
Enjoy your delicately crafted **Pavlova Cake** with friends and family—it’s bound to be a hit!
3 Variations & Substitutions
**1. Chocolate Pavlova:** For a chocolate twist on this classic recipe, you can incorporate **cocoa powder** into your meringue. Replace about two tablespoons of sugar with cocoa powder for a rich chocolate flavor. It pairs beautifully with whipped cream and strawberries for a decadent dessert.
**2. Tropical Fruit Pavlova:** If you love a tropical flair, consider using fruits like **mango**, **pineapple**, and **banana**, along with coconut flakes. This combination adds an exotic taste that evokes beach vibes. Drizzle a bit of coconut cream on top instead of plain whipped cream for an added layer of flavor.
**3. Mixed Berry Pavlova:** Use a combination of **mixed berries**—like blueberries, raspberries, and blackberries—for a burst of color and flavor. You can macerate the berries in a bit of sugar and lemon juice beforehand to enhance their sweetness and create a juicy topping for the creamy meringue.
When making substitutions, remember that the texture and overall taste may change slightly. Experimenting with different fruits and flavors allows you to tailor this dessert to your likings.
Common Mistakes to Avoid
Baking a perfect Pavlova is a delicate process, but avoiding a few common pitfalls can lead to a successful outcome.
– **Underbeating the Egg Whites:** If not beaten sufficiently, your meringue won’t hold its shape. Always whip them until stiff peaks form. This means that when you lift the whisk out of the mixture, the peaks remain upright without collapsing.
– **Overbaking:** Keeping the Pavlova in the oven for too long can lead to browning, which means you’ve missed out on that beautiful white exterior. Monitor it closely and start checking for doneness after about an hour. The Pavlova should sound hollow when tapped.
– **Humidity Issues:** Warmer, humid weather is not your meringue’s friend. The moisture can complicate the drying process and may result in a soggy texture. On particularly humid days, consider baking your Pavlova when it’s cooler, or using your oven’s residual heat if the weather is warm.
By being mindful of these common mistakes, you can improve your chances of crafting a flawless Pavlova.
Storage, Freezing & Reheating Tips
Pavlova is best enjoyed fresh, but if you need to store it, you can keep it for a short time. Here’s how to handle leftovers:
– **Short-term storage:** If you have leftover Pavlova, store it in an airtight container at room temperature. Do not refrigerate, as this can cause the meringue to become soggy.
– **Long-term storage:** While it’s technically possible to freeze a meringue, it’s not recommended because the structure can be compromised, leading to an undesirable texture. If you must freeze, wrap the cooled meringue tightly in plastic wrap and aluminum foil. It can last for about a month.
– **Reheating:** Ideally, you should not need to reheat Pavlova, but if you’ve stored it, you can place it back in a low oven (around 200°F) for about 10 minutes to crisp it up again. However, avoid added moisture, as this can ruin its texture.
As for the toppings, prepare fresh whipped cream and fruit just before serving for the best result.
Frequently Asked Questions
**1. Can I use pasteurized egg whites instead of fresh eggs?**
Yes, you can use pasteurized egg whites if you are concerned about food safety or prefer it for convenience. Just remember that the consistency might be slightly different, so look for brands specifically designed for meringue use.
**2. Why did my Pavlova crack?**
Cracking can happen for several reasons, especially if the meringue is baked at too high a temperature or if it is moved too quickly from one environment to another (like from a hot oven to a cold kitchen). It’s natural for some cracks to form, but keeping the oven temperature low and allowing the meringue to cool gradually will minimize this issue.
**3. How can I fix a soggy Pavlova?**
If your Pavlova has absorbed moisture and become soggy, there’s not much to be done to reverse that. However, you can create a new topping to freshen it up—using a whipped cream layer can disguise the texture. If you’re baking again, aim for lower humidity days and ensure it’s baked long enough for a proper outer crust.
**4. Can I make Pavlova in advance?**
Indeed, you can prepare the meringue ahead of time and store it in an airtight container for a day or two. Just remember to assemble with cream and fruits right before serving for the best taste and texture.
**5. What fruits pair best with Pavlova?**
Almost any fruit goes well with Pavlova, but traditional choices include berries (strawberries, raspberries), kiwis, and passion fruit. Stone fruits like peaches or nectarines can also make delicious toppers. You can choose based on your preferences and seasonal availability.
By keeping these tips and insights in mind, your Pavlova adventure will surely be a delightful success!
In conclusion, making a **Pavlova cake** at home can become a cherished tradition or a party showstopper. This recipe highlights its simplicity while allowing you the freedom to put your unique spin on it. Whether dressed with mixed fruits, chocolate, or other variations, it serves not only as a dessert but as a canvas for creativity. So grab those egg whites, whisk away your worries, and get ready to concoct a delightful masterpiece that delights every palate! Don’t hesitate to share your creation with friends or explore new topping ideas. Enjoy the sweet journey!