Prep time: 30 minutes
Cook time: 15 minutes
Total time: 45 minutes
Servings: 4
Blooming onions are more than just a dish; they are a culinary experience that can make any gathering feel more festive. Imagine the golden, crispy petals beckoning you—inviting you to tear off a petal, dip it in warm, zesty sauce, and savor the crunch. This irresistible appetizer has its roots in Southern cuisine, with many believing it hails from the state of Texas. Whether it’s served at sports events, parties, or simply enjoyed on a cozy movie night, blooming onions have a unique way to bring people together.
In this guide, you’ll uncover the secrets of making blooming onions at home. You’ll explore tips to achieve the perfect texture and flavor, variations to suit different tastes, and everything you need to know about storing any leftovers (if there are any!). By the end of this article, you’ll feel empowered to impress your friends and family with this delightful treat. So, let’s dive into the world of blooming onions!
What Is Blooming Onions Recipe – Easy, Irresistible Party Appetizer Guide?
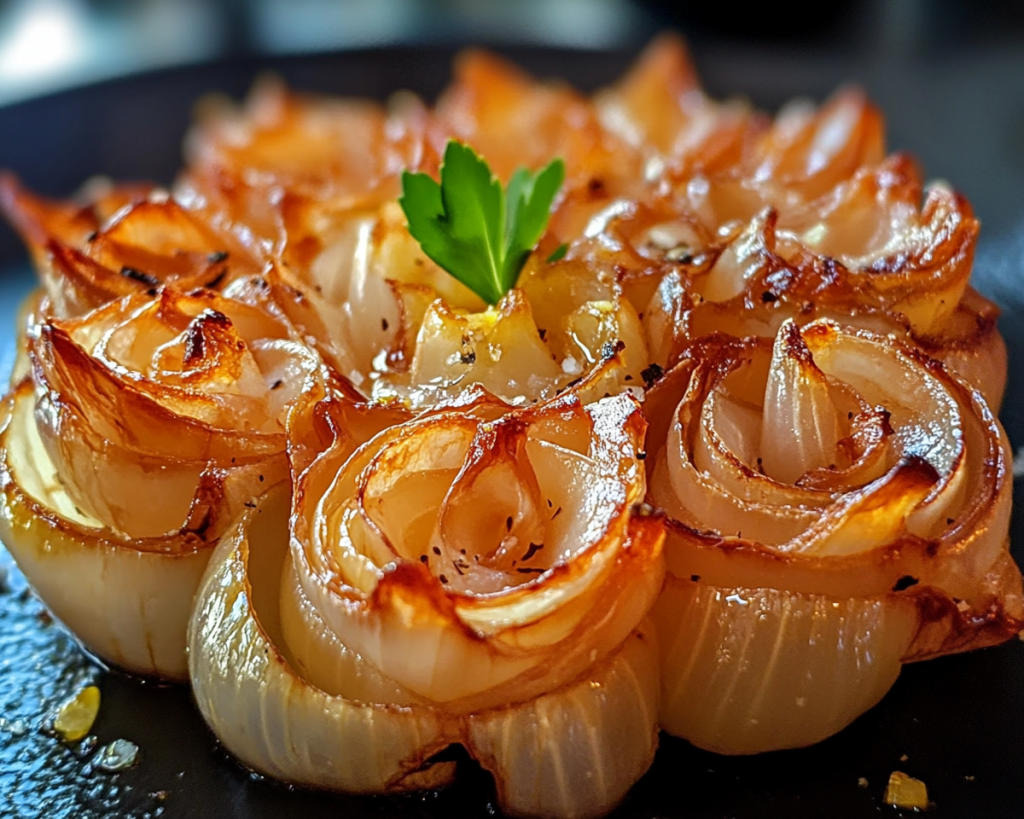
A blooming onion is essentially a whole onion that has been sliced to resemble a flower, then battered and deep-fried until golden brown. This unique presentation makes it a showstopper that is often a highlight of any appetizer platter. The outer layers become crisp and crunchy, while the inner layers remain soft and tender. The flavor is a harmonious blend of onion sweetness and savory spices, usually enhanced by a tangy dipping sauce.
The origin of the blooming onion is often debated, but its stand-out identity in American cuisine makes it a beloved choice for many. The texture speaks volumes, with a satisfying crunch that contrasts beautifully with the soft interior. Each petal is easy to pull apart for dipping, making it not just a dish but an experience to share with friends over laughter and good times.
If you’ve never tasted a blooming onion, you’re in for a treat! It’s perfect for gatherings, as it brings joy and a sense of shared experience that few appetizers can match. Making it at home means you can customize the flavors and cooking methods, ensuring that you get to enjoy it just how you like it.
Why You’ll Love This
There are several reasons why you are going to fall head over heels for this blooming onion recipe. Firstly, the taste is rich and complex; the *sweetness* of the onion balances well with the *spices* in the batter. Everyone finds themselves craving that perfect blend of flavors, especially when paired with a tasty dipping sauce.
Secondly, the *ease* of preparing blooming onions is remarkable. Although they may seem intimidating, following this guide ensures that even kitchen novices can achieve fantastic results. The cooking process is straightforward, requiring minimal equipment and fundamental frying techniques that anyone can master.
Cost shouldn’t be a concern either; blooming onions are made primarily from inexpensive ingredients. The only splurges might be for the dipping sauce or any specialized spices you choose to incorporate. This makes it an economical choice for satisfying a crowd, whether at a casual get-together or a festive celebration.
Lastly, blooming onions offer versatility that many other appetizers cannot. Whether you want to jazz them up with *spicy seasoning*, go for a healthier baked version, or even create a *gluten-free* alternative, this recipe can adapt to suit a wide range of dietary needs.
It’s time to put aside any misconceptions you might have about making this dish. Rather than just being a restaurant specialty, it’s easy to recreate in your own kitchen.
Ingredients You’ll Need
To make blooming onions, gather the following ingredients:
- Large white or yellow onions: These varieties are preferred for their natural sweetness and crisp texture. Avoid red onions as they are too pungent for this recipe.
- All-purpose flour: This will help create a light and crispy batter. For gluten-free options, use a gluten-free flour substitute.
- Cornstarch: This enhances the crispiness of the batter. If unavailable, you can omit it, though the texture may vary slightly.
- Baking powder: This ingredient provides the necessary lift for the batter.
- Salt: Essential for flavor enhancement. Feel free to adjust the amount to your taste.
- Paprika: This adds a delightful smoky flavor to the batter. For extra kick, consider using smoked paprika.
- Cayenne pepper: This is optional, but if you enjoy spicy food, it will give an added warmth to the flavor profile.
- Buttermilk: This adds a layer of flavor and helps tenderize the onion. If you don’t have it, you can substitute with a mixture of milk and vinegar.
- Vegetable oil for frying: Choose a neutral oil with a high smoke point, like canola oil.
- Dipping sauce: Consider a classic ranch dressing or a zesty remoulade sauce. The choice of dipping sauce can significantly affect the overall experience.
Understanding these ingredients will make your cooking experience smoother. Taking the time to find quality onions and fresh spices can significantly elevate the dish.
How to Make
Follow these step-by-step instructions for a successful blooming onion.
- Prepare the onion: Start by peeling the outer layer of the onion and cutting off about 1 inch from the top. Make sure not to cut off the root end as this will help hold the onion together. Place the onion cut-side down on a cutting board, and carefully slice it into eighths, stopping about half an inch from the root. This ensures that the petals don’t detach completely.
- Prepare the batter: In a mixing bowl, combine the all-purpose flour, cornstarch, baking powder, salt, paprika, and cayenne pepper. Mix these dry ingredients well to ensure even coating later. In another bowl, pour in the buttermilk. The transition from wet to dry will help create a great texture for the batter.
- Coat the onion: Start by gently separating the petals of the onion. It’s important to be gentle so as not to break them. Sprinkle a little flour mixture between the petals, ensuring even coverage. Then, dip the whole onion in the buttermilk, allowing any excess to drip off before coating it generously with the flour mixture. Shaking the onion will help get rid of any excess flour so that it’s not clumpy.
- Heat the oil: In a deep fryer or a heavy pot, heat the vegetable oil to 350°F (175°C). Use a thermometer to check the temperature; this is an essential step to ensure a crispy finish. If the oil isn’t hot enough, the onion will absorb too much oil and become soggy.
- Fry the onion: Carefully lower the coated onion into the hot oil, cut-side down. Fry for about 3-4 minutes before gently flipping it over and frying for an additional 3-4 minutes until golden brown. Keep an eye on it to avoid burning!
- Remove and drain: Once the onion is fully cooked, carefully remove it from the oil and place it on a paper towel-lined plate to drain excess oil. This step is crucial in retaining its crispiness and avoiding sogginess.
- Serve: Serve the blooming onion hot with your favorite dipping sauce. The visual appeal is enhanced when served on a platter; you can sprinkle some extra paprika or herbs for an added touch.
By following these detailed steps, you will create a blooming onion that not only looks tempting but also delivers on taste. Don’t rush the cooking process. It’s all about getting that perfect golden color while keeping the inner petals tender.
Variations & Substitutions
Spicy Blooming Onion: If you’re a fan of heat, consider adding more cayenne pepper or even diced jalapenos to the batter. This variation incorporates additional spices, giving an exciting kick to the classic dish. Consider serving it with a chipotle mayo to elevate the flavor even more.
Cheesy Blooming Onion: For cheese lovers, incorporating shredded cheese into the batter can take your blooming onion to another level. Opt for sharp cheddar or pepper jack for added flavor. Just ensure that the cheese is finely shredded so that it adheres well to the petals.
Herbed Blooming Onion: Adding fresh or dried herbs such as rosemary, thyme, or oregano can introduce fragrant notes to your onion. This variation is perfect for those who adore the taste of fresh herbs and want to add complexity to the dish. Use about a tablespoon of herbs in your batter for the best results.
Baked Blooming Onion: For a healthier twist, consider baking your blooming onion instead of frying it. Preheat your oven to 400°F (200°C) and place the coated onion on a baking sheet lined with parchment paper. Spray lightly with cooking spray. Bake for about 20-25 minutes until golden and crispy. This method saves on calories while still providing that satisfying crunch.
Gluten-Free Blooming Onion: For those with gluten sensitivities, simply substitute all-purpose flour with a gluten-free mix. Ensure all other ingredients, especially the baking powder, are gluten-free as well. This way, you can enjoy the classic dish without worry.
Exploring these variations ensures you can cater to different taste preferences and dietary needs, maximizing enjoyment at any gathering.
Common Mistakes to Avoid
There are several common pitfalls when it comes to making blooming onions. One frequent error is cutting the onion too deep. If you cut all the way through, the petals will fall apart during frying. To avoid this, make careful cuts and remember to leave the root intact.
Another mistake is to overlook the importance of the oil temperature. If the oil is not hot enough, the onion will absorb too much oil, resulting in a greasy product. Using a thermometer can help maintain the correct frying temperature for optimal crispiness.
Skipping the coating process can also lead to disappointing results. Each step of coating is vital for achieving that desired crunch. Ensure you take the time to coat in flour after dipping in buttermilk, as this creates a protective crust that keeps the onion tender yet crispy.
Lastly, don’t forget to let the onion drain on paper towels after frying. This critical step helps remove excess oil and keeps the onion crisp. Allowing it to sit without draining can lead to a soggy texture that defeats the purpose of this delightful appetizer.
Storage, Freezing & Reheating Tips
If you somehow manage to have leftover blooming onion (which seems unlikely!), proper storage is important. Allow the onion to cool completely before wrapping it in plastic wrap or placing it in an airtight container. Consume any leftovers within 2-3 days for the best quality.
For longer storage, consider freezing the blooming onion after frying. Wrap it tightly in plastic wrap and then place it in a freezer-safe bag. When ready to eat, reheat in the oven at 375°F (190°C) for about 15-20 minutes. This method helps revive some of the crispiness lost during storage.
When it comes to reheating, avoid microwaving as this often results in a soggy texture. Always use the oven to restore the crunch, ensuring that the experience of biting into the petals remains satisfying and delightful. Food safety is crucial, so always check for any signs of spoilage before consuming.
Frequently Asked Questions
Can I make a blooming onion in an air fryer?
Yes! An air fryer can be a fantastic option for making blooming onions. Just follow the same battering process and place the onion in the air fryer basket. Cook at 375°F (190°C) for about 15-20 minutes. Check frequently to ensure they achieve that golden color without overcooking.
Is it necessary to soak the onion before frying?
While soaking isn’t necessary, some cooks prefer to soak their onions in cold water for about 30 minutes before coating and frying. This method supposedly helps soften the onion slightly and allows for better flavor absorption during cooking. If you’re short on time, skipping this step will still yield great results.
Can I use different types of onions for blooming onion?
While large white or yellow onions are traditionally used for blooming onions due to their sweetness, you can experiment with other varieties like sweet onions or even Vidalia onions. However, red or green onions might be too pungent and won’t yield the same delightful texture.
What dipping sauce is best for blooming onions?
Classic choices include ranch dressing or a spicy remoulade. You can also experiment with a honey mustard or even a garlic aioli, depending on your flavor preferences. The sauce can elevate the entire experience, so choose something that complements the flavors well.
Can I prepare the batter ahead of time?
While it’s best to prepare the onion just before frying, you can mix the dry ingredients of the batter in advance and store them in an airtight container. Just make sure to mix the wet and dry components right when you are ready to cook, as the batter is best fresh for the crispiest result.
Conclusion:
Blooming onions are not only a treat for the eyes but also a delight for the palate. These crispy, savory petals give the satisfaction of summertime backyard barbecues or the thrill of your favorite sporting event. By making this recipe, you’re not just preparing food; you’re creating a shared experience that can bring family and friends closer together.
So why not give it a try? Customize it to your liking, whether you prefer it spicy or cheesy, and let the warm aromas fill your kitchen. Enjoy experimenting with flavors, and don’t forget, food is all about sharing joy with others. Share your creation and inspire others with the irresistible charm of blooming onions!