Prep time: 15 minutes
Cook time: 30 minutes
Total time: 45 minutes
Servings: 15
Making delicious gummies that kids will adore can be a real challenge for parents seeking healthier alternatives. How do you provide a treat that satisfies both their insatiable sweet tooth and your dedication to their well-being? Enter the recipe for healthy homemade gummies! These delightful, chewable snacks can be customized to suit your family’s preferences and can be made with natural ingredients you probably already have at home. In this article, we’ll guide you through the entire process of making gummies that are not only nutritious but also bursting with flavor. We’ll cover everything from ingredients to step-by-step instructions, including variations, common mistakes to avoid, and answers to frequently asked questions.
The beauty of homemade gummies lies in the ability to choose wholesome ingredients that provide a guilt-free treat for your kids. Unlike store-bought gummies, which often contain artificial colors and flavors, our recipe allows you to control what goes into your children’s favorite snack. Whether you’re looking to pack a punch of vitamin C with fruit juice or incorporate collagen for added health benefits, you are bound to enjoy this fun and engaging cooking process. So, roll up your sleeves, gather your supplies, and let’s dive into making healthy homemade gummies that your kids will love!
What Is Can You Make Healthy Homemade Gummies Kids Love So Much?
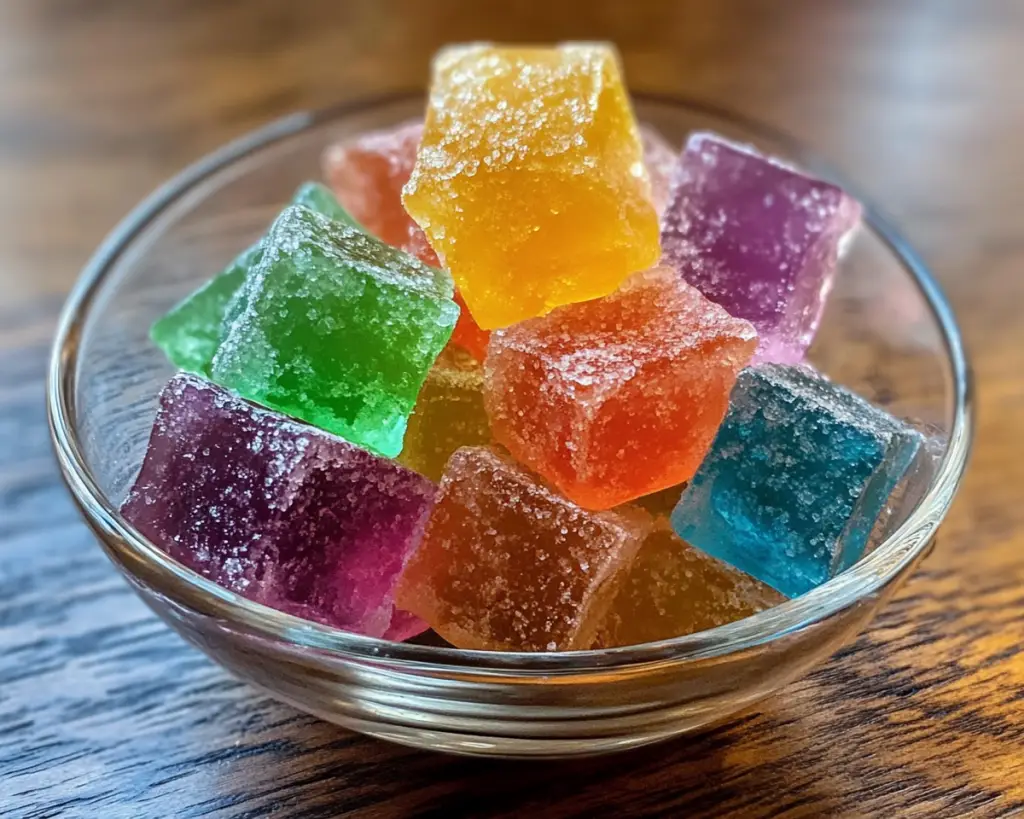
Healthy homemade gummies are a vibrant, flavorful snack that serves as a perfect alternative to processed sweets. Originating from traditional gelatin-based candies, these gummies bring an excellent texture that is chewy and satisfying. You will notice their delightful fruit flavors, which can range from tart to sweet based on your choices of juice and sweetener.
The primary ingredients in healthy homemade gummies include gelatin, fruit juice, and a natural sweetener. While the gelatin provides that classic gummy texture, the fruit juice gives flavor and a touch of natural sweetness. This recipe not only satisfies cravings but also allows you to sneak in essential nutrients, making it a win-win for both you and your little ones. Your kids will enjoy the pleasing chewiness and colorful presentation while you appreciate knowing exactly what they are consuming.
In summary, healthy homemade gummies represent an excellent balance of fun and nutrition, making them a highly popular choice among health-conscious parents.
Why You’ll Love This
There are numerous reasons you will fall in love with healthy homemade gummies. First, the **taste** is simply delightful; the natural fruit flavors really shine through, making for a delicious treat that you won’t mind your kids indulging in. Unlike the overly sweet and artificial flavors found in store-bought varieties, these gummies offer a refreshing burst of flavors that your kids won’t soon forget.
Furthermore, this recipe is incredibly **easy** to follow. Even if you’re a beginner in the kitchen, you’ll find that making gummies requires minimal effort and basic cooking skills. The step-by-step instructions ensure that no matter your cooking experience, you’ll feel confident in your ability to create these delectable treats.
Cost is another benefit. Purchasing ingredients for your homemade gummies is more economical than buying specialty gummy brands—especially if you’re serving a larger family or often find yourself buying snacks for gatherings. Health-wise, using natural *sweeteners* and *real fruit juice* means you can skip out on unnecessary additives, dyes, and high-fructose corn syrup, making these gummies a beneficial choice for your family.
Lastly, their **versatility** means you can mix things up each time you create them! That’s right, from flavor combinations to different shapes and colors, healthy homemade gummies give you the freedom to let your creativity shine in the kitchen.
Ingredients You’ll Need
- 1 cup fruit juice: This is the primary flavor component. Use your children’s favorite juice, such as apple, grape, or orange. You can also opt for cold-pressed juice for a fresh taste.
- 3 tablespoons gelatin: This ingredient will give your gummies their chewy texture. You can find both *unflavored* and flavored gelatins in stores. If you’re vegan, look for agar-agar as an alternative.
- 2 tablespoons honey or maple syrup: Both sweeteners naturally enhance the flavor. Honey may be better suited for older kids, while maple syrup is vegan-friendly.
- Optional vitamin C powder: This can be added for a nutrient boost and to help prolong shelf life. It will also add a slight tanginess to the gummies.
- Optional fruit puree: For a thicker consistency and added nutrients, consider using fruit puree such as banana or berries.
Each ingredient plays a crucial role in making these gummies not only delicious but also healthy. Understanding the purpose of each component can help you customize the recipe to fit your family’s needs.
How to Make
- Start by preparing your molds. Silicone molds with fun shapes work best for removing the gummies once they’re set. Lightly grease them with a bit of coconut oil to ensure easy release later on.
- In a medium saucepan, pour in the one cup of fruit juice. Heat over low flame, ensuring not to boil it. This step is crucial because boiling can destroy some of the juicy flavors. Just heating it will allow for a smoother mixture when you add the gelatin.
- Slowly sprinkle in the three tablespoons of gelatin while whisking continuously. It is essential to whisk vigorously to prevent clumps from forming. Continue to stir until the gelatin is completely dissolved. This process should take about 3-5 minutes.
- Add in any sweeteners like honey or maple syrup at this stage. Make sure to mix until everything is fully combined. Taste the mixture at this point; if you’d like more sweetness, you can adjust it to your preference.
- If you’re adding vitamin C powder, incorporate it now and mix thoroughly until dissolved. At this point, transitioning from the saucepan to pouring into molds is a great time to add any fruit puree for texture.
- Carefully pour the mixture into your prepared molds. You might want to use a funnel or a measuring cup with a spout for better control. Fill each cavity slowly to avoid spills!
- Once filled, place the molds in the refrigerator for about 30 minutes or until the gummies are set. The gelatin will firm up as it cools. Keep an eye on the time, as leaving them too long can make them rubbery.
- After 30 minutes, remove the molds from the fridge. Gently pop out the gummies—this is where the lightly greased molds come in handy!
- Lastly, store your homemade gummies in an airtight container. They can last in the refrigerator for up to two weeks, although I doubt they’ll last that long with kids around!
This straightforward recipe ensures you create gummies that not only taste great but also make you feel proud as a parent. The best part? You’ve involved your kids in a healthy kitchen activity that promotes their interest in cooking and nutrition.
Variations & Substitutions
Fruit Variety: Feel free to switch up the fruit juice based on your preferences. For instance, using tropical juices like pineapple or mango can bring sunshine into even the cloudiest of days. Each juice has its unique flavor profile, so don’t hesitate to experiment until you find the combination your family adores.
Flavored Gelatin: If you’re looking for a quick shortcut, consider using flavored gelatin products. Just be cautious with the added sugars present in these products, as they will change the nutritional profile of your gummies.
Vegan Option: For those who follow a vegan lifestyle, simply replace the gelatin with agar-agar, which is derived from seaweed. This can provide a different texture, often firmer than traditional gelatin. Be sure to read the instructions on the packaging for the correct agar-agar to liquid ratio.
Boosted Nutritional Value: Adding in things like *chia seeds, flaxseeds*, or *spirulina powder* can up the health ante substantially. Just a tablespoon or two can add *fiber* and *omega-3 fatty acids*, enhancing the overall nutritional value without overwhelming the flavor.
Colorful Variants: Use pureed fruits like blueberries or strawberries to create layers of color within your gummies. Not only will they look stunning, but you’ll also introduce your kids to more flavors and textures they might not typically eat. Layering can be as easy as allowing one color to set slightly before adding another.
Common Mistakes to Avoid
When making healthy homemade gummies, some **common mistakes** can hinder the success of your delightful treat. First and foremost is not whisking the gelatin thoroughly while it dissolves in the juice. If there are clumps, your gummies will have unsightly lumps and a less appealing texture.
Another mistake is not heating the fruit juice gently enough. Always pay attention to the heat; boiling juice can alter the flavor and cause the gelatin to break down, meaning your gummies won’t firm up properly. If they do not set, this is typically due to an imbalance in the gelatin-to-liquid ratio.
Lastly, don’t skip the cooling step in the refrigerator. Allow the gummies enough time to set completely; removing them too early can result in a gooey, sticky mess. Patience is key here!
Be aware of these tips to ensure your homemade gummies come out perfectly every time!
Storage, Freezing & Reheating Tips
When it comes to **storage**, it is essential to keep your gummies in an airtight container. This will prevent them from dehydrating and losing their mouthwatering chewiness. Storing them in the refrigerator can help prolong their freshness, letting you keep these snacks for up to two weeks. Be sure to separate layers of gummies with wax paper if stacking them.
If you find you’ve got a large batch or simply want to make them in advance, the good news is they can also be **frozen**! Place them in a freezer-safe container and seal them tightly. They can be stored in the freezer for up to three months. When you’re ready to enjoy, allow them to thaw at room temperature, and you’re good to go.
However, do not attempt to **reheat** gummies as this will compromise their texture and quality. The integrity of the gelatin will be disrupted, leading to undesirable results. Instead, make smaller batches if you’re worried about spoilage, so your family always has a fresh and delightful treat on hand.
Frequently Asked Questions
Are homemade gummies healthier than store-bought ones?
Yes, healthy homemade gummies can be much better for you compared to store-bought versions. Store brands are often packed with artificial colors, flavors, and high-fructose corn syrup. By making your own, you control the ingredients, allowing you to choose only nutritious options that fit your family’s dietary needs.
Can I use fresh fruit instead of juice?
Absolutely! While fruit juice is the more traditional route, using fresh fruit will yield a different taste and texture. You will need to blend the fresh fruit and strain it to obtain a smooth puree before adding it to your mixture. This way, your gummies can be more nutrient-packed and offer an even fresher flavor.
Is it possible to make alcohol-infused gummies?
Yes, you can certainly introduce alcohol into your gummies for an adult twist! However, keep in mind that the amount of alcohol you use should not exceed the liquid measurement in the recipe. Too much may prevent the gummies from setting. Always consume responsibly!
Can these gummies be made sugar-free?
Yes! To make your gummies sugar-free, simply utilize natural sweeteners such as erythritol or stevia. Note that different sweeteners have varying levels of sweetness, so adjust accordingly to make it just right for your taste buds.
What shapes can I create with my gummy molds?
The possibilities are endless! From traditional bear shapes to stars, hearts, and even fun holiday-themed molds, you can make your gummies as imaginative and colorful as you desire. Using various shapes can make the gummies even more enticing for kids, transforming healthy eating into a fun experience.
Conclusion:
In conclusion, healthy homemade gummies are a fantastic addition to your family’s snack repertoire. With their delightful flavors, vibrant colors, and chewy texture, they’re sure to be a hit with kids and parents alike. Not only do they allow you to control the ingredients, but they also open up a world of creativity in the kitchen. So why not give this recipe a try? Customize it according to your family’s preferences, teach your kids about healthy eating, and above all, enjoy the satisfying experience of crafting delicious treats together. Don’t forget to share your creations with friends or other family members who might be looking for a guilt-free sweet fix!