Prep time: 20 minutes
Cook time: 30 minutes
Total time: 50 minutes
Servings: 12
When it comes to desserts, few treats evoke the comforting nostalgia of freshly baked cinnamon rolls. Imagine the aroma wafting through your kitchen as you prepare a dessert that combines this beloved flavor with rich, buttery bars — enter the Cinnamon Roll Bliss Bars. These bars channel the essence of traditional cinnamon rolls but are presented in an accessible, easy-to-make format that makes them the perfect afternoon treat, party snack, or family dessert.
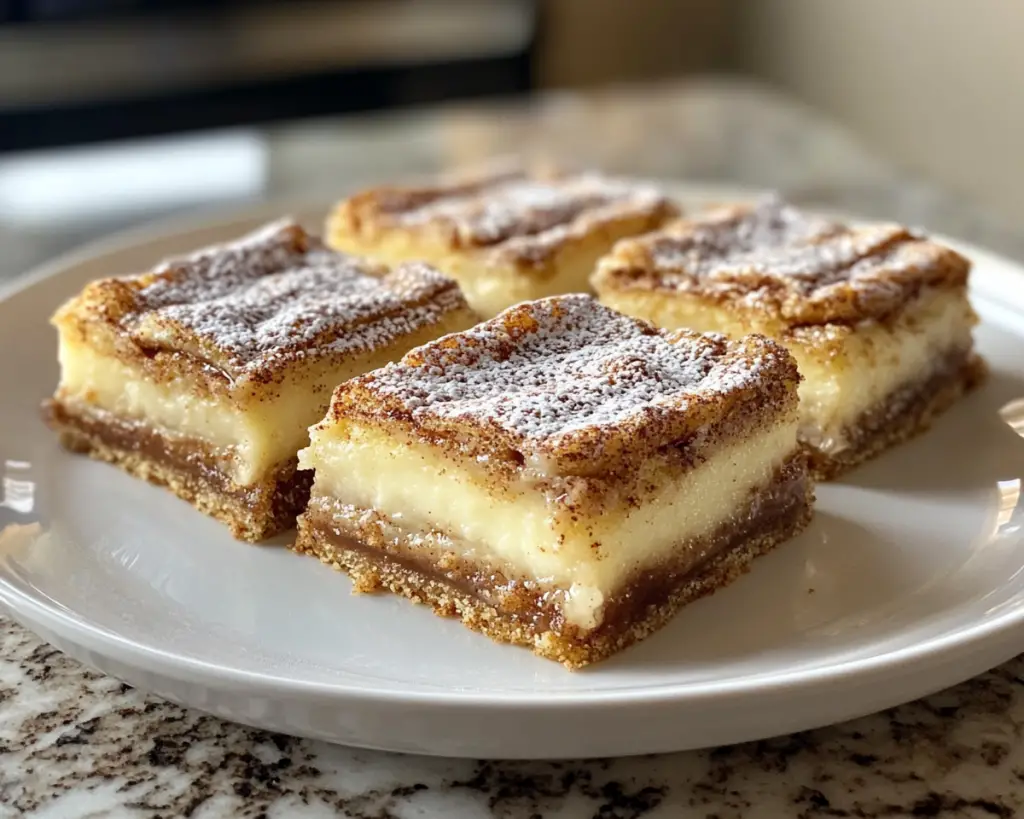
What sets these blissful bars apart is their delightful combination of textures: a soft, chewy base topped with creamy frosting, reminiscent of the traditional glaze that drips over a warm cinnamon roll. Not only are these bars a delicious treat, but they also cater to busy parents and home cooks looking to whip up something special without the fuss. Throughout this recipe, you will discover helpful tips, variations, and a step-by-step guide to ensure your Cinnamon Roll Bliss Bars turn out perfect every time.
What Is Cinnamon Roll Bliss Bars Recipe Easy Must-Try Dessert Bars?
Cinnamon Roll Bliss Bars are a delectable fusion of traditional cinnamon rolls and dessert bars, delivering the best of both worlds. Rooted in classic dessert lore, this dish takes inspiration from the iconic cinnamon roll, which often features a tender dough swirled with a sticky cinnamon-sugar filling and topped with a rich frosting. The key characteristics of these bliss bars include their soft texture, the comforting taste of cinnamon, and the satisfying sweetness of a cream cheese glaze.
In addition to their delightful flavor, the bars’ simple preparation method makes them particularly appealing. Unlike traditional cinnamon rolls that require careful rolling, slicing, and proofing, these bars come together quickly in a single pan. Once baked, they can be sliced into generous squares, making them perfect for sharing — or keeping all to yourself. Each bite unveils layers of cinnamon flavor juxtaposed with a creamy, decadent frosting that will transport you straight to dessert heaven.
The versatility of Cinnamon Roll Bliss Bars means they fit perfectly in any season or occasion. They are an excellent choice for breakfast, brunch gatherings, or simply a sweet snack enjoyed with coffee or tea. Whether for a cozy family breakfast on a rainy day or a centerpiece at a celebration, these bars cater to everyone’s cravings.
Why You’ll Love This
There are many reasons to fall in love with Cinnamon Roll Bliss Bars. Firstly, their amazing taste is hard to resist. The combination of warm cinnamon, buttery richness, and sweet glaze creates a symphony of flavors that complement each other beautifully. Each mouthful is a delightful medley, whether enjoyed warm from the oven or at room temperature.
Secondly, the ease of preparation means even novice bakers can successfully whip up these bars with confidence. No complex techniques are involved; simply mix, bake, and frost. This simplicity is particularly appealing for busy parents juggling multiple responsibilities or those new to baking. These bars require minimal ingredients and effort, yet deliver impressive results.
Additionally, Cinnamon Roll Bliss Bars are budget-friendly. The ingredients are commonly found in most pantries, making them an excellent choice for anyone looking for an affordable dessert option. You can often find everything you need at your local grocery store without breaking the bank, allowing you to create a delicious dessert without the premium price tag.
Health-conscious bakers can even customize the recipe by slightly modifying ingredients to create variations that suit dietary restrictions, such as gluten-free or reducing sugar content. This versatility allows you to cater to various tastes and preferences, making it an excellent addition to your baking repertoire.
Ingredients You’ll Need
To create these scrumptious Cinnamon Roll Bliss Bars, you will need the following ingredients:
- All-purpose flour: Forms the base of the bars and gives structure. If needed, you can substitute it with gluten-free flour blends.
- Sugar: Provides sweetness and helps with the browning process. You can use granulated sugar or opt for coconut sugar for a healthier choice.
- Brown sugar: This ingredient adds moisture and a deeper flavor to the cinnamon-sugar filling. Light or dark brown sugar can work interchangeably.
- Cinnamon: The star of the show! This warm spice provides the characteristic flavor of cinnamon rolls. Adjust the amount if you prefer a more pronounced flavor.
- Baking powder: A leavening agent that helps the bars rise to a fluffy texture.
- Salt: Balances the sweetness and enhances the overall flavor.
- Unsalted butter: Adds richness and moisture. Using unsalted butter allows you to control the salt level in your recipe.
- Eggs: Help bind the ingredients together and contribute to the bars’ texture.
- Vanilla extract: Adds a lovely aroma and depth of flavor. Using pure vanilla extract is preferable for the best results.
- Powdered sugar: This is essential for the creamy frosting that coats the bars. You can make your own by blending regular sugar in a food processor.
- Milk: Used in the frosting to thin it out to a spreadable consistency. You could also use plant-based milk if desired.
- Cream cheese: This ingredient gives the frosting its rich and creamy texture. Make sure to use softened cream cheese for easy mixing.
These ingredients work together to create a perfectly balanced dessert that is not only delightful to eat but also relatively easy to prepare. By understanding the role of each ingredient and opting for substitutes when necessary, you can easily tweak the recipe to fit your dietary preferences while still achieving delicious results.
How to Make
Making Cinnamon Roll Bliss Bars is easier than you might think! Just follow these step-by-step instructions, and you’ll be waving goodbye to those store-bought desserts for good.
- Preheat your oven: Start by preheating your oven to 350°F (175°C). This step is crucial as it ensures that the bars bake evenly. While the oven is heating, you can prepare your baking pan.
- Prepare your baking pan: Grease a 9×13-inch baking dish with cooking spray or line it with parchment paper for easy removal. This will prevent the bars from sticking and help you serve them easily once baked.
- Mix dry ingredients: In a medium-sized bowl, whisk together the all-purpose flour, baking powder, salt, granulated sugar, and brown sugar. This will ensure that all the leavening agents and sweeteners are evenly distributed throughout the mixture.
- Combine wet ingredients: In another large bowl, melt the unsalted butter and let it cool slightly. Then, add the eggs, vanilla extract, and stir until well combined. The butter should be warm but not hot to avoid cooking the eggs.
- Combine wet and dry mixtures: Gradually add the dry mixture into the wet ingredients, stirring until just combined. Avoid overmixing at this stage, as that can lead to dense bars. The batter should be thick yet smooth.
- Add the cinnamon filling: In a small bowl, mix together the cinnamon and brown sugar to create the filling. Spread half of the batter evenly in the prepared baking pan, then sprinkle the cinnamon-sugar mixture over it. Finally, dollop the remaining batter on top and gently spread it to cover the filling.
- Bake the bars: Place the baking pan in the preheated oven and bake for about 25 to 30 minutes or until the edges are lightly golden and a toothpick inserted in the center comes out clean. Keep an eye on them towards the end of the baking time to prevent them from drying out.
- Cool the bars: Once baked, remove the pan from the oven and allow the bars to cool in the pan for 10 to 15 minutes. This will help them set and make it easier to cut into squares later.
- Frost the bars: To prepare the frosting, combine the softened cream cheese, powdered sugar, and milk in a clean bowl. Mix until smooth and spreadable. Once the bars have cooled slightly, drizzle or spread the cream cheese frosting evenly over the top. You can even add a little more cinnamon on top for a touch of presentation.
- Slice and serve: After frosting, let the bars cool completely before slicing them into squares. Serve them at room temperature or slightly warmed, and enjoy the warm and comforting flavors.
Remember that the key to achieving perfect Cinnamon Roll Bliss Bars lies in the mixing techniques and baking time. Whether you’re a novice or an experienced baker, you can easily master this recipe with these straightforward instructions.
Variations & Substitutions
Chocolate Chip Cinnamon Roll Bliss Bars: For those who can’t resist chocolate, feel free to mix in semi-sweet or dark chocolate chips into the batter before baking. The addition of chocolate adds a rich contrast to the cinnamon flavor and creates a delightful treat for chocolate lovers.
Nutty Crunch Variation: Enhance the texture by incorporating chopped nuts, such as pecans or walnuts, into the cinnamon filling. They add a satisfying crunch and compliment the soft bars beautifully. Ensure to toast them lightly prior to mixing for an extra depth of flavor.
Gluten-Free Cinnamon Roll Bliss Bars: If you’re gluten intolerant but still want to enjoy these bars, opt for a gluten-free all-purpose flour blend. Be sure to check that your baking powder is gluten-free as well. The result will be equally delightful, with the same comforting flavors you crave.
Maple Cream Cheese Frosting: For a delightful twist on the traditional frosting, incorporate real maple syrup into the cream cheese frosting instead of milk. This adds a richer flavor profile and a lovely caramel note to the dessert.
Vegan Cinnamon Roll Bliss Bars: To make this dessert vegan, substitute the eggs with a flaxseed meal or a chia egg, and use dairy-free butter and plant-based milk in place of regular ingredients. You won’t miss out on flavor; these bars will still shine with the warmth of cinnamon and sweetness.
Each variation enhances the experience differently and provides options for various dietary preferences. Don’t hesitate to mix and match ideas to create the perfect dessert that caters to your needs!
Common Mistakes to Avoid
Baking can sometimes be a bit tricky, especially for those who are new to it. A few common mistakes can result in less-than-stellar Cinnamon Roll Bliss Bars.
One of the most frequent oversights is overmixing. While stirring the batter is essential, doing it too much can lead to tough, dense bars instead of soft and chewy ones. Mix until just combined; lumps are perfectly fine.
Another common issue is incorrect oven temperature. Every oven is a little different, so using an **oven thermometer** to ensure precise temperatures can be blissfully helpful. If your oven runs hot, you might find your bars overcooking on the edges while remaining gooey in the middle.
Additionally, ensure that you allow the bars to cool adequately before slicing. Cutting them too soon can lead to messy squares and an uneven texture. Patience pays off in the baking world!
Lastly, when preparing the frosting, make sure your cream cheese is softened at room temperature. Trying to mix cold cream cheese will lead to clumps that don’t blend smoothly, ruining the creamy texture of your frosting.
Avoiding these mistakes will ensure that you present a delicious batch of Cinnamon Roll Bliss Bars to your family or friends!
Storage, Freezing & Reheating Tips
To store your Cinnamon Roll Bliss Bars, keep them in an airtight container at room temperature for up to five days. If you live in a particularly warm climate, it may be better to refrigerate them.
If you choose to freeze the bars, they can be wrapped tightly in plastic wrap and placed in a freezer-safe container. They can last in the freezer for up to three months. To reheat them, take the desired amount out and place them in the refrigerator to thaw overnight before warming them in the microwave for a few seconds, or in a 350°F oven for about 10-15 minutes until warmed through.
When reheating, be cautious not to overheat, which can dry them out and diminish their delightful texture. Following these storage and reheating tips ensures you always have a delicious treat on hand, whether for surprise guests or a late-night snack.
Frequently Asked Questions
Can I make Cinnamon Roll Bliss Bars ahead of time?
Absolutely! These bars can be made a day in advance and stored at room temperature. Just be sure to frost them shortly before serving for the best texture and flavor.
Can I use a different frosting?
Yes! While the cream cheese frosting is a classic pairing, you can experiment with glazes made from powdered sugar and milk or even a chocolate drizzle. The options are endless!
What’s the best way to cut these bars?
For clean cuts, use a sharp knife that has been warmed under hot water and wiped dry. This method helps slice through the bars smoothly without tearing them apart.
Can I make these bars without eggs?
Certainly! You can use substitutes like a flaxseed egg or chia seed egg as a binding agent. Substitute one egg with one tablespoon of flaxseed meal mixed with three tablespoons of water, let it sit for a few minutes, and use it as you would in the recipe.
What if I don’t have all-purpose flour?
If you don’t have all-purpose flour on hand, you can substitute it with a gluten-free flour blend or whole wheat flour. Just keep in mind that the texture may vary slightly, so adjust your liquid amounts if necessary to achieve the desired consistency.
Conclusion:
Cinnamon Roll Bliss Bars are an enchanting addition to your dessert repertoire that is both easy to make and utterly delicious. With their warm cinnamon flavor and creamy frosting, they have the potential to become a family favorite. Whether you choose to follow the original recipe or experiment with creative variations, the joy these bars bring will surely delight everyone who gets a taste.
Don’t hesitate to gather your ingredients and get started on this blissful treat now! You might find that this recipe becomes a staple in your home, encouraging endless creativity and customization as you make it your own. Happy baking!
[Read also: Easy Dessert Recipes for Beginners]


