Prep time: 20 minutes
Cook time: 30 minutes
Total time: 50 minutes
Servings: 12 servings
There’s something incredibly special about the aroma of stuffing wafting through your home, evoking warmth and memories of gathering around the table with loved ones. Cozy Grandma Dot’s Stuffing Balls Recipe is not just any stuffing; it’s a loving tradition passed down through generations. With a delightful mix of herbs, spices, and a variety of textures, these stuffing balls promise to be a highlight of your holiday feast or any family dinner. Whether served alongside a succulent roast or simply as a savory snack, you’ll learn how to create these delightful bites that embody comfort and love through food.
In this article, you’ll dive into the world of Cozy Grandma Dot’s Stuffing Balls. From tips to ensure your stuffing balls have the perfect texture to ways you can customize the recipe to suit your family’s tastes, this guide is loaded with all you need to know. Prepare to embrace the kitchen, gain confidence, and enjoy the tastes and aromas that come with making these lovely, comforting bites.
What Is Cozy Grandma Dot’s Stuffing Balls Recipe?
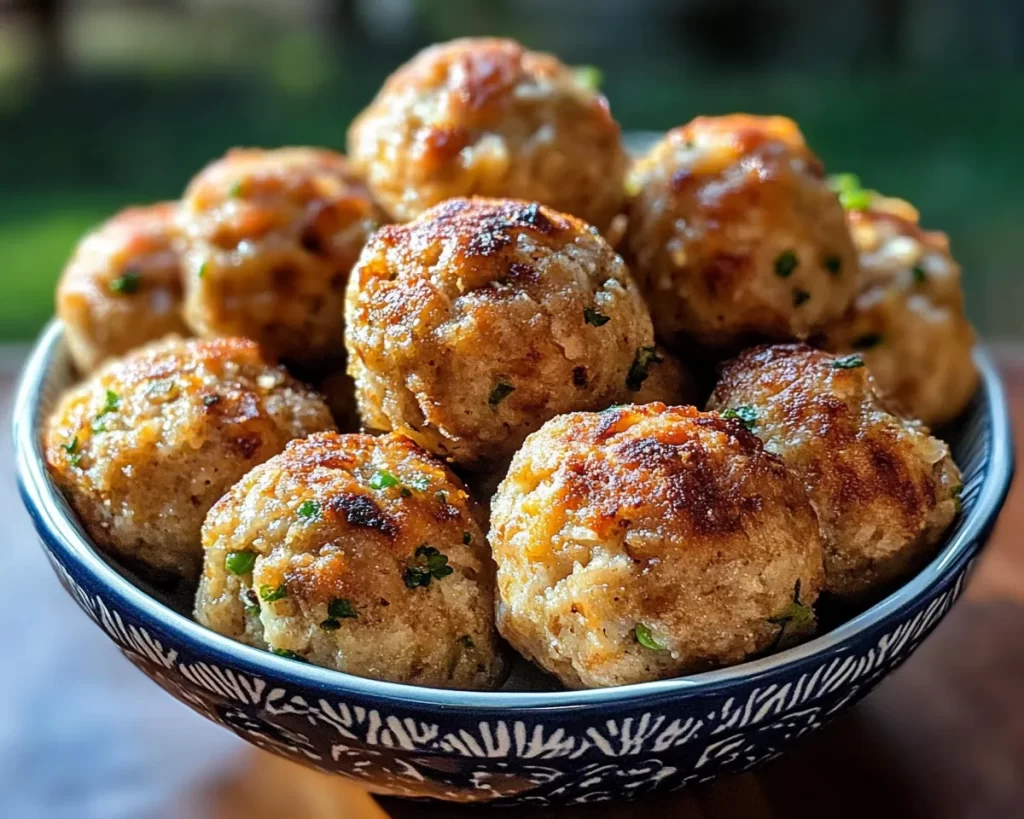
Cozy Grandma Dot’s Stuffing Balls are a traditional dish known for their rich flavors and cozy textures. Originating from a time when families relied on simple ingredients to create something delicious, this recipe stands out due to its combination of savory herbs, warm bread, and tender vegetables. At their core, these stuffing balls are made from a mixture of cubed bread, flavorful broth, and a variety of seasonings, all expertly combined to create bite-sized delights.
The unique elements in this recipe provide a delightful chewiness, with the bread forming a satisfying crust around the outside and a wonderfully moist interior infused with the flavors of onion, celery, and herbs. It’s a dish that resonates with nostalgia, reminding many of cozy family dinners or holiday gatherings aplenty. Not only do these stuffing balls boast a robust flavor profile, but they also offer a fun and interactive way to enjoy a classic comfort food.
Whether you’re hosting Thanksgiving dinner, a Christmas feast, or simply looking to enjoy the creamy goodness of homemade stuffing, this recipe deserves a spot on your menu. As your family gathers around, the joyful smiles and satisfied stomachs will be a testament to the love infused into this comforting dish.
Why You’ll Love This
This stuffing balls recipe is a true crowd-pleaser, merging delightful taste with the comfort of familiar ingredients. One of the standout aspects of Cozy Grandma Dot’s Stuffing Balls is their versatility; they can function as a side dish or even as a light main course. You’ll appreciate how easily they can fit into various diets, simply by swapping out certain ingredients to accommodate dietary restrictions. Whether you are cooking for health-conscious eaters, picky kids, or adventurous taste buds, these stuffing balls can cater to all.
Another compelling element is the ease of preparation. Though it may seem daunting, especially if you’re a beginner in the kitchen, the clear steps outlined in this recipe make it accessible to anyone. The result is a hearty dish with minimal clean-up, as most of the work involves mixing ingredients before baking them to golden perfection. Unlike traditional stuffing baked in a larger pan, these individual balls maintain their moisture while providing a satisfying crunch.
Additionally, when compared to packaged alternatives, Homemade stuffing balls significantly elevate your meal’s flavor and nutrition. You control each ingredient, from whole grain bread to fresh herbs, ensuring your dish is free from unnecessary preservatives. In summary, Cozy Grandma Dot’s Stuffing Balls are delicious, adaptable, and manageable — the perfect combination for your next family gathering.
Ingredients You’ll Need
- Stale Bread: About 6 cups of cubed stale bread forms the base of your stuffing balls. Stale bread absorbs the broth better without becoming mushy.
- Vegetable Broth: Approximately 2 to 3 cups provide moisture and depth of flavor. You can substitute chicken broth if preferred.
- Celery: One cup of finely chopped celery adds a delightful crunch and fresh taste.
- Onion: One cup of finely chopped onion offers aromatic sweetness that enriches the overall flavor.
- Fresh Herbs: A combination of sage, thyme, and parsley enhances the stuffing balls with earthy undertones. Feel free to experiment with dried herbs if fresh ones aren’t available.
- Eggs: Two large eggs are crucial for binding the mixture together, ensuring that your stuffing balls hold their shape while baking.
- Salt and Pepper: Add spices to taste. These are the basic enhancers of flavor in this recipe.
- Butter: About 4 tablespoons (melted) give a rich flavor to the mixture while providing a golden crust when baked.
Each ingredient plays a vital role in creating harmonious flavor profiles and delightful textures. The stale bread is your canvas, while the broth infuses moisture and taste. Vegetables contribute crunch and sweetness, while fresh herbs elevate the dish with aromatic complexities.
How to Make
To prepare Cozy Grandma Dot’s Stuffing Balls, follow these clear, detailed steps. Each step highlights essential actions and timing to ensure your stuffing balls come out perfectly.
- Preheat the Oven: Begin by preheating your oven to 375°F (190°C). A hot oven is essential to ensure your stuffing balls cook evenly while achieving a beautiful golden brown color on the outside.
- Prepare the Bread: Cut your stale bread into small cubes, ideally about 1-inch in size. Lay them out evenly on a baking sheet and let them dry out for approximately 15-20 minutes. This step enhances their ability to absorb the broth without become soggy, ensuring a delightful final texture.
- Sauté the Vegetables: In a large skillet over medium heat, melt 2 tablespoons of butter. Add the finely chopped celery and onion, cooking until the onion becomes translucent. This should take about 5-7 minutes. The smell will be incredibly fragrant; stirring occasionally ensures even cooking.
- Combine Ingredients: In a large mixing bowl, add the stale bread cubes, sautéed onions and celery, and a mix of your chopped fresh herbs. Gently toss the bread and vegetable mixture together, allowing the flavors to blend.
- Add Liquids: Carefully pour in the vegetable (or chicken) broth and melted butter, followed by the cracked eggs. The broth is the key to giving your stuffing balls moisture while the eggs work as a binding agent.
- Mix Together: Using your hands (or a large spoon), gently mix all the ingredients together until moistened. This is where you’ll want to check the consistency; the mixture should stick together without being too wet or dry. If needed, adjust with more broth or crumbled bread.
- Form the Balls: With clean hands, take portions of the stuffing mixture and form them into balls, roughly the size of a golf ball. This recipe should yield about 12-15 balls. Place formed stuffing balls on a greased baking sheet or one lined with parchment paper.
- Bake: Place your baking sheet in the preheated oven and bake for approximately 25-30 minutes or until the balls are golden brown and firm to the touch. Keeping an eye on them in the last few minutes will help you achieve that perfect crust.
- Cool and Serve: Once baked, allow the stuffing balls to cool slightly on the baking sheet before transferring them to a serving platter. But don’t wait too long — the aroma will entice everyone to the table!
Each of these steps is designed not only to create a dish you can be proud of but also to involve you in a process that feels rewarding and fun. As you follow along, allow yourself to enjoy the experience — the sounds, sights, and, most importantly, the smells filling your kitchen will remind you of the joy and comfort that comes with home cooking.
Variations & Substitutions
Gluten-Free Variation: For those following a gluten-free diet, substituting gluten-free bread or cornbread can be a delightful tweak. Both options maintain the flavor profile while allowing you to enjoy stuffing balls without gluten. Use gluten-free vegetable broth as well to keep everything aligned with your dietary needs.
Herb-Infused Veggies: If you want to switch up the flavors, try adding roasted garlic or sautéed mushrooms as additional ingredients. These will introduce a rich depth and umami essence to your stuffing balls. Just note to sauté mushrooms until they release their moisture before mixing them in.
Meat Lover’s Option: For those who crave protein, mixing in cooked sausage or even finely chopped bacon can completely change the game. Simply cook your chosen meat until browned and mix it into the stuffing as you combine the ingredients. This addition not only enhances flavor but also adds a delightful heartiness.
Vegan Version: To make this recipe vegan-friendly, substitute eggs with flax eggs and use vegetable broth as needed. The same goes for butter; swapping it with margarine or a neutral cooking oil will ensure that the stuffing balls remain delicious and satisfying.
Cheesy Stuffing Balls: If you’re a cheese lover, try adding shredded cheese into the mix right before forming the balls. Cheddar, mozzarella, or even a sharp blue cheese can add a delightful creaminess and additional depth. Just be mindful of how much cheese you add, so your stuffing balls hold together well.
Each of these variations offers a unique twist on Cozy Grandma Dot’s Stuffing Balls while keeping the essence and comfort of the original recipe intact. Experimenting with different ingredients not only makes the dish your own but also opens the door to new flavor explorations!
Common Mistakes to Avoid
Making stuffing balls may seem straightforward, but there are common pitfalls that can affect the final outcome. One such mistake is **using fresh bread instead of stale bread**. Fresh bread can lead to a soggy mixture that fails to hold its shape during baking. If you don’t have stale bread on hand, toasting fresh bread cubes in the oven for a few minutes can be a quick fix.
Another critical point to consider is **overmixing your stuffing mixture**. While it’s tempting to combine all the ingredients thoroughly, overmixing can lead to a denser texture that doesn’t hold together well. Instead, mix gently and just until all ingredients are combined.
It’s also important to pay attention to your **broth measurement**. Adding too much broth can make your stuffing balls wet and unpalatable, while too little can lead to dry, crumbly balls. Always start with less broth and gradually add more as needed, ensuring a moist yet firm mixture.
Lastly, be cautious with the **baking time**. Overbaking your stuffing balls can dry them out, while underbaking will leave them raw inside. Keep an eye on the golden brown color and touch them lightly to ensure they are firm before removing them from the oven.
By keeping these common mistakes in mind and adjusting accordingly, you’ll create the perfect Cozy Grandma Dot’s Stuffing Balls that won’t disappoint.
Storage, Freezing & Reheating Tips
If you’ve made a large batch of Cozy Grandma Dot’s Stuffing Balls, you’ll want to know how to keep them fresh. These stuffing balls can be stored in an airtight container in the refrigerator for up to 3-4 days. Before storing, ensure they are completely cooled to prevent condensation from forming inside the container, which may make them soggy.
For longer storage, consider **freezing your stuffing balls**. Arrange the cooled stuffing balls in a single layer on a baking sheet and freeze until solid. Once frozen, transfer them to a freezer-safe container or a heavy-duty freezer bag. They can be stored this way for up to 3 months. Freezing them individually first helps prevent them from sticking together, making it easier to take out exactly how many you need.
When it comes time to **reheat**, you can either bake them directly from frozen or thaw them overnight in the refrigerator before baking. When reheating from frozen, preheat your oven to 375°F (190°C) and bake for approximately 25-30 minutes or until heated through.
As a pro tip, consider drizzling a bit of broth over the stuffing balls before reheating; this extra moisture will enhance their flavor and texture, making them taste just as delicious as when they were freshly made.
Frequently Asked Questions
Can I use different types of bread for the recipe?
Absolutely! In fact, using a combination of different breads can add complexity to the flavor and texture of your stuffing balls. You can use sourdough for a tangy taste, whole wheat for a heartier option, or even cornbread for a sweet twist.
Can I prepare the stuffing balls in advance?
Yes, you can prepare your stuffing balls a day ahead of time. Simply follow the instructions up to the point of baking, then cover and refrigerate them overnight. When you’re ready to serve, bake them at the recommended temperature.
What is the best way to serve stuffing balls?
Cozy Grandma Dot’s Stuffing Balls can be served warm as a side dish or a main course. They pair beautifully with gravies, cranberry sauces, or even a simple drizzle of olive oil.
What should I do if my stuffing balls are falling apart?
If you find that your stuffing balls are too crumbly and not holding together, it may be due to insufficient binding agents. Consider adding an extra egg or a touch more broth and mixing gently to achieve your desired consistency.
How do I know when the stuffing balls are done baking?
Your stuffing balls should be golden brown and firm to the touch when finished baking. Using a toothpick or fork, a gentle poke will help you determine if they are cooked through by assessing their texture.
Conclusion:
Cozy Grandma Dot’s Stuffing Balls Recipe is not just about food; it’s about love, tradition, and creating cherished memories around the dinner table. Whether you’re preparing for a holiday feast, a family gathering, or a simple weeknight dinner, these stuffing balls bring a soulful touch to any meal. Their delightful textures, comforting flavors, and adaptability make them a must-try for anyone looking to infuse warmth into their cooking.
So go ahead, try this recipe today! Customize it to your taste, gather your loved ones, and relish in the comfort that comes from homemade food. If you enjoyed this recipe, don’t forget to share your experience or explore more wonderful dishes in our blog. Happy cooking!