Prep time: 30 minutes
Cook time: 1 hour
Total time: 1 hour 30 minutes
Servings: 12
The search for the perfect dessert often leads to a craving that simply can’t be ignored. Introducing the Decadent Cream Cheese Cake, a mouthwatering treat that will not only satisfy your sweet tooth but also impress friends and family alike. You might remember a family gathering where rich desserts were the stars of the show; that’s exactly the vibe this cake encapsulates. It boasts an indulgent creamy texture, a subtle tang from cream cheese, and an unbeatable sweetness that harmonizes beautifully. In this article, you’ll discover not just the magic behind this recipe but also tips, variations, and common pitfalls to ensure your baking journey is as delightful as the cake itself.
What Is Decadent Cream Cheese Cake Recipe You’ll Love!?
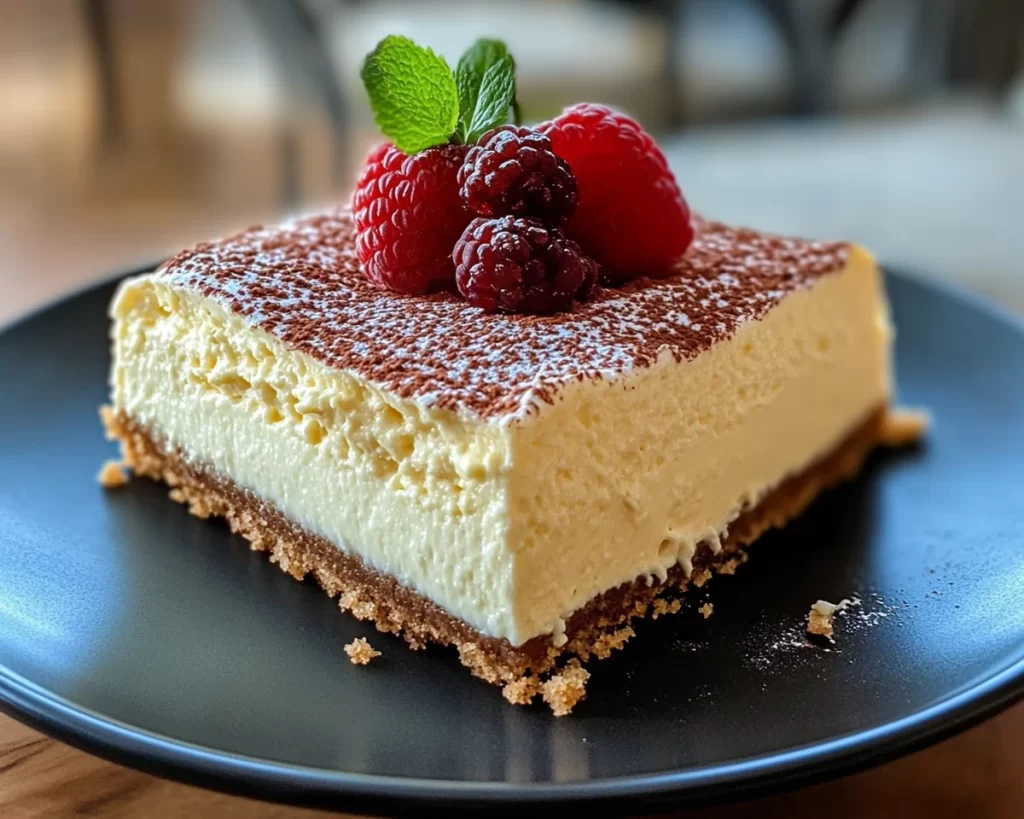
The Decadent Cream Cheese Cake is a luxurious dessert that combines a velvety cream cheese layer with a rich cake base, resulting in a dessert that is as visually stunning as it is delicious. Originating from classic cheesecake recipes, this cake takes the essence of creamy cheesecakes and blends it with the comforting texture of cake, making it a multifaceted treat that appeals to a wide range of palates. The layers of soft, moist cake complemented by a rich, creamy frosting create a balance that is hard to resist.
This cake isn’t just about the taste; it’s about the experience. Imagine a slice with a slight tender crumb that melts in your mouth, providing a delightful contrast to the sweet, creamy frosting. The flavor profile is rich and neutral, allowing the cream cheese to sing while playing nicely with added flavors like vanilla or lemon. Whether you’re celebrating a special occasion or simply want a slice of something extraordinary after a long day, the Decadent Cream Cheese Cake is bound to become a staple in your recipe collection.
Why You’ll Love This
There are several reasons why the Decadent Cream Cheese Cake is a standout dessert. First, its delicious flavor profile makes it a crowd-pleaser; it’s rich enough to feel special but versatile enough to be served at any gathering. The recipe is easy to follow, perfect for novice bakers and experienced cooks alike. Its simplicity doesn’t compromise on flavor, ensuring you can deliver a stunning dessert without spending hours in the kitchen.
Another major benefit of this recipe is its adaptability. You can easily customize it to fit dietary preferences or flavor cravings. For instance, if you prefer a lighter cake, using low-fat cream cheese can help adjust the richness without sacrificing flavor. And when it comes to cost, creating a decadent dessert at home often provides a better value than purchasing something similar at a bakery.
Many people worry that baking from scratch is time-consuming or difficult; however, this cake comes together seamlessly with straightforward steps. It’s a fantastic option for busy parents looking to whip up something special without spending an entire day in the kitchen.
Ingredients You’ll Need
- All-purpose flour: The foundation of the cake, providing structure and texture. You can substitute it with gluten-free flour for a gluten-free alternative.
- Cream cheese: The star ingredient, giving the cake its decadent creaminess. Opt for block cream cheese instead of spreadable to achieve the best texture.
- Granulated sugar: Sweetens the cake. Brown sugar can be used for a deeper flavor.
- Unsalted butter: Adds richness. Make sure it’s at room temperature for easier mixing.
- Eggs: They bind the ingredients together and make the cake rise. Room temperature eggs work the best.
- Vanilla extract: Enhances the overall flavor profile. Pure vanilla gives the best taste.
- Baking powder: A leavening agent that helps the cake rise, creating a fluffy texture.
- Salt: Balances the sweetness and enhances flavors.
- Powdered sugar: Used for the creamy frosting, offering a smooth texture.
- Heavy cream: To make the frosting extra luscious and easy to spread.
These ingredients work in harmony to create a cake that not only looks impressive but tastes heavenly. Each component plays a vital role in achieving that perfect blend of flavors and textures. Be sure to use quality ingredients, especially for the cream cheese and vanilla, as they will significantly impact the final outcome of your cake.
How to Make
- Preheat your oven to 350°F (175°C) and grease your cake pans. Use parchment paper to line the bottom to ensure easy removal. The preheating stage is crucial as it helps the cake rise evenly and gives it a nice golden crust.
- Prepare the cake batter by creaming together the unsalted butter and granulated sugar in a large mixing bowl. Use an electric mixer on medium speed for about 3–5 minutes until the mix is light and fluffy. This step is essential; proper creaming incorporates air, resulting in a tender cake.
- Add the cream cheese next. Mix it in until fully incorporated and there are no large lumps left. This should take about 2–3 minutes. You want the batter to be smooth because lumps can affect the final texture.
- Mix in the eggs, one at a time, ensuring each is fully mixed before adding the next. After all eggs have been incorporated, add the vanilla extract. This will deepen the flavor of the cake and complement the cream cheese.
- In a separate bowl, whisk together the all-purpose flour, baking powder, and salt. Gradually add this dry mixture to your wet ingredients, mixing on low speed until just combined. Over-mixing can lead to a dense cake, so don’t go overboard.
- Divide the cake batter evenly into your prepared cake pans, smoothing the tops. This ensures even baking and proportional layers. Then, place the pans in the preheated oven and bake for 25–30 minutes, or until a toothpick inserted in the center comes out clean. Pay attention to this step; underbaking can result in a gooey texture, while overbaking can dry your cake out.
- Allow the cakes to cool in the pans for about 10 minutes before transferring them to a wire rack to cool completely. Cooling the cakes properly is important for applying the frosting smoothly.
- Prepare the frosting by beating the heavy cream until soft peaks form in a separate mixing bowl. Gradually add the powdered sugar and continue to beat until stiff peaks appear. This frosting will be light and fluffy, complementing the dense cake beautifully.
- Assemble the cake by placing the first layer on your serving plate. Spread a layer of cream cheese frosting on top, then gently place the second layer of cake on top. Continue frosting the top and sides of the cake until covered. A smooth spatula is useful for achieving a polished finish.
- Refrigerate the assembled cake for at least an hour before serving. This helps the flavors meld and the frosting to set. Cutting too soon can lead to a mess, so be patient!
Your Decadent Cream Cheese Cake is now ready to serve! As you slice into it, you can expect a beautiful layering of creamy frosting and moist cake that looks just as good as it tastes.
Variations & Substitutions
Chocolate Cream Cheese Cake: For a chocolate twist, add cocoa powder to the cake batter. Replace a portion of the flour with cocoa for a deeper, richer cake. This variation is perfect for chocoholics craving a more intense dessert. Adding chocolate chips can also enhance the flavor, making every bite a delight packed with cocoa goodness.
Fruit-Infused Cream Cheese Cake: Adding pureed fruits like strawberries or raspberries to the frosting can brighten the flavor profile. This variation makes the cake a bit lighter and adds a refreshing touch. If you opt for this, consider using fresh or frozen fruits to create a lovely, colorful presentation that balances the richness of the cream cheese.
Gluten-Free Cream Cheese Cake: You can easily adapt this recipe for gluten-free diets by substituting regular flour with gluten-free all-purpose flour. Just make sure it contains xanthan gum or add that separately for proper texture. This adjustment allows those with gluten sensitivities to indulge without worry.
Lemon Zest Cream Cheese Cake: Incorporating lemon zest into both the batter and frosting elevates the flavors with a zesty brightness. The acidity from the lemon works well with the cream cheese, cutting through the richness nicely. This is a great summer dessert that feels light and refreshing.
Vegan Cream Cheese Cake: For a plant-based version, you can switch out the eggs for flaxseed meal or chia seeds as a binding agent. Use dairy-free cream cheese and non-dairy milk in place of butter. This variation keeps the essence of the cake while making it accessible for those following a vegan lifestyle.
Each of these variations allows for creativity in the kitchen while maintaining the core flavors of the original Decadent Cream Cheese Cake. Whether you have dietary restrictions or simply want to explore new flavors, there’s a version suited just for you.
Common Mistakes to Avoid
One of the most common mistakes when making cream cheese cake is forgetting to bring your ingredients to room temperature. If you start with cold cream cheese or butter, they won’t mix well, resulting in a lumpy batter. Always remember to set your ingredients out well in advance to ensure beautifully smooth and blended mixtures.
Another frequent issue is overmixing the batter. While you want to combine the ingredients thoroughly, excessive mixing can lead to a dense cake instead of a light and fluffy texture. Once you add the flour, mix just until incorporated, and you’ll reduce the risk of this.
Finally, neglecting the cooling time can be detrimental. Trying to frost a warm cake can lead to melting frosting and a messy application. Allow the layers to cool completely before adding frosting for a polished appearance and better texture. Taking the time for these steps will make a significant difference in your final result.
Storage, Freezing & Reheating Tips
Proper storage of your Decadent Cream Cheese Cake is essential for maintaining freshness. If the cake is not consumed within two days, keep it in an airtight container in the refrigerator. This cake can last about a week when properly stored. Be mindful of the cream cheese frosting, as it requires refrigeration to prevent spoilage.
For longer-term storage, consider freezing the cake. To do this, wrap the cooled cake layers tightly in plastic wrap, followed by aluminum foil, then place them in a heavy-duty freezer bag. This method will help prevent freezer burn and keep the moisture intact. You can freeze the cake for up to three months. When you’re ready to enjoy it, simply thaw it overnight in the fridge before frosting or serving.
If you find yourself with leftover cake, try placing individual slices in a container for easy grabbing. Just be sure they are well-protected so they don’t dry out.
Frequently Asked Questions
Can I use low-fat cream cheese for this recipe?
Yes, you can use low-fat cream cheese, but keep in mind that the texture and richness of the cake may change slightly. The taste will still be delicious, but the cake might not be as creamy and dense as it would be with full-fat cream cheese.
How do I know when my cake is baked?
The best way to check if your cake is done is by inserting a toothpick into the center. If it comes out clean or with a few moist crumbs, it’s ready. If there’s wet batter on the toothpick, give it a few more minutes, watching closely to avoid overbaking.
Can I make this cake ahead of time?
Absolutely! You can bake the cakes ahead of time and store them wrapped in plastic wrap. Frost them just before serving for the best texture and appearance.
What can I serve this cake with?
This cake pairs beautifully with coffee or tea. For an extra treat, serve slices with fresh berries or a drizzle of chocolate sauce. Whipped cream can also add a light touch to balance out the richness.
Can I freeze the cake after frosting?
While it’s best to freeze the cake before frosting to preserve its texture, you can freeze it after frosting. Just make sure to place it in a container that won’t alter the frosting’s design, or you can freeze the slices individually.
Conclusion:
The Decadent Cream Cheese Cake Recipe is not just a dessert; it’s an experience filled with flavors, textures, and memories. With simple ingredients and clear instructions, you’ll find this is the perfect addition to your baking repertoire. Whether you keep it traditional or experiment with variations, each slice of this cake promises a moment of joy. So gather your ingredients, roll up your sleeves, and embark on this sweet baking adventure! Don’t forget to share your creation or customize it to make it truly your own!