Prep time: 20 minutes
Cook time: 30 minutes
Total time: 50 minutes
Servings: 12
The satisfying aroma of a freshly baked cake drifts through the air, drawing you into the kitchen. The creamy richness of peanut butter mixes with sweet confectionery, giving rise to a recipe that feels both indulgent and comforting. Welcome to the world of the Decadent Peanut Butter Cake with Frosting, a dessert that’s perfect for special occasions, family gatherings, or simply satisfying a late-night sweet craving. In this article, you’ll uncover the secrets of crafting this delightful cake, from the essential ingredients to helpful baking tips. You’ll also find variations to suit different dietary needs and preferences, ensuring that everyone can enjoy this delicious treat.
What Is Decadent Peanut Butter Cake with Frosting Recipe?
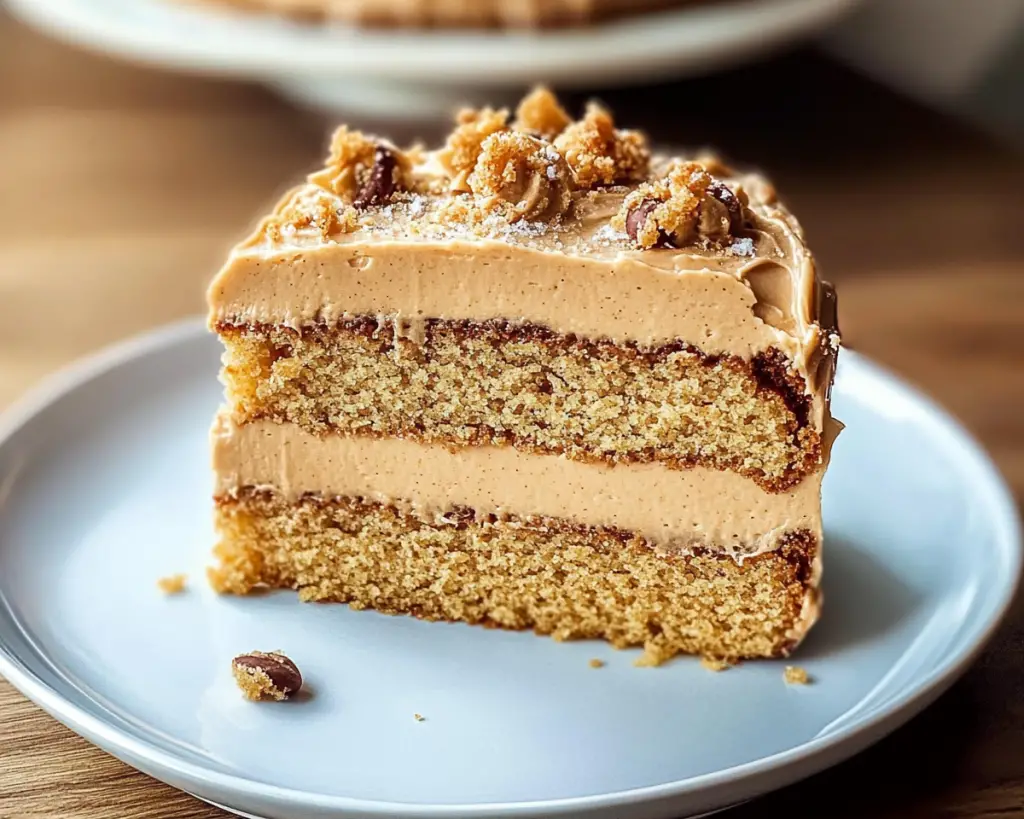
The Decadent Peanut Butter Cake is a rich, moist cake that infuses the creamy, nutty flavor of peanut butter throughout its layers. Originating as a favorite among home bakers, this cake offers a delightful twist on traditional dessert recipes, marrying nutty flavors with sweet frosting to create an irresistible treat. The texture is a harmonious blend; the cake itself is soft yet sturdy, a perfect canvas for a luscious frosting that hides delightful surprises like crispy peanut bits or chocolate chips.
Whether you enjoy it plain or with a layer of frosting, the flavor profile makes every bite a journey—smooth, nutty, and just sweet enough to engage your taste buds without overwhelming them. The peanut butter frosting adds another layer of decadence; it’s creamy and full-bodied, making each slice not just a dessert, but an experience to savor. By the end of this article, you’ll feel empowered to whip up your own Decadent Peanut Butter Cake, complete with personalized variations that cater to your taste or dietary needs.
Why You’ll Love This
There are many reasons to love this Decadent Peanut Butter Cake—it’s not just delicious, but also easy to prepare and relatively cost-effective. Imagine a cake that can serve as a centerpiece for a birthday party or a comforting dessert after a long day. Its versatility allows it to be adapted to various dietary requirements; you can easily turn it gluten-free or lower in sugar with simple ingredient swaps.
One common misconception is that baking a cake from scratch is difficult or time-consuming, but this recipe is straightforward enough for beginners yet rewarding for even seasoned bakers. Many of my friends have successfully tried this recipe, remarking on how impressively it turns out. You also get to control the ingredients, ensuring that it aligns perfectly with your dietary goals and preferences, unlike store-bought options that often contain additives and preservatives.
Ingredients You’ll Need
- All-purpose flour: 2 cups. This ingredient provides structure to the cake. You can substitute with gluten-free flour for a gluten-free option, but be sure to adjust the liquid ingredients as needed.
- Granulated sugar: 1 ½ cups. Sugar not only sweetens the cake but also contributes to browning and texture. Consider using coconut sugar or a sugar substitute if you aim for a healthier version.
- Baking powder: 1 tablespoon. This is essential for helping the cake rise. Be cautious about its freshness; expired baking powder may lead to a denser cake.
- Baking soda: ½ teaspoon. Works alongside the baking powder to leaven the cake.
- Salt: ½ teaspoon. Enhances flavors throughout the cake, balancing sweetness.
- Unsalted butter: ½ cup (softened). Butter adds richness; if you’re looking for a dairy-free version, try using a vegan butter substitute.
- Peanut butter: 1 cup (creamy or chunky). This is the star ingredient, imparting that beloved flavor. For those allergic to peanuts, sunflower seed butter works similarly but alters the taste slightly.
- Eggs: 2 large. These bind the ingredients and provide moisture. For a vegan alternative, flax eggs and applesauce can serve as great substitutes.
- Vanilla extract: 1 teaspoon. Vanilla rounds out the flavor, bringing warmth to the cake.
- Milk: 1 cup. Any milk works, including almond, soy, or dairy milk, depending on your preference.
With these basic ingredients, you’ll be able to create a mouthwatering cake that’s sure to impress family and friends.
How to Make
To embark on your Decadent Peanut Butter Cake journey, follow these step-by-step instructions:
- Preheat your oven: Start by preheating your oven to 350°F (175°C). This ensures an even baking temperature. While your oven heats, prepare your baking pans for a smooth transfer of the batter.
- Mix dry ingredients: In a large mixing bowl, combine 2 cups of all-purpose flour, 1 ½ cups of granulated sugar, 1 tablespoon of baking powder, ½ teaspoon of baking soda, and ½ teaspoon of salt. Whisk these together until evenly distributed, which enhances flavor throughout the cake.
- Cream butter and peanut butter: In another bowl, beat together ½ cup of softened unsalted butter and 1 cup of peanut butter until the mixture is light and fluffy. This can take about 3-5 minutes. The aeration from this step gives the cake its light texture.
- Add eggs and vanilla: To your peanut butter mixture, add 2 large eggs and 1 teaspoon of vanilla extract. Beat until well combined; the mixture should appear smooth and slightly pale.
- Incorporate dry ingredients and milk: Gradually add the dry ingredients to the wet mixture, alternating with 1 cup of milk. Begin and end with the dry ingredients. Beat just until combined; avoid over-mixing to ensure the cake remains tender.
- Prepare your pans: Grease two 9-inch round cake pans with butter or oil, then line the bottoms with parchment paper to prevent sticking. This preparation is crucial for easy removal after baking.
- Fill the pans: Divide the batter evenly between the two prepared pans. You can use a kitchen scale for accuracy, aiming for approximately 600 grams in each pan.
- Bake the cakes: Place the pans in your preheated oven and bake for 25-30 minutes. The cakes are ready when they bounce back when gently pressed and a toothpick inserted into the center comes out clean.
- Cool down: Once baked, remove the pans from the oven and allow them to cool in the pans for about 10 minutes. Then, turn the cakes out onto a wire rack to cool completely.
- Prepare your frosting: While the cakes cool, whip together 1 cup of softened butter, 2 cups of powdered sugar, and ½ cup of peanut butter until smooth and fluffy. If desired, mix in a splash of milk to adjust the consistency.
- Frost the cake: Once the cakes are completely cool, place one layer on a serving platter. Spread a generous amount of frosting on top, then gently place the second layer on top and frost the top and sides of the entire cake. Use a spatula or a knife to create decorative swirls or patterns for added flair.
- Serve and enjoy: Slice a piece and enjoy the rich, creamy, and decadent flavors of your homemade peanut butter cake. You can serve it chilled or at room temperature, and perhaps garnish it with crushed peanuts or chocolate shavings for an extra touch.
Whether you are a novice baker or an experienced home chef, this recipe breaks down the process simply and effectively. Always remember to bake with love—your results will definitely shine through!
Variations & Substitutions
Gluten-Free Variation: For those who cannot consume gluten, simply swap the all-purpose flour for a gluten-free baking blend. Be aware that the texture might vary slightly, so using a blend that contains xanthan gum will help mimic the texture of regular flour. Many blends are specifically formulated to replace all-purpose flour in cakes, making this an easy switch.
Lower-Sugar Alternative: If you wish to reduce sugar intake, consider using a sugar alternative like erythritol or a natural sweetener like honey or maple syrup. Be mindful that this may alter the moisture slightly, so adjust your liquids accordingly for the perfect texture.
Chocoholic Variation: For chocolate lovers, you can easily incorporate cocoa powder into the batter. Substitute ½ cup of flour with ½ cup of unsweetened cocoa powder for a fudgy, chocolate-peanut butter fusion. You may also add chocolate chips to the batter or sprinkle them into the frosting for an extra chocolate kick.
Vegan Variation: To make this cake vegan, you can replace the eggs with flax eggs, which consist of 1 tablespoon of ground flaxseed mixed with 2.5 tablespoons of water per egg. Use dairy-free butter and a plant-based milk of your choice to maintain that rich flavor. Additionally, ensure that your peanut butter is also vegan-friendly.
Peanut Butter Banana Cake: If you wish to infuse your cake with delicious banana flavor, consider adding mashed ripe bananas to the batter. Substitute 1 cup of mashed bananas for half of the peanut butter for a delightful banana-peanut butter combination. The natural sweetness of bananas will complement the flavors beautifully and add a touch of moisture, creating a moist cake that melts in your mouth.
Common Mistakes to Avoid
Many home bakers encounter issues that prevent their cakes from turning out beautifully. One critical warning is not to overmix the batter. While mixing is essential for combining ingredients, overmixing can lead to a dense texture instead of the desired lightness. Always mix until just combined.
Another common mistake involves skimping on the right baking temperature. Make sure your oven is fully preheated before you place the cake inside. An inadequate temperature can lead to uneven baking, where the outside cooks much faster than the inside, resulting in a raw center.
Additionally, always allow your cake to cool completely before frosting it. Frosting a warm cake can lead to melting frosting, creating a messy situation rather than the beautiful, layered cake you envisioned. Patience is key here!
Storage, Freezing & Reheating Tips
To keep your Decadent Peanut Butter Cake as fresh as possible, store it in an airtight container at room temperature for up to 3 days. If you want to preserve it for longer, refrigerating it will allow it to last about a week. Make sure to cover it to prevent it from drying out.
If you wish to freeze the cake, wrap it in plastic wrap and then foil to keep the moisture in. You can freeze the cake for up to three months. When you’re ready to enjoy it, simply thaw it in the refrigerator overnight. Be careful with the frosting; if you choose to freeze the frosted cake, it’s best to freeze it before frosting and add frosting later.
Food safety best practices are important, especially with perishable ingredients like milk and fresh eggs. Always check expiration dates and ensure that your workspace and hands are clean to avoid foodborne illness.
Frequently Asked Questions
Can I use natural peanut butter in this cake? Yes, you can use natural peanut butter, but be aware that its consistency is different. Natural peanut butter has oils that can separate, making the batter a bit more runny. Stir well before measuring, and you may need to adjust the amount of flour slightly to achieve the proper consistency.
How do I prevent my cake from sticking to the pan? To prevent sticking, it’s crucial to grease your pans well with butter or oil and line the bottoms with parchment paper. After the cake has cooled for about 10 minutes, gently run a knife around the edges to help release it from the sides before inverting.
Can I make this cake ahead of time? Absolutely! This cake can be baked a day in advance; just remember to store it properly. You can frost it just before serving for the best texture, or you can frost it ahead of time if you prefer a firmer frosting.
What can I substitute for eggs in this recipe? If you’re looking for egg substitutes, consider using ground flaxseed mixed with water. One tablespoon of ground flaxseed combined with 2.5 tablespoons of water equals one egg. Applesauce or mashed banana can also be used as a substitute, which will add a hint of flavor.
Can I decorate the cake with more than just frosting? Of course! Get creative with your decorations. You can top your cake with crushed peanuts, chocolate shavings, or even drizzle some melted chocolate over it for an elegant touch. Fresh fruit like bananas can also complement the flavors beautifully.
Conclusion:
In summary, the Decadent Peanut Butter Cake with Frosting is not just another cake recipe; it’s a delightful experience that melds taste, texture, and customization options. Whether you’re looking to indulge or to find a perfect dessert for a gathering, this cake ticks all the boxes. So gather your ingredients, follow these easy steps, and create your own masterpiece. Feel free to share your twists on this recipe, and remember that every bite brings you one step closer to making tasty memories. Happy baking!


