**Prep Time:** 15 minutes
**Cook Time:** 20 minutes
**Total Time:** 35 minutes
**Servings:** 12 rolls
Imagine a family gathering, the table beautifully set, and the warm, enticing smell of fresh bread wafting through the air. There’s nothing quite like biting into a warm, fluffy dinner roll, the soft texture cradling rich flavors that elevate any meal. Dinner rolls aren’t just a side; they’re a cherished part of the dining experience that can make ordinary meals extraordinary.
In this recipe, you will learn how to craft perfect dinner rolls that are both sweet and savory, balancing a subtle sweetness with that enticing buttery goodness. Whether you’re serving them alongside a hearty roast or pairing them with some homemade soup, these rolls are sure to steal the show at your next meal. Let’s dive into this easy-to-follow guide, packed with tips, variations, and everything you need to know to master the art of dinner rolls!
What Are Dinner Rolls?
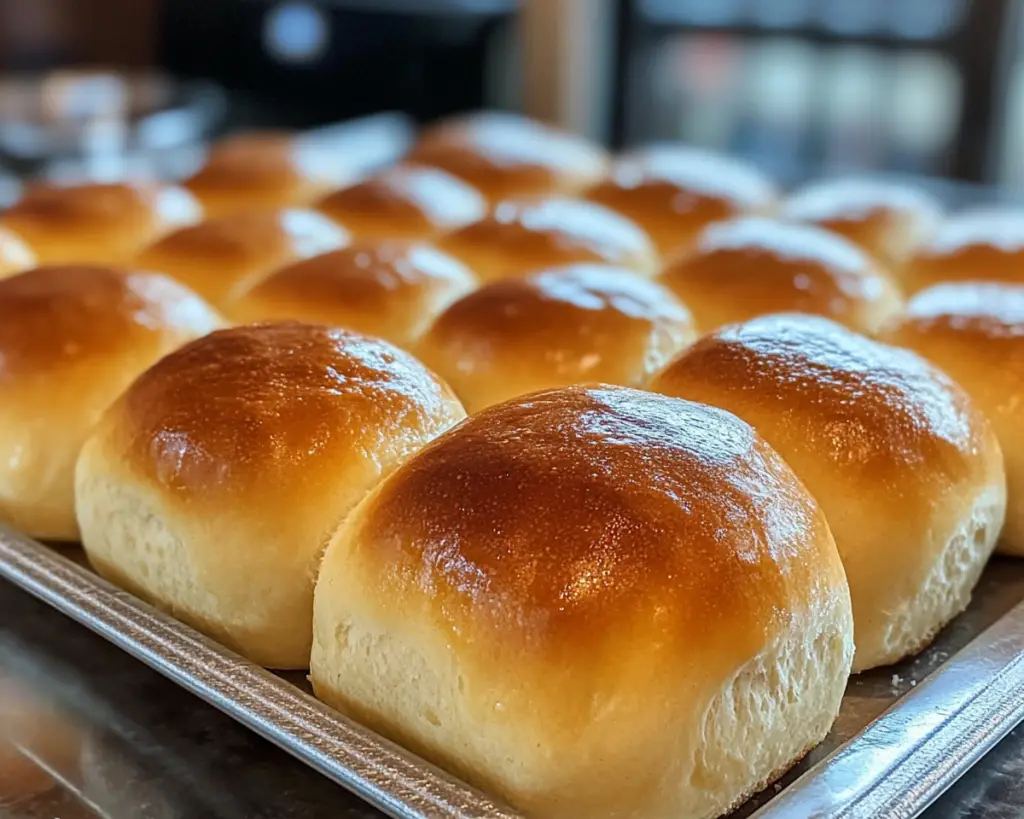
Dinner rolls are small, individual bread rolls typically served during meals, particularly in Western cuisine. Their origins trace back centuries, rooted in traditional bread-making practices. These rolls can be light and fluffy, often made with white flour and enriched with butter, sugar, and milk, yielding that soft texture we crave. Some cultures have their twists, with ingredients like herbs, cheese, or spices infused for added flavor.
The classic texture is both chewy and airy, with a golden crust that gives way to a soft, warm interior. The flavor profile can vary widely according to the recipe. Sweet rolls often include sugar and milk, leading to a delightful, slightly sweet taste, while savory variations might incorporate herbs, garlic, or even cheese, making them a versatile addition to any meal.
This recipe for dinner rolls strikes a perfect balance between sweet and savory, creating rolls that are genuinely irresistible. You’ll enjoy not only their delightful aroma but also their luxurious texture that complements virtually any dish.
Why You’ll Love This Dinner Rolls Recipe
There are countless reasons to fall in love with this dinner rolls recipe. Firstly, the taste is exceptional—you’ll experience the perfect combination of sweetness and buttery richness in each bite. They are incredibly versatile, and you can tailor them to fit both sweet and savory meals. Imagine enjoying them with a light salad or slathering the inside with honey or butter; the options are endless!
Moreover, making dinner rolls from scratch can seem intimidating, but this recipe simplifies the process. With a reasonable prep and cook time, you can walk away with a batch of delicious, fresh rolls that taste like they came from a fancy bakery. One of the best aspects is that you control the ingredients; you can swap in whole-grain flour or adjust the sweetness to suit your preferences.
Additionally, these dinner rolls are perfect for meal prepping or freezing. They can be made ahead of time, saved for a busy weeknight, or turned into delightful sandwich bases. The aroma and warmth from the oven will fill your kitchen, making it an inviting space for family and friends.
Finally, who doesn’t love the satisfaction of baking? Making dinner rolls is a rewarding experience that allows you to connect with the food you serve.
Ingredients You’ll Need
To make these delicious dinner rolls, gather the following ingredients:
– **All-purpose flour (4 cups)**: This is the base of your rolls, providing the necessary structure and texture. For those looking for a healthier alternative, whole wheat flour or gluten-free options can be used.
– **Active dry yeast (2 ¼ teaspoons)**: Essential for the bread to rise; yeast ferments the sugars and produces carbon dioxide, which creates air pockets in the dough, giving it that fluffy texture.
– **Warm water (1 cup)**: The warmth of the water activates the yeast. Ensuring it’s not too hot is crucial; you want it around 110°F to avoid killing the yeast.
– **Sugar (2 tablespoons)**: This will provide slight sweetness and also serves to feed the yeast, helping it to activate more effectively.
– **Salt (1 teaspoon)**: A critical flavor enhancer, salt adds depth and balances the sweetness of the dough.
– **Butter (3 tablespoons, melted)**: This enriches the dough, resulting in a soft crumb and a delightful buttery flavor. You can use unsalted butter for better control over seasoning.
– **Milk (½ cup)**: Adds moisture and tenderness to the rolls. Whole milk gives richer flavor, but any milk option will work, including dairy-free alternatives.
– **Egg (1 large)**: Providing additional structure and richness, the egg helps bind the ingredients together and contributes to a beautiful golden color.
Each ingredient plays a crucial role in creating the perfect dinner roll—omit or substitute them thoughtfully for best results.
How to Make Dinner Rolls
Now that you have your ingredients ready, let’s take a step-by-step approach to crafting these mouthwatering dinner rolls.
1. **Activate the Yeast**: In a mixing bowl, combine the **warm water** and **sugar**. Sprinkle the **yeast** over the water and let it sit for about 5-10 minutes until bubbly and frothy. This indicates that the yeast is active. If it doesn’t foam, your yeast may be dead, and you’ll have to start over.
2. **Mix the Dough**: Add the **melted butter**, **milk**, and the **egg** to the activated yeast mixture. Then, gradually mix in the **flour** (start with 3 cups) and **salt**. Stir until a rough dough starts to form; it may be sticky but that’s ok. If your dough is overly wet, you can add a bit more flour, but be careful not to make it too dry.
3. **Knead the Dough**: Transfer the dough onto a floured surface and knead for about 8-10 minutes. You want the dough to become smooth and elastic. A well-kneaded dough should bounce back when you poke it. If you’re a beginner, consider using a stand mixer fitted with a dough hook for this step.
4. **First Rise**: Form your dough into a ball and place it in a large, greased bowl. Cover it with a damp cloth or plastic wrap and let it rise in a warm, draft-free area until it doubles in size, about 1 hour. This is known as the first rise.
5. **Shape the Rolls**: Once the dough has risen, punch it down to release excess air. Divide the dough into 12 equally sized pieces. Shape each piece into a ball. Place these balls onto a greased baking pan, leaving some space between each for expansion.
6. **Second Rise**: Cover the shaped rolls with a cloth and let them rise again for about 30-45 minutes until puffy. This second rise is crucial as it ensures soft, fluffy rolls.
7. **Preheat the Oven**: While the rolls are rising, preheat your oven to 375°F (190°C).
8. **Bake**: Once the second rise is complete, bake the rolls for about 16-20 minutes, or until they are golden brown and sound hollow when tapped on the bottom.
9. **Cool and Serve**: Remove the rolls from the oven and let them cool slightly in the pan. Brush the tops with additional melted butter if desired for extra flavor. Serve warm or at room temperature.
Enjoy these luscious rolls with your favorite soups, salads, or main courses. They’ll soon become a staple at your dining table!
5 Variations & Substitutions
1. **Garlic Herb Rolls**: Add 2-3 minced garlic cloves and 1 tablespoon of mixed Italian herbs (like basil and oregano) to the dough during the mixing process. This variation infuses the rolls with beautiful savory flavors, perfect for pairing with pasta dishes or grilled meats. For best results, ensure the garlic is finely minced to evenly distribute the flavor.
2. **Cheesy Rolls**: Incorporate shredded cheese—like cheddar or mozzarella—into the dough conditions at the same time as the flour. This adds a rich, cheesy flavor to the rolls. You can even tuck pieces of cheese inside each roll before shaping them for a gooey surprise!
3. **Sweet Cinnamon Sugar Rolls**: Add 1-½ tablespoons of cinnamon and ½ cup of brown sugar to the dough mixture for a delightful sweet treat. After the second rise, sprinkle additional cinnamon sugar on top before baking for an extra crunchy sweetness.
4. **Whole Wheat Rolls**: Substitute half the all-purpose flour with whole wheat flour for a healthier take. This will give a nuttier flavor and denser texture while retaining moisture. Keep in mind that whole wheat flour absorbs more liquid, so you might need a bit more milk or water to achieve the right dough consistency.
5. **Gluten-Free Rolls**: To make these rolls gluten-free, swap the all-purpose flour for a gluten-free blend that is specifically formulated for baking. Follow the instructions on the flour package for proper ratios and rising times. Adding 1 tablespoon of vinegar can help with the dough’s elasticity.
Common Mistakes to Avoid
When making dinner rolls, it’s easy to make mistakes that can impact your final product. Here are some common pitfalls and tips to avoid them:
1. **Kneading Too Little or Too Much**: Kneading is crucial for developing gluten, which gives the dough its structure. Kneading too little can result in dense bread, while over-kneading can make it tough. Aim for 8-10 minutes of kneading until the dough is smooth and elastic.
2. **Incorrect Yeast Temperature**: Yeast is sensitive to temperature. Using water that is too hot can kill the yeast, and if it’s too cold, it won’t activate. Always aim for a temperature around 110°F (43°C) for optimal results.
3. **Not Allowing Enough Rising Time**: Patience is key to bread-making. Don’t rush the rising times; your dinner rolls need ample time to rise to achieve that fluffy texture. If your kitchen is cool, it may take longer than expected.
4. **Skipping the Second Rise**: The second rise is critical for light, airy rolls. Skipping this step will result in dense, tough bread. Make sure they have puffed up nicely before you bake.
5. **Using Too Much Flour**: Adding flour is a common instinct when dealing with sticky dough. However, too much flour can create dry, crumbly rolls. Start with less and add only when necessary; the dough should be tacky but not overly sticky.
Storage, Freezing & Reheating Tips
Proper storage and rewarming can ensure your dinner rolls maintain freshness even after baking. Here are some helpful tips:
– **Storing**: Store leftover rolls in an airtight container at room temperature for up to 2 days. If they begin to stale, you can reheat them in the microwave for 10-15 seconds to revive their softness.
– **Freezing**: To freeze, let the baked rolls cool completely. Place them in a single layer on a baking sheet and freeze until solid. Once frozen, transfer them to a freezer-safe bag or container. They will last for up to 3 months.
– **Reheating**: To reheat frozen rolls, allow them to thaw overnight in the refrigerator. For a fresh-out-of-the-oven feel, warm them in an oven preheated to 350°F (175°C) for about 10-15 minutes until warmed through. This method helps them regain their soft texture and golden crust.
Always ensure that your rolls are well-covered to prevent freezer burn, which can ruin their delightful flavor and texture.
Frequently Asked Questions
1. **Can I use instant yeast instead of active dry yeast?**
Yes, absolutely! If you opt for instant yeast, you can mix it directly with the dry ingredients without needing to activate it first. You will want to keep the same amount, two and a quarter teaspoons, for best results.
2. **Can I make these rolls ahead of time?**
Certainly! You can prepare the dough and let it rise, shape the rolls, and place them in the fridge overnight. The next day, allow them to come to room temperature, let them rise again, and then bake as directed. This is a great time-saver for gatherings or busy weeknights.
3. **What can I serve these rolls with?**
These rolls pair beautifully with a variety of dishes! They are perfect with soups, stews, roasted meats, and salads. They can serve as bases for small sandwiches, or simply enjoyed with butter or jam for breakfast.
4. **What should I do if my dough isn’t rising?**
If your dough isn’t rising, it could be due to old yeast or the wrong water temperature. Make sure to check the yeast’s expiration date before use. If the yeast was too cold or hot during activation, try finding a warmer location for it to rise.
5. **Can I add flavors or fillings?**
Absolutely! You can incorporate herbs, cheese, or even sweet fillings into the dough. Just remember that if you’re adding moisture-rich ingredients (like fruit or vegetables), you may need to adjust your flour quantities slightly.
In conclusion, this dinner roll recipe is not just any bread—it’s an experience. These rolls will invite warmth into your kitchen and home, filling your space with soothing aromas and bringing everyone to the table. Whether you enjoy them fresh from the oven or as leftovers, they are perfect for any meal. So, roll up your sleeves, gather your ingredients, and start baking these delightful dinner rolls. Your family will thank you, and I bet you’ll find a new favorite in your baking repertoire!


