Prep time: 15 minutes
Cook time: 25 minutes
Total time: 40 minutes
Servings: 12 bars
Eating is an experience that can evoke nostalgia, warmth, and a little excitement, especially when you’re finding a healthier snack on the go. For those who adore nut bars, DIY varieties can be a delightful surprise, offering a texture and flavor experience that you can customize to your liking. Today, we will dive into making your own nut bars that mirror the popular KIND style snacks, ensuring a delicious way to enjoy nutritious ingredients.
This recipe is not just another ordinary snack; it provides a perfect amalgamation of flavors, crunch, and nutrition. Imagine biting into a homemade nut bar with a blend of roasted nuts, sweetened with natural honey, and enhanced by aromatic spices. As we explore this recipe together, you will learn how to achieve that satisfying crunch, the perfect level of sweetness, and how to customize these bars to match your dietary preferences or cravings.
With simple cooking techniques and just a few wholesome ingredients, you’ll find that making these bars at home is not only easy but also incredibly rewarding. Let’s embark on this nutty adventure!
What Is Easy DIY Nut Bars | KIND Style Snacks at Home?
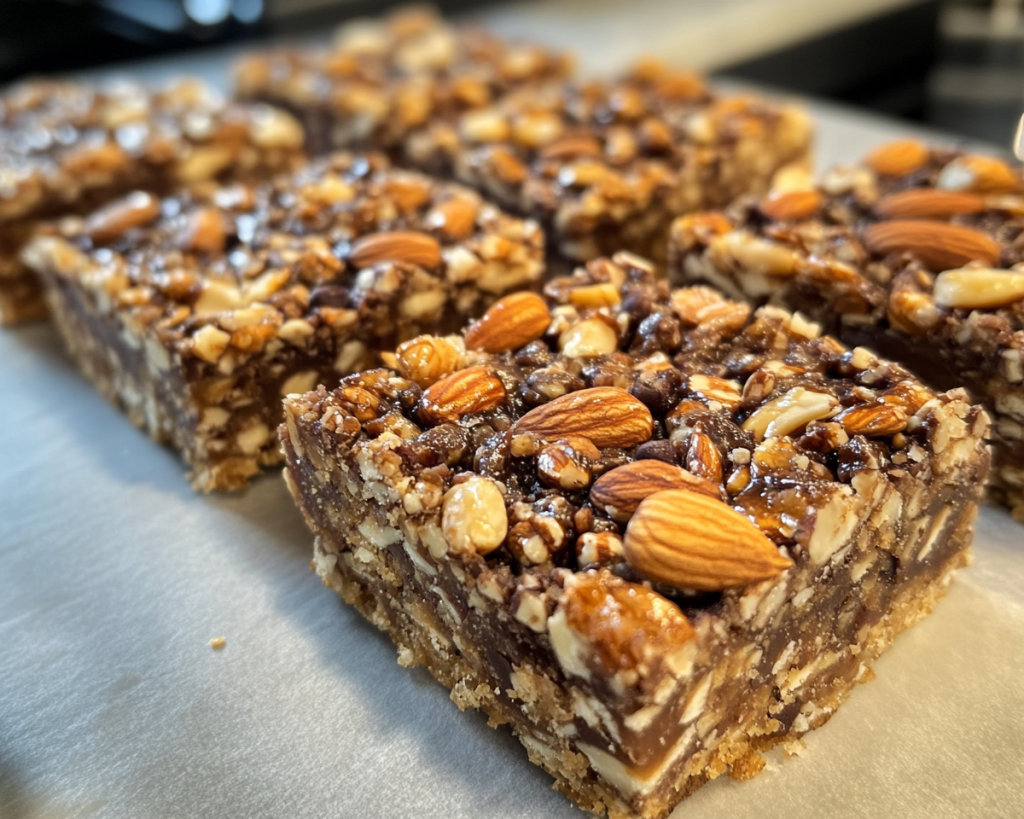
Easy DIY nut bars are homemade snack bars traditionally packed with nutritious ingredients like nuts, seeds, and dried fruits. Their origin stems from the growing demand for healthy, on-the-go snacks that cater to busy lifestyles while avoiding artificial sugars and additives present in many store-bought options. These bars typically feature a chewy texture complemented by a satisfying crunch from the nuts, making them not only a snack but also a fulfilling energy booster for all ages.
The flavor profile is versatile, allowing for sweet, savory, or even spicy variations depending on the ingredients used. Think of rich almonds mixed with honey, or perhaps a tangy kick from dried cranberries. The beauty of DIY nut bars lies in their adaptability; you can easily tailor them to your taste preferences, dietary restrictions, or even seasonal ingredients.
In essence, these DIY nut bars offer a wholesome, delightful eating experience that connects you to the act of making food. It’s a simple way to enjoy healthier snacks while indulging your creativity in the kitchen.
Why You’ll Love This
You will absolutely love this recipe for several reasons: First off, the taste is undeniably spectacular. Each bite offers a rich blend of nutty goodness balanced with natural sweetness, crafting a sensory delight that will have your taste buds singing. These bars can easily become a staple in your daily routine, providing the energy needed to power through your busy day.
Moreover, making your own nut bars at home is cost-effective. Compared to purchasing pre-packaged bars from stores, which can be pricey, creating your own at home allows you to save money while ensuring that you know exactly what goes into each bar. This is especially beneficial for families or individuals looking to maintain control over their food expenses.
In addition to cost-effectiveness, these nut bars offer excellent health benefits. Packed with protein, healthy fats, and fiber, they can be easily incorporated into meal prep for breakfast or as a satisfying mid-afternoon snack. Furthermore, you can adjust the ingredients based on any dietary needs – whether you are vegan, gluten-free, or following a ketogenic diet.
It’s also common to make mistakes while cooking or baking. Fear not! We will cover common pitfalls and how to avoid them further along to ensure that your nut bars turn out perfectly every time.
Ingredients You’ll Need
To create your very own DIY nut bars, gather the following ingredients:
- Mixed Nuts: Use a blend of almonds, walnuts, and cashews for a balanced flavor and texture. You can substitute your favorite nuts based on preference or allergies.
- Honey or Maple Syrup: Acts as a natural sweetener and binding agent. Choose honey for a classic sweetness or maple syrup for a vegan option.
- Dried Fruits: Raisins, cranberries, or apricots work well to add a chewy texture and natural sweetness. Feel free to mix and match!
- Rolled Oats: Provides additional texture and acts as a healthy binding agent. You can replace them with gluten-free oats if necessary.
- Nut Butter: Almond or peanut butter adds creaminess and richness. It also helps hold the bars together. Opt for natural varieties without added sugars or oils.
- Cinnamon: A pinch enhances flavor without added sugar, providing warmth and depth.
- Salt: A small pinch balances the flavors, elevating the overall taste of your nut bars.
As you gather these ingredients, pay attention to their freshness, particularly the nuts and dried fruit. Fresh ingredients lead to the best flavor and texture, enhancing the overall experience of your homemade nut bars.
How to Make
Follow these simple steps to create your delicious nut bars:
- Start by preheating your oven to 350°F (175°C). This ensures a perfect toasty flavor in your nut bars. While waiting for the oven, prepare your baking dish by lining it with parchment paper, leaving extra paper hanging over the sides. This makes it easy to lift the bars out after baking.
- In a large mixing bowl, combine your mixed nuts, rolled oats, and a sprinkle of salt. This mixture provides a great texture foundation for your bars, lending crunch and wholesome goodness.
- In a separate small pot, heat your honey (or maple syrup) and nut butter over low heat. Stir constantly to combine until it turns smooth and well-mixed. Be careful not to boil it; just heating it enough to blend the ingredients will do.
- Pour the warm mixture over the nuts and oats. With a spatula or wooden spoon, mix thoroughly until everything is evenly coated. It’s important to make sure all the dry ingredients are well-bound to ensure cohesive bars.
- Once thoroughly mixed, fold in your dried fruits and a dash of cinnamon. These additions bring layers of flavor and chewiness to your bars, making them delectable.
- Transfer the mixture to your prepared baking dish, spreading it evenly into the corners. Use a spatula to firmly press the mixture into the dish; this step is vital for achieving solid bars that hold together well.
- Bake in your preheated oven for 20-25 minutes until the edges begin to turn a golden brown. Keep an eye on them toward the end to avoid burning. The aroma wafting from the oven will whet your appetite!
- After baking, remove the dish from the oven and allow it to cool completely in the dish. Once cooled, use the overhanging parchment paper to lift the nut bars out. Slice them into squares or rectangles, depending on your preferred serving size.
- Store the bars in an airtight container at room temperature or in the refrigerator for longer shelf life. You can also freeze them for up to 3 months.
Each step brings you closer to enjoying a delicious, nutritious snack that is enjoyable anytime during the day. Feel free to customize these bars within the instructions and ingredients to suit your unique taste!
Variations & Substitutions
Chocolate Chip Nut Bars: If you’re a fan of sweet treats and chocolate, why not sprinkle in some dark chocolate chips into your mixture? This will enhance the overall flavor and introduce a delightful melt-in-your-mouth quality. Chocolate pairs beautifully with nuts, creating a rich and indulgent treat. Just be mindful of the added sugars and adjust your other sweeteners accordingly.
Protein-Packed Bars: For those looking to increase their protein intake, consider adding protein powder to the nut mixture. You can choose your favorite flavor, whether vanilla, chocolate, or a neutral version. This is particularly helpful for busy parents trying to maintain energy levels throughout the day. Just ensure to balance the wet ingredients accordingly to avoid a dry bar.
Seasonal Fruit Bars: Introduce seasonal flavors by incorporating chopped dried fruits like figs, dates, or apples during the fall. This gives a local twist and reimagines your nut bars for each season. The flavors will meld beautifully, adding a remarkable sweetness and depth to the bars. Additionally, varying fruits can dramatically change the texture, keeping things exciting.
Spicy Nut Bars: Want to take a walk on the wild side? Fold in a sprinkle of cayenne pepper or a splash of hot sauce to introduce a surprising kick. This variation can be particularly appealing for those who love a touch of heat in their snacks. The contrast between sweet and spicy can elevate flavors, creating an addictive treat.
Vegan Options: If you’re looking for a completely vegan-friendly recipe, ensure to choose plant-based nut butters and substitute honey with maple syrup or agave nectar. This adjustment ensures everyone can enjoy the nut bars regardless of dietary restrictions, bringing folks together around a shared love for tasty snacks.
Common Mistakes to Avoid
Even seasoned cooks can run into **common pitfalls** when making these nut bars. One mistake many make is not allowing the bars to cool completely before cutting them. Cutting too soon can lead to uneven pieces and make the bars crumble.
Another issue involves **overbaking**, which can dry out the bars and rob them of that delightful chewiness we crave. Always keep an eye on them as they bake, especially toward the end, and use a timer!
Not pressing the mixture firmly enough into the baking dish can lead to bars that fall apart. Take your time in this step; press the mixture firmly, ensuring that everything is compacted well.
Lastly, using a mix of nuts that aren’t fresh can lead to a less than appealing flavor. Always check for freshness to ensure that your DIY nut bars taste their absolute best.
Storage, Freezing & Reheating Tips
Once your nut bars have cooled and been cut into pieces, it’s essential to store them properly to maintain freshness. Store your bars in an airtight container at room temperature for up to a week. Ensure the container is sealed to prevent moisture, which could lead to soggy bars.
If you want to preserve the bars for a longer time, they freeze incredibly well. Wrap each bar individually in plastic wrap, and then place them in a freezer-safe ziplock bag or container. Label the bag with the date, and they will last up to three months in the freezer. When you’re ready to enjoy one, simply thaw it in the refrigerator or at room temperature.
Always adhere to **food safety practices** when dealing with homemade snacks. If you notice any strange smells, discoloration, or texture changes after storing, it’s best to discard the bars. Proper storage ensures that your DIY nut bars remain a delicious and enjoyable treat.
Frequently Asked Questions
Can I use any type of nuts for this recipe?
Absolutely! You can customize your nut selection based on your preferences or any allergies. Almonds, walnuts, cashews, or even peanuts provide different flavors and textures. Feel free to experiment with different combinations for your perfect nut bar.
What can I use instead of honey?
If you are looking for a vegan alternative or simply prefer not to use honey, maple syrup works beautifully as a substitute. It will not only bind your ingredients but also add a hint of sweetness that complements the nuts perfectly.
How do I know when my nut bars are done baking?
Keep a close eye on your bars as they bake. You’re looking for a golden color around the edges and a firm top. If they appear too soft or undercooked, allow them a few more minutes but check frequently to avoid burning.
What if my bars are too crumbly?
If you find that your nut bars are crumbling too much, it may be due to not enough binding agents. Ensure to mix well and press the mixture deeply into the baking dish before baking. If they’re already baked, you might want to try turning them into granola by crumbling them over yogurt or adding milk!
Can I add protein powder to this recipe?
Yes! Protein powder can be added to increase the nutritional value of your nut bars. Ensure that you balance the wet ingredients accordingly to prevent them from being too dry. This can be a great option for those looking to enhance their protein intake with a snack.
Conclusion:
In summary, these Easy DIY Nut Bars are not only a delicious and satisfying snack but also an affordable and health-minded alternative to store-bought options. You can elevate your snacks by experimenting with flavors, textures, and seasonal ingredients while enjoying a sense of accomplishment from creating them yourself.
I encourage you to try this recipe, customize it to your liking, and perhaps share it with family and friends. You never know, you might inspire them with your culinary adventures in healthy snacking! Get in the kitchen, embrace your creativity, and enjoy these tasty nut bars.