Prep time: 20 minutes
Cook time: 0 minutes
Total time: 20 minutes
Servings: 24
There’s something undeniably delightful about treating yourself to a delicious dessert, and what’s better than biting into a rich, creamy Oreo ball? These delicious no-bake treats are not just an indulgence but a true crowd-pleaser at any gathering. Whether you are planning a birthday party, a family gathering, or just a casual get-together with friends after a long week, these Oreo balls will steal the show. The best part? They’re incredibly easy to make, requiring minimal time and effort while yielding maximum deliciousness.
The beauty of this recipe lies not only in its simplicity but also in the rich, decadent flavors that each bite delivers. Combining sweet cream cheese with crushed Oreo cookies and enveloping them in a smooth layer of chocolate creates an experience that tantalizes the taste buds. This fusion results in a treat that is both creamy and crunchy, making it an irresistible dessert option for any occasion. In this article, you’ll gain insight into how to make these decadent gems, variations to try, essential tips for the best results, and answers to common questions surrounding this irresistible treat.
What Is Easy No-Bake Oreo Balls Recipe – Best Dessert for Parties?
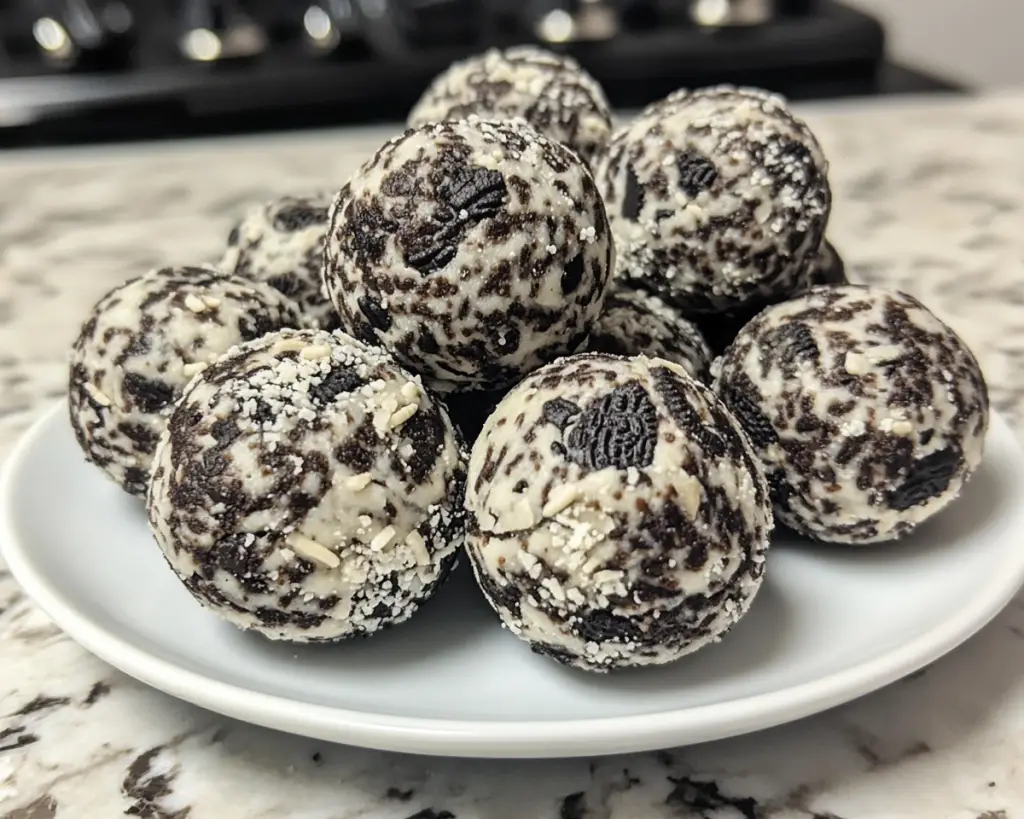
The Easy No-Bake Oreo Balls Recipe, as the name suggests, is a simple dessert that combines the beloved Oreo cookie with cream cheese, rolling it into balls, and then dipping it in melted chocolate. These blissful bites are adored for their rich flavor and creamy texture. Originating from the need for a quick and satisfying dessert, this recipe has evolved to become a staple at parties, potlucks, and even holiday gatherings.
The delightful combination of the chocolate cookies and the sweet cream cheese filling creates a dessert that brings nostalgia to anyone who remembers enjoying Oreos as a child. You’ll appreciate the crunchy exterior of the chocolate coating that harmonizes with the smooth, rich interior. Unlike traditional baking, this no-bake recipe saves time and energy while ensuring you achieve that same level of satisfaction found in baked goods. Just envision your next event, where guests indulge in these delectable treats, relishing every bite!
Why You’ll Love This
There are countless reasons to adore the Easy No-Bake Oreo Balls. For starters, they are incredibly **easy** to make, requiring minimal kitchen skills and time. You could easily whip them up in about 20 minutes, leaving you ample time to prepare other delicious dishes or simply enjoy time with your loved ones. Not only are they a **cost-effective** dessert option, but they also eliminate the need for complicated cooking methods or hours spent in the kitchen.
Another reason people love these Oreo balls is their versatility. You can customize them to fit various dietary needs or flavor preferences. Whether you’re entertaining gluten-free friends or chocolate aficionados, there’s an option for everyone. It’s important to note that a common misconception is that no-bake desserts lack flavor or texture; however, this recipe proves that with the right ingredients and methods, no-bake treats can be just as satisfying and delicious as their baked counterparts.
Ingredients You’ll Need
To successfully create these delightful Oreo balls, you will need the following ingredients:
- Oreo Cookies: The base of this recipe, providing the distinct chocolate flavor and crumby texture.
- Cream Cheese: This creamy component binds the crushed Oreos, adding richness and moisture.
- Chocolate (dark or milk): Used for coating the Oreo balls, lending a decadent layer of chocolate that enhances the flavor.
- Optional toppings (like sprinkles or crushed nuts): For garnishing. You can get creative with the toppings to add both visual appeal and texture.
The star players in this recipe are undoubtedly the Oreo cookies. While you can use any chocolate sandwich cookie, the classic Oreo provides a taste that many find irreplaceable. On the other hand, if you prefer a less sugary option, consider using reduced-fat cream cheese or even non-dairy cream cheese for a vegan version. The chocolate coating can vary based on preference – dark chocolate provides a more intense flavor, while milk chocolate offers a creamy sweetness that complements the Oreos beautifully.
How to Make
Making these Oreo balls is a breeze, allowing anyone, including beginners, to impress their family and friends with a delightful dessert. Here’s a straightforward guide on how to bring these tasty treats to life:
- Prepare Your Workspace: Start by gathering all your ingredients and equipment. You will need a food processor or a large zip-top bag, a mixing bowl, a baking sheet lined with parchment paper, and a microwave-safe bowl for melting chocolate. Make sure your workspace is clean and organized before you begin.
- Crush the Oreos: Using a food processor, pulse the Oreo cookies until they are finely crushed. If you don’t have a processor, you can place the cookies in a zip-top bag and crush them with a rolling pin. The goal is to achieve a fine crumb to ensure even mixing. This step should take about 1-2 minutes.
- Mix with Cream Cheese: In a large mixing bowl, combine the crushed Oreos with softened cream cheese. Use a spatula or your hands to mix them together until fully incorporated. The mixture should be thick and sticky, similar to cookie dough. Take your time with this step to ensure that every crumb is well-mixed with the cream cheese.
- Shape the Mixture: Scoop out small portions of the mixture and roll them into 1-inch balls. It can help to use a small cookie scoop for even sizes. Place each ball onto the prepared baking sheet, leaving a little space in between them to avoid sticking.
- Melt the Chocolate: Use a microwave-safe bowl to melt the chocolate. Heat it in 30-second intervals, stirring between each interval until smooth. Be careful not to overheat the chocolate, as it can seize up if too hot.
- Coat the Balls: Once the chocolate is melted, dip each Oreo ball into the chocolate using a fork or your hands, allowing any excess to drip off. Place the coated balls back onto the parchment-lined baking sheet. If desired, sprinkle with toppings like crushed nuts or sprinkles before the chocolate sets.
- Let Them Set: Refrigerate the coated Oreo balls for at least 30 minutes, or until the chocolate has hardened. This step allows the flavors to meld and solidify the texture, making for a delightful treat!
- Serve & Enjoy: Once set, your Oreo balls are ready to serve! They can be stored in the refrigerator for up to a week (if they last that long!). Enjoy sharing them at gatherings, or simply treat yourself to a delicious dessert!
With each step, remember to be patient and take your time; the result will be well worth the effort. The smell of melted chocolate will entice you as you work, creating a sweet atmosphere in your kitchen.
Variations & Substitutions
Peanut Butter Oreo Balls: For a fun twist, consider adding peanut butter to the mixture. Just fold in 1/4 cup of creamy peanut butter along with the cream cheese and crushed Oreos. This variation adds a nutty flavor that complements the chocolate and will surely appeal to peanut butter lovers.
Mint Oreo Balls: Another exciting variation is the mint flavor. Simply use Mint Oreos instead of regular Oreos and add a few drops of peppermint extract to the cream cheese mixture. This will result in a refreshing minty treat that’s perfect for holiday gatherings.
Gluten-Free Option: If you want to accommodate gluten-free diets, use gluten-free Oreo cookies. Check the labels carefully to ensure they meet the necessary dietary requirements. The texture and flavor won’t be compromised, allowing everyone to enjoy them!
Vegan Oreo Balls: For those following a vegan diet, substitute regular cream cheese with non-dairy cream cheese and use dark chocolate or dairy-free chocolate chips for coating. These tweaks will ensure everyone can indulge in these sweet bites without feeling left out.
Coconut Oreo Balls: For a tropical twist, incorporate toasted coconut flakes into your mixture or as a topping. This variation will add an interesting texture and flavor that makes these Oreos all the more delightful.
Feel free to experiment with these variations or come up with your own! The joy of baking lies in creativity and finding unique ways to enjoy classic recipes.
Common Mistakes to Avoid
When making these Oreo balls, there are some common pitfalls to keep in mind. One frequent issue is not allowing the cream cheese to soften adequately. If it’s too cold, it won’t mix well with the crushed Oreo cookies, resulting in an uneven texture. Be sure to take the cream cheese out of the refrigerator at least 30 minutes before you start.
Another mistake is rushing the melting process of the chocolate. Microwaving it for too long without stirring can lead to it seizing. Instead, heat it slowly in 30-second increments, stirring frequently. This method ensures a smooth chocolate coating that’s perfect for dipping.
Finally, avoid overcrowding your baking sheet with the Oreo balls before they are set. Leaving enough space helps the chocolate to set evenly and reduces the risk of the balls sticking together.
Storage, Freezing & Reheating Tips
When it comes to storing your no-bake Oreo balls, the refrigerator is your best bet. Place them in an airtight container and store them at a cool temperature. They can last for up to a week, allowing you to savor each delectable bite over several days.
If you want to keep them longer, consider freezing them. Arrange the balls on a baking sheet in a single layer and freeze them for about 30 minutes until firm. Once firm, transfer them to a freezer-safe bag, removing as much air as possible. They can be kept frozen for up to three months. To serve frozen Oreo balls, simply take them out of the freezer and let them thaw in the refrigerator for a few hours before enjoying.
For safety, always handle the ingredients with clean hands and store them properly to avoid contamination. The ability to pull out a batch of these delightful treats on a whim will undoubtedly impress family and friends!
Frequently Asked Questions
Can I make these Oreo balls in advance?
Absolutely! These Oreo balls are perfect for making a day or two in advance. Preparing them ahead of time not only saves you stress on the day of your event but allows the flavors to meld beautifully. Just store them in an airtight container in the refrigerator until ready to serve.
What type of chocolate is best for coating?
While you can use any type of chocolate, dark chocolate is often preferred for its rich flavor that balances the sweetness of the cream cheese and Oreos. Milk chocolate offers a sweeter profile. It’s really a matter of personal preference, so feel free to experiment!
Can I use different types of cookies?
Certainly! While the classic Oreo is popular, you can try other chocolate sandwich cookies like Hydrox or even vanilla-flavored cookies for a different taste. Just keep in mind that the overall flavor profile will change, possibly leading to exciting, uncharted territory in flavor combinations!
Are Oreo balls safe for kids?
Yes, these delicious treats are safe for kids to enjoy, although moderation is key! The mixture contains no raw ingredients that would pose a risk, such as uncooked eggs. Just be sure to supervise small children when indulging to avoid any choking hazards.
Can I add flavorings to the chocolate coating?
Absolutely! You can infuse the chocolate with various flavor extracts like vanilla or almond for added depth. Mixing in a little sea salt can also enhance the flavor, creating a beautiful contrast with the sweetness of the chocolate and Oreo filling.
Conclusion:
The Easy No-Bake Oreo Balls Recipe is an excellent addition to any gathering, offering delicious flavor, impressive presentation, and a straightforward preparation process. Whether you’re a seasoned baker or a beginner in the kitchen, these treats are sure to be a hit.
Feel free to customize the recipe to your liking, trying different variations or toppings to find your ideal combination. This dessert not only satisfies sweet cravings but also fits seamlessly into busy lifestyles with its no-bake simplicity. So, gather your ingredients, engage your creativity, and dive into making these fantastic Oreo balls. Your friends and family will appreciate the delightful treat, and you’ll feel satisfied knowing you’ve created something special!


