# Ezekiel Bread – Wholesome, Nutty & Packed with Ancient Grain Goodness!
Meta Title: Ezekiel Bread: Wholesome, Nutty & Ancient Grain Goodness
Meta Description: Discover the wholesome benefits of Ezekiel bread! This nutty, nutritious bread is made from ancient grains—learn how to make it at home.
Ever crave a slice of bread that’s not only delicious but also packed with nutrition? If you’ve never tried Ezekiel bread, you’re in for a treat. This wholesome loaf, made from sprouted grains, is steeped in history and bursting with flavor. Ideal for sandwiches, toast, or simply slathered with butter or almond butter, Ezekiel bread doesn’t just satisfy your cravings—it nourishes your body. In this article, we’ll explore what Ezekiel bread is, why it’s a top choice for health-conscious eaters, the ingredients you’ll need to whip it up, and step-by-step instructions for making it at home. So grab a bowl and let’s get baking!
## What is Ezekiel Bread?
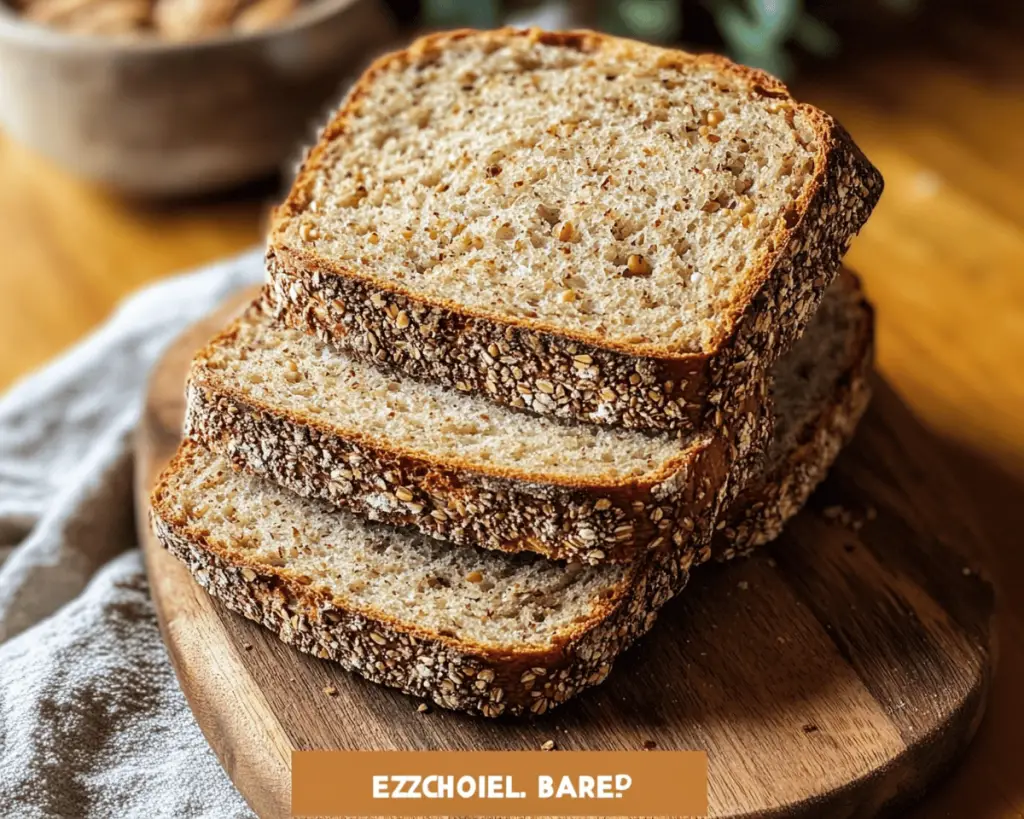
Ezekiel bread is like no other bread you’ve encountered. Originating from biblical times, it’s based on a recipe mentioned in the book of Ezekiel (4:9), which specifies using sprouted wheat, barley, lentils, millet, and spelt. What makes this bread unique is its use of sprouted grains—grains that have begun to germinate, making them easier to digest and enhancing their nutritional profile.
The main ingredients include:
– **Wheat** – A foundational ingredient that contributes a wholesome, nutty flavor.
– **Barley** – Adds chewiness and enhances the bread’s overall texture.
– **Lentils** – Packed with protein and fiber, lentils lend a delightful earthiness.
– **Millet** – These tiny, round grains provide a subtle sweetness.
– **Spelt** – This ancient grain adds complexity and a nutty taste.
Together, these ingredients create a bread that’s distinctly wholesome and filling, perfect for a healthy diet.
## Why You’ll Love Ezekiel Bread
Ezekiel bread truly stands out in the realm of healthy options. Here’s why it’s so beloved:
– **Nutritional Powerhouse**: Sprouted grains contain more vitamins, minerals, and antioxidants than their non-sprouted counterparts. The sprouting process increases the availability of B vitamins, vitamin C, and certain minerals.
– **Rich in Protein**: Thanks to the combination of grains and legumes, Ezekiel bread is a complete protein source, making it an excellent choice for vegetarians and vegans.
– **Low Glycemic Index**: This bread has a lower glycemic index than regular white bread, meaning it won’t spike your blood sugar levels as aggressively. This makes it ideal for anyone managing their weight or blood sugar levels.
– **Versatile**: Whether you’re making a sandwich, a toast topped with avocado, or using it in a breakfast casserole, Ezekiel bread adapts beautifully to various dishes.
With these impressive health benefits, it’s easy to see why Ezekiel bread is a hit among health enthusiasts and busy families alike.
## Ingredients You’ll Need
Gather your ingredients before we dive into the baking process. Here’s what you’ll need for a classic Ezekiel bread recipe:
– **1 cup sprouted whole wheat grain** (or whole wheat flour)
– Provides a hearty base loaded with fiber.
– **1/2 cup sprouted barley**
– Infuses the bread with a unique texture and nutty flavor.
– **1/2 cup sprouted lentils** (green or brown)
– Boosts protein content and adds a delightful earthiness.
– **1/2 cup sprouted millet**
– Adds a subtle sweetness and lightness to the bread.
– **1/2 cup sprouted spelt**
– Offers a hint of nuttiness and depth of flavor.
– **1 1/2 cups warm water** (approximately 110°F)
– Activates the yeast and creates the perfect dough consistency.
– **2 tablespoons honey or maple syrup** (optional)
– Adds a touch of sweetness; feel free to leave it out for a less sweet bread.
– **2 teaspoons active dry yeast**
– This helps the bread rise, giving it that fluffy texture.
– **1 teaspoon salt**
– Essential for enhancing flavor.
### Ingredient Tips:
– If you can’t find sprouted grains locally, consider purchasing them online; brands like Eden Foods and a few specialty health stores carry them.
– You can also sprout your own grains at home by soaking them in water for 8-12 hours, rinsing them, and allowing them to sit in a jar for a few days, rinsing twice a day until sprouted.
## Step-by-Step Instructions for Ezekiel Bread
Baking with sprouted grains requires patience but results in a deliciously wholesome loaf. Follow these steps, and you’ll be rewarded with beautiful Ezekiel bread:
1. **Prepare the Grains**:
– If you have dry sprouted grains, soak them in warm water for about 2 hours. This rehydrates the grains and helps them blend more easily later on.
2. **Activate the Yeast**:
– In a small bowl, combine the warm water with the active dry yeast and honey or maple syrup if using. Let it sit for about 5-10 minutes until it becomes frothy. This step ensures your yeast is alive and ready to work!
3. **Mix the Ingredients**:
– In a large mixing bowl or a stand mixer, combine the sprouted grains, flour, and salt. Stir to combine. Make a well in the center and pour in the activated yeast mixture.
4. **Knead the Dough**:
– If you’re using your hands, mix the ingredients until they come together into a shaggy dough. Knead the dough on a floured surface for about 10 minutes until it is smooth and elastic. If you’re using a stand mixer, knead with a dough hook on medium speed for about 5-7 minutes.
5. **First Rise**:
– Transfer the dough to a lightly greased bowl, cover it with a damp towel, and put it in a warm area. Let it rise until it doubles in size, about 1-2 hours. This is where the magic begins as the yeast does its job.
6. **Shape the Dough**:
– Once the dough has risen, punch it down gently to release the air, and turn it out onto a lightly floured surface. Shape it into a loaf (or divide it for smaller loaves) and place it into a greased loaf pan.
7. **Second Rise**:
– Cover the shaped loaf again with a towel and let it rise for another 30-60 minutes until it has doubled in size again.
8. **Preheat the Oven**:
– While the loaf is rising, preheat your oven to 350°F (175°C). This ensures the bread will bake evenly.
9. **Bake**:
– Once the loaf is ready, bake it for about 30-35 minutes, or until it sounds hollow when tapped on the bottom and has a golden-brown crust.
10. **Cool**:
– Remove the loaf from the pan and let it cool on a wire rack for at least 30 minutes before slicing. Trust me, waiting will be tough, but the texture and flavor will improve as it cools.
## Tips & Variations
Want to make your Ezekiel bread even more exciting? Here are some tips and variations:
1. **Add Seeds**: Sprinkle sunflower seeds, pumpkin seeds, or flaxseeds on top of the loaf before baking for added crunch and flavor.
2. **Herbs and Spices**: Try adding dried herbs like rosemary or thyme to elevate the flavor profile. Even a dash of cinnamon can add a delightful twist.
3. **Storage**: Store your bread at room temperature in a bread box for up to three days. For longer shelf-life, wrap it in plastic wrap and freeze it; it can last up to three months!
4. **Serving Ideas**: Enjoy slices of Ezekiel bread toasted with avocado and a sprinkle of sea salt, or pair it with hummus and fresh veggies for a wholesome snack.
5. **Experiment with Flours**: If you want to change things up, you can try mixing in other flours like rye or whole spelt flour.
## Health Benefits or Nutritional Highlights
Ezekiel bread is truly a nutritional superstar! Here’s why you should feel great about adding it to your meals:
– **Complete Protein**: This bread provides all the essential amino acids, thanks to its mix of grains and legumes. A two-slice serving can contain around 8-12 grams of protein.
– **Rich in Fiber**: High in dietary fiber helps with digestion and promotes a feeling of fullness, which is helpful if you’re watching your weight.
– **Vitamins & Minerals**: Packed with B vitamins, iron, magnesium, and other minerals, Ezekiel bread is a well-rounded dietary addition.
For more on the nutritional benefits of whole grains, check out the USDA’s guide on whole grains .
## Frequently Asked Questions
### 1. Can I use all-purpose flour instead of sprouted flour?
While you can substitute all-purpose flour, you may lose some of the nutritional benefits that sprouted grains offer. Using sprouted flour gives the bread a unique taste and texture, so I recommend staying true to the recipe for the best results.
### 2. How do I know when my bread is done baking?
A good indicator is the sound test! Tap the bottom of the loaf; if it sounds hollow, it’s done. Alternatively, an internal temperature of about 190°F (88°C) means your bread is fully baked.
### 3. Can I make this bread gluten-free?
To make gluten-free Ezekiel bread, use a combination of gluten-free flours such as almond flour, coconut flour, or a gluten-free bread mix. Keep in mind that gluten helps with the elasticity and structure of bread, so the texture might vary.
### 4. How do I serve Ezekiel bread?
Ezekiel bread pairs beautifully with many toppings. Whether you choose almond butter and banana, classic peanut butter with jam, or use it for savory sandwiches, the options are endless!
### 5. Can I use a bread machine?
Absolutely! If you have a bread machine, you can add the ingredients in the order recommended by the manufacturer and set it to the whole-grain function. Just watch the first rise, as it may adapt differently to the machine’s timing.
##
In summary, Ezekiel bread is not just a fade trend; it’s a delicious, nutritious choice that can enhance any meal. With its nutty, wholesome flavor and crispy exterior, it’s a delightful addition to your healthy eating repertoire. Whether you’re making toast for breakfast, a delicious sandwich for lunch, or simply enjoying a slice on its own, you’re treating yourself to a bite of history and health.
Ready to bring the goodness of ancient grains into your kitchen? Try making Ezekiel bread tonight, and let me know how your loaf turns out! Happy baking!