The sheer thrill of a well-made popover can transform even the simplest meal into a memorable event. I still remember the first time I laid eyes on a popover, an enchanting creation rising in the oven like a fluffy tower of cloud. The golden-brown exterior, the hollow inside, and that tantalizing aroma wafting through the kitchen seemed like magic to me. The moment was cemented in my memory as I watched a dear friend pull a batch out of her oven, the soft, airy bodies glistening with butter and catching the light just perfectly. It felt like the kind of culinary wizardry that deserves an audience, and ever since that moment, popovers have had a prominent place in my kitchen.
Popover making carries with it a certain kind of alchemy that has fascinated home cooks for generations. Their origins trace back to England and were often referred to as “Yorkshire pudding.” Yet, with their lightweight structure and airy texture, they seamlessly crossed the pond and became synonymous with any meal that deserves a sprinkle of delight. What I’ve learned through countless baking sessions is that popovers are deceptively simple but demand just the right touch. And through trial and error, I’ve perfected a recipe for the fluffiest popovers ever—a recipe filled with warm memories, moments of laughter, and just a dash of butter.
**Inside the Ingredients of Fluffiest Popovers Ever**
Let’s delve into the ingredients that make this fluffy dream come true.
Inside the Ingredients of Fluffiest Popovers Ever
– **All-Purpose Flour**: The backbone of any popover, all-purpose flour lends the necessary structure. The secret here is to use the right amount; too much flour can lead to dense popovers rather than the ethereal quality we crave. Make sure to either spoon it gently into your measuring cup or sift it beforehand to maintain its lightness.
– **Eggs**: You might consider **eggs** to be the heart and soul of a popover. The proteins in eggs provide the steam necessary for these beauties to rise. When whisked into a frothy mixture, they hold air bubbles, creating that delightful lift in the oven. I always opt for large, fresh eggs for the best flavor—a little extra freshness goes a long way.
– **Milk**: Whole **milk** is my liquid of choice as it contributes richness, flavor, and just the right amount of moisture to keep the popovers tender. You can substitute with lower-fat milk if needed, but don’t skimp too much—the fat plays a crucial role in achieving that sought-after texture. I often find myself letting the milk come to room temperature for an even fluffier result.
– **Salt**: A pinch of **salt** is crucial, acting as a flavor enhancer that balances the sweetness of the eggs and milk. I’ve experimented with sea salt versus table salt, and while both are good, the nuanced flavor of sea salt always ends up winning my heart.
– **Butter**: When it comes to popovers, **butter** is non-negotiable. Not only does it contribute to an exceptional taste, but it also helps the popovers flake ever so delicately. Melting it before adding to the batter ensures it integrates seamlessly. Pro tip: I always reserve a bit to brush onto the popovers just after they come out of the oven—this is where happiness shines!
– **Pan**: While not an ingredient per se, the use of a quality **popover pan** (or a muffin tin in a pinch) is essential. The shape of the pan helps create those tall, lovely forms. I cherish my vintage popover pan—every groove has a story, and every rise has brought me joy.
**How Fluffiest Popovers Ever Fits Into a Balanced Life**
How Fluffiest Popovers Ever Fits Into a Balanced Life
Now, you might be wondering how these indulgent morsels fit into a balanced diet. Popovers certainly invite us to lean into comfort, but in my experience, they can also bring balance in moderation. They’re made with wholesome ingredients and can be enjoyed with a variety of fillings for breakfast, a hearty soup dinner, or even as a light snack with jam in the afternoon.
The beauty of popovers lies in their simplicity, yet they can be complemented with whatever healthier sides you choose. For instance, I adore pairing them with a fresh salad or a warm, rich soup, balancing the airy popover with something substantial. They can also play a role in reducing waste; leftover popovers can be repurposed as croutons in salads or combined in a savory bread pudding.
Popovers fit seamlessly into my philosophy: enjoy the process of cooking, celebrate the sharing of meals, and savor every bite. Everything in moderation, including indulgence!
**What You’ll Need**
What You’ll Need
Here’s a precise list to make the fluffiest popovers:
– **1 cup** all-purpose flour
– **1 cup** whole milk (room temperature)
– **2 large** eggs (room temperature)
– **1/2 tsp** salt
– **2 tablespoons** unsalted butter (plus more for brushing)
– **Popover pan** or jumbo muffin tin
This recipe serves about **6 popovers**, depending on the pan used.
**Preparing Fluffiest Popovers Ever Step by Step**
Preparing Fluffiest Popovers Ever Step by Step
Making popovers is easier than you might think. Remember, the goal is to keep the ingredients as light and airy as possible, so let’s proceed with care.
1. **Preheat Your Oven**: Begin by preheating your oven to **450°F (230°C)**. This high heat is essential to achieve that magnificent rise in the popovers. The oven should be nice and hot before you place your batter inside.
2. **Prepare Your Pan**: While the oven warms up, generously grease your **popover pan** (or muffin tin) with **melted butter**. Don’t be shy; a good coating will help the popovers release easily and create a beautifully crisp exterior.
3. **Whisk the Batter**: In a mixing bowl, combine the **flour**, **salt**, **eggs**, and **milk**. Whisk gently until just combined. It’s okay if there are a few lumps—mixing too much will yield tougher popovers, which we are looking to avoid. The batter should be somewhat thin and pourable.
4. **Add the Melted Butter**: Slowly drizzle in the **melted butter** while whisking. This step always brings me joy because the batter takes on a beautiful sheen, hinting at the magic to come.
5. **Fill the Pan**: Pour the batter evenly into the prepared pan, filling each cup about halfway. This allows room for the popovers to expand. Now, here’s the secret—once in the oven, don’t open that door! They need uninterrupted heat to achieve the tallest rise.
6. **Bake**: Slide the pan into the preheated oven and let them bake undisturbed for **20 minutes**. At this point, you’ll hear a lovely sizzle as the batter transforms. The aroma wafting through your kitchen will be nothing short of heavenly.
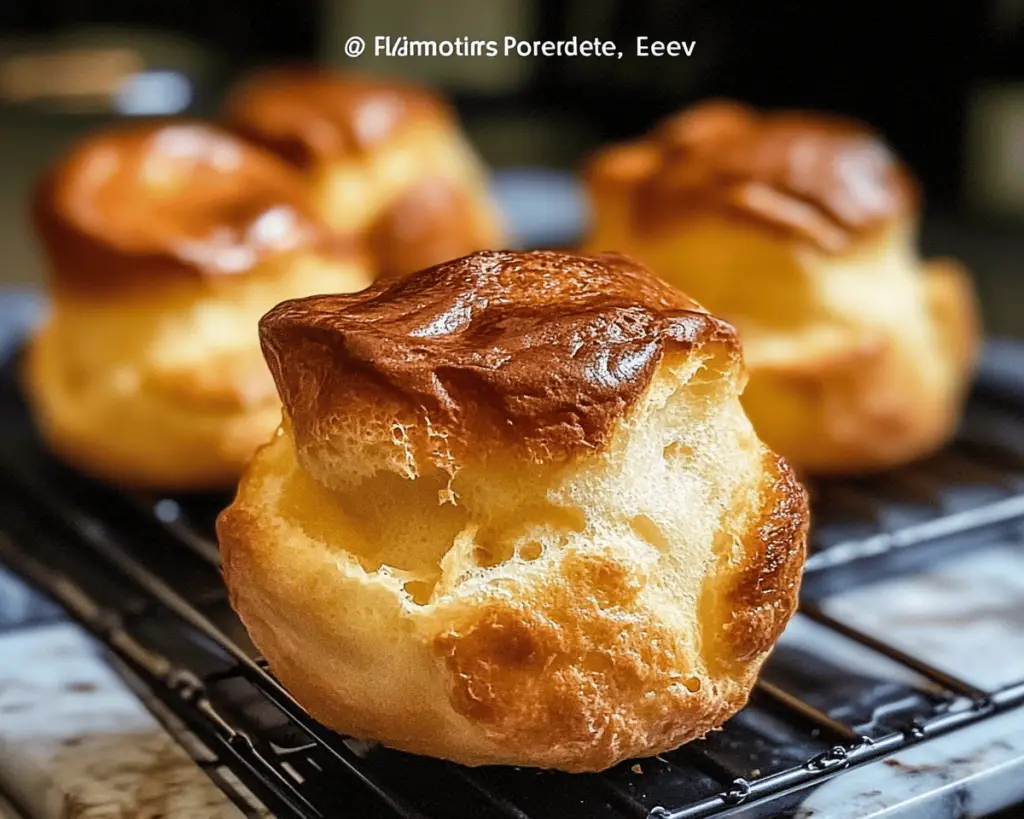
7. **Lower the Temperature**: After 20 minutes, reduce the oven’s temperature to **350°F (175°C)** and continue baking for an additional **10-15 minutes** until the popovers are golden brown and puffed up. The visual spectacle is utterly mouthwatering!
8. **Brush with Butter**: Once they’re beautifully golden, remove the popovers from the oven and immediately brush the tops with melted butter. This step enhances the flavor and gives them a lovely sheen.
9. **Serve Warm**: Carefully transfer the popovers to a wire rack for a moment before serving. I always love to serve them warm, fresh from the oven, often with a side of butter and jam, or sometimes alongside a rich soup.
**Lessons from My Kitchen**
Lessons from My Kitchen
Through my journey with popovers, I’ve come to appreciate the nuances that come with baking. They’ve taught me the importance of patience and precision. In my earlier days, I would often open the oven door to peek, and every time, my popovers would sag like balloons losing air. I learned that good popovers require faith—faith in the process and faith in the oven’s heat.
I’ve also experimented with various flavors and fillings. Once, I tried incorporating grated cheese into the batter, and a cheesy popover emerged, bringing an exhilarating contrast of flavors. Fresh herbs like rosemary or thyme can add exciting depths, taking the popovers from sweet to savory effortlessly. Seasonal variations can be delightful and, in my experience, an excellent way to keep the dish fresh and engaging.
I’ve learned to keep the batter simple; sometimes, the best things come from the least complicated methods. Another lesson worth sharing is the importance of room temperature ingredients. Cold eggs and milk can lead to a clumpy batter, preventing that glorious rise we’re craving.
As the seasons change, I find myself reimagining how popovers fit into my meals. In winter, I pair them with hearty stews, while summer leads me to serve them with fresh salads and fruity jams. These memories are like a warm embrace, and popovers are a significant part of the tapestry of my life and the meals I share with others.
In conclusion, every time I whip up a batch of popovers, they bring an air of festivity to my kitchen, transforming an ordinary day into something extraordinary. As you embark on your popover-making adventure, I urge you to embrace the moment—witness the rise and savor the golden exterior, filled with lightness and potential.
Every popover has its story, and I can’t wait to see how they intertwine with the tales you’ll create in your own kitchen. I invite you to make this dish your own and find your rhythm amidst the flour, eggs, and extravagant joy of baking.