**Meta Title: Cheesy & Juicy Cheeseburger Skulls: A Halloween Dinner Idea**
**Meta Description: Discover a spooky yet delicious Halloween dinner idea with our Cheesy & Juicy Cheeseburger Skulls recipe—perfect for witching hour fun!**
—
When the crisp fall air begins to fill the days and Halloween decorations start creeping into every corner, a shared excitement fills our homes. You can almost taste the anticipation. Halloween brings not just the thrill of costumes and candy but also an incredible opportunity to experiment in the kitchen. And every year, as the pumpkins are carved and scary costumes are prepared, my family looks forward to one spooky favorite: **Cheesy and Juicy Cheeseburger Skulls**.
These golden skulls are not just fun to look at; they are rich with flavor, ooey-gooey melted cheese, and a surprise of juicy beef inside that will make your taste buds dance. They’re perfect for a Halloween dinner idea your whole family will love, blending creativity and comfort seamlessly. Let’s dive into the details of making your Halloween night memorable with this terrifyingly delicious dish!
What are Cheesy & Juicy Cheeseburger Skulls?
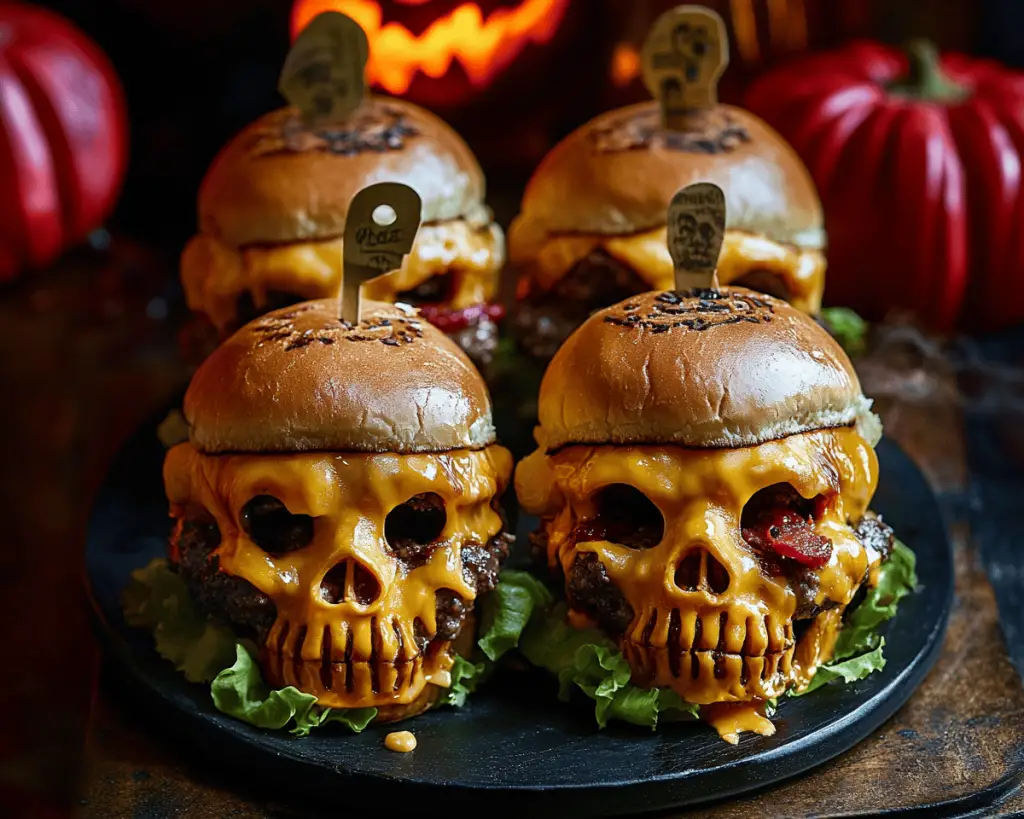
Cheesy & Juicy Cheeseburger Skulls are essentially mini cheeseburgers that have been transformed into spooky skull shapes, perfect for the Halloween festivities. Imagine biting into a golden-brown, cheesy crust, with warm, seasoned beef that’s juicy and flavorful. Each skull is decorated with the delightfully eerie charm of Halloween, making them both a treat for the eyes and a feast for the palate!
These charming creations are made using **store-bought crescent rolls**, which are wrapped around your seasoned beef and cheese mix to create those spooky shapes we all love. The crunch from the pastries paired with the melted cheese and tender beef makes for a delightful **textural contrast** that every bite promises to deliver. It’s no wonder that these cheeseburger skulls are such a hit with kids and adults alike, providing a **mix of nostalgia** and fun.
With roots in American fast food culture, we’ve adapted a classic cheeseburger into a fun, Halloween-themed dish. Not only does this unique shape spark joy, but they are versatile; you can customize the fillings just to your liking!
Why You’ll Love This Cheesy & Juicy Cheeseburger Skulls Recipe
– **Spook-tacular Fun**: Halloween isn’t just about treats; it’s about creating an experience. These cheeseburgers wrapped in bones bring a theatrical touch to your dinner table.
– **Juicy and Flavorful**: The seasoned beef, combined with melted cheese, offers a burst of flavor that could make any mouth water.
– **Kid-Friendly Cooking**: Get your little goblins involved! Making these skulls is a fun activity where kids can help shape their own cheeseburgers.
– **Quick and Easy**: With just a few simple ingredients and minimal prep time, this recipe will fit right into your busy Halloween schedule.
– **Perfect for Parties**: Whether you’re hosting a spooky movie night or an elaborate costume party, these cheeseburger skulls are sure to be a conversation starter.
– **Endless Customization**: Add your favorite toppings, switch out the ground beef for turkey or even plant-based alternatives, and make these skulls your own.
– **Delicious Aroma**: As they bake, your kitchen will fill with the mouthwatering scent of baking bread and sizzling beef, welcoming everyone to the dinner table.
Ingredients You’ll Need
To create these hauntingly delicious Cheesy & Juicy Cheeseburger Skulls, you will need the following ingredients:
– **1 lb ground beef**: The star of your skulls, you could also use ground turkey or chicken, or even a veggie mix if you prefer a meat-free option.
– **½ cup cheddar cheese (shredded)**: For that gooey, melty goodness. Feel free to mix in pepper jack for a little spice!
– **1 packet of taco seasoning**: Adds a flavorful kick to your beef. You can also use homemade seasoning if you prefer.
– **1 can of crescent roll dough**: This is what makes our skulls so unique, creating that perfect flaky, golden crust.
– **Olive oil or cooking spray**: For greasing your baking pan.
– **Optional: diced onions, jalapeños, or other toppings**: Whatever you like; just remember to throw it into the skull mixture for a surprise filling.
How to Make Cheesy & Juicy Cheeseburger Skulls
So, let’s get started on this delightfully spooky journey in your kitchen. Here’s your step-by-step guide:
1. **Preheat the Oven**: Start by preheating your oven to 375°F (190°C). This will create the perfectly crisp and flaky pastry when you pop them in.
2. **Brown the Beef**: In a medium skillet over medium heat, add your ground beef. Cook it until browned, about 5-7 minutes. You’ll want to break it apart with a wooden spoon to make small crumbles. The smell of cooking beef will already have your family’s mouths watering!
3. **Add Taco Seasoning**: Once the beef is nicely browned, stir in the taco seasoning and a splash of water. Cook for another 2-3 minutes until the flavors meld beautifully; you’ll notice a fragrant aroma wafting through your kitchen. Remove from heat and let it cool slightly.
4. **Mix in Cheese**: In the same skillet, sprinkle in the shredded cheddar cheese. Stir well until it’s thoroughly mixed with the beef. You’ll see the cheese melting into the hot beef—indicative of the cheesy goodness that awaits you.
5. **Prepare the Crescent Roll Dough**: On a clean surface, open your can of crescent roll dough. Unroll it carefully. You’ll want to keep each triangle intact—this will serve as the outer part of your skulls.
6. **Shape the Skulls**: Take a triangle of dough and spoon about 2-3 tablespoons of the beef and cheese mixture into the center of the triangle. Now, fold the corners over the filling (almost like wrapping a present) and pinch the seams to ensure they are well-sealed.
7. **Form the Skull Shape**: Pinch the top of the dough to create a skull shape. The dough will stretch a bit, but it will mold itself into a skull beautifully—don’t worry if it looks a little rough at first; that just adds character!
8. **Bake**: Arrange your skulls on a greased baking sheet. Brush the tops with a little olive oil or spray with cooking spray for a lovely golden finish. Now, pop them in the preheated oven and bake for about 12-15 minutes, or until they are golden brown and flaky.
9. **Cool and Serve**: Once out of the oven, allow them to cool for a few minutes. Serve them warm, and watch as your family descends like a pack of hungry ghosts!
Expert Tips, Tricks & Variations
1. **Make Ahead**: You can prepare the beef filling in advance, keeping it stored in the fridge. When you’re ready to use it, just fill the crescent dough and bake.
2. **Personalize the Filling**: Don’t hesitate to customize! Mix in any ingredients you love, like cooked bacon, sautéed mushrooms, or different cheddars for a unique twist.
3. **Dipping Sauces**: Serve your cheesy skulls with an assortment of dipping sauces—ketchup, mustard, or even a spicy ranch make excellent companions.
4. **Check the Dough**: Keep an eye on the dough as it bakes. If you notice any browning too quickly, you can cover them loosely with aluminum foil for the last few minutes to avoid burning.
5. **For a Fun Presentation**: Serve on a Halloween-themed platter, or add spooky garnishes like edible eyeballs or fake spider webs for a festive flair!
What to Serve With Cheesy & Juicy Cheeseburger Skulls
These whimsical cheeseburger skulls pair perfectly with:
– **Crispy Sweet Potato Fries** – Their sweetness and crunch contrast beautifully with the cheesy skulls.
– **Side Salad** – A fresh salad tossed with a light vinaigrette will brighten your plate, balancing the heavy cheeseburgers.
– **Pumpkin Soup** – A warm, comforting bowl of pumpkin soup can take your Halloween dinner to the next level, adding delightful seasonal flavours.
– **Deviled Eggs** – Get into the spirit with spooky deviled eggs, dyeing the filling with a bit of food coloring for that extra Halloween flair!
Storage, Freezing & Meal Prep
If you happen to have some leftovers (which is unlikely since these are so irresistible), don’t worry! Here’s how to handle storage:
– **Refrigerating**: Store any leftover cheeseburger skulls in an airtight container in the refrigerator for up to 3 days. Reheat them in the oven at 350°F (175°C) for about 10 minutes to bring back that fresh-baked flavor.
– **Freezing**: You can also freeze unbaked skulls. Assemble them without baking, place them on a baking sheet until solid, then transfer them to a freezer bag. They can be frozen for up to a month! When you’re ready to bake, cook directly from frozen, adding a few extra minutes to the baking time.
– **Meal Prep**: These skulls are a great option for meal prep. Prepare a batch on the weekend, freeze them, and you’ll have spooky dinners ready at your fingertips all week.
Frequently Asked Questions
**1. Can I use a different type of meat?**
Absolutely! Ground turkey, chicken, or even a plant-based meat substitute will work perfectly. Just be sure to adjust your seasonings to suit the meat type.
**2. What can I use if I don’t have crescent rolls?**
If you don’t have crescent rolls on hand, you can use pizza dough or puff pastry. Both will add a unique texture and flavor to your cheeseburger skulls!
**3. How do I make these skulls spicier?**
For a fiery skull, add diced jalapeños to your beef mixture or swap the cheese for a pepper jack variety. You can also serve with hot sauce on the side for those who love a good kick!
**4. How long do these take to bake?**
Baking these cheeseburger skulls usually takes about 12-15 minutes. Keep a close eye on them to prevent over-baking.
**5. Can I decorate my skulls?**
Definitely! Use edible markers, melted chocolate, or colored icing to decorate your skulls after baking for an extra special touch that adds thematic flair.
—
Now it’s your turn—grab your ingredients and create this magic in your kitchen tonight! Cheesy & Juicy Cheeseburger Skulls are stepping up your Halloween dinner game and sure to bring smiles and cheers from your family. Don’t forget to tag me when you try it, and share your own creative twists on this festive dish! Happy Halloween!


