# Halloween Oreo Cake Bars – Spooky, Fudgy & Loaded with Cookies-and-Cream Magic!
You know that feeling when Halloween is just around the corner, and you start craving something sweet, a tantalizing treat that wraps you in a cozy blanket of nostalgia? Perhaps it’s that delightful and familiar taste of Oreos combined with the richness of cake. That’s exactly what these Halloween Oreo Cake Bars promise: a fudgy, spooky good time that will make your Halloween festivities even more magical. Today, I’m excited to guide you through crafting these decadent bars, perfect for parties, trick-or-treaters, or simply indulging while you binge-watch your favorite thriller!
In this article, you’ll not only discover how to create these sinfully delicious bars, but we’ll dive into what makes them so special. With layers of tender cake, creamy frosting, and, of course, crunches of those iconic black-and-white cookies, these Halloween Oreo Cake Bars are bound to become your favorite holiday treat. So grab your spatula, and let’s conjure some kitchen magic!
What Are Halloween Oreo Cake Bars?
Halloween Oreo Cake Bars are based on rich, fudgy chocolate cake loaded with crushed Oreo cookies, creating a delightful texture that combines the softness of cake with the satisfying crunch of those beloved cookies. Originating from the classic cookie bar recipes, these bars take a spooky twist with a colorful frosting and themed decorations that evoke the festive spirit of Halloween.
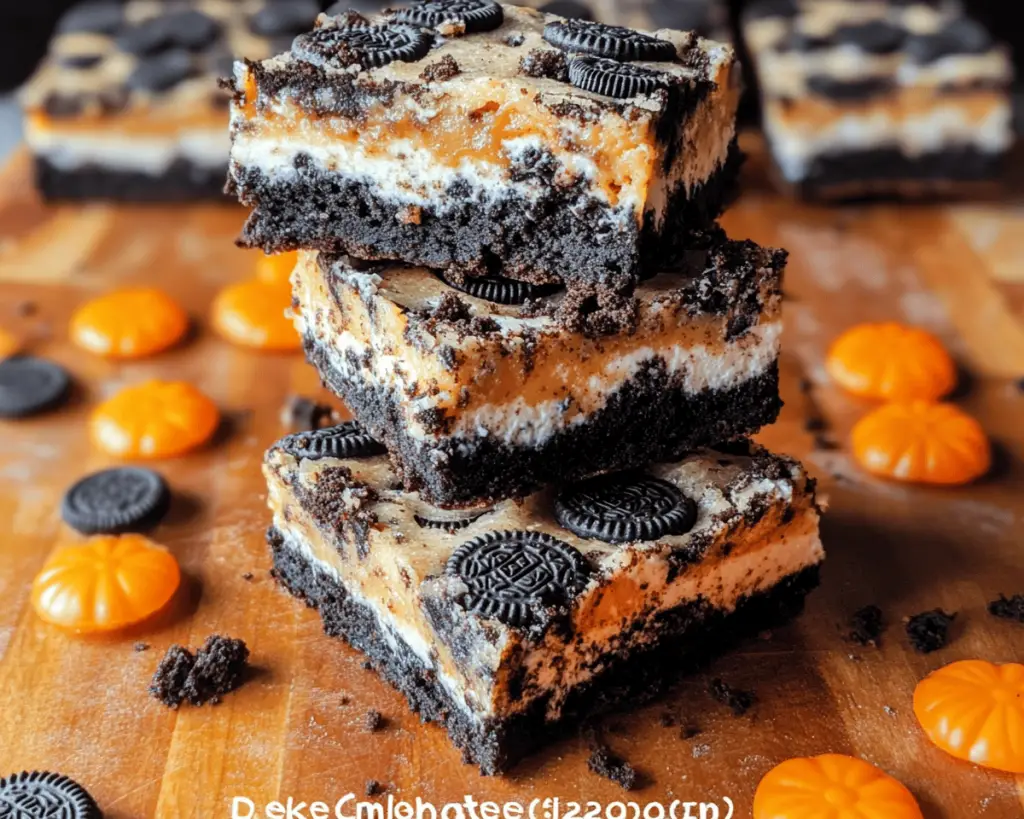
Picture a dark, rich cake topped with a creamy, almost cloud-like frosting, speckled with crunchy cookie bits. Each bite offers a contrast between the moist fudginess of the cake and the delightful surprise of Oreo chunks. The bars can be adorned with Halloween-themed candies or sprinkles, making them an eye-catching centerpiece for any spooky gathering.
Why You’ll Love These Halloween Oreo Cake Bars
There’s so much to love about these delectable treats! First, they’re incredibly simple to make, requiring no advanced baking skills. The combination of cake and Oreos creates a flavor that’s comforting yet fun, satisfying both kids and adults alike. They make for an excellent family activity, too—getting everyone involved in the mixing, decorating, and, of course, the taste-testing is a delight.
Moreover, these Halloween Oreo Cake Bars are perfect for meal prep; you can whip them up in advance and store them for your Halloween party or even during the upcoming holidays. Plus, who doesn’t adore a treat that combines cake and cookies? It’s the best of both worlds, ensuring that each bite is indulgent and memorable.
Lastly, as the nights grow longer and the air crisper, baking these bars fills your kitchen with an aroma that makes everyone feel at home. And let’s not forget the festive spirit: with a splash of food coloring and some seasonal decorations, these bars look as whimsical as they taste. It’s a surefire way to add some spooky cheer to your festivities!
Ingredients You’ll Need
Preparing these Halloween Oreo Cake Bars is a breeze! Here’s the full list of ingredients you’ll need for the cake, frosting, and decorations:
– **1 cup of unsalted butter** – Adds richness and a tender crumb to the cake.
– **2 cups of granulated sugar** – Sweetens the cake and provides structure.
– **4 large eggs** – Essential for moisture and binding the batter together.
– **2 cups of all-purpose flour** – Provides the base for the cake, giving it a light yet sturdy texture.
– **1 cup of unsweetened cocoa powder** – Infuses the cake with that deep, rich chocolate flavor.
– **2 teaspoons of baking powder** – Helps the cake rise and achieve a lovely fluffy texture.
– **1 teaspoon of baking soda** – Works alongside the baking powder to create lift.
– **1 teaspoon of vanilla extract** – Enhances the overall flavor and aroma.
– **1/2 teaspoon of salt** – Balances the sweetness.
– **1 cup of buttermilk** – Keeps the cake moist and helps develop a tender crumb.
– **2 cups of crushed Oreos** – The star ingredient that gives those delightful cookie bits throughout the cake.
For the frosting:
– **1 cup of unsalted butter, softened** – Creates a creamy and luscious frosting.
– **4 cups of powdered sugar** – Sweetens the frosting and provides structure.
– **1/4 cup of heavy cream** – Gives the frosting a smooth consistency.
– **1 teaspoon of vanilla extract** – Again, boosting the flavor profile.
– **Black and orange food coloring** – To achieve that perfect Halloween vibe.
– **Extra Oreos for decoration** – Crushed or whole, they add texture and a fun aesthetic.
How to Make Halloween Oreo Cake Bars
Ready to bring some spooky cheer to your kitchen? Just follow these easy-to-follow steps to whip up your Halloween Oreo Cake Bars:
1. **Preheat your oven** to 350°F (175°C). Line a 9×13 inch baking pan with parchment paper, allowing some overhang for easy removal later. This will help ensure your cake bars come out perfectly shaped!
2. **In a large mixing bowl**, beat the softened butter and granulated sugar together with an electric mixer until light and fluffy—about 2-3 minutes. You want the mixture to become a pale yellow color, which indicates that air has been incorporated.
3. **Add the eggs, one at a time**, mixing well after each addition. Make sure everything is combined before moving to the next step. Then, mix in that delightful vanilla extract to round out the flavors.
4. **In another bowl**, sift together the flour, cocoa powder, baking powder, baking soda, and salt. This step helps eliminate clumps and ensures a smooth batter. Gradually add the dry ingredients to the wet mixture, alternating with the buttermilk. Start and finish with the flour mixture, mixing until just combined. **Avoid over-mixing,** as this can lead to a dense cake.
5. **Gently fold in the crushed Oreos** with a spatula. You’ll want to be careful here, ensuring even distribution without breaking them down too much.
6. **Pour the batter into the prepared baking pan** and smooth out the top with the spatula. Bake for about 25-30 minutes, or until a toothpick inserted in the center comes out clean with a few moist crumbs.
7. **Once baked**, remove the pan from the oven and set it aside to cool for about 10 minutes before transferring the cake to a wire rack to cool completely. This is key—don’t rush this step, as a warm cake doesn’t allow for frosting to stick well, and trust me, nobody wants a sliding frosting disaster!
8. **While the cake cools**, prepare your frosting. In a large mixing bowl, beat the softened butter until creamy. Gradually add the powdered sugar, alternating with the heavy cream, until you reach your desired consistency. Mix in the vanilla extract, and don’t forget to taste—it’s pure magic!
9. **Divide your frosting into two bowls.** Add a few drops of black food coloring to one bowl and orange to the other, mixing thoroughly until you achieve the desired hues.
10. **Now for the fun part!** Once your cake has cooled completely, spread the black frosting evenly over the top. Follow up with a layer of orange frosting using a spatula to create swirls or zigzags for a festive appearance.
11. **Finally, decorate** with additional crushed Oreos, sprinkles, or any spooky candies you have on hand. Grab your favorite Halloween-themed sprinkles for added flair to make this dessert truly pop!
12. **Slice into bars** once the frosting has set (about 30 minutes in the fridge can help them firm up), and serve proudly at your next Halloween gathering.
Tips, Tricks & Variations
– **Storage:** Keep these delectable bars in an airtight container at room temperature for up to 3 days, or in the fridge for up to a week. They can also be frozen! Just wrap tightly in plastic wrap and store in a freezer-safe container for up to a month.
– **Flavor variations:** Feel free to swap out the Oreos for other cookies—think golden Oreos, peanut butter cookies, or even Thin Mints if you want to experiment!
– **Vegan version:** You can easily make these bars vegan by replacing the eggs with flaxseed eggs (1 tablespoon ground flaxseed mixed with 2.5 tablespoons water for each egg) and using non-dairy butter and milk.
– **Great for parties:** For Halloween parties, consider cutting the bars into festive shapes with cookie cutters for an eye-catching presentation!
– **Frosting swaps:** If you want something lighter, a whipped cream cheese frosting can work beautifully in place of buttercream. It’s creamy yet retains a light flavor that complements Oreo beautifully.
What to Serve With Halloween Oreo Cake Bars
These Halloween Oreo Cake Bars can stand alone as the star of your dessert table, but they also pair well with a variety of beverages and accompaniments.
– **Milk:** Nothing beats a classic pairing of chocolate cake and a tall glass of milk — it’s the perfect combination that brings out the rich flavors of the cake while cleansing the palate between bites.
– **Coffee:** A warm, light roast or a seasonal café mocha would make the perfect pairing, enhancing the chocolate notes and providing a sophisticated touch to your dessert.
– **Halloween-themed drinks:** Consider serving these bars alongside a spooky punch or homemade cider spiced with cinnamon and cloves to bring the flavors of the season into perfect harmony.
– **Ice cream:** Vanilla or cookies-and-cream ice cream is a fantastic option to add a fun touch to this rich dessert.
Nutrition & Health Benefits
While indulging in treats always brings joy, it’s essential to be aware of the nutritional impact. These Halloween Oreo Cake Bars are rich and decadent; each bar contains approximately 250 calories, with around 12 grams of fat and 35 grams of carbohydrates, depending on portion size and frosting used.
However, there’s a bit of silver lining! By incorporating Oreos into the actual cake, you’re adding something nostalgic while still keeping to rich flavors. Plus, the use of buttermilk adds a touch of calcium to the mix.
For further insights into the nutritional benefits of various ingredients, you can consult resources such as [Healthline](https://www.healthline.com/) or [USDA](https://www.usda.gov/).
Frequently Asked Questions
**1. Can I make these bars in advance?**
Absolutely! These bars keep well and can be made a day or two in advance. Just store them in an airtight container in the fridge until you’re ready to serve them. You can also make the cake and frosting separately a day ahead, storing them until you’re ready to assemble.
**2. How should I store leftover bars?**
Leftover bars can be stored in an airtight container at room temperature for up to 3 days. If you want to extend their lifespan, pop them in the fridge for up to a week or freeze them for a delightful treat later on.
**3. Can I use a different type of cookie in this recipe?**
Yes! Feel free to experiment with other cookies that you enjoy. Just note that this may change the overall flavor profile, so it could be fun to incorporate your favorites or seasonal offerings.
**4. Is there a gluten-free option for these bars?**
Certainly! You can substitute the all-purpose flour with a gluten-free flour blend. Make sure to check the other ingredients to ensure they are gluten-free, especially the baking powder.
**5. How can I make my bars more festive?**
Decorating is key! You can dress them up with Halloween-themed sprinkles, chocolate spider webs, or even edible glitter to give them that extra fun flair. Using cookie cutters to create spooky shapes is another creative way to serve these bars!
With the chills of Halloween in the air, create these Halloween Oreo Cake Bars that are not only fun to look at but are also a treat for the taste buds. As you gather around with friends and family, indulging in these delicious dessert bars, let the magic of Halloween fill your home. If you loved this recipe, leave a comment below or tag me on Instagram—I can’t wait to see your creations! Happy baking!


