Prep time: 20 minutes
Cook time: 45 minutes
Total time: 1 hour 5 minutes
Servings: 12
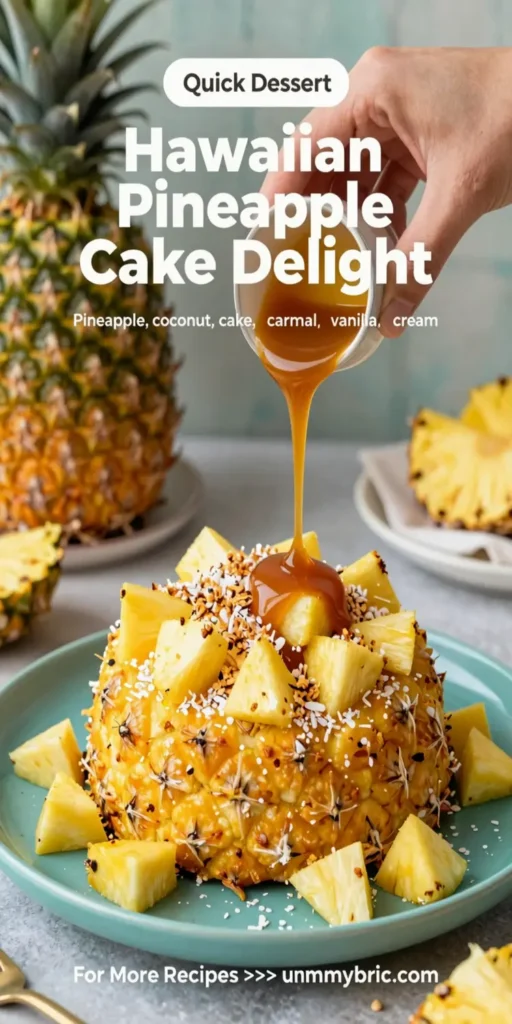
Hawaiian Pineapple Cake Delight is a fabulous treat that brings the tropical flavors of Hawaii straight to your kitchen. This cake is not only beautifully moist but is also infused with sweet pineapple and topped with a deliciously rich frosting. Perfect for gatherings, birthday parties, or a simple weeknight dessert, this cake will have everyone asking for seconds.
What Is Hawaiian Pineapple Cake Delight?
Hawaiian Pineapple Cake Delight is a layered cake that features a delightful combination of crushed pineapple, coconut, and a hint of vanilla. The fluffy cake is perfect for warm weather occasions, offering a sweet and tangy twist that adds a bit of sunshine to any table. Often enjoyed during luaus or family reunions, this cake is not just a dessert; it’s a delightful experience of tropical bliss that resonates with everyone, from children to adults.
Why You’ll Love This
There are many reasons to fall head over heels for Hawaiian Pineapple Cake Delight, from its **delicious flavor** to its **eye-catching presentation**. Here are just a few reasons why this cake is a must-try:
- Moist and Flavorful: The crushed pineapple keeps the cake moist while contributing to its unique flavor profile.
- Simple Preparation: The steps are straightforward, making it a great choice for beginners and busy parents.
- Beautiful Presentation: Layered and topped with fluffy icing, it’s a cake that impresses visually.
- Versatile Serving: Whether served at a party or a family dinner, it fits in perfectly on any occasion.
Ingredients You’ll Need
To create this Hawaiian treat, gather the following ingredients:
- 2 cups all-purpose flour: Forms the base of your cake and provides structure.
- 1 ½ cups granulated sugar: Sweetens the cake while ensuring a moist crumb.
- ½ cup unsalted butter, softened: Adds richness and helps to achieve a tender texture.
- 2 large eggs: Binds the ingredients for a cohesive cake.
- 1 teaspoon vanilla extract: Enhances flavor for a delicious finish.
- 1 teaspoon baking powder: Allows the cake to rise and become fluffy.
- ½ teaspoon baking soda: Works in conjunction with baking powder to assist in lift.
- 1 can (20 oz) crushed pineapple, drained: The key ingredient that brings sweetness and moisture.
- 1 cup shredded coconut: Adds a tropical flair with its chewy texture.
- 1 cup cream cheese, softened: Essential for the frosting, giving it a creamy and tangy flavor.
- 2 cups powdered sugar: Used in frosting for sweetness and stability.
- 1 teaspoon coconut extract: Adds an extra layer of coconut flavor.

How to Make
Follow these simple steps to create your own Hawaiian Pineapple Cake Delight:
- Preheat the oven: Set your oven to 350°F (175°C) and grease two 9-inch round cake pans. This ensures that your cakes will not stick and will easily release once baked.
- Mix the dry ingredients: In a large mixing bowl, combine the all-purpose flour, baking powder, and baking soda. Mixing these together helps to distribute the leavening agents evenly throughout the flour.
- Cream the butter and sugar: In another bowl, beat the softened butter and granulated sugar until light and fluffy. This process typically takes about 3-5 minutes, and it helps to incorporate air into the batter for a lighter cake.
- Add the eggs and vanilla: Directly into the buttery mixture, add the eggs one at a time, along with the vanilla extract. Beat until well combined. This step ensures your cake has a rich flavor.
- Combine the mixtures: Gradually add the dry ingredient mixture into the wet ingredients, alternating with the crushed pineapple. Begin and end with the dry ingredients, mixing just until combined to avoid overmixing, which can lead to a dense cake.
- Fold in coconut: Last, gently fold in the shredded coconut, which will provide that essential tropical flavor. The batter should have a thick yet pourable consistency.
- Pour and bake: Divide the batter equally between the two prepared cake pans and smooth the tops. Bake in the preheated oven for 25 to 30 minutes, or until a toothpick inserted into the center comes out clean.
- Cool the cakes: Allow the cakes to cool in the pans for 10 minutes before transferring to wire racks to cool completely. This step helps maintain the moisture and flavor integrity of the cake.
- Prepare the frosting: While the cakes are cooling, beat the cream cheese and powdered sugar in a bowl until smooth. Then add the coconut extract and mix until fully incorporated.
- Assemble the cake: Once the cakes are completely cool, place one layer on a serving plate and generously spread frosting over the top. Add the second layer and spread frosting on the top and sides of the cake, creating a smooth and appealing finish.
- Chill and decorate: For best results, chill the assembled cake for about 30 minutes before serving. This helps set the frosting, ensuring that it holds its shape when cut and served.
Variations & Substitutions
Gluten-Free Option: For those needing a gluten-free alternative, you can substitute the all-purpose flour for a gluten-free all-purpose flour blend. Many excellent blends are available today that are created specifically for baking, ensuring that you can still enjoy this delightful cake without the gluten.
Vegan Version: For a vegan version, replace eggs with flax eggs (1 tablespoon flaxseed meal mixed with 2.5 tablespoons water per egg) and use a non-dairy butter for the recipe. Ensure your frosting ingredients are also vegan or create a simple whipped coconut cream for a dairy-free frosting option.
Nutty Addition: Adding chopped nuts such as walnuts or macadamia nuts will provide a wonderful crunch and flavor. Simply toss in about 1 cup of your chosen nuts during the mixing stage with the coconut.
Extra Tropical Flair: Incorporate additional tropical fruits like mango or banana into the batter. You can fold in about a cup of diced mango or banana alongside the coconut for an even more fruit-forward dessert.
Common Mistakes to Avoid
One common mistake is overmixing the batter. Overmixing can lead to a denser texture rather than a light, fluffy cake. To avoid this, mix just until the dry ingredients are incorporated.
Another issue can arise from not letting the cake layers cool adequately before frosting. This can result in the frosting melting and sliding off. Always ensure that the cakes are completely cooled on wire racks before you begin the frosting process.
Lastly, ensuring the crushed pineapple is well-drained is crucial. Too much moisture can lead to a soggy cake. Press the crushed pineapple gently with a sieve to remove excess liquid.
Storage, Freezing & Reheating Tips
For any leftover cake, it’s essential to store it properly. Wrap the cake tightly in plastic wrap or store it in an airtight container at room temperature for up to three days. If you need to keep it for a longer period, you can freeze it.
To freeze: Wrap the cake layers separately in plastic wrap and then in aluminum foil to preserve freshness. They can be frozen for up to three months. When ready to enjoy, let them thaw completely in the refrigerator and then frost as usual.
Always note that if the cake is frosted, it’s best kept refrigerated and consumed within 5 days. For reheating, slices can be warmed in the microwave for about 10-15 seconds, just enough to take the chill off without melting the frosting.
Frequently Asked Questions
Can I use fresh pineapple instead of canned?
Absolutely! Using fresh pineapple will lend an even more vibrant flavor to the cake. Be sure to finely chop the fresh pineapple and drain any excess juice before adding it to the batter to prevent a soggy cake.
Can I make this cake ahead of time?
Yes, this cake can be made ahead. You can prepare the cake layers a day in advance and store them wrapped tightly in plastic wrap at room temperature. You can frost them the following day when you are ready to serve.
Can I make the frosting ahead of time?
Certainly! The frosting can be made a day or two in advance and stored in the refrigerator in an airtight container. Just be sure to give it a good stir before spreading it on your cooled cake layers.
Is there a way to make this cake dairy-free?
Yes, you can substitute non-dairy alternatives like almond or coconut milk instead of dairy milk in the frosting and use vegan butter for a dairy-free version of this cake.
How can I enhance the flavor of the frosting?
You can add a touch of lemon or lime zest to the frosting for a zesty kick or incorporate a tablespoon of pineapple juice for an extra burst of pineapple flavor.
Conclusion: This Hawaiian Pineapple Cake Delight is a dessert that covers all bases, from easy preparation to mouthwatering taste and impressive aesthetics. Whether you are looking to impress guests or simply treat your family, this cake is sure to steal the show. With its vibrant flavors and delightful textures, it resonates perfectly with anyone longing for a taste of paradise in their everyday lives. Enjoy your baking, and embrace the tropical vibes with every bite!