Let’s Get Real
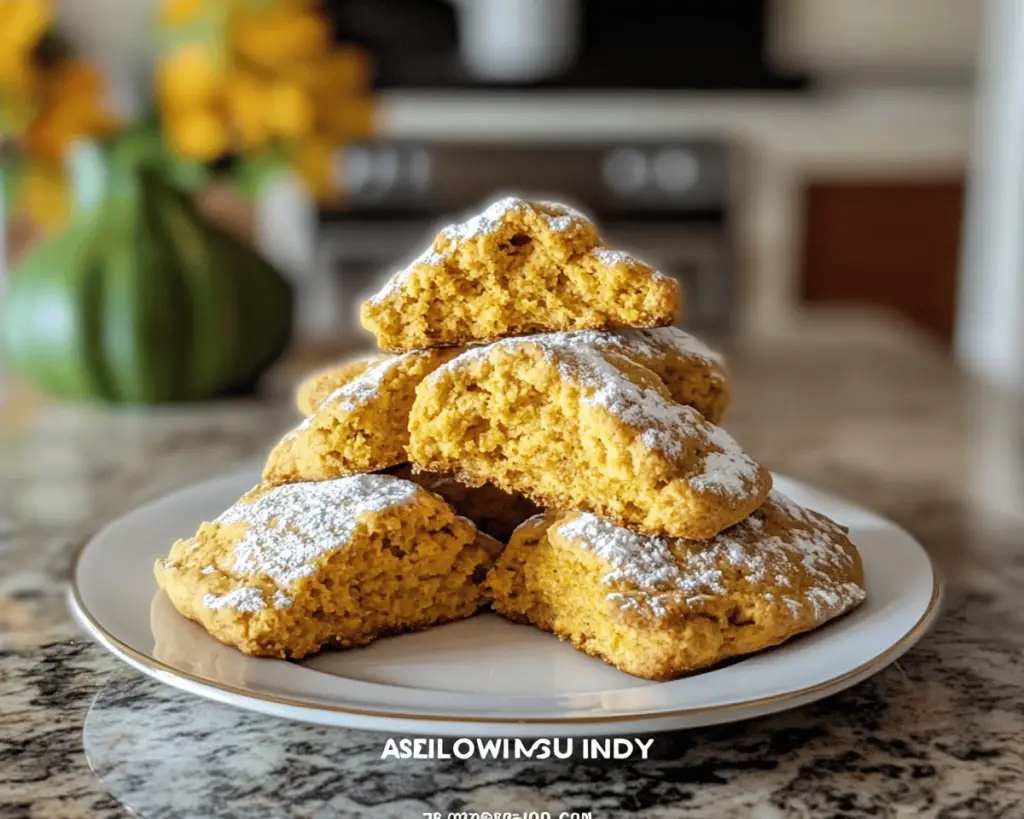
Ah, pumpkin scones. Just when you think you can’t love autumn anymore than you already do, bam! You’re hit with a wave of pumpkin spice and a touch of cinnamon that warms your soul like a cozy blanket. I have to confess, I used to have a real hate-hate relationship with scones. I mean — what exactly was the point? They were dry, crumbly, and tasted like someone’s wooden coffee table had just been ground up and mixed with flour. But then, one fateful autumn morning, I stumbled into a cafe that served the most heavenly pumpkin scones I’ve ever tasted, and my life was forever changed. Seriously, I couldn’t believe it! They were soft, fluffy, and bursting with all the fall flavors I never knew I needed in my life.
Now, armed with my newfound love, I decided I needed to bring some pumpkin scone magic into my own kitchen. Who needs overpriced coffee shops when I can whip them up in my own chaos-filled domain? Spoiler alert: they’re way easier to make than a three-layer chocolate mousse cake. Plus, they’re the perfect excuse to get your friends together for a cozy brunch (or just a reason to eat baked goods while wearing pajama pants at home — no judgment here!). So, are you ready to embark on this pumpkin scone adventure with me? Let’s dive in!
Ingredients, Unfiltered
What’s Really in Heavenly Pumpkin Scones
Let’s break down the glorious misunderstanding of ingredients that you will need for these pumpkin scones. Don’t worry, I’m here to make it as relatable as possible, even if your kitchen is just as chaotic as mine.
All-Purpose Flour: The default flour of kitchen warriors! I usually go for King Arthur Flour because I trust it more than some family members. It helps create that perfect flaky texture we’re gunning for.
Granulated Sugar: You know, even if you’re on a health kick, you’ll want this little gem. It brings sweetness into the scone while balancing out the spicy pumpkin flavor. I’ve tried brown sugar before, and while it’s tempting, I found it gives a chewy texture that just doesn’t jive with my scone vibe.
Baking Powder: This is what makes your scones rise like the sun on a perfect fall morning. If you see it hanging out in your pantry, go ahead and get it a little fresh air because trust me—bad baking powder is a scone’s worst enemy.
Ground Cinnamon: The king of baking spices! I’m the kind of person who lies awake at night saying “more cinnamon, please.” It adds that touch of warmth and nostalgia — like being wrapped in your favorite sweater while sipping on a chai latte.
Ground Nutmeg: Honestly, nutmeg is like that eccentric cousin who shows up to family gatherings. You don’t expect much from it, but when it delivers, oh boy, does it deliver. It’s the secret ingredient that elevates this scone recipe to heavenly heights.
Salt: Trust me, you need it. You don’t want your scones tasting like sad silence, right? A pinch goes a long way in enhancing all the other fabulous flavors.
Butter: Let’s be real—if you think you can make scones without butter, you might need a reality check. This is what makes every bite feel like a cloud puffs in your mouth. I usually go with unsalted butter because I believe I can control the saltiness in my own kitchen, thank you very much.
Pumpkin Purée: The star of the show! Buy a can or, if you’re feeling particularly adventurous, roast your own pumpkins. Just don’t forget to wear an apron — this scone journey can get a little messy, and I’m not here to add to your laundry bill.
Heavy Cream or Milk: This gives the scones that luscious moisture. You can use whatever milk you have on hand, but I do adore heavy cream because it makes me feel fancy. Plus, you deserve a little decadence in your life!
Pecans or Walnuts (optional): Get nutty or not—this is totally up to you! I usually toss in some chopped pecans because they add a delightful crunch, but if you’re not feeling nuts, feel free to omit them. Nobody is going to come knocking on your door demanding a nut audit!
Let’s Talk Health (or Not)
Is This Even Healthy? Let’s Discuss
Alright, let’s get real about health. These scones are undeniably delicious but I’m not going to pretend like they’re a salad or something. Sure, they have pumpkin, which is a total nutrition superstar packed with Vitamins A, C, and E. But then again, they do have butter and sugar — and yes, I’m smiling while I say that.
Look, if you’re looking for 100% clean eating, these might not be your best bet. But also, life is about balance! I eat kale and quinoa, but I also embrace the joy of these scones. So if you’d like to indulge a bit, we can fully own that. Sure, there’s butter. And yes, I sleep just fine at night. Cooking isn’t about guilt; it’s about joy. So let’s get excited for a little treat!
Your Grocery List
Here’s What You’ll Need
– 2 cups all-purpose flour
– 1/2 cup granulated sugar
– 2 teaspoons baking powder
– 1 teaspoon ground cinnamon
– 1/4 teaspoon ground nutmeg
– 1/2 teaspoon salt
– 1/2 cup unsalted butter, cold and cubed
– 3/4 cup pumpkin purée
– 1/4 cup heavy cream or milk
– 1 large egg
– 1/2 cup chopped pecans or walnuts (optional)
This recipe should make about 8-10 scones which is perfect for sharing. Or not. No judgment if you want to hoard some scones for yourself.
The Actual Cooking Part
Okay, Let’s Make This
Ready to make some magic happen? Let’s roll up our sleeves and make a mess — it’s part of the fun, I promise. You might want to preheat the oven now to 400°F (200°C) to get things nice and toasty by the time our muffins are ready for their big debut.
1. **Mix it Up:** Start by grabbing a large mixing bowl (the bigger, the better — we don’t want flour explosions). Combine the all-purpose flour, granulated sugar, baking powder, ground cinnamon, ground nutmeg, and salt. Whisk it lightly until it’s all mixed. Feel free to channel some inner whisking Olympian here!
2. **Butter Up:** Time to cut in the butter! Using a pastry cutter or your fingers (it’s kind of therapeutic to get your hands messy, am I right?), mix the cold, cubed butter into the flour mix until it resembles coarse crumbs. I’ll be honest, my first attempt looked more like guerilla warfare with butter blobs everywhere. Just embrace the chaos.
3. **The Good Stuff:** In a separate bowl, whisk together that luscious pumpkin purée, heavy cream (or milk), and the egg. Once mixed, pour it into the dry ingredients and – brace yourself – mix until just combined. You don’t want to overmix unless you want chewy scones, and nobody came here for that sort of heartbreak.
4. **Oops, I Did It Again:** If you’re adding nuts, now’s the time! Gently fold them into the dough. If it looks like a messy blob, congratulations! That means you’re doing it right!
5. **On to the Baking Sheet:** Dump the mixture onto a floured surface and, using your hands, gently pat it into a disc about 1 inch thick. (And yes, it might feel sticky — just roll with it.) Cut the disc into wedges — I usually go for 8, but I’m not here to judge your shape choices. Transfer those wedges onto a baking sheet lined with parchment paper.
6. **Egg Wash Magic:** Before they bake, brush the tops of the scones with a little bit of egg wash (one egg beaten with a splash of water) if you want shiny scones that feel extra fancy. At this point, you can also sprinkle some sugar on top for a sweet crunch.
7. **Bake It Till You Make It:** Slide those beauties into the oven and set a timer for 15–18 minutes. Don’t panic if this looks messy — it’s supposed to! They should be golden and firm to the touch when done but keep an eye out because nobody wants burnt scones on their Saturday morning!
8. **Cool Down Club:** Once baked to perfection, pull them from the oven and let them cool on the baking sheet for a few minutes. Then transfer them to a wire rack — if you have one because let’s be honest, I forget that part every single time. You can dive right in, but if you want the full experience, let them cool for about 10 minutes before devouring.
Side Notes & Sassy Hacks
Bonus Tips You Didn’t Ask For
– **Cutting Corners:** If you don’t have heavy cream, no biggie! Use whatever milk you have on hand — it’s all about the pumpkin magic after all.
– **Make It Your Own:** Feel free to swap in different spices. Some people love adding ginger; others prefer allspice. Channel your inner fall witch and get creative!
– **Make-Ahead Magic:** You can totally prep the dough ahead of time. Shape your disc, wrap it up tightly in plastic wrap, and refrigerate it for up to a day (or freeze it for a month). Just bake it straight from the fridge or freezer when you’re ready, but be sure to allow extra baking time if frozen!
– **Go Crazy with Glaze:** A simple glaze made of powdered sugar and milk drizzled over the top? Game changer. You’re welcome!
– **Be the Brunch Boss:** These scones are perfect for brunch spread. Whip up some coffee and other pastries, and everyone will think you’ve secretly hired a chef. Just let them believe it because that’ll make you look cooler!
Final Words of (Culinary) Wisdom
At the end of the day, scones are like the little hugs of baked goods. They’re comforting, indulgent, and remind you that even on stormy days, the oven can bring a little sunshine into your kitchen. So if you try this recipe, please tag me or just send me a mental high-five from wherever you are. I’d love to see your creations and hear about your scone adventures! Happy baking, my lovely kitchen wizards!


