Prep time: 30 minutes
Cook time: 1 hour
Total time: 1 hour 30 minutes
Servings: 24 treats
Creating homemade Valentine treats is a delightful way to show love and affection to family and friends. These treats not only allow you to choose the **ingredients** but also provide a unique touch with a variety of shapes and flavors. Whether you’re a beginner in the kitchen or an experienced cook, this recipe will guide you through a fun and engaging process. Valentine’s Day is the perfect occasion to tap into your creativity and whip up something truly special for the ones you hold dear. The process of making these treats can also serve as a quality bonding experience for busy parents or couples who want to celebrate the day.
What Is Homemade Valentine treats everyone loves?
Homemade Valentine treats refer to a variety of sweet goodies, traditionally presented during Valentine’s Day, as tokens of affection. These treats can range from cookies and cupcakes to chocolates and candies. The beauty of crafting these treats at home lies in the possibility to customize them to personal preferences, ensuring they are suited to the taste buds of everyone you plan to share them with. Moreover, the aroma of freshly baked goodies filling your home acts as an irresistible invitation to indulge in your creations.
Why You’ll Love This
This homemade Valentine treat recipe is adored for many reasons:
- Customizability: You can modify flavors and decorations to fit your loved ones’ tastes.
- Quality Ingredients: By making them yourself, you have complete control over the **ingredients**, ensuring they are fresh and of high quality.
- Fun Activity: It’s an engaging activity that can involve the whole family—perfect for busy parents looking to share an experience with their children.
- Economical: Making treats at home is generally more budget-friendly than purchasing ready-made ones.
- Sensory Delight: The joy of decorating treats and their beautiful presentation appeals to the eye and palate alike
Ingredients You’ll Need
To embark on your culinary adventure, gather the following **ingredients**:
- 2 cups all-purpose flour: This forms the base of your treats, giving them structure.
- 1 cup granulated sugar: Sugar adds sweetness and helps with the browning process.
- 1/2 cup unsweetened cocoa powder: Use Dutch-processed for a richer chocolate flavor.
- 1/2 cup softened butter: For a moist texture and rich flavor.
- 2 large eggs: Eggs bind the ingredients together and provide moisture.
- 1 teaspoon vanilla extract: This enhances the overall flavor profile.
- 1/2 teaspoon baking powder: For leavening, giving a light and fluffy texture.
- 1/2 teaspoon salt: Balances the sweetness and enhances flavors.
- Chocolate chips or sprinkles (optional): For extra flavor and decoration.
How to Make
Making your **treats** is straightforward. Just follow these numbered steps carefully to ensure success:
- Prepare your oven: Preheat your oven to 350°F (175°C) and line a baking sheet with parchment paper. This ensures easy cleanup and prevents sticking.
- Mix the dry ingredients: In a large bowl, whisk together the flour, cocoa powder, baking powder, and salt. This step ensures uniform distribution of dry ingredients, which is crucial for even baking.
- Cream the butter and sugar: In another bowl, beat the softened butter and granulated sugar together until the mixture is light and fluffy. This process incorporates air into the mixture, leading to a light texture.
- Add the eggs and vanilla: Mix in the eggs, one at a time, followed by the vanilla extract, ensuring a smooth and creamy consistency.
- Combine wet and dry ingredients: Gradually add the dry mixture to the wet ingredients, mixing until just combined. Be cautious not to overmix, as this can lead to tough treats.
- Fold in chocolate chips: Gently fold in any additional mix-ins like chocolate chips or sprinkles to add an exciting flavor and texture.
- Scoop the dough: Using a cookie scoop or tablespoon, drop spoonfuls of the dough onto your prepared baking sheet, spacing them evenly apart to allow for spreading.
- Bake and cool: Bake the treats in the preheated oven for 10-12 minutes. Once they are done, let them cool on the baking sheet for a few minutes before transferring them to a wire rack.
Variations & Substitutions
Creating variations of your homemade Valentine treats can be an exciting journey of flavors. Here are some delightful options you can consider:
Classic Red Velvet Treats: To make red velvet version of your treats, substitute some of the cocoa powder with red food coloring. Red velvet can be paired with cream cheese frosting for an extra layer of flavor and soft texture.
Nutty Treats: For a nutty twist, incorporate chopped nuts such as almonds, walnuts, or pecans into the dough. This variation not only adds flavor but also introduces a delightful crunch.
Fruit-Infused Treats: Add dried fruits, such as cranberries or cherries, to the batter for a fruity burst of flavor. This variation can create a lovely contrast to the sweetness of the chocolate.
Gluten-Free Option: If you prefer a gluten-free version, substitute the all-purpose flour with a gluten-free flour blend. This allows those with gluten sensitivities to enjoy your creations without sacrificing flavor.
Dairy-Free Version: Use vegan butter or coconut oil instead of regular butter and choose dairy-free chocolate chips. This results in a delicious dairy-free treat for those who are lactose intolerant.
Common Mistakes to Avoid
When making homemade Valentine treats, it’s easy to encounter some common pitfalls. Here are a few to be mindful of:
Overmixing the batter: When combining the wet and dry ingredients, be cautious not to overmix as this can lead to tough treats. Mix just until the flour is integrated.
Not preheating the oven: Ensure your oven is completely preheated before placing your treats inside. Failure to do so may result in uneven cooking and improper texture.
Ignoring ingredient temperature: Using cold butter or eggs can hinder the mixing process. Ensure that all ingredients are at room temperature for the best results.
Skipping the cooling step: Allowing your treats to cool properly prevents them from falling apart. Ensure they are fully set before transferring them from the baking sheet.
Storage, Freezing & Reheating Tips
To keep your homemade Valentine treats fresh and delicious, consider the following storage tips:
– Store cooled treats in an airtight container at room temperature for up to a week.
– For longer storage, freeze the treats in a single layer on a baking sheet until solid, then transfer them to a freezer-safe bag or container. They can last up to three months in the freezer.
– To enjoy frozen treats, let them thaw at room temperature for about an hour before indulging. Alternatively, you can reheat them in a microwave for about 10-15 seconds for a fresh-out-of-the-oven experience.
Frequently Asked Questions
Can I use different types of flour?
Yes, you can substitute all-purpose flour with other types of flour, such as whole wheat or gluten-free flour. Just be aware that this may change the texture slightly, so modifications may be necessary for optimal results.
How do I make the treats less sweet?
If you prefer a less sweet option, consider reducing the amount of sugar by about 1/4 cup. You can also introduce ingredients like cacao powder for a richer chocolate flavor without adding sweetness.
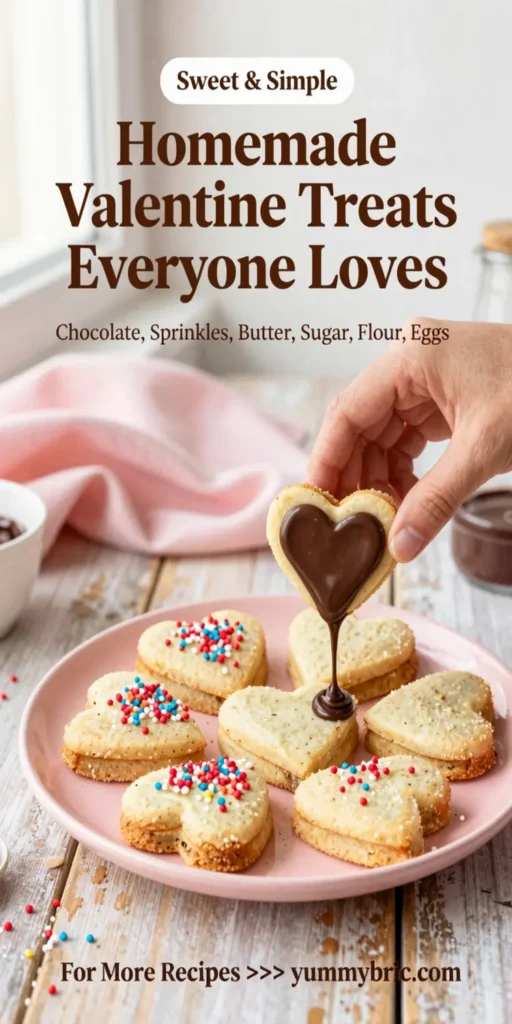
What can I add for decoration?
Decorating your Valentine treats can be an enjoyable process! Use options such as melted chocolate drizzle, colorful sprinkles, edible glitter, or even fondant shapes. Make these treats visually appealing to enhance the gifting experience.
How can I make these treats more festive?
Consider adding festive ingredients such as red and pink sprinkles, heart-shaped cookie cutters for shaping, or incorporating flavored extracts like almond or peppermint for different variations. The choices are vast!
What is the best way to serve these treats?
Present your treats on a decorative plate or in gift boxes for a charming touch. You can also pair them with a small handwritten note expressing your love, adding an extra heartfelt element to your gift.
Conclusion: Homemade Valentine treats are a celebration of love and creativity. By embarking on this culinary journey, you’re not only creating delightful sweets but also crafting memorable experiences with loved ones. Embrace the process, experiment with flavors, and enjoy every bite of your delicious creations. Happy baking!